Outdoor

Hoop Floral Arrangements

magnolia hoop arrangement.jpg

I am intrigued by framed arrangements.  I love the contrast of a rigid framed shape against the natural beauty of foliage and flowers.  The frame provides boundary and format to the creativity and unique beauty of G-d’s world

Last year, I attended a cousin’s Bar Mitzvah in Jerusalem and the simple floral arrangements mesmerized me.  The arrangements  incorporated circular hoops as the backdrop for tropical flowers.  I was intrigued by these arrangements and just couldn’t take my eyes off them.  There was something about the way the circular hoop framed the arrangement and the way the lush tropical foliage and orchids contrasted with the simplicity of the circular shape.  My relatives caught me staring and  quickly realized that they would be seeing  more of this type of arrangement on  my blog.

hoop floral arrangement

I spent some time thinking about how I could achieve that look on a budget and with flowers from my garden.  I loved the idea of the circular framing.  I was determined to use the hoop as a frame for a sparse arrangement that would allow one to see right through the arrangement.

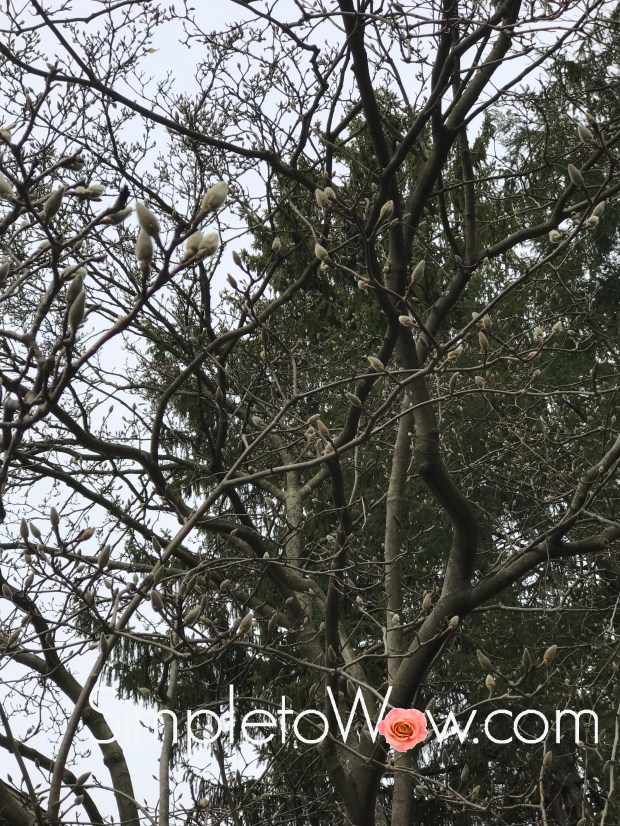
For our Purim seuda (feast), I created these arrangements using the just budding branches of our Magnolia trees in our backyard.  Back in late February-early March, the buds were fuzzy, kind of like pussy willow buds but with meandering branches that were so interesting in their unique shapes.

magnolia tree in february.jpg

I contrasted rose-gold painted hoops with these branches and the effect was breathtaking and unique.  I mounted the hoops onto cans spray-painted in the same metallic color as the hoops.   They were conversation starters, especially because they incorporated elements from the winter-beleaguered trees in my backyard.  And, they signaled that spring really would arrive this year.

shabbos table through copper hoop arrangement

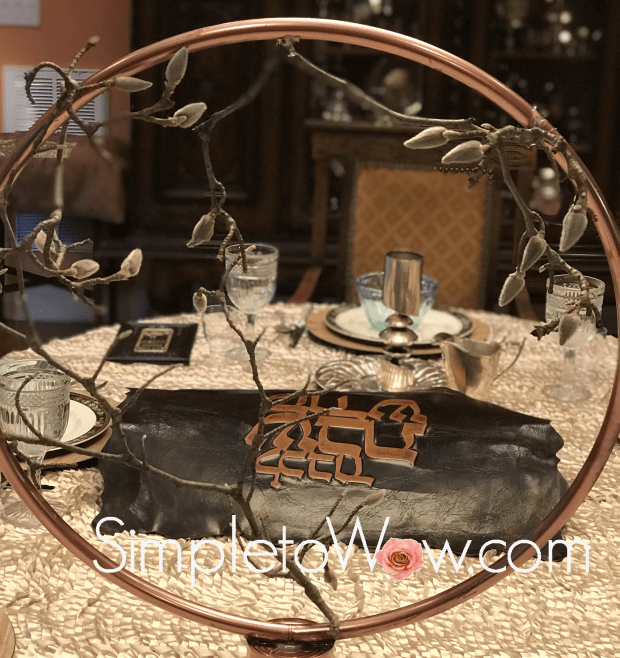
Almost two months later, the branches are still gorgeous and fresh with the fuzzy, though slightly withered blossoms still attached.   I found an old globe stand and I fitted one of the metallic hoop arrangements into the semicircular base of the globe stand and have been enjoying the floral arrangement in my front hall.

Until, last week.

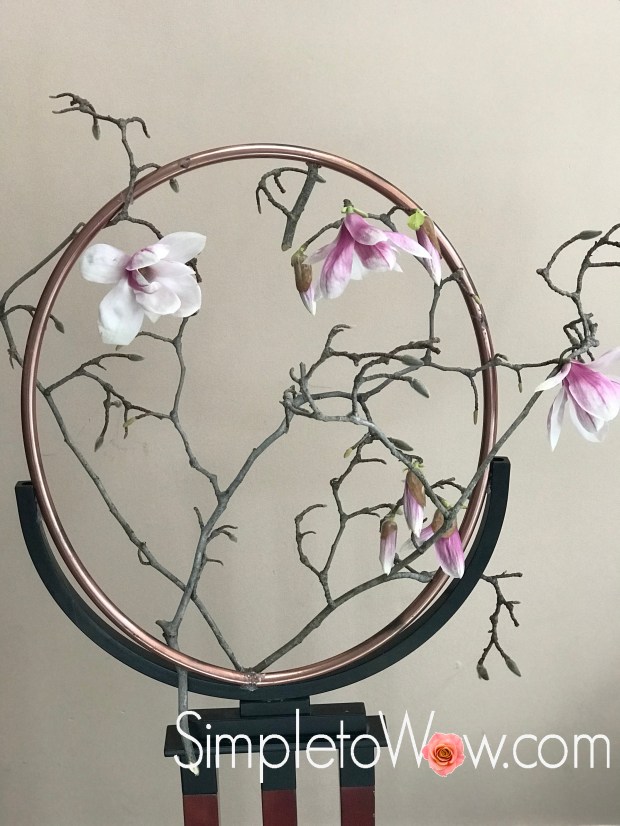
Just a few days ago, the Magnolia tree fuzzies metamorphosed into their trademark showy pink blossoms.

magnolia tree.jpg

And, I just couldn’t resist updating and upgrading the hoop arrangements.

And this old-new arrangement just took my breath away.  Not because of the rose-gold hoops.  Or, the meandering branches.  Or the fuzzy blossom beginnings.  Or, even the spectacular magnolia blossoms.

magnolia hoop arrangement 2

It is because of the symbolism.  The round world surrounding the flowing beauty of nature, marching to the same rhythm and yet, ever changing.  It is the miracle in the world.  And in nature.  And in creativity.  And, mostly in the things we just take for granted.


SUPPLIES

pruning shears

small 16-24″ hula hoop

metallic spray paint

glue gun with glue sticks

heavy brick or can for base

INSTRUCTIONS

Using pruning shears, cut interesting branches, with or without blossoms, that will fit inside the hoop.   Peel any stickers or coating off of the small 16-24″ hula hoop. Spray the hoop and the base carefully with metallic spray paint.  Using a glue gun with glue sticks, carefully secure branches or flowers to the insides of the hula hoop, securing them in a few spots on the hoop.  Using the glue gun with glue sticks,  secure the hoop to the weighted base.

Voila!

shabbos table through copper hoop arrangement

Quince Blossom Arrangement: Admiring the Outdoors Inside

quince blossom arrangement

I love arrangements that force the observer to admire the delicacy and individual nature of  each blossom.  After all, this blog began with floating roses displayed in a grid-like formation for all to admire.  Outdoors, in its native state, oftentimes, the beauty of each flower is lost in the majesty of  so many blossoms admired as one.

Springtime is the perfect time to appreciate the uniqueness of each blossom indoors as well as outdoors.  We have a quince tree in our backyard and it blossoms at different points in the winter and spring each year.  There have been years that the quince tree begins blossoming in January or February after a short spell of warmer weather, only to be rudely reminded that spring has not yet sprung.  Most years, our quince tree dazzles us with its array of pinkish reddish flowers for Purim.  This year, our favorite tree  has just began to blossom now, weeks after Pesach (Passover).

quince tree

There are so many flowering trees to admire now and by bringing some branches inside, you will have the opportunity to more closely enjoy and appreciate each individual blossom and the contrast between branch and blossom.  Cherry blossoms and forsythia bushes are perfect for this type of arrangement.  My suggestion is to carefully hose down the branches before bringing them in just to make sure that you’re not bringing in any insects or larvae along with the branches.

When cutting branches, it is best to leave enough of a length of branch to fit on the bottom of the vase.  If that is not possible, just cut away at the lower part of the branch and remove enough twigs so that your branch will stay upright in the vase.  Try to choose an assortment of branches that are straight on top and that twist in all directions at the top.  This will allow for enough spread in the arrangement above the top of the vase.  Make sure to use a vase that is sturdy enough for the weight and breadth of your branches.  Enjoy the spring outdoor branches inside your home.

Voila!

quince blossom arrangement

A Bottlebrush Arrangement


20170728_181652

My favorite floral arrangements are those that bring the outdoors inside.  This weekend, we are visiting the Upper Galilee and we are always amazed by the beautiful varieties of plants and trees that are native to this gorgeous part of Northern Israel.  One of my favorite shrubs found is this part of the world  is the Callisteon, affectionately known as a bottlebrush plant.  The flowers of this shrub resemble a bottlebrush and are unique and stunning.

For this Shabbos, I designed an arrangements using three branches of a bottlebrush shrub and two Monstera leaves brought in from the outdoors.

Shabbat Shalom (peaceful Shabbos)!

Growing Lettuce in TopSoil Bags

When Aaron was a little boy, he loved to join me in shopping for our summer annuals and vegetable plants. We would peruse the aisles of the local garden center, looking for unusual plants and interesting planting combinations and techniques.

We discovered that our local nursery started some of their lettuce and leafy vegetables right inside topsoil bags. We couldn’t wait to try this technique ourselves. We tried it and it worked beautifully, producing vibrant plants with minimal care. Best of all, once we harvested the leafy plants, we would reuse the topsoil for our vegetable garden. It seemed like a win-win.

We have been using this technique for spring gardening for the past many years.

topsoil planters for lettuce  supplies upside down


SUPPLIES
bag of top soil, potting soil or mixed soil
a knife or box cutter
seeds

DIRECTIONS

Place bag of topsoil in a sunny area.  Using the box cutter or knife, cut x’s in 12-15 inch intervals.  Pour one or two seeds into each hole created by the x.

topsoil planters for lettuce with xs cut

Make sure that the soil bag is damp, but not wet.  Seeds should sprout within a week or 10 days.

lettuce in soil bags
.

At War with Weeds: A Homemade Non-Toxic Weed-Killer

weed killer spray

Our nineteen year old son, Aaron, is our resident landscaper.  Aaron has always been a budding entrepreneur and handy around the house and yard.  When he was thirteen years old, he took some of the monetary gifts that he had  received for his Bar Mitzvah celebration and purchased a bright red lawn tractor.  He convinced us to hire him as our resident gardener to earn back the cost of the tractor and he has acquired other garden tools since then, too.   For the past six years, Aaron has used his tractor to manicure our lawn and yard, his tiller to turn our flower and vegetable garden areas and his edger to edge our lawn.

Problem is…Aaron is studying in yeshiva this year in Israel.  We have had to manage without him and we have had to find easy solutions to our gardens’ overgrown messes. Don has been driving the tractor around the lawn and yard to cut the grass.  I have been planting the vegetable garden and mulching the flower beds.    Aaron will be home for a few weeks in the summer and we have lots of landscaping and maintenance waiting for his expert care.

One of the biggest problems is battling the weeds.   In the past, Aaron has tilled the garden beds with his gas-powered tiller which has cut down on the weeds.   This year, Don and I have had to figure all of it out on our own.  I have discovered this amazing homemade weed killer that does the job without the toxins found in most commercially available products.  This solution works best when used on a hot, sunny day and sprayed in the morning.  The sun will wither the sprayed weeds as long as there is no rain expected within the next 24 to 48 hours.

Here it is:

(more…)

Our Backyard is for the Birds…now that I have discovered suet feeders

We enjoy sitting at the kitchen table and watching the variety of gorgeous birds that frequent our backyard.  Over the years, I have purchased and created many different bird feeders.  Some were not sturdy enough, others attracted too many squirrels, but most were just too difficult to refill.

Last year, our favorite birdhouse feeder was knocked over by a large fallen tree limb and broken beyond repair . It was time to replace it and I was looking for something that could draw birds as close to our kitchen window as possible.  I wanted something sturdy and inexpensive, something that that would draw birds without squirrels, and something that would be simple to refill.

At the supermarket, I discovered suet bird feeders.  They are simply coated metal grid-like feeders that hold suet cakes securely.  To feed, the birds peck at the suet cake through the metal grid, while squirrels cannot.  These suet feeders are easy to refill by just opening a sturdy latch and they can be hung just about anywhere.  Best of all, they only cost a couple of dollars.

I purchased a few suet feeders to hang near our kitchen window.  I hung one off of a thin but strong ribbon that I tossed over a sturdy branch on the magnolia tree behind the kitchen. I hung the others on the light posts near the window.  I have tried a variety of suet cakes which are simple to install in the suet holders. Now we get an assortment of woodpeckers, blue jays, cardinals, robins and finches (with no squirrels) joining our family for breakfast.

Our backyard is simply for the birds….

.

Branches, Cabbages and Blue Spruce: Winter Planters

For the fall, I plant decorative cabbages in my outdoor planters.  The variety of colors and textures makes me smile every time I approach the front door of my house.  This year, we had warm weather deep into December, but alas, winter is finally here and my cabbages have wilted and faded due to the frost.

(more…)