Floral

Remembering my Mother-in-Law: Calaniot and Bees


yahrzheit-anemone-and-succulent-arrangement-2.jpg

Today is chof-alef (21) Kislev, the eleventh Yahrzheit (anniversary of passing) of my dear mother-in-law, Devorah bas Yitzchok Aaron (Devorah, the daughter of Yitzchok Aaron).  We are in Israel to commemorate the yahrzheit and it is a time of reflection upon a life well-lived.

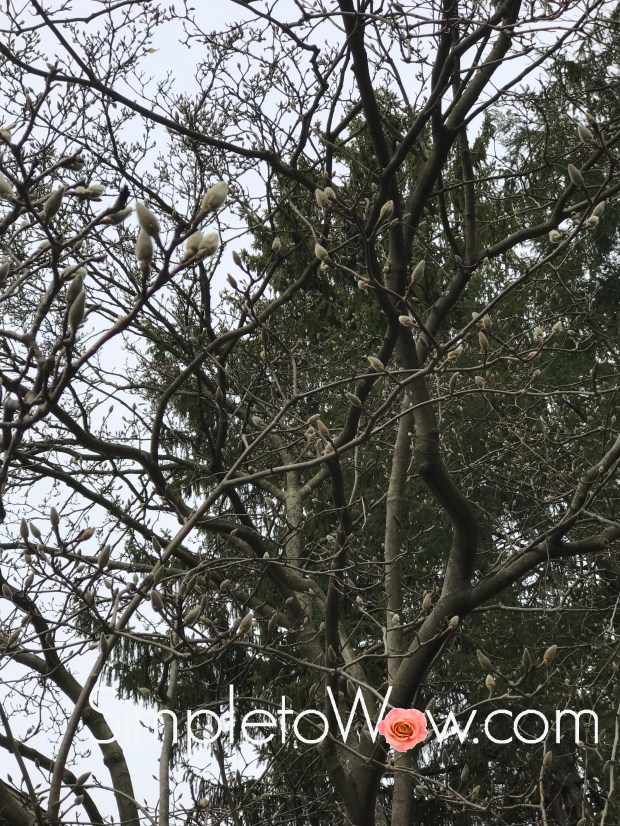
It is winter here and we have cool, beautiful weather.  The fields, the mountains, and the flower stands all over Israel abound with calaniot (anemones)  in every color of the spectrum.   These calaniot are the national flower of Israel and they represent all that Israel is.  They add color and hope to the darkest season in the most barren places.  As the rain brings nourishment to the fields and mountains during the winter, these calaniot blossom.

Our small garden as you enter our Jerusalem apartment is also replete with greenery and its own flowers.  The variegated leaves and chrysanthemums that were planted two years ago are lush and nourished by the winter rains.  They, too, bring the promise of color and bounty in the cold winter.

jeruslaem garden winter


In honor of the yahrzheit, Don and his brother, Mordechai, completed a masechta (portion) in Gemara (ancient Talmud).  On the eve of the yahrzheit, we hosted a siyum (finishing party) and seuda (festive meal) for family and friends in Jerusalem.  It was a time to combine reflection, learning and good food as a way to elevate the soul of my mother-in-law.

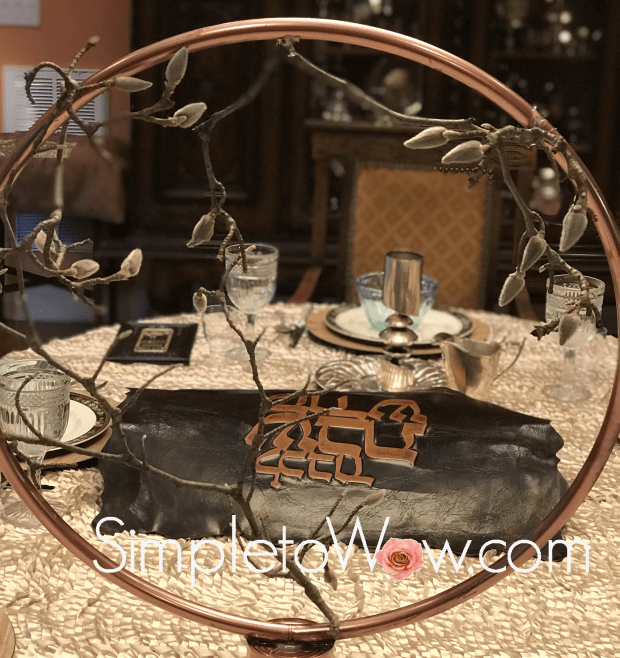
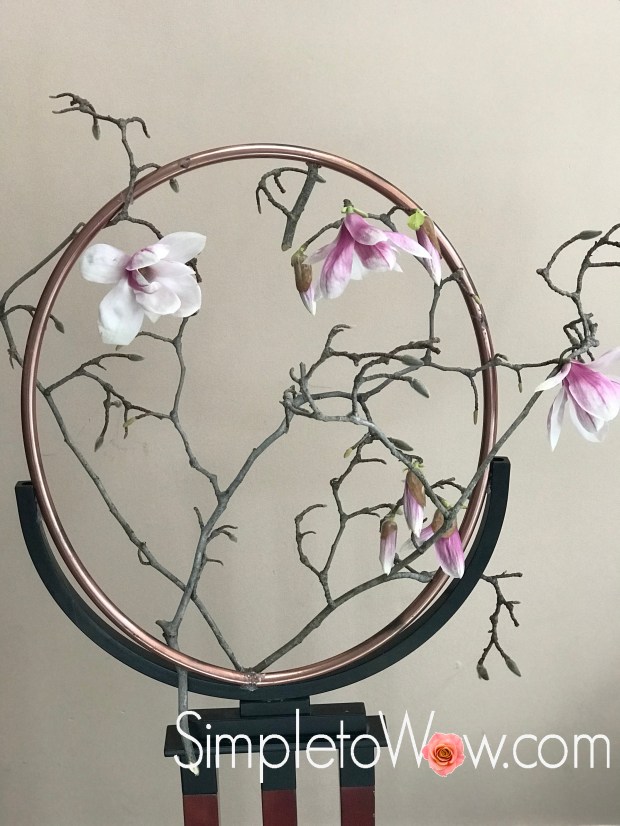
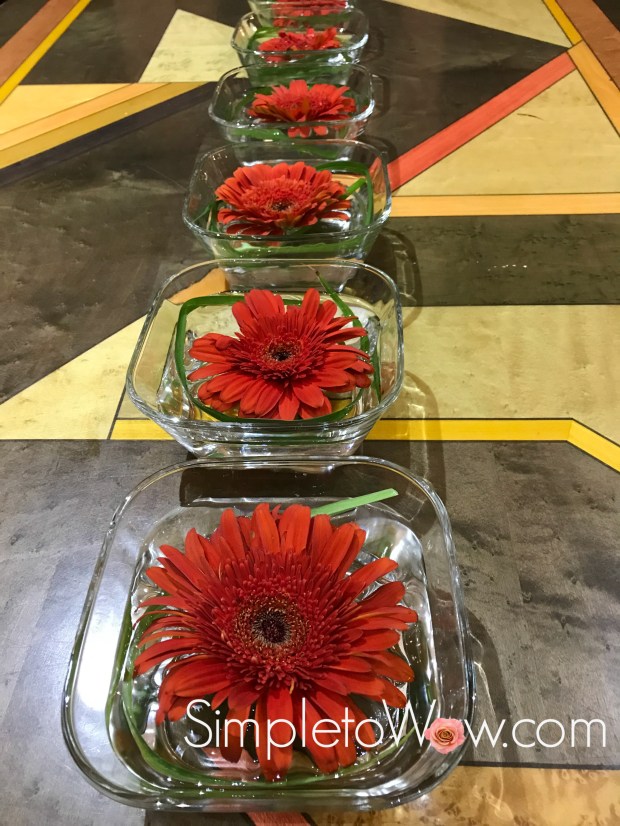
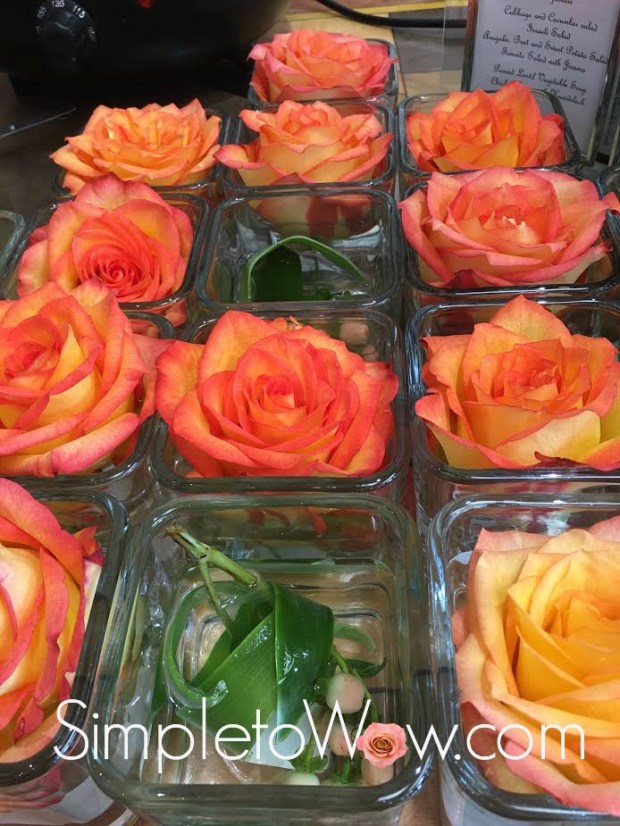
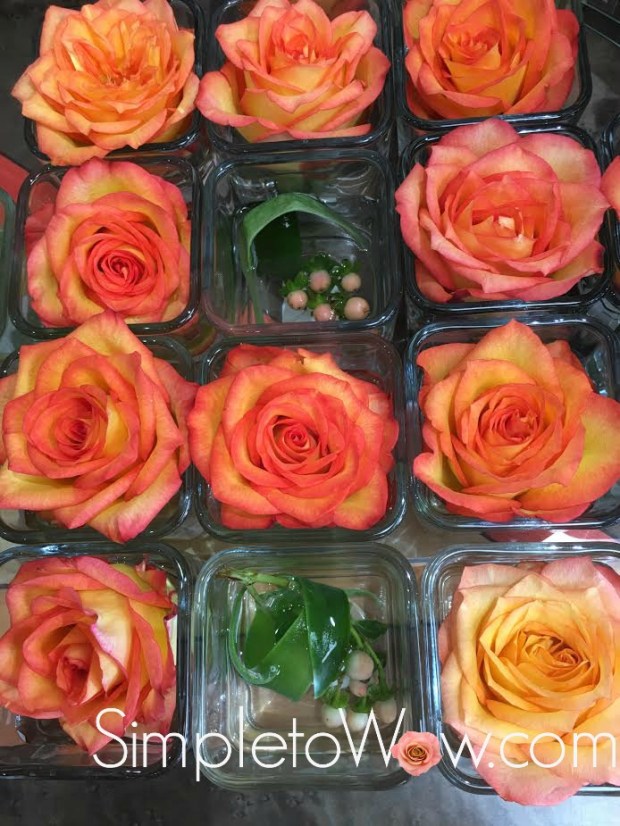
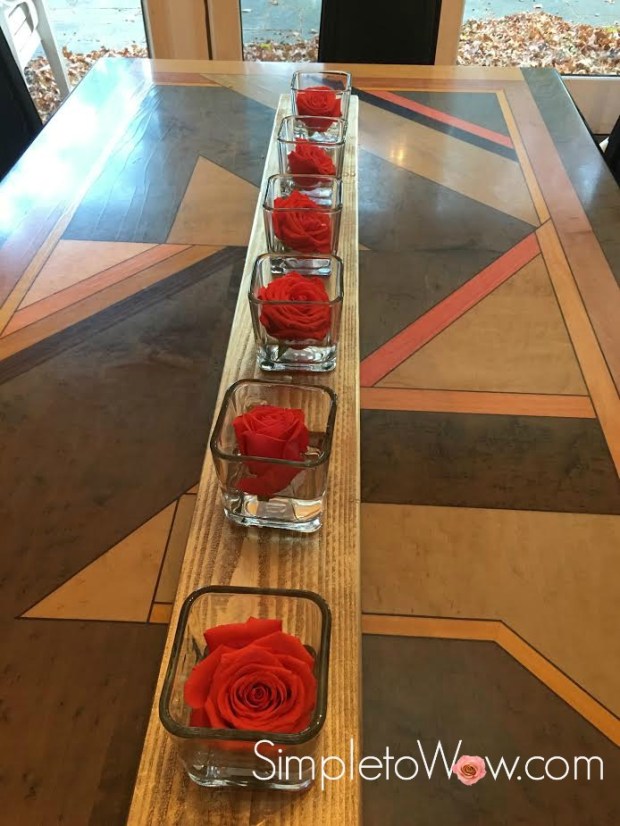
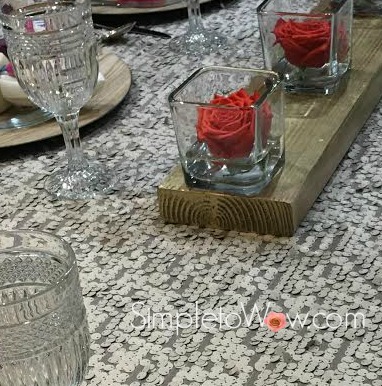
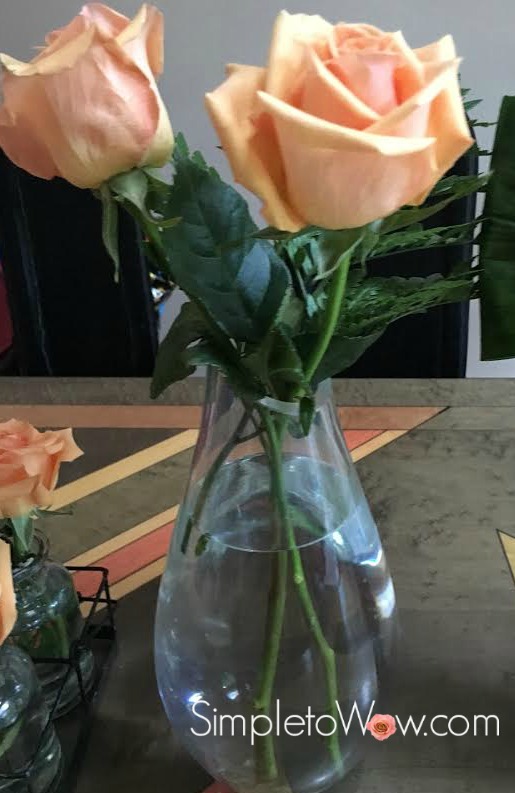
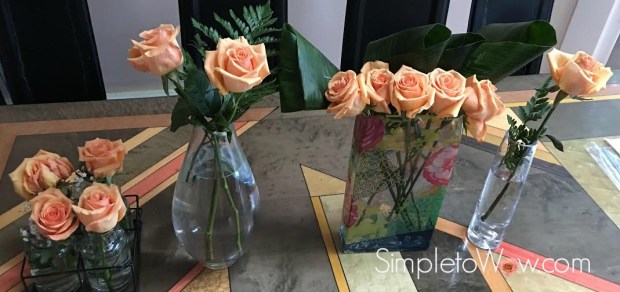
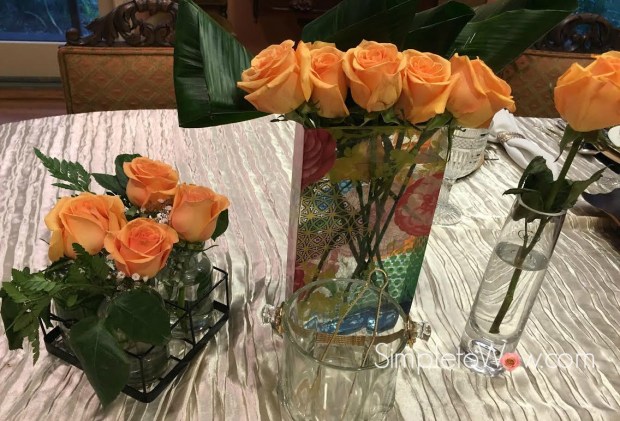
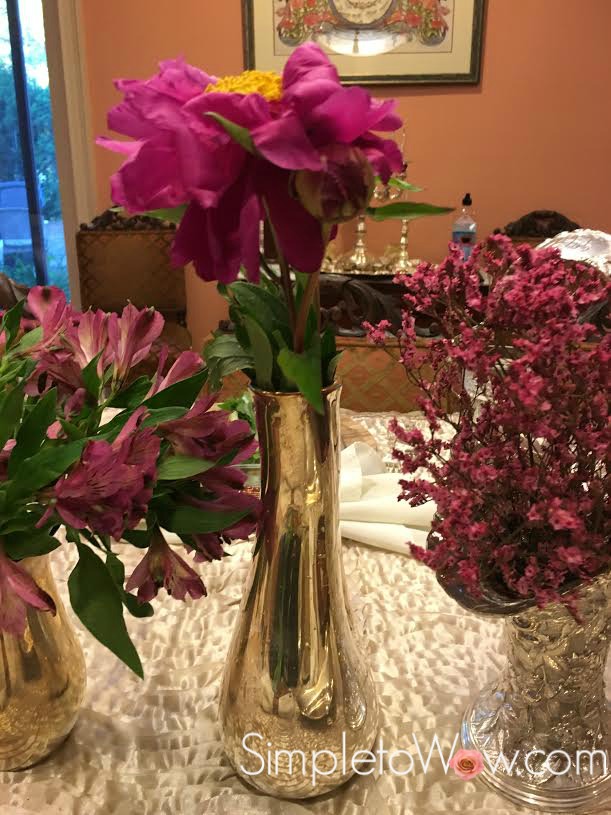
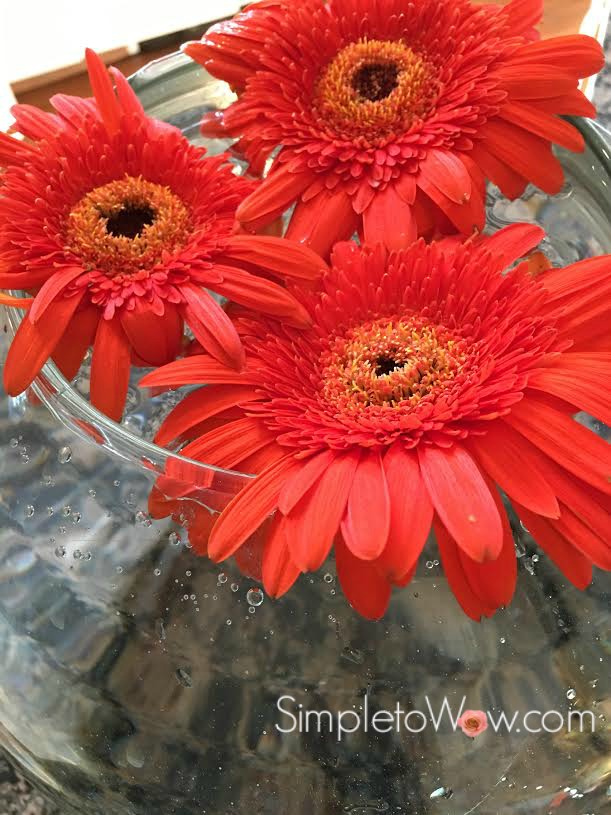
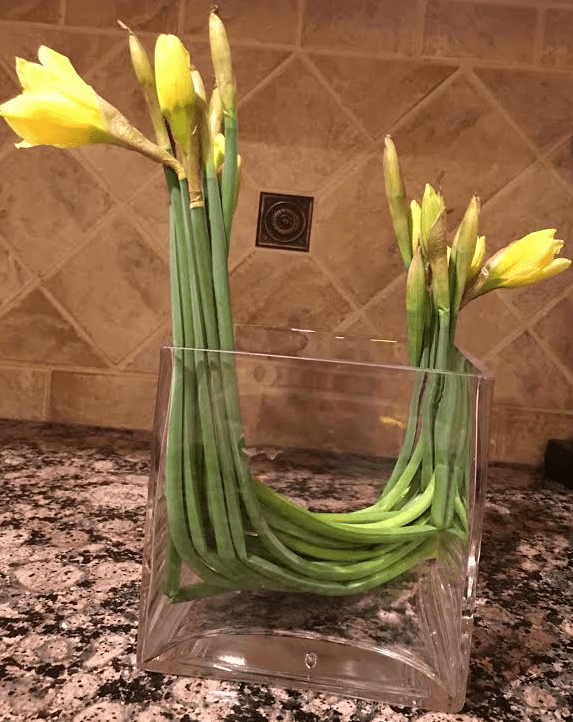
I created a number of small floral arrangements and one larger one to decorate the tables of our siyum seuda.  The smaller floral arrangements were intended as a take-home gift for our guests.  The larger centerpiece was to remain with us to grace this week’s Shabbos table.

yahrzheit small arrangements.jpg


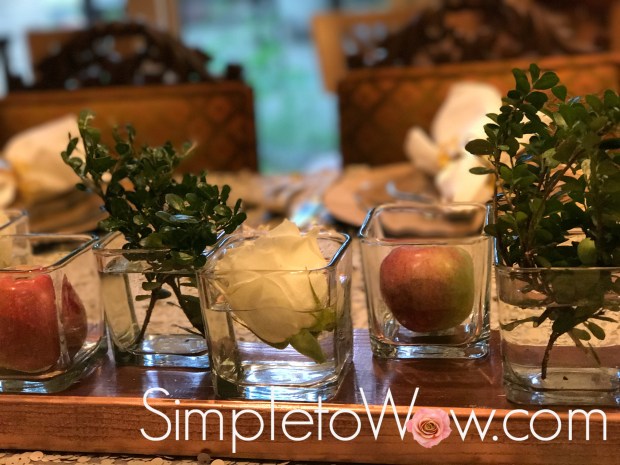
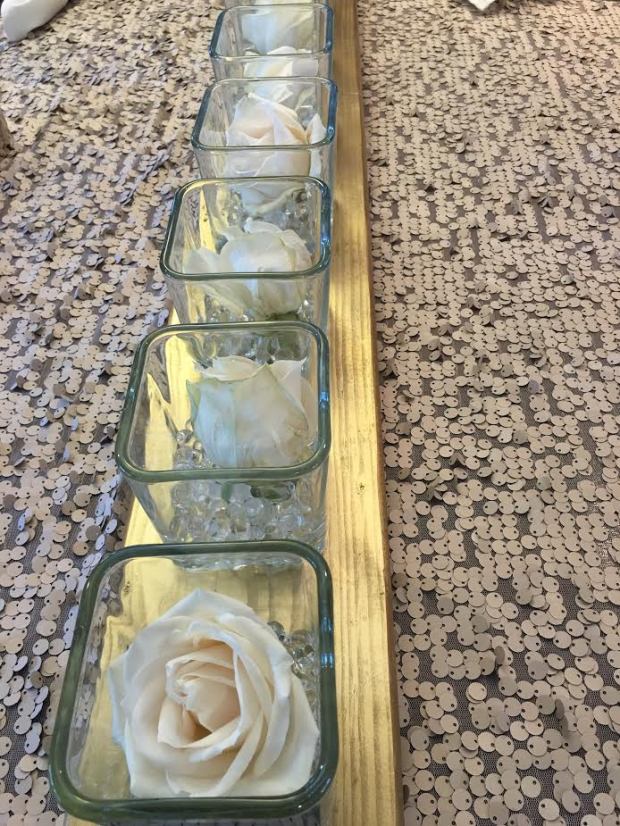
I began with a glass low vase and soaked a piece of oasis.  I then took a variety of leaves from the garden.  I started with a single succulent to create this centerpiece.  I then added the ribbon-like variegated leaves and stuck them into the oasis in two places.  Each leaf end was secured with a toothpick to ensure that the top end of the variegated leaf didn’t budge.  I randomly added fuchsia anemones, making sure that they moved in all directions of the arrangement.  Finally, I added some more leaves on short stems to fill in the arrangement and to ensure that all of the oasis foam was covered.

yahrzheit-anemone-and-succulent-arrangement-2.jpg


At the yahrzheit siyum, I spoke about Mom and reflected upon what made her unique.  I compared her to a Devorah (bee).  K’shma kein haysa (her name reflected upon who she was).

T’hay nishmasa tzrurah b’tzror hachaim (May her soul be bound in the bond of life).

************************************************************************************

Tonight is the Yarzheit of  Devorah bas Yitzchok Ahron

The Yarzheit is a special time to reflect on the qualities of the neshoma (soul) that remain  in this world even after a persons petira (passing)

This year I thought we would take my mother-in-law’s name, Devorah, which means bee and we would explore some of the unique and even surprising facts about bees to garner some lessons that she taught us all:

1.  A bee is a busy and social creature.  One bee must fly on average 90,000 miles, about three times around the globe, to produce one pound of honey.    A bee colony is comprised of more than ten thousand bees and less than 80,000 bees.       

My mother-in-law was a busy woman, always thinking of others and connecting people around her Shabbos and Yom Tov table.  She was really a people person who enjoyed being in the company of others. She sought out new friends wherever she went and so many lonely people found a place in her home and in her heart.   She was truly a busy and social creature.

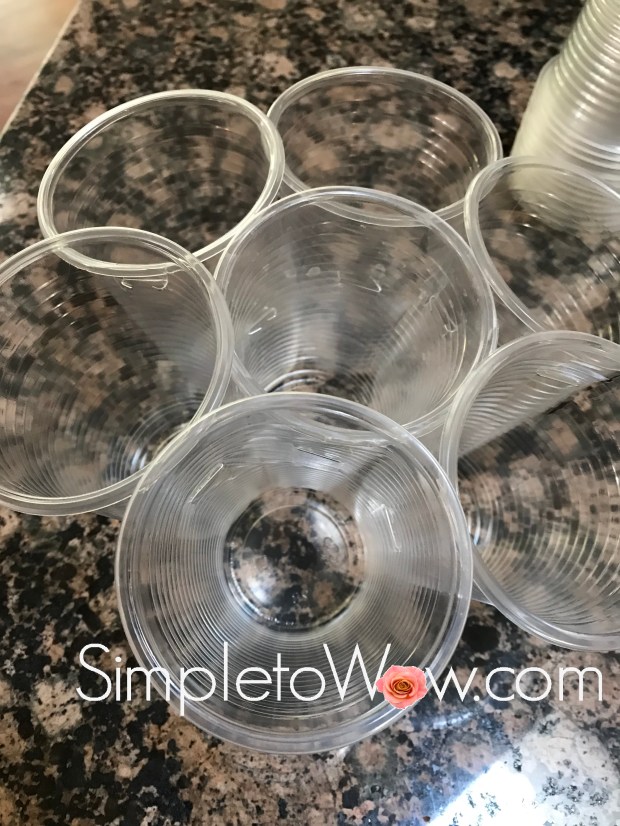
2. A bee honeycomb is a very efficient structure. It uses the minimum amount of beeswax in each perfect hexagon to hold the maximum amount of honey.   My mother-in-law had the unique quality of finding a small and inexpensive gift that would show her concern and caring for another person. She would keep a box of Dixie cups with knock-knock jokes for decades.  She would take them out and distribute them.   We were each mandated to read the knock-knock jokes out loud and then she would make sure no one ruined the cups by drinking from them. She would then collect them and those Dixie cups would go right back in the box and into her cabinet.

On Shabbos and Yom Tov, Mom would ask me to make platters for kiddush and then she would whisper to me “in case more people come, please cut each piece of gefilte fish into half and then into quarters so that each guest would get a piece.”   Every guest would arrive hungrily and at least go home with a quarter-piece of fish.  Her friends always left filled by her friendship and attention.

She would find safety pins and Bobby pins and dollar store gifts that would be just what we all needed    Like the beehive, Mom was efficient about using small things to their maximum benefit.

3. The venom in a bee sting has medicinal properties. Bee venom has shown promise in treating arthritis and other types of pain.

Mom was known to speak her mind, especially when she saw something with which she disagreed.  For me as a new daughter-in-law,, some of my mother-in-law’s words stung.  But, as I got to know Mom  I really began to understand and appreciate this quality.  I learned that her bee sting had medicinal properties. Her words were honest and truthful, and I personally learned a lot through her.

When I first was married, she admonished me for not calling her every Friday.  I apologized and felt stung by the criticism.  After all, in my family, we called each other whenever we felt like calling.  There was no schedule and that was just what I was used to doing.  Nonetheless, I decided to start calling my in-laws every Erev Shabbos (Friday afternoon) as that was their expectation.  As the years went by, I realized what a blessing the initial criticism had been.  Now, my children and grandchildren call me just about every Friday afternoon.  That is the medicinal quality of that sting.

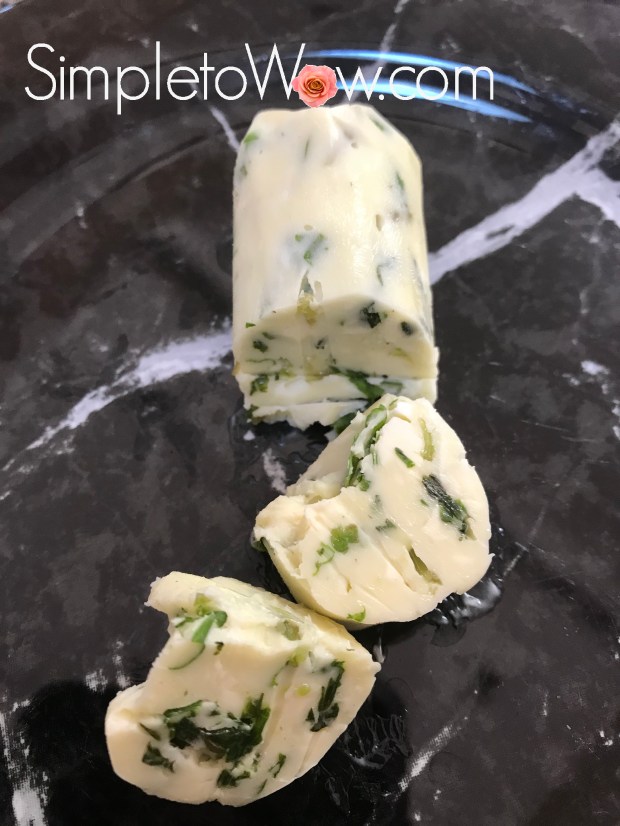
4. A bee is the only insect that produces human food and the bee is the only non- kosher creature that produces a substance that we are allowed to eat. 

Like the bee, the sweet honey that my mother-in-law produced is unique and defies logic.  She had the ability to take the most mundane and insignificant gift and elevate it by making someone feel special.  She was able to take her toughness and criticism and combine it with her Simchas Ha’chaim (joie de vivre) to produce children who are known for their incredible sweetness   And, she taught us that it is possible for each one of us to be the only insect that can produce something edible and then elevate it to something pure and kosher.

May the neshoma (soul) of Devora bas Yitzchok Aaron have a tremendous Aliyah as she buzzes and soars in the Next World.  May each one of us continue to produce the honey from all that Mom has taught us.

Love Birds Floral Arrangement

love birds arrangement 3

This week is one where we have been basking in the beauty, delight and joy of a new couple in our lives.  Our son, Yitzchak Aaron, has announced his engagement to Hindy Shippel.  As we welcome Hindy into our family, we feel humbled by the enormity of the gift of this union between two families.  My parents, who are now staying with us, have been actively involved in this shidduch and my father especially has been delighting in the details of their courtship.

We were in Israel for the past two weeks and wedding-themed accessories seemed to be everywhere.  Hindy and Yitzchok Aaron’s effervescence has been infectious and my father called Israel occasionally to provide updates on them, always referring to them as the “love birds”.

So, when I found a pair of Styrofoam wedding birds in a store in Israel, I just couldn’t resist buying them.   The groom was wearing a black top hat and the bride was decked out in a tulle veil.  They were charming and delightful.  The five-shekel price was perfect and I knew that I would find the ideal opportunity to use them.

The lovebirds accompanied me home and were unpacked.  They patiently sat on my kitchen counter in their package.  Yitzchok Aaron and Hindy announced their engagement Wednesday night, just hours after we arrived in New Jersey.  The past thirty-six hours were a whirlwind.  And, I forgot about the Styrofoam love birds.

Yesterday, I picked up a 3 for $12 flower special at Shoprite along with the basic groceries to restock my refrigerator.  Still basking in the wedding spirit, I chose all white flowers.  I purchased two bunches of hydrangeas and one bunch of calla lilies.  I cut them down to size and arranged them into my hallway vase.

And, as I was bringing the vase back to the front hall, I encountered the love birds.  After positioning them atop my new arrangement, they too are basking in the excitement of this simcha.

A Bouquet of Cupcakes with Purpose

cupcake bouquet.png

Davida volunteered to host a Shavuos bake sale at our home next Wednesday night, May 16th, 2018  from 8:00 PM to 10:30 PM.  It comes right on the heels of Mother’s Day and right before the Jewish holiday of Shavuos.


Screen Shot 2018-04-29 at 8.28.45 PM

Both Mother’s Day and Shavuos are days associated with flowers, so Davida and I prepared a few cupcake bouquets for the bake sale.  All proceeds will benefit families in need and will satisfy both the food and decorative aspects of the upcoming holiday.  

Davida is the go-to person in the family for any baking or cooking tasks.  She is a master at baking and decorating and her baked goods are both delicious and beautiful.  This one is no exception.  It uses items that you would have on hand and is simple to assemble.


SUPPLIES

7 cupcakes

7 cups
stapler
green cocktail napkins
green tissue paper

glue stick
ribbon
container

DIRECTIONS

Frost seven cupcakes with icing to resemble flowers.

Find plastic or paper cups that will allow each cupcake to fit snugly inside.

Staple the seven cups together in the following way to easily form a bouquet base with places to hold the flower cupcakes:

  • Staple three cups in a row.
  • Staple another two cups to each other.
  • Staple the last two cups to each other.
  • Staple the three cups to one pair of two stapled cups.  Staple the other pair of two cups to the three cups on the other side.  This will form a base for your seven cupcakes with one cup in the middle and six cups all around.

cupcake bouquet-cups only

Fit the plastic cup base into a basket or bowl that fits snugly.  I found a farmer’s market basket that fit perfectly.

Cut the green tissue paper in half and wrap around the basket, gluing it into place.  Tie a ribbon around the basket and secure with glue, if necessary.

Cut each cocktail napkin into a large circle.  Tuck the napkin remnants between each cup to fill in gaps.

cupcake bouquet assembled with greenery ready

Wrap each cupcake in a napkin circle and fit each floral cupcake snugly into each plastic cup.

Voila!

cupcake bouquet


Basil Pesto Butter

basil butter flowers.png

Close to ten years ago, we shared a dairy lunch meal with our good friends, Neal and Marilyn, at their new home in Jerusalem.  They ordered food from Village Green, a well-known and delicious vegetarian restaurant on Jaffa Street right in the heart of Jerusalem.  They ordered a lavish assortment of salads, quiches, pastas and desserts.

It was a luncheon to remember.  The food was delicious, colorful and plentiful.  The camaraderie among the adults and the kids was remarkable.  But, there was one stand-out rockstar at that luncheon.

It was the herbed butter.

Village Green had packaged the food with small individual pats of herbed butter and those delicious flavorful butter treats transformed that afternoon.

So, ten years later, I decided that it was time to recreate that buttery sensation.   I simply added basil to the food processor and pulsed it into a rough pesto.  I then added softened butter and processed it until it was well combined.

Best of all, when I served the butter, it transported us back instantly to that afternoon in the heart of Israel.  Hopefully, this simple upgrade to your dairy meal will create pleasant memories for you, too….


INGREDIENTS

1/2 cup fresh basil leaves, cleaned and pat dry (see kosher notes)
1 pound salted or unsalted butter


DIRECTIONS

Place basil leaves in the food processor.  Using the s-blade, pulse until roughly ground.  Cut butter into small cubes and add to food processor.  Pulse until smooth and well-combined.

Alternatively,  chop basil.  Soften butter by using the time-defrost mode on the microwave.  Defrost in 30 second intervals until softened but not melted. Combine chopped basil and softened butter until well-combined

Place pesto butter onto parchment paper and roll.  Twist ends of parchment roll.  Refrigerate until firm.

basil butter log.png

Cut into thin slices before serving.

basil butter log cut into pieces.jpg

KOSHER NOTES

Kosher laws disallow the eating of any whole insects and therefore herbs require a process of soaking, rinsing and in some cases, pureeing, unless purchased with a reputable kosher hashgacha (certification). Kashrut authorities differ on the proper checking of broccoli. This blog was not designed to be your kosher authority, so please consult your local rabbinic authority regarding using and preparing fresh herbs.

TIP

For an additional wow, place basil butter in individual molds or interesting ice cube trays.  Freeze until it is easy to pop out into individual decorative pats of butter.

basil butter flowers

Refrigerate or freeze leftovers and use as starter for dairy soups and omelets or as  a delicious accompaniment to roasted or steamed vegetables and fish.

Hoop Floral Arrangements

magnolia hoop arrangement.jpg

I am intrigued by framed arrangements.  I love the contrast of a rigid framed shape against the natural beauty of foliage and flowers.  The frame provides boundary and format to the creativity and unique beauty of G-d’s world

Last year, I attended a cousin’s Bar Mitzvah in Jerusalem and the simple floral arrangements mesmerized me.  The arrangements  incorporated circular hoops as the backdrop for tropical flowers.  I was intrigued by these arrangements and just couldn’t take my eyes off them.  There was something about the way the circular hoop framed the arrangement and the way the lush tropical foliage and orchids contrasted with the simplicity of the circular shape.  My relatives caught me staring and  quickly realized that they would be seeing  more of this type of arrangement on  my blog.

hoop floral arrangement

I spent some time thinking about how I could achieve that look on a budget and with flowers from my garden.  I loved the idea of the circular framing.  I was determined to use the hoop as a frame for a sparse arrangement that would allow one to see right through the arrangement.

For our Purim seuda (feast), I created these arrangements using the just budding branches of our Magnolia trees in our backyard.  Back in late February-early March, the buds were fuzzy, kind of like pussy willow buds but with meandering branches that were so interesting in their unique shapes.

magnolia tree in february.jpg

I contrasted rose-gold painted hoops with these branches and the effect was breathtaking and unique.  I mounted the hoops onto cans spray-painted in the same metallic color as the hoops.   They were conversation starters, especially because they incorporated elements from the winter-beleaguered trees in my backyard.  And, they signaled that spring really would arrive this year.

shabbos table through copper hoop arrangement

Almost two months later, the branches are still gorgeous and fresh with the fuzzy, though slightly withered blossoms still attached.   I found an old globe stand and I fitted one of the metallic hoop arrangements into the semicircular base of the globe stand and have been enjoying the floral arrangement in my front hall.

Until, last week.

Just a few days ago, the Magnolia tree fuzzies metamorphosed into their trademark showy pink blossoms.

magnolia tree.jpg

And, I just couldn’t resist updating and upgrading the hoop arrangements.

And this old-new arrangement just took my breath away.  Not because of the rose-gold hoops.  Or, the meandering branches.  Or the fuzzy blossom beginnings.  Or, even the spectacular magnolia blossoms.

magnolia hoop arrangement 2

It is because of the symbolism.  The round world surrounding the flowing beauty of nature, marching to the same rhythm and yet, ever changing.  It is the miracle in the world.  And in nature.  And in creativity.  And, mostly in the things we just take for granted.


SUPPLIES

pruning shears

small 16-24″ hula hoop

metallic spray paint

glue gun with glue sticks

heavy brick or can for base

INSTRUCTIONS

Using pruning shears, cut interesting branches, with or without blossoms, that will fit inside the hoop.   Peel any stickers or coating off of the small 16-24″ hula hoop. Spray the hoop and the base carefully with metallic spray paint.  Using a glue gun with glue sticks, carefully secure branches or flowers to the insides of the hula hoop, securing them in a few spots on the hoop.  Using the glue gun with glue sticks,  secure the hoop to the weighted base.

Voila!

shabbos table through copper hoop arrangement

Quince Blossom Arrangement: Admiring the Outdoors Inside

quince blossom arrangement

I love arrangements that force the observer to admire the delicacy and individual nature of  each blossom.  After all, this blog began with floating roses displayed in a grid-like formation for all to admire.  Outdoors, in its native state, oftentimes, the beauty of each flower is lost in the majesty of  so many blossoms admired as one.

Springtime is the perfect time to appreciate the uniqueness of each blossom indoors as well as outdoors.  We have a quince tree in our backyard and it blossoms at different points in the winter and spring each year.  There have been years that the quince tree begins blossoming in January or February after a short spell of warmer weather, only to be rudely reminded that spring has not yet sprung.  Most years, our quince tree dazzles us with its array of pinkish reddish flowers for Purim.  This year, our favorite tree  has just began to blossom now, weeks after Pesach (Passover).

quince tree

There are so many flowering trees to admire now and by bringing some branches inside, you will have the opportunity to more closely enjoy and appreciate each individual blossom and the contrast between branch and blossom.  Cherry blossoms and forsythia bushes are perfect for this type of arrangement.  My suggestion is to carefully hose down the branches before bringing them in just to make sure that you’re not bringing in any insects or larvae along with the branches.

When cutting branches, it is best to leave enough of a length of branch to fit on the bottom of the vase.  If that is not possible, just cut away at the lower part of the branch and remove enough twigs so that your branch will stay upright in the vase.  Try to choose an assortment of branches that are straight on top and that twist in all directions at the top.  This will allow for enough spread in the arrangement above the top of the vase.  Make sure to use a vase that is sturdy enough for the weight and breadth of your branches.  Enjoy the spring outdoor branches inside your home.

Voila!

quince blossom arrangement

Tulips Times Two

tulips

On these frigid winter days, it is so exciting to see tulips for sale at the local market. Tulips, a member of the lily family,  are a welcome harbinger of spring and it keeps hope alive for warmer weather ahead.

Tulips come in thousands of varieties and can be found in all colors, shapes and heights.  Their leaves are soft and large, sometimes as long as the tulip stem itself.

I especially love tulips that have variegated colors and interesting petal shapes.  These pink tulips were for sale at my local supermarket and boasted green edges, light green leaves and soft blossoms.

This arrangement uses both the tulip blossoms and their leaves.  My tulip bunch was comprised of ten blossoms and my narrow vase fit two five-blossom bunches with enough space left over for effect.

This type of arrangements creates interest both at the top of the vase where the blossoms are arranged and inside the vase where each bunch is wrapped in a tulip leaf.   It is best suited for a long and narrow glass vase.  This can easily be done with one, two or three bunches of tulips, as long as your vase is wide enough.

SUPPLIES
long glass vase
bunch of tulips
piece of wire or small rubber band
water

DIRECTIONS
Trim tulips so that they are just a few inches taller than your vase.  Separate tulips into groups of at least 4 tulips each, trying to keep tulip bunches symmetric.  Remove lower tulip leaves and reserve an unblemished leaf for wrapping each bunch.  Wrap the leaf around each bunch, securing with thin wire or rubber band.

Display in long glass vase and fill with water.


Please Note: This post contains affiliate links from Amazon, which means I earn a small commission if you click and make a purchase.

Apples and Roses: A Rosh Hashana Table Arrangement

roses and apples arrangement

I was looking to create a SimpletoWow fruit and floral arrangement worthy of the Rosh Hashana (Jewish New Year) table.  On Rosh Hashana, we dip an apple into honey as a symbol for a sweet new year (see Dip the Apple… Rosh Hashana Cupcakes), so incorporating apples into the arrangement was a no-brainer.    I wanted the apples to remain as pristine as possible so that they can be admired as part of the table arrangement but still be ceremoniously eaten later.

Voila!

roses and apples arrangement 2

SUPPLIES

2 large open-blossoms
2 unblemished apples
6 short but full boxwood branches
two to four foot section of 2″x6″ wood beam
copper spray paint
6 clear 4″ square glass vases
water

TOOLS

hand sander
copper spray paint

INSTRUCTIONS

Using hand sander, sand rough edges of beam.

Spray paint the top and all sides of the beams in your favorite color.   I used metallic copper spray paint.  Allow to dry.

Cut two open rose blossoms off of stem.  Float each rose in each of two vases filled with water almost to the top.

Cut six short and full boxwood stems.  Place three boxwood stems in each of two vases filled with water almost to the top.

Select interesting and unblemished apples sized to fill the remaining two vases.  Place these apples into the vases without adding any water.

Set up the six rose, apple and boxwood clear 4″ square glass vases at equal intervals along beam, aligning first and last vases with the edges of the beam.  Optionally, alternate vases on the left and right sides of the beam.

Please Note: This post contains affiliate links from Amazon, which means I earn a small commission if you click and make a purchase.

Gorgeous Roses on a Rose Gold Base

roses on copper

Don still brings home roses just about every Friday.  He brings home a different color every week just to keep things interesting.  While I always favored tropical flowers like birds of paradise, ginger flowers, antherium and haleconias,  I have learned to enjoy and embrace the simple, classic rose, mostly because that is what Don brings home. Every week.

There was a time when Leah would set our Shabbos table on Thursday night and then suggest a matching color of roses to Don so that everything would match.  Nowadays, I am back to setting the table on Friday mornings.  I look forward to the color surprise as Don brings home a dozen roses right after Shacharis (morning prayers) and before he leaves to the office on Friday morning.   I just match my napkins and table design to whatever the rose color of the week is.

I still try to keep the roses for at least two weeks.  Sometimes, we are lucky and can even enjoy them for three weeks.  The newer roses are mere buds, while the older roses are open, mature and beautiful.  Most of the time, by the end of the first week, the week-old roses are starting to droop.  They look so forlorn on the edge of their stems, barely able to hold on.

Once cut off the stem and floated in water, each blossom takes on a new life.  It is amazing how these “older” roses are even more beautiful than their young counterparts. Invariably, my guests ask me if the roses are real, because their complexity borders on perfection.

And I love these roses because they are real.  And mature.  And beautiful despite their age.

Is there a metaphor to the aging process?  Maybe.

This week, to match the vintage looking roses, I resprayed one of the wooden planks that I sanded and painted in an arrangement of Single Roses: Simple, Upcycled and Breathtaking.  I chose a copper color (rose gold) paint, so currently in vogue and such a perfect match to offset the delicate and unusual color of these roses.

Voila!

roses on copper

SUPPLIES

6 large open-blossoms
four foot section of 2″x6″ wood beam
metallic copper spray paint
6 clear 4″ square glass vases
water


TOOLS

hand sander


INSTRUCTIONS

Using hand sander, sand rough edges of beam.

Spray paint the top and all sides of the beams in your favorite color.   I used metallic copper spray paint

Cut open rose blossoms off of stem.

Set up 6 clear 4″ square glass vases at equal intervals along beam, aligning first and last vases with the edges of the beam.

Fill each vase two-thirds with water.

Carefully place each blossom in each vase.


Please Note: This post contains affiliate links from Amazon, which means I earn a small commission if you click and make a purchase.

A Simple and Regal Gladiola Arrangement

orange gladiolas after arranging

I love gladiolas.  I love their ladder-like flowers that are soft and delicate.  I find gladiolas to be regal and tall, stately, yet graceful.  I look forward to each higher blossom budding and opening, just as the lower blossoms are withering and falling off.  I love the deeper and interesting shades of this flower, gladiolas that come in deep orange,  scalloped red and midnight purple.

Gladiolas seem to be a flower from the past,  a flower that has lost its way for no good reason.  They are rarely admired anymore and are hard to find.  Their graceful silhouette no longer seems to be in fashion and I feel badly about that, sad for their disgrace.  I am always excited when I can find gladiolas for purchase at my local market.

My husband, Don, hates gladiolas.

Don associates gladiolas with funerals.  I’m not sure why.

There are no flowers at Jewish funerals.  Jewish law requires burial as soon as possible and that the body be buried with simple shrouds in a plain coffin with no special adornment.

But, Don insists that Gladiolas are funeral flowers.

Sorry, Don.  I still love Gladiolas.

And, this week, I found them at my market.  Each bunch was $1.99.  How could I resist?


SUPPLIES

sharp pruning shears

tall glass vase


DIRECTIONS

Trim gladiolas so that base of flowering blossoms begins just above the top of your vase.

orange gladiolas before arranging

Strip leaves from each gladiola, setting the leaves aside.

orange gladiolas laid out with leaves removed

Fill vase with water and place gladiolas in vase, arranging them so that they branch out slightly from the top of the vase in each direction.  You may want to keep turning the vase to make sure that the gladiola arrangement looks good from all sides.

orange gladiolas in vase

Add the gladiola leaves to the arrangement, making sure that they are evenly distributed within the arrangement and that the water level is reaching the base of each leaf.

orange gladiolas after arranging

Really, Don.  Aren’t these flowers gorgeous?


Please Note:  This post contains affiliate links from Amazon, which means I earn a small commission if you click and make a purchase.

Floating Gerber Daisies in Series

I am enchanted by simple floral arrangements that highlight the beauty, intricacy and detail of individual blossoms.  From my very first blog post entitled  It’s all about the arrangement (psst….even with last week’s roses)until now, I have advocated for using a few blossoms to create inexpensive and stunning floral arrangements.

When there are many blossoms in an arrangement, very often the individual detail of each flower is lost.  It’s hard to tell the trees from the forest, or rather the flowers from the arrangement.  In an arrangement where a few blossoms rule, it is important to choose full-bodied blossoms like open roses, gerber daisies or large chrysanthemums.

Here I simply floated gerber daisy blossoms cut right below the blossom in square glass bowls.  For a little extra pizzazz, I encircled each blossom with tall leaves that I snipped from my lily bushes.

Voila!

floating gerbers.JPGfloating gerber daisies up close.JPGfloating gerber daisies in series.JPG

A Bottlebrush Arrangement


20170728_181652

My favorite floral arrangements are those that bring the outdoors inside.  This weekend, we are visiting the Upper Galilee and we are always amazed by the beautiful varieties of plants and trees that are native to this gorgeous part of Northern Israel.  One of my favorite shrubs found is this part of the world  is the Callisteon, affectionately known as a bottlebrush plant.  The flowers of this shrub resemble a bottlebrush and are unique and stunning.

For this Shabbos, I designed an arrangements using three branches of a bottlebrush shrub and two Monstera leaves brought in from the outdoors.

Shabbat Shalom (peaceful Shabbos)!

Simple Layered Iris Arrangement

For last Shabbos, I decided to pamper myself with some flowers other than the roses that Don brings home ever Friday morning.  I picked up some beautiful irises at Trader Joe’s on Friday afternoon and arranged them using Dusty Miller and Hosta leaves from my garden.

Here it is:

iris arrangement

TIPS

For effective layering, use tall straight flowers for the top layer.  Good choices for the top layer are tall roses, irises, allium, tulips, gladiolas, birds of paradise or lilies.  For the bottom layer, use large leaves that fan out creating a base that covers the top of your floral container or vase  For the middle layer, use leaves or flowers that create a color or textural contrast between the bottom and top layers.  Great choices for the middle layer are hydrangea, dusty miller, herbs and filler flowers.

An Endless Row of Roses

For a recent dinner party, I constructed arrangements of single roses on gold wooden planks (see An arrangement of Single Roses: Simple, Upcycled and Breathtaking).  For that original arrangement, I used 6 roses for each 6-foot section of gilded wood.

This arrangement takes inspiration from that one, but uses 10 single rose blossoms for each 6 foot wooden plank.  This leaves almost no whitespace between the individual vases of rose blossoms and creates the illusion of an endless row of rose blossoms.

Simple to Wow?  You decide.


roses in a row

Roses in a Grid


Just about one year ago, this blog started with a simple arrangement of rose heads floating in a grid-like pattern: It’s all about the arrangement (psst….even with last week’s roses)  I have mixed things up by using floating roses in so many different ways.  I have mixed rose blossoms with lanterns in Roses and Lanterns: A Simple and Stunning Centerpiece and with plenty of white space over spray-painted wooden planks in An arrangement of Single Roses: Simple, Upcycled and Breathtaking.

Admittedly, roses have never been one of my favorite flowers.  They just seemed so….ordinary.  I have learned to embrace their beauty by admiring these blossoms for their variety of colors, soft petals and classic style.  I have discovered that by floating rose blossoms in different types of arrangements, it allows the viewer to see the majesty of each unique petal on each individual rose.

This is yet another simple wow arrangement that highlights the special qualities of the lovely rose.

This arrangement was created quite by accident.  I had just finished clearing up the dining room from our Purim seuda (festive meal).  For the seuda, I had set up individual square vases with floating roses alternating with individual vases with submerged orange berries and tulip petal swirls.  I placed all the vases that I had collected on my kitchen table and was contemplating what to do with the flowers.  When I looked down, I realized that I had inadvertently formed a beautiful, albeit haphazard collection of individual roses interspersed with submerged berries and tulip petals.

Here it is!

roses in a grid 1


An arrangement of Single Roses: Simple, Upcycled and Breathtaking

roses-in-sequence

Last week, I hosted Sheva Brochos (one of seven wedding after-parties, each with seven blessings) for the children of my dear friends, Andrea and Michael.  The chosson (groom) and kallah (bride), Davidi and Efrat, are a gorgeous and young couple.

The Sheva Brochos was hosted together with five other couples, all close friends of Andrea and Michael.  Since this Sheva Brochos was toward the end of the week of partying, we created a theme and menu that would be lighthearted, interesting and youthful.

We decided to host the Sheva Brochos as a Spanish fiesta and it was wonderful!

We set up a taco bar with pulled beef, pulled chicken,  chili, an assortment of taco shells and rice choices.  There were lots of toppings and salad choices for the vegetarian and diet-conscious guests, too.  Over the next weeks, I will share recipes, menu and table setting inspirations from this wonderful Sheva Brochos.

As a backdrop to the Sheva Brochos fiesta, I challenged myself to create centerpieces to reflect the youth and glamour of this couple and the fun inspired by the fiesta theme.

Since we had not allocated much of a budget for centerpieces, I created centerpieces that were inexpensive but sensational.  I set up long rectangular tables and round tables.  For each long table, its  centerpiece spanned four feet in length, six inches in width and amazingly, only required six flowers that I had upcycled from last week’s floral bouquet.  For each round table, its centerpiece spanned two feet in length, six inches in width and amazingly, only required three flowers that I had upcycled from last week’s floral bouquet.

For the floral arrangements, I selected the straightest two  inch by six inch by eight foot lumber beams from my local Home Depot.  Since I was using both long and round tables, I purchased two eight foot length beams and had the lumber cutter at Home Depot cut them.  I cut one beam into two four-foot beams and the other into one four-foot beam and two two-foot beams.

I now had three four-foot beams and two two-foot beams.  On an outside table, I sanded the wood with my hand sander, paying particular attention to the area that had been cut at Home Depot. The sanding took only a few moments per beam, but really smoothed the beams, removing all splinters and jagged edges.

I then sprayed the top and the sides of each beam with metallic gold spray paint and let it dry for several hours.

Finally, I lined up 6 clear 4″ square glass vases at equal intervals along the beam.  I placed a floral blossom in each vase with just an inch of clear water pearls

Voila!

roses-in-series-on-sequin-tablecloth

SUPPLIES

6 large open-blossoms
four foot section of 2″x6″ wood beam
metallic gold spray paint
6 clear 4″ square glass vases
clear water pearls (optional) or water

TOOLS

hand sander

INSTRUCTIONS

Sand rough edges of beam.

Spray paint the top and all sides of the beams in your favorite color.  I used metallic gold spray paint

wilted-roses

Cut  blossoms off of stem.

Set up glass vases at equal intervals along beam, aligning first and last vases with the edges of the beam.

Add one inch of water or  clear water pearls to each vase.

Carefully place each blossom in each vase.

roses-in-series-on-sequin-tablecloth
Please Note:  This post contains affiliate links from Amazon,
which means I earn a small commission if you click and make a purchase.

A Dozen Roses Stretched to Fill the Shabbos Table

Don brings home roses every Friday in honor of Shabbos.  The roses are always of wonderful quality and it  a surprise to discover what color roses will adorn our Shabbos table.  Most Fridays, we enjoy all twelve roses in one traditional arrangement.

This week, Don brought home peach color roses, one of my favorites.  Our home is decorated in earth tones and peach works well in our dining room.  The roses were large and robust and I decided to stretch the twelve roses into four different arrangements.

I lined up different vases and spread out the roses.

One arrangement took five roses.

roses in a row

One took a single rose.

rose in single bud vase

One arrangement took two roses and that left four roses.

roses in a pair

The last arrangement was a collection of glass bottles set up in a grid-like formation (Upcycled Glass Jar Floral Arrangement: Simply Stunning).  I placed the last four roses into these vases, adorning them with the ferns that accompanied the dozen roses.

roses in glass bottles


Here is how they all look together:

roses-four different ways


roses-a dozen in different ways

roses-3 different ways

Good Shabbos!

A Dozen Red Roses Split Up: Contemporary Arrangements

Don brings home roses most every Erev Shabbos (Shabbos eve).  I try to find different ways to arrange the roses every Friday so that the Shabbos table setup is unique.  As you know, most recently, I have begun to break the dozen roses up into several arrangements.  I love the flexibility of moving the arrangements into different rooms and setting them up differently for each part of Shabbos.

Before I arranged the roses, I took my pruning shears out to the backyard.  I snipped some Dusty Miller to use for my grid-like vase.  I snipped some branches off one of the magnolia trees to use in the largest arrangement.  I re-purposed some leaves from an older arrangement to use in the bud vase.  And so, I arranged the roses in three different vases…

For Friday night, I placed all three arrangements on the table.  For Shabbos lunch, I placed the largest arrangement on the Shabbos table and moved the other two arrangements into the kitchen.  And, so it goes…..

Here are the three arrangements, together and separately:trio of red roses

red roses in bud vase

red roses with dusty miller

roses in wavy vase

Roses and Lanterns: A Simple and Stunning Centerpiece

It all started with It’s all about the arrangement (psst….even with last week’s roses), my first blog post.  This original blog post was one of those ideas born out of an upcycling strategy and week-old roses.  The idea was to take last week’s open but slightly wilted roses and enjoy the blossoms in another arrangement, floating the wilting blossom heads to straighten them out and enjoy them in another way.

Don buys roses just about every Erev Shabbos (Sabbath eve) and I try to create original arrangements for the Shabbos table from these roses.   These roses  are sold right in front of our synagogue by a member of our community.  These roses have thick stems and  high quality blossoms and come in a variety of colors.  They really last a full week and with these upcycled arrangements, I can get at least one more week and sometimes two weeks of added enjoyment from each rose bouquet.

This week, I was setting the table for a weekday dinner and still had some lanterns on the kitchen table from a goodbye barbecue that we had hosted for one of Leah’s friends last week.   Sitting next to the lanterns, were the variegated roses from last Shabbos.  Most of the blossoms were still gorgeous,  but the stems were already starting to droop, making the flowers appear wilted.

wilting roses in silver vase

I cut the roses off their stems, cutting them right below each blossom.  I placed a single rose blossom in each of six square glass vases and bowls.  I interspersed the lanterns with the roses and stood back to admire the newest upcycled arrangement.

Here it is:

lanterns and variagated roses


A Trio of Magenta Flowers in Vintage Silver Vases

magenta flowers tri up close

My local supermarket had some beautiful magenta peonies for sale. I thought that the vintage quality of these fluffy peonies would look gorgeous in series with some other magenta flowers arranged in different types of silver vases.

magenta flowers in silver.jpg

I used the same inspiration that I described in Three’s a Crowd? A Trio of Floral Arrangements by arranging three types of flowers of the same color in separate vases. This time I used peonies, Alstroemeria and a gorgeous magenta filler. Here is what is looks like:

magenta flowers tri on table


A Simple Fluffy Arrangement of Peonies and Hyndrangea

For Shavuos, Davida’s friend, Chava, brought us a gorgeous new vase.  It is rectangular with a narrow opening, perfect for arranging so many different types of flowers.  It is unique in its narrow but long shape, and it is stunning with a floral motif designed into the glass.  Since Shavuos, I have tried so many types of floral arrangements in this vase and they all work.

But, this is my favorite, so far.

My niece, Michal, hosted an event at her home last night and she sent a bouquet of hydrangea and peonies from the event to us.  I rearranged these flowers using a large structural leaf that I already had.  I placed everything in Chava’s vase and I love the soft and delicate floral arrangement.


hydrangea and peony arrangement with orange background

(more…)

Three’s a Crowd? A Trio of Floral Arrangements

I love to arrange flowers of the same color and my favorite floral centerpieces are white.  Often, I can find beautiful flowers at my local supermarket that are sold as three bunches for a single price.  When that happens, I usually pick all white flowers and I arrange them as a trio of floral arrangements.

When time is short,  I find that it is easiest to create a series of arrangements using one color.  Each arrangement uses a different flower in that same color and it works best if the flowers are different heights and textures.

This arrangement uses soft and puffy hydrangeas, structural cala lilies and tender stems of bell-shaped flower to play off the softness of the hydrangeas and the architectural height of the cala liles.  To make things interesting, I used some steel grass from a previous arrangement to set off the clean look of the cala lilies.  I rounded off the corners of  a palm leaf to create a round backdrop for the bell-shaped floral stems.

There are many perks in creating three smaller arrangements, rather than one larger one.  They are simpler to arrange and can be set up in different configurations for each meal.  After dinner, I move these to the kitchen or anywhere else that needs a breath of floral freshness.

Try your own trios of floral arrangements.  I would be interested to hear about your favorite combinations.

(more…)

A Few Good Blossoms: Floating Arrangements

I began this SimpletoWow blog in January with an original post,   It’s all about the arrangement (psst….even with last week’s roses), on arranging last week’s open and just-wilting roses.  It was intended to showcase  simple and wow ways to use what you have in surprising and unexpected ways.

last week's roses in a square bowl

As the Jewish holiday of Shavuos approaches (see Countdown to Shavuos: Floral Inspirations and Dairy Recipes), I would like to add some other ways to make use of a few good blossoms.

last week's gerber daisies in a large rose bowl

(more…)

Upcycled Glass Jar Floral Arrangement: Simply Stunning

My friend Marilyn, and her family joined us for a meal over Pesach (Passover). Since we were in a small apartment in Jerusalem with our extended family, we did not have enough room to host everyone in the dining room. Instead, we set up tables and ate in the courtyard. Marilyn sent flowers before Yom Tov (holiday) in the perfect arrangement. It was a gorgeous grouping of narrow clear bottles lined up side by side in a metal caddy spilling over with white garden roses. The arrangement was narrow and long, just perfect for our narrow outdoor tables.

It created a stunning visual impact without taking away from the table space needed for setting and serving. The white roses lasted for several days, but the centerpiece containers were so easy to fill that I refilled them for the last few days of our stay in Jerusalem with an array of other flowers. Both arrangements were simply stunning.

Over Pesach, I commented so many times about the beauty and the practicality of this centerpiece. I was determined to recreate it with upcycled materials for use back in the States. And….here it is!

upcycled square arrangement-top view (more…)

Daffodils: Simply and Artfully Arranged

daffodil arrangement on counter-crop


Daffodils are in season and they are inexpensive and beautiful.  I like to buy bunches with blossoms that are mostly closed, so that they will last the longest.  I usually look for bunches that have only one or two blossoms showing and the rest are still tight buds.

My favorite arrangements are ones where the stems are as artfully arranged as the blossoms.  Because most of the daffodil blossoms on my bunches are still closed, this also makes the arrangement interesting, even when most of the blossoms have not yet opened. (more…)