Side Dishes

Yerushalmi Kugel Reinvented

yerushami kugel reinvented.jpg

Kaitlyn’s husband, Aaron, joined the family six years ago.  On our first Shabbos together, I prepared Susie Fischbein’s Yerushalmi Kugel from her Kosher by Design cookbook.  Aaron, always the gentleman, complimented the kugel profusely, telling me that it reminded him of a delicious kugel he had tasted in the Geula neighborhood of Jerusalem years ago.  Trying to impress my new son-in-law, I prepared that same kugel for him each and every time he would come for Shabbos.

I served him Yerushalmi kugel every Shabbos for the first four years they were married.

Yes, four years.

To be fair,  when I joined the Respler family, my father-in-law a’h would bring a bottle of Ginger Ale to the Shabbos table every time I visited.  He knew how much I enjoyed Ginger Ale.  And, I noticed.  And, thirty years later I no longer savor Ginger Ale, though Ginger Ale still makes me think of Dad.

Over time and with a gentle comment from Kaitlyn, I came to realize that although delicious,  this kugel needed a break.

I guess times have changed.  And, just maybe, Yerushalmi Kugel is different than my favorite soda.

I stopped preparing Yerushalmi Kugel for Aaron.  And, I let it go.

That is, I let it go until the last time Kaitlyn and Aaron visited.  After all, it was nearly two years since I stopped the Yerushalmi Kugel barrage.

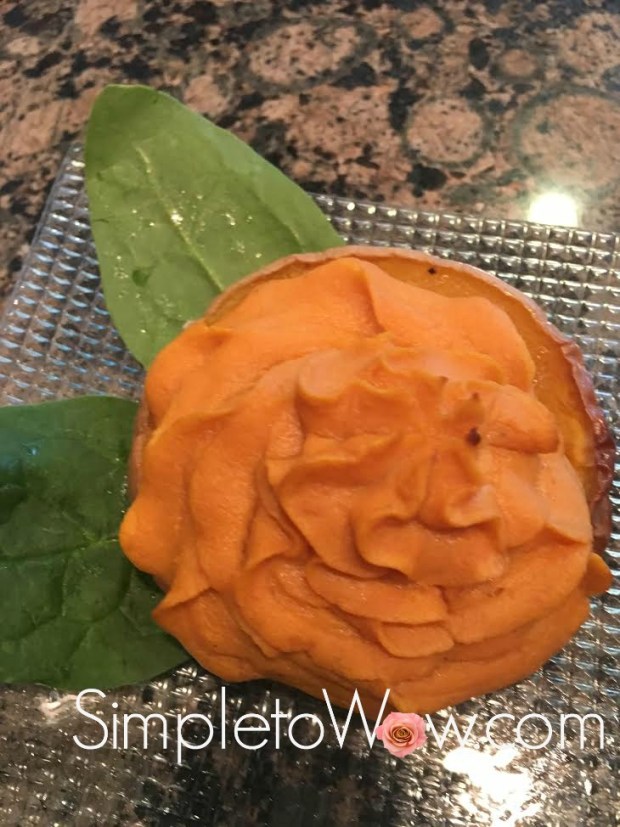
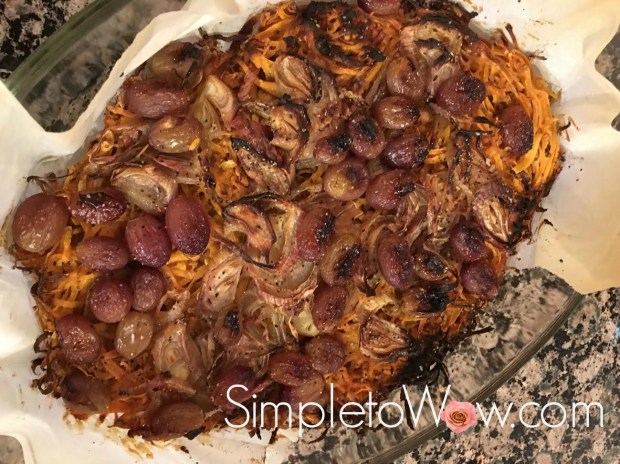
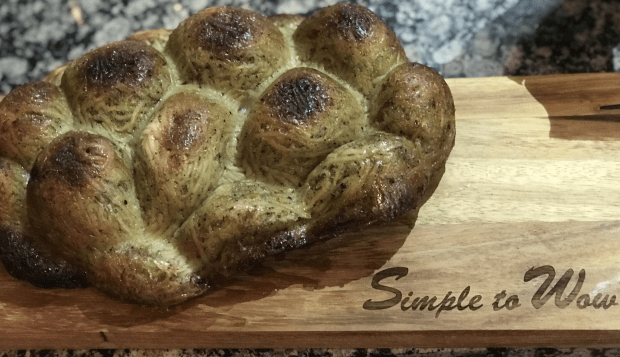
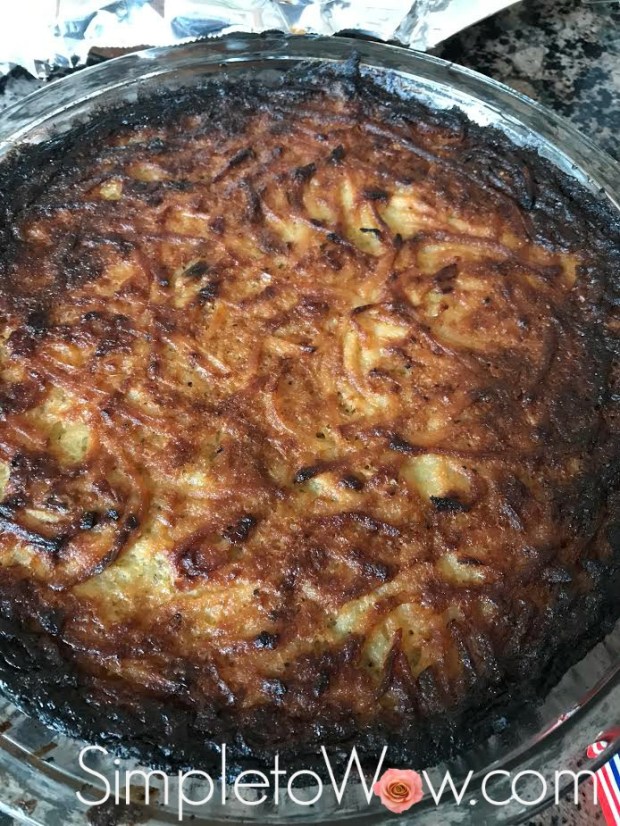
I reinvented the Yerushalmi Kugel recipe.  It is now simpler.  It does not use margarine.  It has less sugar.  And, it looks like a challah.

I served it once again.  Aaron just smiled.

yerushami kugel reinvented.jpg


INGREDIENTS

4  cups water
1/2 cup oil
2/3 cup sugar
1  tablespoon freshly ground black pepper
2 teaspoons salt
12 ounces fine egg noodles, uncooked
2 eggs
4 tablespoons  brown sugar
2 tablespoons vegetable oil

SUPPLIES

silicone challah mold

DIRECTIONS

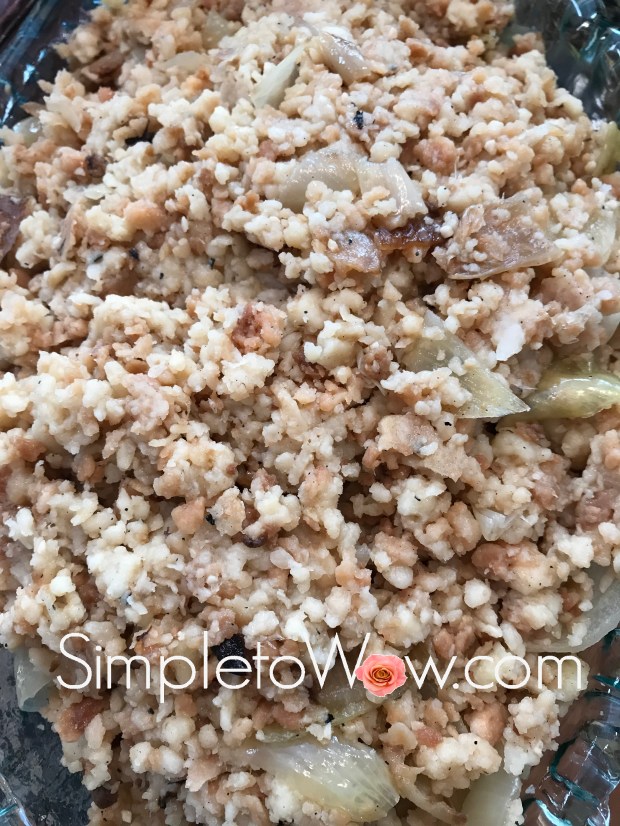
In a large pot, bring the water, oil, sugar, pepper and salt to a boil.  Turn off the heat and add the uncooked egg noodles. Stir. Cover the pot and let stand for at least 15 minutes.
In a separate bowl,  combine eggs, brown sugar and oil.  Add mixture to the noodle mixture and stir until well combined.

Generously grease pan or silicone challah mold with nonstick spray.  Brush generously with oil or coat with parchment paper.  Pour batter into prepared pan and bake at 375 degrees F for 1-1/2 hours.

Remove kugel from the pan immediately when done.

Enjoy!

Please Note: This post contains affiliate links from Amazon, which means I earn a small commission if you click and make a purchase.

Heimeshe Farfel

heimeshe farfel.jpg

My son, Aaron, loves farfel (flake-shaped pasta popular in Jewish cuisine).

When he was younger, Aaron used to love to visit Bubby and Zaidy in Kew Gardens Hills, Queens.  While he enjoyed spending time with his grandparents, he was excited by the fact that there was nearly a dozen places where he could buy prepared farfel within a short radius of  Bubby and Zaidy‘s home.  That meant something back then.

Some things haven’t changed.

When Aaron comes home for Shabbos, I try to prepare heimeshe (home-style) farfel.  Nowadays, there are not many stores in our hometown that sell Heimeshe farfel.  Most sell egg barley, which is more like orzo than like farfel.  Heimeshe farfel is typically made from an egg noodle dough and/or matzo and is toasted before being cooked.  It has trademark light and dark coloration, reminiscent of the color of matzo.

Farfel is something that reminds me of my childhood.  That uniquely hemishe side dish evokes images of a past era where life was so much simpler.   On my visits to Monsey or Brooklyn, I can easily find this ingredient, much to Aaron’s delight.  And, when I prepare this simple and delicious dish, he doesn’t even need to leave the house to enjoy it!

INGREDIENTS

2 small bags heimeshe farfel
1-2 onions
garlic, minced (optional)

oil
1 teaspoon salt
dash of pepper

1 1/2- 2 cups of water

 
DIRECTIONS

Over medium-high heat, saute onions and garlic in oil, just until starting to brown.  Add  heimeshe farfel and toast for 1-2 minutes.  Add 1 1/2 cups of water and bring to a boil.  Reduce heat to low and stir occasionally for 15-20 minutes, making sure that farfel doesn’t stick to the bottom of the pan.  Add a bit more water in intervals, if necessary.  Farfel should be dry and soft when ready.

Pesach Onion Kugel

pesach onion kugel

I absolutely love a challenge!  In a comment on my Simply Amazing Onion Kugel, Pearl asked about adjusting this simple and delicious recipe to Pesach (Passover) cooking.  I worked on making this recipe suitable for Pesach and my family contends that this recipe is even better than the original.

I agree.

Our custom on Pesach is not to bruck (use matzo products with liquid), so it was not possible to merely substitute soaked matzo for the soaked bread in the original recipe.  I played with the recipe until I came up with this Pesach variation.

We all licked our plates clean.  It is a winner and it will be on our seder menu this year.

Have a Chag Kasher V’Samaech (Happy and Kosher Passover)!

SUPPLIES

food processor
pyrex pie plate


INGREDIENTS

4-5 onions

3 eggs
2/3 cup potato starch
1/4 cup oil
1/3 cup seltzer
1 teaspoon salt
pinch black pepper


DIRECTIONS

Preheat oven to 425 degrees F.

Coat a pyrex pie plate lightly with oil and place in oven.

While the oil is heating up, cut the onions into large chunks. Using the metal s-blade of the food processor, pulse the onions until they are shredded but not liquidy.  Add eggs, oil, seltzer,  salt and pepper. Pulse a few times to combine.

Carefully remove the sizzling pyrex pie plate from the oven. Pour the mixture directly from the food processor bowl into the pyrex pie plate and bake uncovered for one hour and ten minutes. When done, the onion kugel should be caramelized on top and bottom and soft and creamy on the inside.


TIPS

Because sulphuric gas released from the onion during cutting reacts with tear ducts, eyes feel irritated and release tears when cutting onions.  Heating the onion before cutting  breaks apart the enzymes that emit sulphuric gas to reduce and/or eliminate the tears.   The easiest way to heat the onions for this kugel is to microwave them on high for several minutes  in 30 second increments.  For best results, cool the microwaved onions before cutting into chunks.

Please Note: This post contains affiliate links from Amazon, which means I earn a small commission if you click and make a purchase.

Out of the Bowl Tiered Salad

Who says that salad must be served in a salad bowl and tossed?

out of the bowl salad-side view.png

One of the most exciting things about salad is its versatility.  A beautiful and delicious salad can incorporate so many disparate ingredients and the contrast of colors, textures and flavors makes each salad unique.

Today’s salad is about layering a gorgeous vessel with different vegetables and toppings.  Its effortless simplicity achieves an elegance that highlights the colorful and flavorful vegetables themselves.

This salad is prepared on a rose gold hammered elongated platter with the ingredients placed in long tiers.  The vibrant colors of the romaine lettuce, shredded fresh beets, rainbow peppers and heirloom tomatoes speak for themselves.

SUPPLIES

hammered elongated bowl (different than bowl pictured on blog post)

INGREDIENTS

romaine lettuce, shredded
raw red beets, peeled and shredded
rainbow peppers, cut into small pieces
heirloom tomatoes
parsley and scallions, cut into tiny pieces

Balsamic Vinaigrette

DIRECTIONS

Place a layer of shredded romaine lettuce.  Top that with a layer of shredded red beets, overlapping the bottom layer so that the romaine lettuce can be viewed from the sides.

out of the bowl salad-layers 1 and 2.png

Top that with small pieces of rainbow peppers and small colorful tomatoes.

rainbow peppers

Garnish with shredded or sliced parsley and scallions.  Drizzle Balsamic Vinaigrette over the salad and serve.

out of the bowl salad partial view.png


This salad is truly simple to wow!

out of the bowl salad.png

Please Note: This post contains affiliate links from Amazon, which means I earn a small commission if you click and make a purchase.

Simple 10-Minute Creamed Spinach

creamed spinach


Creamed spinach pairs so well with deli, meat, fish and just about every protein.  It is a favorite at steakhouses and delicatessens.  The bright green wilted spinach takes only minutes to prepare and its creamy texture and fresh flavor tantalize the eye and the palate.  This classic recipe can be easily prepared with soy or almond milk instead of heavy cream for a pareve side dish.

This side dish is delicious and oh, so simple to prepare.  It is always a winner in my house.  It is fresh, hearty and delectable.

INGREDIENTS

olive oil
1 pound spinach, fresh or frozen (see kosher notes)
2-3 garlic cloves
1 onion, diced
1 pound spinach, fresh or frozen
½ cup cream (milk, soy or almond milk may be substituted)
½ tablespoon salt
½ tablespoon pepper
1-2 tablespoons flour


DIRECTIONS

Soak and wash spinach well. In a large saute pan over medium-high heat, saute onion and garlic in oil just until starting to brown. Add cream or milk and bring to a boil. Add salt and pepper and dusting of flour, slowly stirring with a wooden spoon or a whisk. Once the mixture starts to thicken, add spinach and reduce heat to a simmer until the spinach is wilted and the sauce is thick.

KOSHER NOTES

Kosher laws disallow the eating of any whole insects and therefore most greens require a process of soaking, rinsing and in some cases, pureeing. I have found that flat-leafed greens like baby spinach are much easier to check for insects than their curly-leaf counterparts. Kashrut authorities differ on the proper checking of leafy vegetables and some disallow the use of spinach altogether. This blog was not designed to be your kosher authority, so please consult your local rabbinic authority regarding using and preparing greens such as spinach.

Enjoy!

Simply Amazing Onion Kugel

onion kugel.pngMy life is rather like a “Chopped” competition.  After all, so many of my favorite recipes are developed using the ingredients on hand, keeping the preparation quick and transforming simple ingredients into something more than the sum of the parts.  Most often, my time is limited so I am racing the clock just like the contestants on “Chopped”.

This onion kugel is exactly that.

It uses onions and leftover challah, ingredients that always seem to be available in my “basket”.  The preparation is simple and fast.  And, the end-product is truly a masterful transformation of these simple ingredients.

I normally try to use up the leftover challah from Shabbos by creating bread crumbs or croutons rather than stuffing the challah leftovers into the freezer, just to be fed to the birds before Pesach (Passover).  This recipe elevates challah leftovers to something that will really wow you.  And, do not worry.  I am certain that you will still have plenty of frozen challah leftovers to feed the birds before Pesach.

For this onion kugel, the prep time is quick and once baked, the ingredients take on a divine flavor and texture.  I added seltzer to the batter to achieve fluffiness as in my Abracadabra Potato Kugel.  The resulting texture is caramelized and crunchy on the outside, yet soft and creamy on the inside.

SUPPLIES

food processor
pyrex pie plate

INGREDIENTS

3 eggs
1 cup soaked challah or bread
1/3 cup oil
1/3 cup seltzer
1 teaspoon baking powder
1 teaspoon salt
pinch black pepper
3 large onions

DIRECTIONS

Preheat oven to 425 degrees F.

Coat a pyrex pie plate lightly with oil and place in oven.  Soak challah or bread in warm water and squeeze out water, leaving softened bread.

While the oil is heating up, cut two of the onions into large chunks.  Using the metal s-blade of the food processor, pulse eggs, soaked challah or bread, oil, seltzer, baking powder, onion chunks, salt and pepper.  Pulse a couple of times to combine.

Remove the s-blade and add the shredding blade to the food processor.  Shred the last onion.   Pour everything into a large mixing bowl and stir to combine.   I like to use the stainless steel mixing bowl of my Kitchen Aid mixer, since it is a large, sturdy bowl with a handle for pouring,

Carefully remove the sizzling pyrex pie plate from the oven.  Pour the mixture into the pyrex pie plate and bake uncovered for one hour.  When done, the onion kugel should be caramelized on top and bottom and soft and creamy on the inside.

Please Note: This post contains affiliate links from Amazon, which means I earn a small commission if you click and make a purchase.

Abracadabra Potato Kugel

My grandson, Judah, has learned a new word this summer.  Abracadabra.

Abracadabra is quite a mouthful for a two year old.    And, when Judah uses the word, he uses it with such flair.  He must have learned it from one of the many shows he enjoyed in summer camp.

I have been preparing potato kugel for as long as I remember and most kugels share similar ingredients.  I have two potato kugel recipes on this blog (Davida’s Awesome Potato Kugel,  Simply the Best Potato Kugel Ever and ) and they are both delicious, but rather similar.

There just doesn’t seem to be much new in potato kugel.

Until now.


abracadabra potato kugel

After I published Davida’s famous potato kugel recipe (Davida’s Awesome Potato Kugel), my aunt shared a secret tip to her fluffy and creamy potato kugel that proved to be wonderful.

It is a very simple and effective secret.  And, it is well-deserving of the simple to wow seal of approval and Judah’s favorite word, Abracadabra.

Wait for it….

Tante Sari adds seltzer to her potato kugel batter.  The effervescence of the seltzer  adds lightness and creaminess to the potato kugel.  I adapted my potato kugel recipe to accommodate the seltzer and after some tweaking (with plenty of happy taste-testers around), here is the simple to wow recipe.  It has received rave reviews from family and friends alike.

SUPPLIES

food processor
pyrex pie plates

INGREDIENTS

1 onion, quartered

1/3 cup of seltzer
1/3 cup oil
3 large eggs

1 teaspoon salt
1/4 teaspoon black pepper

4 medium to large potatoes, peeled and cut into chunks

DIRECTIONS

Set oven to 450°F degrees.

Coat a pyrex pie plate lightly with oil and place in oven (no preheating necessary).

While the oil is heating up, using the metal s-blade of the food processor, shred the onion.  Once the onion is shredded,  add oil, eggs, seltzer, salt and pepper.  Pulse a couple of times to combine.

Remove the s-blade and add the shredding blade to the food processor.  Shred the potatoes.  Pour everything into a large mixing bowl and stir to combine.   I like to use the stainless steel mixing bowl of my Kitchen Aid mixer, since it is a large, sturdy bowl with a handle for pouring,

Carefully remove the sizzling pyrex pie plate from the oven.  Pour the mixture into the pyrex pie plate and bake uncovered for one hour.

Please Note: This post contains affiliate links from Amazon, which means I earn a small commission if you click and make a purchase.

Fan Potatoes and Family Memories

fan potatoes.jpg

When I was young, I vividly remember my mother preparing fan potatoes.  She did not serve them often.  They were a rare treat.

I can picture in my mind how the potatoes fanned out and how delicious they were: crisp on the outside. soft and buttery on the inside.  The fins of each fan potato created pockets of crispy caramelized deliciousness.  They were simple and perfectly salted.

After I had my own children, I asked my mother for the fan potatoes recipe.  My mother returned my request with a blank stare.

How did she not remember preparing or serving them?  They conjured such fond memories for me.  How could she not recall?  Worse yet, how could she not find the recipe?

Now that I have my own kitchen, I understand.  There are countless recipes that I made for a time and then forgot about.  Some of those for-a-time recipes were even shared with friends and they have found a permanent place in their homes.  How many times does someone mention that they still prepare my cranberry mold or my chocolate mousse cake and I have no recollection of preparing it, serving it or sharing the recipe?

A few years ago, one of my friends shared a cranberry-oatmeal souffle recipe with me.  I later found the same recipe that I had written in my own handwriting thirty years ago!

Despite it all, I was determined to recreate those fan potatoes of my childhood.  It is one those truly simple to wow recipes.  It has become part of my own family’s memory bank…and it is a here-to-stay recipe.

Yields 6-8 servings.

INGREDIENTS

Potatoes, scrubbed or peeled
Kosher or pink Himalayan salt salt
fresh garlic or minced garlic  (optional)
Olive oil or cooking spray

DIRECTIONS

Preheat oven to 450 degrees Fahrenheit

Grease/spray cookie sheet or line cookie sheet with parchment paper.

Half potatoes lengthwise. Place potato halves flat side down on cookie sheet.  Cut slits in each potato half starting at the round side but not cutting all the way through to the flat bottom.  If using garlic, coarsely chop and place between potato slits.

Drizzle lightly or spray generously with oil.  Sprinkle salt over the tops of the potatoes.

Roast in the oven for 45-65 minutes depending on the size of the potatoes. Potatoes should be golden brown when ready.

NOTES

These fan potatoes are best when eaten right away.  I usually prepare them late Friday afternoon and set them on the counter.  Most of them are devoured before Shabbos even begins.  The few that are left are still delicious for Friday night dinner, served hot.

Potatoes may be peeled or just scrubbed for this recipe.  Scrubbed potatoes will achieve a more rustic looking result, while the peeled potatoes will achieve a more refined result. They are delicious both ways!

Any potatoes may be used, but the results will differ.  Let your taste buds decide which type of potato is your favorite for this recipe.  Higher starch potatoes like Idaho or Russet will yield a firmer and mealier inside texture.  Lower starch potatoes like Red or Yukon Gold will yield a softer and creamier inside texture.

I have also served this recipe as an hors d’oeuvre using small potatoes and interesting toothpicks. It is simply delicious and beautiful both ways!

Perfectly Roasted and Seasoned Bok Choy

Bok choy is one of our favorite ingredients in leafy salads.  It is a powerhouse of nutrition, and has a signature taste and bold texture, making it the perfect ingredient for salads that are dressed in advance.  I have incorporated it into a number of salads already highlighted on the blog (see Simple, Colorful and Crunchy Baby Bok Choy Salad with Apples, Peppers, Tomatoes and Craisins).

Bok Choy is a cabbage-like green that can be found in most vegetable markets and green grocers.  For centuries, bok choy has been a staple of Chinese cuisine and medicine.   Bok choy is a rich leafy vegetable that has stalks similar to celery and leaves that are reminiscent of  Romaine lettuce.    Rich in vitamins  A, C and K, bok choy is an excellent sources of beta carotene, calcium, magnesium, potassium, manganese, and iron.

Until now, I have only enjoyed bok choy as a raw ingredient.  Kaitlyn suggested trying bok choy as a roasted vegetable.  I took Kaitlyn’s advice and roasted it with my Everything Bagel Seasoning and it was a huge hit.  It will now becom epart of my permanent roasting repertoire.

roasted bok choy

INGREDIENTS 

1-2 heads bok choy, cleaned and cut lengthwise into large spears (see kosher notes)
cooking spray
Everything Bagel Seasoning

DIRECTIONS

Preheat oven to 425 degrees F.  Line baking sheets with parchment paper or greased foil.

Spread bok choy spears in a single layer on baking sheet(s).  Lightly spray with cooking spray and  sprinkle with Everything Bagel Seasoning.

Roast for 25-35 minutes, checking that bok choy is slightly brown on top, but still moist and tender inside.

KOSHER NOTES

Kosher laws disallow the eating of  any whole insects and therefore greens like bok choy require a process of soaking and rinsing and.   Kashrut authorities differ on the proper checking of  these type of greens and some disallow its use altogether.  This blog was not designed to be your  kosher authority, so please consult your local rabbinic authority regarding using and preparing bok choy.

Simple Superstar Roasted Onions

roasted onions up close

Onions are the ultimate team player.   They are used to start soups and sautes, taking very little credit for the impactful favor that they impart.  They are sprinkled atop salads or roasts, adding spiciness and satisfying juiciness wherever they are used.

They are the utility player that can be used here or there, always making the other ingredients taste a little better without taking credit themselves.  Fried or sauteed onions become the basis for great flavorful dishes.  Onions have the ability to make so many different types of recipes heartier, fuller and more delicious.

Onions are the unsung stars of so many dishes.

But, do onions not deserve to be superstars in their own right?

After all, there is nothing like a caramelized onion.  The decadent smell.  The charred sweet outside and the creamy soft inside is one of those texture combinations that is like no other.

This side dish is so simple.  So perfect.  And, so delicious.  And, it finally highlights the onion as the star of the game.

After preparing these roasted onions and certainly after tasting their distinctive creamy sweet flavor, you’ll be cheering for the onion to be your new favorite player, too!

roasted onions on plate


INGREDIENTS

3-4 large onions

oil spray
salt
pepper
minced or granulated garlic


DIRECTIONS

Line baking sheet with parchment paper. Cut onions crosswise into 1/2 inch sections. Line onions on pan and spray lightly with oil spray. Sprinkle with salt, pepper and garlic.

Roast at 400 degrees F for 45-55 minutes or until onions are golden brown on outside and soft and creamy on the inside.

roasted onions on baking sheet

Chana’s Low-Carb Broccoli Kugel

chana's low-carb brocolli kugel.jpg

Last Shabbos, we hosted my brother-in-law and sister-in-law and niece for Shabbos.    We always look forward to their visits.  Yisroel and Chana are some of my favorite guests, so helpful and appreciative.

We had a wonderful Shabbos, sharing divrei torah (words of Torah) and my father-in-law’s a’h favorite zemiros (Shabbos melodies) at our Shabbos table.  Don and his brother entertained us as they shared uproarious accounts of their childhood antics.   Chana regaled us with side-splitting stories, as Devora Brocha, their beautiful daughter kaH, acted out these anecdotes.

Since we only arranged to spend Shabbos together late Thursday afternoon, Chana offered to prepare and bring her delicious broccoli kugel.  That was an offer that was hard to refuse because I love Chana’s cooking and I am always happy to serve one more, delicious dish.

It did not disappoint.  This broccoli kugel is flavorful with excellent texture. Its creaminess and depth of flavor are perfect.  Best of all, it is gluten-free and low in carbs. Thanks, Chana!

INGREDIENTS

1 bag (24 oz) chopped broccoli, steamed for 10 minutes (see Kosher notes)
1 large onion and 2 cloves garlic, sautéed
2 eggs
1 1/2 heaping teaspoons mayonnaise
1/2 heaping teaspoon chicken soup mix or consomme
3/4 teaspoon salt
dash of black pepper

DIRECTIONS

Preheat oven 400 degrees F. Combine all ingredients and pour into a 9″ round pan. Bake for 40-50 minutes, until golden brown on top.

KOSHER NOTES

Kosher laws disallow the eating of any whole insects and therefore broccoli requires a process of soaking, rinsing and in some cases, pureeing, unless purchased with a reputable kosher hashgacha (certification).  Kashrut authorities differ on the proper checking of broccoli.  This blog was not designed to be your kosher authority, so please consult your local rabbinic authority regarding using and preparing broccoli.

TIPS
I eliminate the consomme and just increase the salt and pepper slightly.

Enjoy!

Davida’s Awesome Potato Kugel

It is so wonderful to have Davida back from Israel.  The house is a more joyful abode and Davida and her friends fill our house with laughter, music and good food.  No matter how chaotic things are, Davida seems to have just the right lighthearted joke and is always willing and able to prepare delicious food for all.

Whatever Davida prepares is not only delicious, but perfectly executed, as well.   Her challahs are beautifully braided, her salads are impeccably tossed and her food just begs to be enjoyed.

When we visited Israel for Pesach (Passover),  Davida prepared this delicious kugel for us.  This past winter, Davida first tried this recipe when she prepared a Shabbos in Jerusalem  for Michelle, Scotty and their gluten-free guests.

The original recipe is from Susie Fischbein’s Pesach cookbook.   Davida tweaked and simplified it just a bit.   It contains a small amount of sugar and when I scoffed at that, Davida admitted that she tried it without the sugar and it just wasn’t the same.

This past Shabbos, Davida prepared this potato kugel again and it was another winner.

Welcome home, Davida!

davidas awesome potato kugel

SUPPLIES

food processor
2 pyrex pie plates

INGREDIENTS

1⁄2 cup  oil
8 medium potatoes, peeled and cut into chunks
2 medium onions, peeled and quartered
1 tablespoon salt
1 teaspoon black pepper
2 tablespoons sugar
5 large eggs

DIRECTIONS

Preheat oven to 425°F degrees.

Using the metal s-blade of the food processor,  shred the onions and then place in a large mixing bowl.  I like to use the stainless steel mixing bowl of my Kitchen Aid mixer, since it is a large, sturdy bowl with a handle for pouring,

Using the metal s-blade of the food processor,  shred the peeled potato chunks until almost smooth.  Add the potatoes to the mixing bowl

Add the salt, pepper, and sugar to the potato-onion mixture and then add the eggs.  Stir until completely combined.

Coat each pyrex pie plate with 1/4 cup of oil and place in preheated oven. When the oil sizzles, carefully remove each pyrex pie plate from oven and spoon some of the sizzling oil into the waiting potato mixture to add fluffiness to the kugel.  Incorporate the sizzling oil into the mixture until well combined.   Pour the mixture into the 2 pyrex pie plates and bake uncovered for one hour.

Enjoy this delicious kugel with music and laughter!

Please Note: This post contains affiliate links from Amazon, which means I earn a small commission if you click and make a purchase.

Watermelon Jicama Salad

watermelon jicama salad


A few weeks ago, we had very hot weather on Shabbos.  It was one of those weeks that boasted a potpourri of  weather patterns.  We had rain, cold, overcast skies, bursts of sunshine and then a 40 degree rise in temperatures from Friday to Shabbos.

We just did not have enough time for our bodies to acclimate to nearly ninety degrees F on Shabbos.

I had bought a watermelon to greet the warm weather and Shabbos morning, on the spur of the moment, I decided to serve the watermelon as a salad rather than as a dessert.  I remembered having a delicious watermelon salad at my friend, Sallie’s house several years ago.  I didn’t remember anything about the other ingredients in Sallie’s salad, just that I had really enjoyed her watermelon salad.

I ran the idea of creating a watermelon salad by Ruti, our Shabbos house-guest from Jerusalem.

She had one word for the idea.  Muzar.  Strange.

That didn’t stop me.  I looked in my refrigerator.  I had jicama, mint, scallions and blood oranges in addition to the watermelon.  So, I cut everything up, placed the salad bowl in the refrigerator and waited for inspiration to set in for the dressing.

Inspiration is the mother of invention,  The salad was refreshing, delicious and beautiful.

Oh, and Sallie joined us with her family for Shabbos lunch.  At first all our guests remarked, “So, we’re the guinea pigs for the blog?”, to which I simply said “yes!”.

But then, Sallie tasted the salad and just said, “Wow!”

That made my day.  The ingredient combinations may be muzar, but Sallie’s declaration of wow confirmed that this recipe would be a keeper.

INGREDIENTS

watermelon, cut into cubes (about 4 cups)
jicama, peeled and cut into small cubes
scallions, washed and cut into 1″ sections
mint, soaked and rinsed (optional) (see kosher notes)
2 blood oranges, peeled and cubed

1-2 teaspoons kosher salt
dash of pepper
lemon juice or cider vinegar
drizzle of oil (optional)

SUPPLIES

wavy crinkle cutter


DIRECTIONS

Cube watermelon and cut jicama into small strips or cubes using  wavy crinkle cutter. Clean and rinse scallions and mint.  Sprinkle kosher salt and pepper over ingredients. Drizzle with lemon  juice or cider vinegar.  Lightly drizzle with oil.

Enjoy!

KOSHER NOTES

Kosher laws disallow the eating of  any whole insects and therefore most greens require a process of soaking, rinsing and in some cases, pureeing.  Kashrut authorities differ on the proper checking of herbs and some disallow the use of fresh herbs altogether.  This blog was not designed to be your  kosher authority, so please consult your local rabbinic authority regarding using and preparing herbs such as mint.

Firecracker Cauliflower

firecracker cauliflower.jpg

Every once in a while, I want to serve something that surprises everyone.  Cauliflower is one of those side dishes that everyone enjoys and is simply good for you.  When roasted, it has both delicious flavor and texture (see Rockstar Roasted Cauliflower).

This week, I decided to wake everyone’s taste buds up by adding some heat to my typical roasted cauliflower.  This recipe was inspired by Simply Spicy Firecracker Salmon.

INGREDIENTS

1-2 heads cauliflower, separated into florets and cleaned (see kosher notes)
Oil

Kosher Salt
Simple and Perfect Spicy Mayo
Lime juice (optional)

DIRECTIONS

Line baking sheets with parchment paper or greased foil.

Spread cauliflower in a single layer on baking sheet(s).  Sprinkle with kosher salt and lightly drizzle with spicy mayo.  Drizzle lightly with lime juice for a fresh flavor.

Roast at 425 degrees F for 40-50 minutes, checking that cauliflower is sot on inside and just turning brown on outside before removing from oven.

KOSHER NOTES

Kosher laws disallow the eating of any whole insects and therefore cauliflower require a process of soaking, rinsing and in some cases, pureeing. Kashrut authorities differ on the proper checking of cauliflower and some disallow its use altogether. This blog was not designed to be your kosher authority, so please consult your local rabbinic authority regarding using and preparing cauliflower.

Zucchini Mushroom Kugel

zucchini mushroom kugel

Jewish cooking favors the preparation of kugels (casseroles), probably because of their versatility.  Since cooking is prohibited on Shabbos (Sabbath) and is limited on the Jewish holidays, the kugel has become a go-to solution.  It allows for make-ahead preparation and can be served hot or at room temperature.

Although I favor keeping my vegetables raw and simply prepared, this kugel has become one of my favorites.  It highlights a simple list of fresh ingredients and this kugel  is perfect for freezing in advance of a busy Yom Tov (holiday, lit: good day) like Pesach (Passover).  Although zucchini squash has a high water content and usually needs to be squeezed out, the sliced zucchini in this recipe needs no squeezing.  The moisture of the zucchini slices creates a satisfying textural compliment to the other ingredients and make for a soft and juicy kugel.

INGREDIENTS

1 large onion or 2 shallots, diced
2-3 garlic cloves, minced or garlic powder
3 large zucchini, thinly sliced
1 package mushrooms, sliced

1/2 cup potato starch
3 eggs
1/4 cup oil

1 teaspoon salt
dash pepper

DIRECTIONS

Grease a pie dish or line a baking dish with parchment paper.

Saute onions, garlic and mushrooms until soft and starting to brown.

Whisk eggs and combine with oil, seasonings, sauteed onion, garlic and mushrooms. Sprinkle zucchnii slices with potato starch.  Fold egg mixture into zucchini slices until just combined.

Fill baking dish with mixture and bake uncovered at  400 degrees F for 45 minutes to one hour.  Kugel should be golden brown and set when ready.


VARIATIONS

Flour and a tad of baking powder may be substituted for the potato starch for non-Passover cooking.

Roasted Sweet Potato and Beet Salad

For our annual Purim seuda (festive meal),  I decided to prepare a new salad.

This salad took inspiration from a delicious battata (sweet potato) salad that I enjoyed at Cafe Greg in Rosh Pina in the Upper Galilee of Israel.  It combined the delicious colors, flavors and textures of roasted sweet potatoes, candied almonds and shredded fresh beets. All these were served atop a bed of arugula and baby kale and then tossed right before serving.

I prepared this salad as my feature salad, reserving my biggest salad bowl for this new recipe.

The only thing that took extra time was roasting the sweet potato cubes in advance.  It was well worth the effort.

It must have been delicious because it was the only item that I prepared for the seuda that was finished within the first hour.

INGREDIENTS

3 cups checked salad greens (see kosher notes)
2 cups roasted cubed sweet potatoes
2 cups shredded fresh beets
1/2 cup nuts
thinly sliced scallions
french fried onions (optional)

4 tablespoons olive oil
4 tablespoons cider vinegar or lemon juice
1 teaspoon Dijon mustard
1 teaspoon honey

DIRECTIONS

Preheat oven to 425 degrees F.  Line baking sheet with parchment paper or greased foil.

Peel sweet potato and cut into small cubes.  Place sweet potato cubes in a single layer on baking sheet. Drizzle with olive oil or spray with cooking spray and lightly sprinkle with kosher salt.

Roast for 35-55 minutes checking that sweet potato cubes are crisp on outside and soft on inside before removing from oven.  Cubes may be prepared in advance.  They may either be added to the salad warm or at room temperature.

Peel beets.  Using the shredder disk on the food processor, shred beets.

Combine, process or shake all dressing ingredients together.

Layer greens and shredded beets. Lightly drizzle dressing over the salad. Top with nuts, scallions and french fried onions.  Toss right before serving.


KOSHER NOTES

Kosher laws disallow the eating of  any whole insects and therefore most greens require a process of soaking, rinsing and in some cases, pureeing.  I have found that flat-leafed greens like baby spinach and flat-leaf  kale are much easier to check for insects than their curly-leaf counterparts.  Kashrut authorities differ on the proper checking of leafy vegetables and some disallow the use of spinach and kale altogether.  This blog was not designed to be your  kosher authority, so please consult your local rabbinic authority regarding using and preparing greens such as spinach and kale.


VARIATIONS

Cubed butternut squash or fresh pumpkin may be substituted for the sweet potatoes.


TIPS

When I prepare greens in advance, I place a few absorbent paper towels at the bottom of the bag or dish.  I then layer the greens over the paper towels.  These paper towels will absorb any extra moisture in the greens and will keep the green fresh. roasted sweet potato salad


Nutty Beet Pesto Pasta

beet-pesto-pastaThere are certain new recipes that have the power to surprise and delight.  This one is one of those awesome recipes.  It is colorful and delicious and at the same time, it is simple and versatile.

The smooth texture of the beets offsets the nutty texture of the almonds and the gorgeous pink color offers a magical and surprising twist to this pasta dish.

In our house, we have “Shabbos pasta”.  During the week, we use ordinary pasta shapes, like ziti, elbows, spaghetti and penne.  When I prepare pasta for our Shabbos meals, I try to find more unique pasta shapes, like the whole wheat Gigli shown in this posting.

The beet pesto can be served as an accompaniment to other foods, as well. It can be served with fish, with grilled chicken or steak.  It can be served as a pareve side dish or can be served as a main dish pasta with some shredded, shaved or crumbled cheese on top.

My favorite way to serve this pasta is with a sprinkling of chopped nuts and some chopped scallions.

INGREDIENTS

1-2 pounds pasta

1 shallot and 1 onion, diced and sauteed

1/2 cup raw almonds
1 can or 2 large peeled red beets, cooked
4 Tablespoons beet juice or cooking liquid
1/4 cup oil
3 tablespoons lemon juice
1 teaspoon salt
dash of pepper

baby arugula or parsley, checked and rinsed (see kosher notes)


DIRECTIONS

Cook pasta al dente in salted water according to package directions.  Drain.

Saute onions or shallots until just starting to brown.  Reserve half of the mixture for later.

sauteed-onion-and-shallot

Using the s-blade on the food processor, pulse to chop almonds.  Reserve half of the almonds for later.  Add half of the sauteed shallot and beets and pulse until chopped and combined well.  Add beet juice, oil, lemon juice, salt and pepper and puree until smooth.

Toss pasta with beet puree and sauteed shallots.  Garnish with reserved chopped almonds.  Garnish with baby arugula or parsley.  Serve hot or room temperature.


KOSHER NOTES

Kosher laws disallow the eating of any whole insects and therefore most greens require a process of soaking, rinsing and in some cases, pureeing. Kashrut authorities differ somewhat on the proper checking of leafy vegetables. This blog was not designed to be your kosher authority, so please consult your local rabbinic authority regarding using greens such as arugula and parsley

.

Simplest Sesame Noodles

sesame-noodles
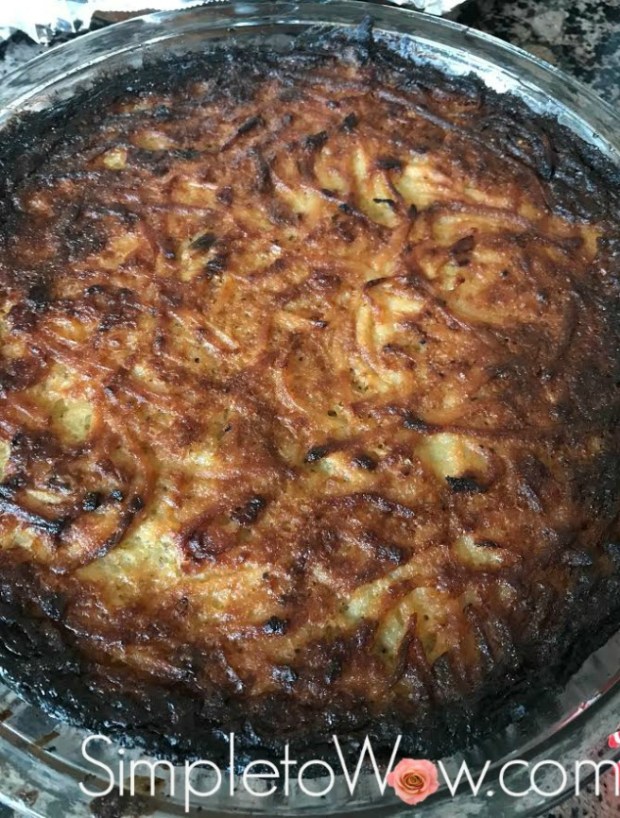
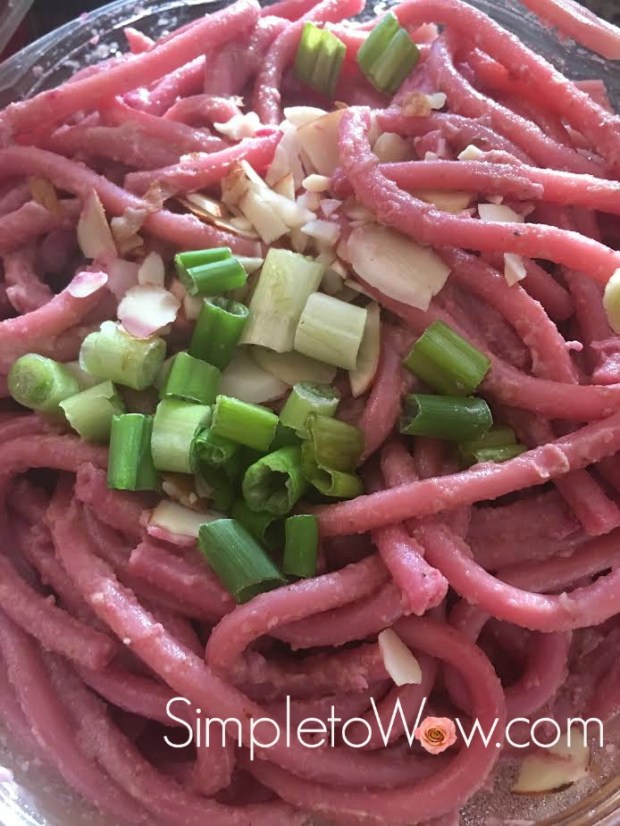
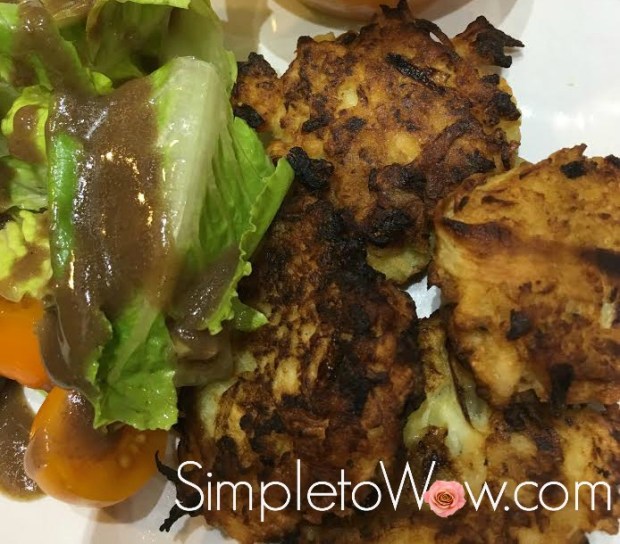
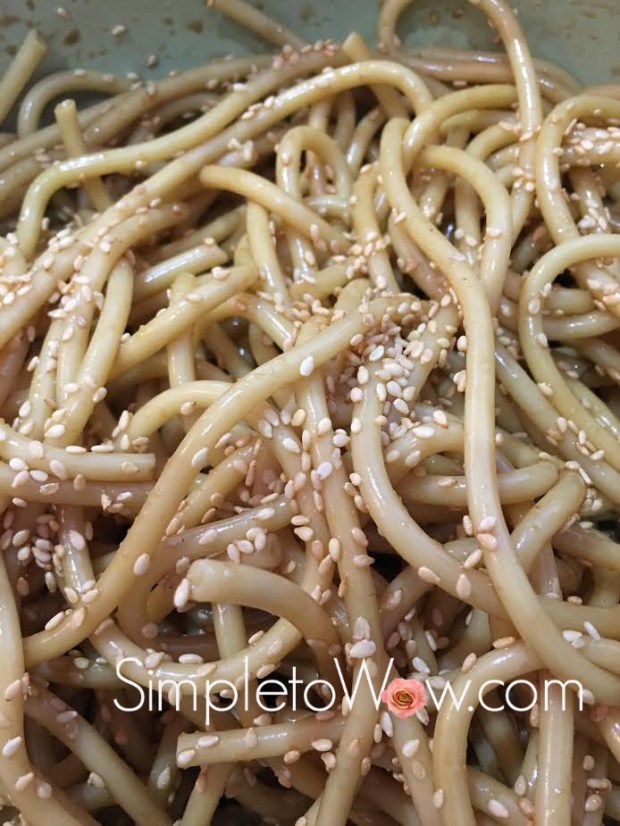
When looking for a pareve and delicious pasta dish, this is my go-to recipe.  It started out as a Kosher by Design recipe and I have adapted and simplified it over the years.  It is still a winner and  the perfect pasta dish.  To upgrade this dish in the simplest way, I use interesting pasta shapes like trumpet-shaped Gigli or hollow Bucatini strands.

INGREDIENTS

1 pound of pasta
1/3 cup soy sauce
1/4 cup sesame oil
2-3 crushed garlic cloves or 2 tablespoons garlic
drizzle of honey or agave syrup
sprinkle of sesame seeds
3-4 scallions or red onions, sliced or diced(optional)

DIRECTIONS

Prepare the pasta al dente.  Drizzle and sprinkle soy sauce, sesame oil, garlic and honey or agave right on top of pasta.  Toss well.   Sprinkle  sesame seeds and scallions on top before serving.

Enjoy!

Sweet Potato Butternut Squash Marigolds

A few weeks ago, I invited our new neighbors over for Shabbos lunch.  I was tired of my tried and true recipes so I decided to combine the ingredients and techniques from a couple of my favorite SimpletoWow recipes.  I really wasn’t sure how it would work out.

Luckily, the end-product was a most pleasant and stunning surprise.    What I ended up with were the most beautiful, most delicious and colorful sweet potato-butternut squash marigolds.

For the piped sweet potato  marigolds, I used the Sweet Potato Cupcake Toppers recipe.  I piped the sweet potato flowers atop slices of butternut squash prepared just as I did in Glazed Butternut Squash with Shallots and Grapes.

It was pretty simple.

It was a wow.

But, best of all, the marigolds really held up well and a few were even left over for Sunday left-overs.   They kept their shape and were devoured by our resident vegetarians.


INGREDIENTS

1 large butternut squash

1-2 tablespoons oil
1-2 tablespoons honey or brown sugar
kosher salt

black pepper to taste

3-4 sweet potatoes
1 egg
2 tablespoons olive oil
1 tablespoon syrup, honey or sugar
dash of salt and pepper


SUPPLIES

Cuisinart Stainless 14 cup Food Processor

Wilton Large Piping Tip Set

Heavy Duty 16″ Disposable Piping Bags

Wood and Silicone Spatula


DIRECTIONS

Preheat oven to 425 degrees F.

Scrub butternut squash.  Using a large knife, cut unpeeled butternut squash crosswise into 1/3 inch to 1/2 inch disks.  Remove seeds from rings at bottom of squash.

Line a baking sheet with parchment paper.  Place butternut squash disks in a single layer on lined baking sheet.

butternut-squash-sweet-potato-flowers-butternut-squash-disks

Lightly drizzle oil and honey or sugar over butternut squash.  Lightly sprinkle with salt and pepper.

Place small whole sweet potatoes on separate baking sheet or in pyrex baking dish.

sweet-potato-cupcake-toppers-roasted-sweet-potatoes

Roast uncovered for 40-45 minutes. Butternut squash should be soft and just beginning to caramelize. Sweet potatoes should be soft with gap beginning to form between peel and pulp. If sweet potatoes are not soft enough to peel, cook for 10-15 more minutes.

Allow squash and sweet potatoes to cool. Leave the squash slices intact and carefully peel away the sweet potato skins and discard.

Using the s-blade in the food processor, pulse sweet potato pulp, egg, olive oil, sugar or honey and salt until puree is smooth and creamy.

sweet-potato-cupcake-toppers-puree-in-food-processor

Fill sweet potato puree into a large piping bag fitted with a star tip or into a zipper bag.  To do this most easily and without making much of a mess, cuff bag over tall jar or glass.  Use a stiff rubber spatula to load puree into piping bag or zipper bag.

If not using a tip, cut corner of bag. Squeeze air out of the top of the bag and twist top of bag shut.  Push puree to tip or cut corner.

Pipe sweet potato puree onto butternut squash slices.  Bake for 20-30 minutes at 400 degrees.  Marigolds should be slightly firm and dry on top when ready.

butternut-squash-sweet-potato-flowers-two


Voila!


Please Note:  This post contains affiliate links from Amazon, which means I earn a small commission if you click and make a purchase.

Simple Carrot Cranberry Kugel

carrot-cranberry-individual-kugel

There are some recipes that don’t look beautiful but have that special blend of wholesome ingredients, delicious taste and  perfect texture.  This recipe is one of those.  I have prepared it with a pound of fresh, frozen or canned carrots.  I have prepared this recipe a loaf pan, in a pyrex pie dish, in individual ramekins and in silicone baking molds.  It is one those wonderful recipes that can served as a side dish, as a dessert or as a snack.

The original recipe was in Yeshiva of North Jersey’s cookbook  published during the time my children were in elementary school.  I have changed and simplified the original recipe by reducing the amount of sugar and oil and simplifying the preparation.  It is one of our family favorites.

carrot-cranberry-kugel-slice

carrot cranberry kugel.jpg


INGREDIENTS

one pound of fresh carrots, shredded (see notes)
1/2 cup oil
2 eggs
2/3 cup sugar
1 teaspoon vanilla
1 cup flour
1 teaspoon baking powder
1/2 teaspoon baking soda
1 teaspoon cinnamon
2/3 cup craisins


DIRECTIONS

Preheat oven to 350 degrees.

Shred carrots using the shredding blade of the food processor.

Add the rest of the ingredients and combine by pulsing in the food processor using the S-blade of food processor until well combined.  Alternatively, combine ingredients by hand or in a mixer.   Pour into a pie dish or a loaf pan lined with parchment paper.

Bake  for 40-45 minutes or until toothpick inserted into center comes out clean.  Carrot kugel should be golden brown in color when ready.


NOTES

Instead of shredded carrots, you can substitute one pound of frozen or canned carrots.  Just mash or pulse in food processor  using S-blade of food processor.  Add rest of ingredients. Pulse a few times until combined.

This can be baked in ramekins or as muffins in large muffin wrappers.  Modify baking time to 15-25 minutes, depending on size of each muffin.

Sweet Potato Gratin with Shallots and Grapes

sweet-potato-gratin-with-shallots-and-grapes-2

A gratin is a dish that is baked or broiled in a shallow dish and has a crispy upper crust. Traditionally, a gratin employs cheese and/or breadcrumbs to achieve that crispy crunchy crust.

This recipe is my own pareve and low-carb version of a gratin.

It is roasted and baked in a shallow dish.  Oh, and it has a delicious caramelized upper crust.  Alas, there is no cheese and there are no breadcrumbs.

Instead, shallots and grapes create that crispy and decadent upper crust.  I think that it is a worthy gratin, albeit pareve and vegan.

I suppose that we can call it a gratin in disguise.

Here it is…

INGREDIENTS

2-3 small sweet potatoes, scrubbed with tough ends removed
3-4 shallots, peeled
handful of green or red grapes, whole

3-4 tablespoons oil
2-3 tablespoons brown sugar, honey, agave or maple syrup
kosher salt
pepper

DIRECTIONS

Preheat oven to 425 degrees F.

Line a casserole dish or deep pie plate with parchment paper.

Spiralize sweet potatoes or shred sweet potatoes in the food processor, using the shredder blade.  Sweet potatoes may be peeled or unpeeled.

Pile the shredded sweet potatoes on the lined baking dish.

Thinly slice shallots using slicer blade of the food processor.  Scatter over the shredded sweet potatoes.

Remove grapes from cluster and clean.  Scatter over the shallots.

Lightly drizzle oil and brown sugar, honey, agave or maple syrup over vegetables.  Lightly sprinkle with salt and pepper.

sweet-potato-gratin-with-shallots-and-grapes-2-before-baking

Roast uncovered for 30-35 minutes.  Lower heat to 350 degrees F and bake for 10 minutes longer.  The gratin should be soft and just beginning to caramelize.

Sweet Potato Cupcake Toppers

sweet-potato-cupcake-toppers-unbaked

Sweet potato is a simple and versatile ingredient that is available year-round. Even the humble sweet potato can be easily dressed up. Its gorgeous orange color, its sweet flavor and its creamy smooth texture make this recipe a masterpiece.

I have called this recipe “sweet potato cupcake toppers” because the mashed sweet potato pipes so beautifully that it looks ready to top a cupcake. The elegance of the star-tip piping makes such a beautifully presented side-dish.

But, don’t let the beautiful color and presentation of these toppers fool you.

The elegance of this dish is paralleled only by the impressive taste and texture. The natural sweetness and of the sweet potato is intensified by roasting the raw sweet potato and then adding honey or agave syrup. The baking of these piped cupcake toppers create a light and crispy ouer shell, while the inside retains a soft, creamy texture.

These sweet potato toppers add a touch of elegance to any meal, but are actually simple to prepare. I have used a large star tip to pipe them, but they can be easily piped from a zipper bag with the corner cut, as well.

This recipe will wow your guests and only you will know how simple they were to prepare.

INGREDIENTS
4-5 sweet potatoes

1 egg
2 tablespoons olive oil
1 tablespoon agave syrup or honey
dash of salt and pepper


SUPPLIES

Cuisinart Stainless 14 cup Food Processor

Wilton Large Piping Tip Set

Heavy Duty 16″ Disposable Piping Bags

Wood and Silicone Spatula


DIRECTIONS

Roast sweet potatoes at 425 degrees F for 45 minutes to 1 hour.  Sweet potatoes are ready when the outside is soft and there is a gap between the peel and the inside pulp. Allow to cool and then carefully peel away the skin.

sweet-potato-cupcake-toppers-roasted-sweet-potatoes

Using the s-blade in the food processor, pulse sweet potato pulp, egg, olive oil, syrup or honey and salt until puree is smooth and creamy.

sweet-potato-cupcake-toppers-puree-in-food-processor

Preheat oven to 400 degrees F.  Line a baking sheet with parchment paper.

Fill a large piping bag fitted with a star tip or a zipper bag with sweet potato puree.  To do this most easily and without making much of a mess, cuff bag over tall jar or glass.  Use a stiff rubber spatula to load puree into piping or zipper bag.

If not using a tip, cut corner of bag. Squeeze air out of the top of the bag and twist top of bag shut.  Push puree to tip or cut corner.  Pipe sweet potato puree  onto parchment paper.

sweet-potato-cupcake-toppers-unbaked

Bake for 20-30 minutes.  Sweet Potato toppers should be slightly firm and dry on top when ready.

Voila!

Please Note:  This post contains affiliate links from Amazon, which means I earn a small commission if you click and make a purchase.

Savta’s Sweet Potato Latkes

sweet-potato-latkes


Savta loves to make latkes and kugels.  I vividly remember how delicious they were when we were growing up and Savta’s kugel and latkes have become a real delicacy for my children.

This is Savta’s sweet potato latke recipe.  It is perfect.

INGREDIENTS

4 medium red potatoes, peeled
1-2 onions, peeled
1 sweet potato
3  eggs
4 tablespoons  flour
1 1/4 teaspoons kosher salt
1/4 teaspoon freshly ground black pepper

olive oil

DIRECTIONS

Using the s-blade of the food processor, process 2 potatoes with the onions, eggs, flour and seasonings. Using the shredder blade of the food processor, shred the remaining potatoes and sweet potatoes. Gently combine all the ingredients together in a large bowl.

Heat olive oil in a large saute pan over medium heat. Spoon a ladle-size amount  of  potato mixture into the oil and fry for 2 minutes. Turn the pancakes over and fry for 2 minutes more.  Latkes should be crispy on the outside and golden brown.

Latkes are best served hot from the skillet.

Leah’s Parsnip Latkes

Leah has been in charge of preparing Sunday night’s dinner.  Leah has a taste and flair for interesting vegetable combinations.   Delegating the responsibility of preparing dinner frees me and gives others a renewed appreciation for all that dinner preparation entails.  Best of all, it introduces all of us, the diners, to the cook’s creativity and style.

This week, Leah prepared a masterful dinner of salad and parsnip latkes.

Parsnip is a root vegetable with a very unique flavor. Although it looks like a white carrot, it has a sweet, earthy and almost nutty flavor. Leah combined ingredients that we had on hand to wow us with this simple dish of complex flavors, just in time for Chanukah


INGREDIENTS

1 large russet potato, peeled

2-3 parsnips, peeled

medium lime, for juice and zest

1/4 cup flour

2 large eggs

1/2 teaspoon salt

1/4 teaspoon pepper

oil


DIRECTIONS

Zest lime and squeeze out the lime juice.

Coarsely grate potato and parsnips by hand or by using the shredder blade on the food processor. Sprinkle with lime juice and then carefully wrap the shredded vegetables in a kitchen towel to squeeze out as much liquid as you can.  Whisk egg and then add shredded potatoes and parsnips, lime zest, flour, salt and pepper.

Heat olive oil in a large saute pan over medium heat. Spoon a ladle-size amount  of  latke mixture into the oil and fry for 2 minutes. Turn the pancakes over and fry for 2 minutes more.  Latkes should be crispy on the outside and golden brown.

Latkes are best served hot from the skillet.

Simple Rutabaga and Celery Saute

sauted-shredded-rutabaga

For me, one of the most exciting things about this blog is the introduction of new ingredients to myself and my readers.

It is really about extending one’s comfort zone and affording new ingredients a chance to shine.

For some, it is about exploring new ingredients.  For others, it is about using old-hat ingredients in new and creative ways.  When I meet one of my blog followers, I am often told that through simpletowow.com, they have tried something new that has now become one of their favorites.  That makes my heart swell.

For one of my readers in Chicago, Simply the best salad…ever! has helped her discover so many new tomato varieties. She had always been a one-variety round red tomato consumer. Through the blog, her eyes were opened up to a rainbow of tomato shapes, colors and flavors.

Another one of my readers had never thought to use raw beets in the past.  His experience with beets had only been limited to cooked beets.  Balsamic Beet Slaw: Easy, Fresh and Delicious introduced him to raw beets as a delicious salad ingredient.

Then, there are the ingredients that people love to hate.

Rutabagas falls into that category so easily.

This fall, I have been seeing waxed turnips in the produce market.  Waxed turnips are also called rutabagas or swedes and have a very unique flavor and texture.   They are an excellent source of potassium, vitamin C and manganese, and are a great source of fiber, thiamin, vitamin B6, calcium, magnesium, and phosphorus.

rutabaga-half-peeled

The taste of a rutabaga is difficult to describe.  It has a sweet earthy bitterness that I find to be delicious and most interesting.  Technically, rutabaga is a cross between cabbage and turnip.  Rutabagas are usually waxed, hence they are also known as waxed turnips. Using a sharp paring knife, it is important to remove the peel of the rutabaga along with the wax coating before using it as an ingredient.

Rutabaga is one of our family’s new favorite ingredients.  I hope that you will learn to love it, too.

This quick saute is one of our simplest and most favorite rutabaga preparations.

(more…)