Vegetarian

Tomato Medley with Arugula Pesto

Don loves arugula.  He will eat a bag of arugula as a snack.

I love tomatoes.

In fact, my mother has told me that “tomato” was my first word.  I pronounced it as “apimanus” and would do anything for a tomato.  I still will.  I just think that the juiciness, sweetness and unique character of a tomato makes a salad complete.

And, nowadays, tomatoes are available in all shapes and colors.  There are yellow pear tomatoes and brown kumato tomatoes.  There are beefsteak and grape tomatoes, cherry and low-acid tomatoes.

And, most are available year-round in your local markets.  Best of all, tomatoes are very simple to check for kashrut (kosher status) as their structure rarely allows for insect infestation.

Recently, a group of our friends joined to prepare an exquisite and delicious Sheva Brochos (seven day wedding after-party) for our newly married children, Yitzchok Aaron and Hindy.   There was gorgeous china and stemware.  The tablecloths were elegant and beautiful.  Every delicious home-cooked dish was impeccably prepared and served.

But, for me, the stand-out memory of the evening was the tomato salad.  It was a beefsteak tomato salad served in stout chunks with the most incredible pesto drizzled on top.  It was gorgeous, fresh and simply delicious.

Last night, my aunt and uncle came to visit my parents who are living with us.  They were coming from quite a distance and were due to arrive around dinnertime.  I had been busy all day with my mother and we arrived home later than expected.  Before I left that morning, I had prepared a crockpot lentil soup and set a simple brisket  and Simple Rainbow Roasted Vegetables in my oven on time-bake.

What I had left for the end was the salad.  I knew that I had some pre-checked lettuce and other assorted vegetables in my refrigerator bin.  Thirty minutes before their arrival, I opened the bin to begin preparing the salad.  All my salad ingredients, including the checked lettuce were gone.  All that remained were tomatoes, onions and arugula.

And, oh, there were tomatoes!  I had containers of every type of tomato imaginable.  There were yellow pear tomatoes and brown kumato tomatoes.  There were grape tomatoes and cherry tomatoes, but no beefsteak tomatoes. Last week, all the local markets had interesting tomatoes at great prices, so I had stocked up.  And, my salad thieves had barely touched the tomatoes.

So, what was there to do?  My mind raced back to the Sheva Brochos tomato fantasy.  I had never received the recipe, but in my mind, I knew exactly what to do.  And, the results were even better than the original and approved by all my guests.

INGREDIENTS

Tomatoes, sliced

Arugula, washed and pat dry

1/2 onion, cut in chunks

juice of 1/2 lemon

1/2 cup extra virgin olive oil

1/2 teaspoon salt

 
DIRECTIONS

Wash and cut tomatoes.  If using large tomatoes, cut into thick slices.  Arrange in a bowl or on a serving platter.
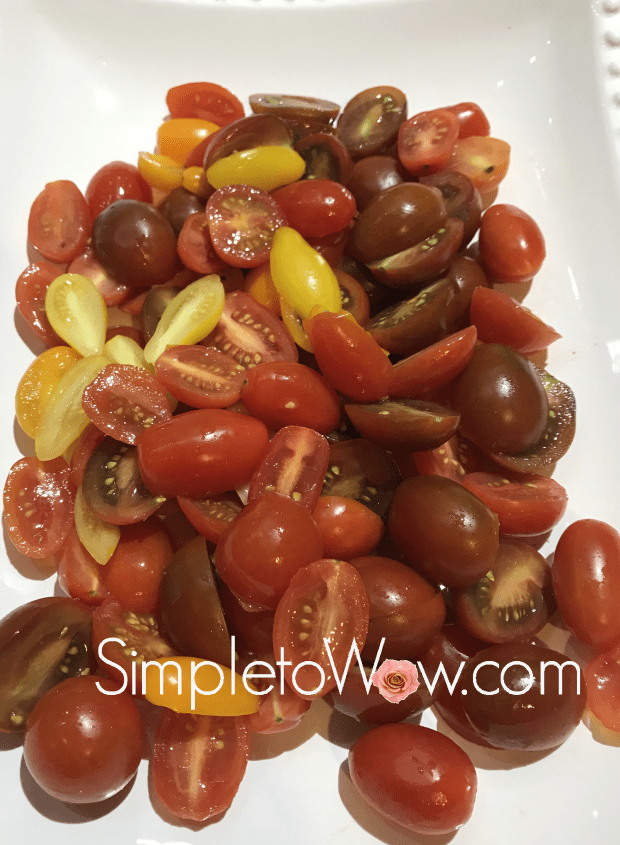
heirloom tomatoes alone.jpg

In the food processor fitted with the s-blade, pulse onion chunks and well-dried arugula.  Once the onion and arugula are completely broken down, add lemon, salt and oil and process until well combined.

arugula pesto.jpg

Right before serving, pour pesto over the tomatoes.  Enjoy!


heirloom tomatoes w arugula pesto on plate

KOSHER NOTES

Kosher laws disallow the eating of any whole insects and therefore most greens require a process of soaking, rinsing and in some cases, pureeing.  Kashrut authorities differ somewhat on the proper checking of leafy vegetables. This blog was not designed to be your kosher authority, so please consult your local rabbinic authority regarding using greens such as arugula.

SERVING SUGGESTION

For an interesting appetizer, side dish or buffet option, decant tomatoes into a glass.  Top with arugula pesto and garnish with a small bread stick or crouton.

heirloom tomatoes w arugula pesto in glass.jpg

Please Note: This post contains affiliate links from Amazon, which means I earn a small commission if you click and make a purchase.
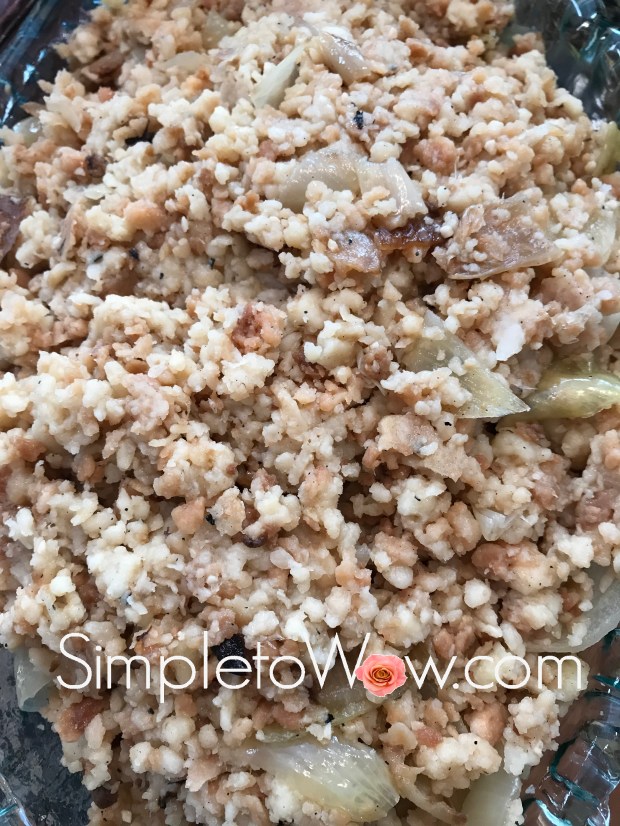


Heimeshe Farfel

heimeshe farfel.jpg

My son, Aaron, loves farfel (flake-shaped pasta popular in Jewish cuisine).

When he was younger, Aaron used to love to visit Bubby and Zaidy in Kew Gardens Hills, Queens.  While he enjoyed spending time with his grandparents, he was excited by the fact that there was nearly a dozen places where he could buy prepared farfel within a short radius of  Bubby and Zaidy‘s home.  That meant something back then.

Some things haven’t changed.

When Aaron comes home for Shabbos, I try to prepare heimeshe (home-style) farfel.  Nowadays, there are not many stores in our hometown that sell Heimeshe farfel.  Most sell egg barley, which is more like orzo than like farfel.  Heimeshe farfel is typically made from an egg noodle dough and/or matzo and is toasted before being cooked.  It has trademark light and dark coloration, reminiscent of the color of matzo.

Farfel is something that reminds me of my childhood.  That uniquely hemishe side dish evokes images of a past era where life was so much simpler.   On my visits to Monsey or Brooklyn, I can easily find this ingredient, much to Aaron’s delight.  And, when I prepare this simple and delicious dish, he doesn’t even need to leave the house to enjoy it!

INGREDIENTS

2 small bags heimeshe farfel
1-2 onions
garlic, minced (optional)

oil
1 teaspoon salt
dash of pepper

1 1/2- 2 cups of water

 
DIRECTIONS

Over medium-high heat, saute onions and garlic in oil, just until starting to brown.  Add  heimeshe farfel and toast for 1-2 minutes.  Add 1 1/2 cups of water and bring to a boil.  Reduce heat to low and stir occasionally for 15-20 minutes, making sure that farfel doesn’t stick to the bottom of the pan.  Add a bit more water in intervals, if necessary.  Farfel should be dry and soft when ready.

Pesach Onion Kugel

pesach onion kugel

I absolutely love a challenge!  In a comment on my Simply Amazing Onion Kugel, Pearl asked about adjusting this simple and delicious recipe to Pesach (Passover) cooking.  I worked on making this recipe suitable for Pesach and my family contends that this recipe is even better than the original.

I agree.

Our custom on Pesach is not to bruck (use matzo products with liquid), so it was not possible to merely substitute soaked matzo for the soaked bread in the original recipe.  I played with the recipe until I came up with this Pesach variation.

We all licked our plates clean.  It is a winner and it will be on our seder menu this year.

Have a Chag Kasher V’Samaech (Happy and Kosher Passover)!

SUPPLIES

food processor
pyrex pie plate


INGREDIENTS

4-5 onions

3 eggs
2/3 cup potato starch
1/4 cup oil
1/3 cup seltzer
1 teaspoon salt
pinch black pepper


DIRECTIONS

Preheat oven to 425 degrees F.

Coat a pyrex pie plate lightly with oil and place in oven.

While the oil is heating up, cut the onions into large chunks. Using the metal s-blade of the food processor, pulse the onions until they are shredded but not liquidy.  Add eggs, oil, seltzer,  salt and pepper. Pulse a few times to combine.

Carefully remove the sizzling pyrex pie plate from the oven. Pour the mixture directly from the food processor bowl into the pyrex pie plate and bake uncovered for one hour and ten minutes. When done, the onion kugel should be caramelized on top and bottom and soft and creamy on the inside.


TIPS

Because sulphuric gas released from the onion during cutting reacts with tear ducts, eyes feel irritated and release tears when cutting onions.  Heating the onion before cutting  breaks apart the enzymes that emit sulphuric gas to reduce and/or eliminate the tears.   The easiest way to heat the onions for this kugel is to microwave them on high for several minutes  in 30 second increments.  For best results, cool the microwaved onions before cutting into chunks.

Please Note: This post contains affiliate links from Amazon, which means I earn a small commission if you click and make a purchase.

Simple Cranberry Sorbet

cranberry sorbet

I’ll share a secret with you.

My Purim seuda (feast) menu is designed around the chametz (leavened products) that I must use up before Pesach (Passover).

This year, I found myself with lots of frozen challah, hence the stuffed chicken breasts and meatballs.  I found that I had three bags of fine egg noodles, and thus yerushalmi kugel was added to the menu. I found myself with way too many boxes of brownie mix, even after giving so many boxes away to the fastest respondents on our Cousins WhatsApp chat.  I created stunning pecan truffle cookies and made delicious Strawberry and Brownie Mini Trifles to use up the remaining boxes of brownie mix.

As I was sorting through the freezer, I found a few bags of frozen cranberries.  According to halacha (Jewish law),  cranberries are not chametz.  Therefore, they did not need to be consumed or discarded before Pesach, but after doing the math, I realized that they probably were already several months old.  After all, I usually buy fresh cranberries around Thanksgiving and then wash and freeze them in late November or early December.

I set a handful of cranberries aside to prepare Frosted Sugar-Coated Cranberries to be used as a garnish, but decided to prepare cranberry sorbet with the rest of the frozen cranberries.  I remember seeing a Cranberry Ice recipe posted by one of my favorite kosher bloggers, CookingfortheTimeChallenged and I used that as my inspiration for this recipe.

This recipe uses sweet soda or juice as the liquid base.  I found some flat soda left over from a Sheva Brochos that I recently hosted.  This is the perfect recipe to use up that leftover grape juice, orange juice or flat soda.

I love the sweet and savory flavor combination.  I garnished these ices with chives for a surprising bite, but other herbs like mint or basil may be blended right in for that stunning palate sensation.

INGREDIENTS

one can cranberry sauce, whole or jellied
1 cup soda or juice
1 bag frozen berries or 2 cups frozen grapes

herb garnish, such as basil, mint or chives (optional)

DIRECTIONS

Using the s-blade of the food processor, puree cranberry sauce, berries and liquid.

Freeze until solid or overnight.

Once frozen, remove from freezer and defrost just enough to scoop back into the food processor fitted with the s-blade.

Pulse sorbet in food processor just until smooth.  Refreeze.

To allow for simple entertaining, I usually defrost for 20-30 minutes before scooping.

Garnish with mint leaves and Frosted Sugar-Coated Cranberries

SUBSTITUTIONS

Any canned fruit may be substituted for the canned cranberry sauce.

Any frozen fruit may be substituted for the frozen berries.  Just make sure to taste puree and blend with enough soda or juice for optimal sweetness.  Honey may be added as well to sweeten the sorbet.

Blend your choice of fresh herbs like mint, basil or chives for that unusual sweet and savory flavor sensation.

TIPS

I scoop the sorbet into small cups in advance and freeze in the cups until ready to serve. That speeds up the serving of a frozen dessert and keeps everything tidy.    I add the garnish at the end so that the leaves stay fresh and green.

Simplest Mushroom Barley Soup

mushroom barley soup.png

I have been thinking about the menu for my upcoming Purim seuda (feast).  Admittedly, I check my pantry for chometz (leavened products unsuitable for Passover) before Purim and many of my seuda recipes are designed to use those products.   It helps me use up those products that I will need to discard, donate or finish before Pesach (Passover).

One of those chometz products is barley.  I use it in the cholent, but not for much else.  And, I had two bags in my pantry, much more than I could use in the next few weeks.  So,  barley came out of my pantry and created this delicious and oh, so simple mushroom-barley soup.

This crockpot soup uses a few simple wholesome ingredients  tossed right into the crockpot.  There is  no sauteing in advance.  Just put it up in the morning and come home to a delicious, hearty and flavorful soup in the evening.  The barley creates a starchy texture that contrasts so well with the smooth earthiness of the mushrooms.  The onions and celery round out the soup so perfectly.

And, you will have less barley to contend with before Pesach.

INGREDIENTS
2 packages mushrooms, sliced (try baby bella)
6 stalks celery, sliced
1 onion, diced
3/4 cup barley
1 tablespoon salt
dash of pepper
water

SUPPLIES
6 quart crockpot

DIRECTIONS
Toss mushrooms, celery, onion barley, salt and pepper into the crockpot and stir. Fill crockpot two-thirds to the top with water. Cook on high from morning to evening, at least six hours.

SHORTCUTS
For an even easier preparation, substitute 2 large cans mushrooms for the fresh mushrooms.

TIPS

For a deeper flavor, substitute vegetable or chicken stock for some of the water.

This soup freezes extremely well. Cool soup and decant into freezer-safe containers or freezer-type zipper bags. Just defrost and reheat. Add fresh herbs and water if necessary to freshen it up.

Please Note: This post contains affiliate links from Amazon, which means I earn a small commission if you click and make a purchase.

No-Chop No-Fuss Spinach Split Pea Soup

split pea spinach soup

On these wintry days, there is nothing like a hot bowl of soup.

This soup takes the bowl! It uses a few simple wholesome ingredients with no chopping and no mess.  Just take a few minutes to toss all the ingredients in the crockpot in the morning and come home to a finished delicious soup in the evening.  The pot does all the work, no dicing. no sauteing, no prep mess.

INGREDIENTS
one 16 ounce bag (2 cups) of yellow split peas
one bag of fresh or frozen baby spinach (see kosher notes)
one tablespoon salt
dash of pepper
water

SUPPLIES

6 quart crockpot


DIRECTIONS
Fill crockpot two-thirds to the top with water. Toss split peas, spinach, salt and pepper into the crockpot and stir. Cook on high from morning to evening, at least six hours.

KOSHER NOTES
Kosher laws disallow the eating of any whole insects and therefore most greens require a process of soaking, rinsing and in some cases, pureeing. I have found that flat-leafed greens like baby spinach are much easier to check for insects than their curly-leaf counterparts. Kashrut authorities differ on the proper checking of leafy vegetables and some disallow the use of spinach altogether. This blog was not designed to be your kosher authority, so please consult your local rabbinic authority regarding using leafy greens such as spinach.

TIPS
This soup freezes extremely well. Cool soup and decant into freezer-safe containers or freezer-type zipper bags. Just defrost and reheat. Add fresh herbs and water if necessary to freshen it up.


Please Note: This post contains affiliate links from Amazon, which means I earn a small commission if you click and make a purchase.

Set It and Forget It Lentil-Vegetable Soup

There is something so hearty and comforting about lentil soup.  And, there is something about taking just a few minutes to prepare a soup on these cold, snowy mornings and coming back at the end of the day to a warm, thick, velvety and delicious soup.  Ordinary lentils really have that magical texture, firm yet creamy.  Adding vegetables to the ingredient list just takes lentil soup to a whole new level.

For this soup, I used the most common brown lentil .  It has the seed hull intact and is most suitable for salads and soups that require the lentil to retain its shape.   If you are short on time, you can use red lentils, instead.   It will cut down on the cooking time and still yield a hearty and delicious soup with a less defined texture to the lentil base.

set it and forget it lentil soup in crock

INGREDIENTS
one bag lentils
1 1/2 teaspoons salt
dash of pepper
3-4 garlic cloves, minced or 1 teaspoon garlic powder

1 parsnip, cut into thin slices
1 package mushrooms, sliced thin
4 stalks celery, sliced thin
1 onion, diced
1 zucchini, diced
water

celery leaves, for garnish (optional)

set it and forget it lentil soup.jpg

DIRECTIONS

Place lentils, vegetables and seasonings into a crockpot. Fill crockpot 3/4 to top with water. Cook on high from morning to evening. If the soup is too thick, add up to a cup of water and stir well. Garnish with celery leaves right before serving.

SHORTCUTS
When in a hurry, I substitute red lentils and adjust the cooking time to 4 hours.  Right before serving, puree soup with a  stick blender for a creamy texture.

Roasted Confetti Vegetables with Cashews

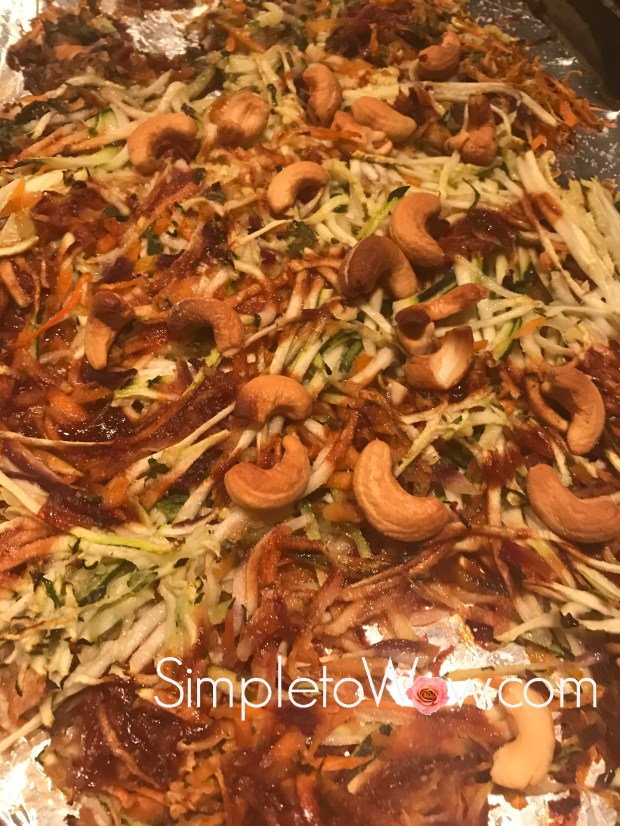
This is the perfect side dish for a weeknight.   It uses wholesome ingredients, takes minutes to prepare and requires only 20 minutes to roast. The meatiness of the cashews paired with the tender shreds of zucchini and rainbow carrots make this dish hearty, flavorful and satisfying.

confetti roasted vegetables.jpg

 INGREDIENTS

1-2 zucchini, shredded
1 package rainbow carrots, peeled and shredded
1 onion, shredded
handful of whole cashews

2 teaspoons kosher salt
flavored oil or olive oil

DIRECTIONS

Preheat oven to 450 degrees F. Line a baking sheet with foil or parchment paper.  Using the shredding blade of the food processor, shred onion, carrots and zucchini.

Spread vegetables atop the lined baking sheet. Drizzle with a scant amount of oil and sprinkle with salt. Sprinkle a handful of cashews over vegetables.

Roast for 15-20 minutes.

Toss and enjoy!

Cranberry Pears on Blankets

The best desserts are simple ones, delicious bites that highlight beautiful ingredients prepared in spectacular ways.  Most recently, I have taken a liking to not-too-sweet desserts.  I love fruit dessert presentations that show off the natural beauty, unique shape and incredible character of the fruit itself.

This dessert is just that: simple, gorgeous and not too sweet. The contrast of flavors and textures between the pastry, pears, cranberries, and dates is incredible.  The puffed pastry outlines the natural shape of the pears and the pastry leaves add dimension and flair.

This dessert may be served at room temperature or warm.  It can be served a la mode with just a bit of ice cream to add a temperature contrast, as well.

pear on blanket before baking

SUPPLIES

melon baller
paring knives
rolling pin
cutting mats

INGREDIENTS

puffed pastry sheet
4 pears, ripe and soft to the touch
12 fresh or frozen cranberries
handful of chopped dates (optional)
egg wash (optional)

DIRECTIONS

Wash pears well and using paring knife, cut pears in half through each core,  keeping the stem intact.  With a melon baller, scoop the core out of the middle of each pear.

pear on blanket dessert with cores removed.jpg

Fill each scooped-out pear hole with 3 cranberries and a few chopped dates.

pear on blanket dessert filled with cranberries

Using rolling pin, roll out puffed pastry sheet on cutting mat.  Carefully place pears on pastry cut side down, making sure that cranberries and dates do not fall out.  Using  sharp paring knife, trace around the pears, leaving a 1/4″ border of pastry around the pear.  Cut 8 leaf shapes out of the pastry sheet and score each leaf with paring knife to resemble the veins of the leaf. Score the tops of each pair in a grid-like pattern.

Line a baking sheet with parchment and carefully place each pastry pear on the sheet.  Place two leaves on the top of each pear. Optionally, brush the pastry with egg wash.

Bake at 375 degrees F for 20 minutes.

pear on blanket

Serve with a dusting of powdered sugar and/or a dollop of whipped cream.

Pumpkin Quiche for a Dairy Thanksgiving

pumpkin quiche

We normally celebrate Thanksgiving with a delicious heimeshe (traditional Jewish style) turkey and meat dinner at our niece’s house.  Michal and Shui open their beautiful home and prepare an assortment of delicious foods for this occasion.  After all, the theme of hakaras hatov (thanksgiving) is of paramount importance to our Jewish faith and Thanksgiving is an excellent opportunity to get the family together  to express our appreciation for all that we have been given.  Michal’s dinner is one that the whole family anticipates and enjoys.

This year is different.  This Shabbos, right after Thanksgiving, Michal and Shui will be hosting the entire family for their son’s Bar Mitzvah.  And, the energy and excitement for a wonderful Shabbos all together with aunts, uncles and cousins is palpable.

So, we are left to make our own plans for Thanksgiving.   And, this year, Thanksgiving day comes on the heels of Michelle’s birthday.  And Michelle loves milchig (dairy) foods.

We are changing things up this year and having a dairy Thanksgiving feast with many of Michelle’s favorite foods.  There will be Onion Quiche, fettuccine alfredo (stay tuned for the recipe), Lasagna and plenty of salads.  Of course there will be a Carvel ice cream cake, Michelle’s favorite, and some Cheesecake for dessert.

And, in celebration of Thanksgiving, I will be serving this awesome pumpkin quiche.  After all, we have to keep some tradition in this festive dairy birthday feast.

INGREDIENTS

2 tablespoons oil
2-3 onions
2-3 cloves garlic, minced
1/2  teaspoon salt
dash of black pepper

4 eggs
1/4 cup cream
1/2 cup milk
1 large can of pumpkin puree
8 ounces shredded or grated cheese

DIRECTIONS
Preheat oven to 400 degrees F.

Over medium-high heat, heat oil and add onions and seasonings. Stir occasionally until the onions are soft. Reduce the heat to medium-low and cook until the onions are light brown, stirring occasionally.

Place half of the cheese in the quiche pan. Combine the eggs, cream, milk and pumpkin puree. Pour into the quiche pan over the cheese. Sprinkle the sauteed onions and garlic over the egg mixture and top with the remaining shredded cheese.

Bake uncovered for 45 minutes or until the top of the quiche is golden-brown.

Happy Thanksgiving!

Simple Celery Ribbons

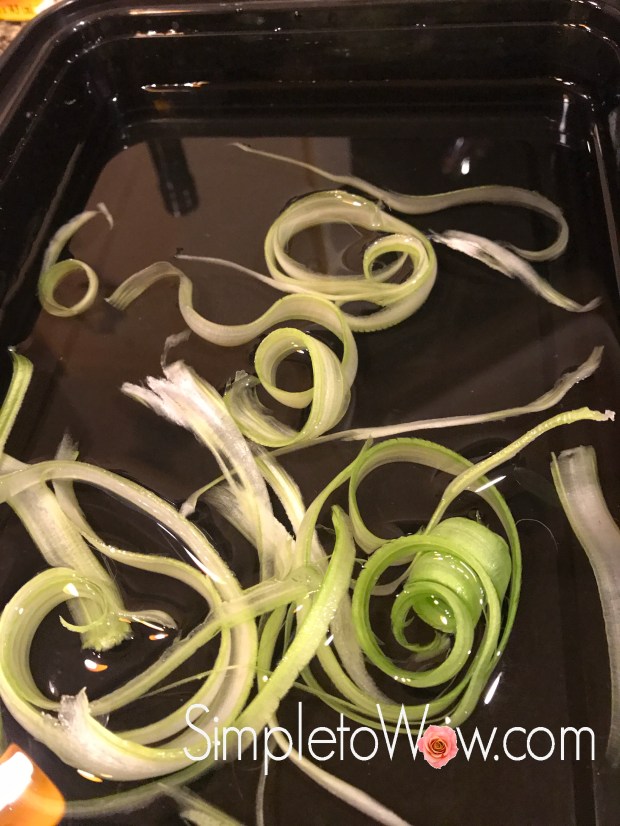
I am fascinated with garnishes, especially simple garnishes constructed from ordinary ingredients.  After all, simple garnishes put the wow into a dish.  This one is fast and simple, using just celery and cold water.

celery ribbons.png

INGREDIENTS

celery
cold water

DIRECTIONS

Remove a stalk from a head of celery and wash well.  Using a peeler, peel long ribbons of celery off of the celery stalk.

Drop the celery ribbons into cold water and submerge completely for at least 20 minutes or refrigerate overnight.

celery ribbons in ice water.jpg

Voila!

Out of the Bowl Tiered Salad

Who says that salad must be served in a salad bowl and tossed?

out of the bowl salad-side view.png

One of the most exciting things about salad is its versatility.  A beautiful and delicious salad can incorporate so many disparate ingredients and the contrast of colors, textures and flavors makes each salad unique.

Today’s salad is about layering a gorgeous vessel with different vegetables and toppings.  Its effortless simplicity achieves an elegance that highlights the colorful and flavorful vegetables themselves.

This salad is prepared on a rose gold hammered elongated platter with the ingredients placed in long tiers.  The vibrant colors of the romaine lettuce, shredded fresh beets, rainbow peppers and heirloom tomatoes speak for themselves.

SUPPLIES

hammered elongated bowl (different than bowl pictured on blog post)

INGREDIENTS

romaine lettuce, shredded
raw red beets, peeled and shredded
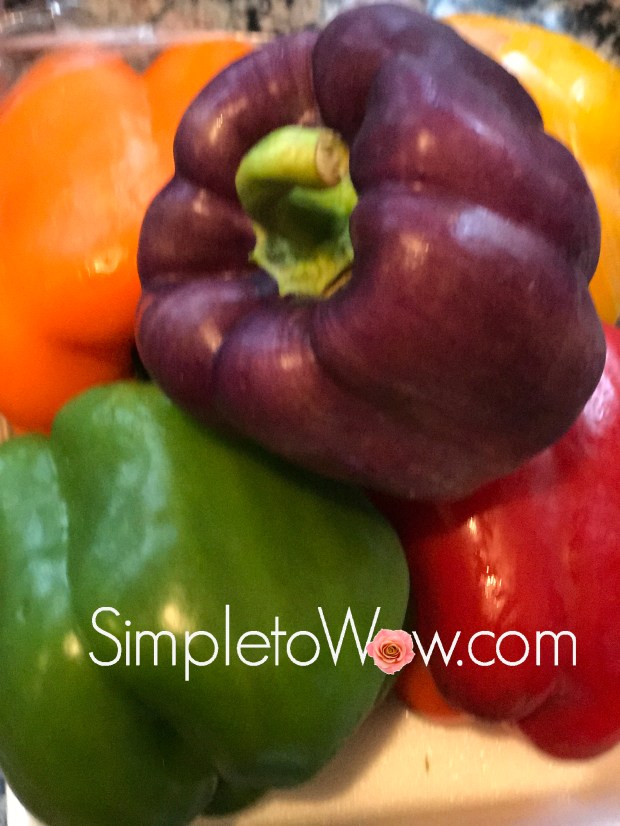
rainbow peppers, cut into small pieces
heirloom tomatoes
parsley and scallions, cut into tiny pieces

Balsamic Vinaigrette

DIRECTIONS

Place a layer of shredded romaine lettuce.  Top that with a layer of shredded red beets, overlapping the bottom layer so that the romaine lettuce can be viewed from the sides.

out of the bowl salad-layers 1 and 2.png

Top that with small pieces of rainbow peppers and small colorful tomatoes.

rainbow peppers

Garnish with shredded or sliced parsley and scallions.  Drizzle Balsamic Vinaigrette over the salad and serve.

out of the bowl salad partial view.png


This salad is truly simple to wow!

out of the bowl salad.png

Please Note: This post contains affiliate links from Amazon, which means I earn a small commission if you click and make a purchase.

Simple 10-Minute Creamed Spinach

creamed spinach


Creamed spinach pairs so well with deli, meat, fish and just about every protein.  It is a favorite at steakhouses and delicatessens.  The bright green wilted spinach takes only minutes to prepare and its creamy texture and fresh flavor tantalize the eye and the palate.  This classic recipe can be easily prepared with soy or almond milk instead of heavy cream for a pareve side dish.

This side dish is delicious and oh, so simple to prepare.  It is always a winner in my house.  It is fresh, hearty and delectable.

INGREDIENTS

olive oil
1 pound spinach, fresh or frozen (see kosher notes)
2-3 garlic cloves
1 onion, diced
1 pound spinach, fresh or frozen
½ cup cream (milk, soy or almond milk may be substituted)
½ tablespoon salt
½ tablespoon pepper
1-2 tablespoons flour


DIRECTIONS

Soak and wash spinach well. In a large saute pan over medium-high heat, saute onion and garlic in oil just until starting to brown. Add cream or milk and bring to a boil. Add salt and pepper and dusting of flour, slowly stirring with a wooden spoon or a whisk. Once the mixture starts to thicken, add spinach and reduce heat to a simmer until the spinach is wilted and the sauce is thick.

KOSHER NOTES

Kosher laws disallow the eating of any whole insects and therefore most greens require a process of soaking, rinsing and in some cases, pureeing. I have found that flat-leafed greens like baby spinach are much easier to check for insects than their curly-leaf counterparts. Kashrut authorities differ on the proper checking of leafy vegetables and some disallow the use of spinach altogether. This blog was not designed to be your kosher authority, so please consult your local rabbinic authority regarding using and preparing greens such as spinach.

Enjoy!

Simply Amazing Onion Kugel

onion kugel.pngMy life is rather like a “Chopped” competition.  After all, so many of my favorite recipes are developed using the ingredients on hand, keeping the preparation quick and transforming simple ingredients into something more than the sum of the parts.  Most often, my time is limited so I am racing the clock just like the contestants on “Chopped”.

This onion kugel is exactly that.

It uses onions and leftover challah, ingredients that always seem to be available in my “basket”.  The preparation is simple and fast.  And, the end-product is truly a masterful transformation of these simple ingredients.

I normally try to use up the leftover challah from Shabbos by creating bread crumbs or croutons rather than stuffing the challah leftovers into the freezer, just to be fed to the birds before Pesach (Passover).  This recipe elevates challah leftovers to something that will really wow you.  And, do not worry.  I am certain that you will still have plenty of frozen challah leftovers to feed the birds before Pesach.

For this onion kugel, the prep time is quick and once baked, the ingredients take on a divine flavor and texture.  I added seltzer to the batter to achieve fluffiness as in my Abracadabra Potato Kugel.  The resulting texture is caramelized and crunchy on the outside, yet soft and creamy on the inside.

SUPPLIES

food processor
pyrex pie plate

INGREDIENTS

3 eggs
1 cup soaked challah or bread
1/3 cup oil
1/3 cup seltzer
1 teaspoon baking powder
1 teaspoon salt
pinch black pepper
3 large onions

DIRECTIONS

Preheat oven to 425 degrees F.

Coat a pyrex pie plate lightly with oil and place in oven.  Soak challah or bread in warm water and squeeze out water, leaving softened bread.

While the oil is heating up, cut two of the onions into large chunks.  Using the metal s-blade of the food processor, pulse eggs, soaked challah or bread, oil, seltzer, baking powder, onion chunks, salt and pepper.  Pulse a couple of times to combine.

Remove the s-blade and add the shredding blade to the food processor.  Shred the last onion.   Pour everything into a large mixing bowl and stir to combine.   I like to use the stainless steel mixing bowl of my Kitchen Aid mixer, since it is a large, sturdy bowl with a handle for pouring,

Carefully remove the sizzling pyrex pie plate from the oven.  Pour the mixture into the pyrex pie plate and bake uncovered for one hour.  When done, the onion kugel should be caramelized on top and bottom and soft and creamy on the inside.

Please Note: This post contains affiliate links from Amazon, which means I earn a small commission if you click and make a purchase.
Fan Potatoes and Family Memories

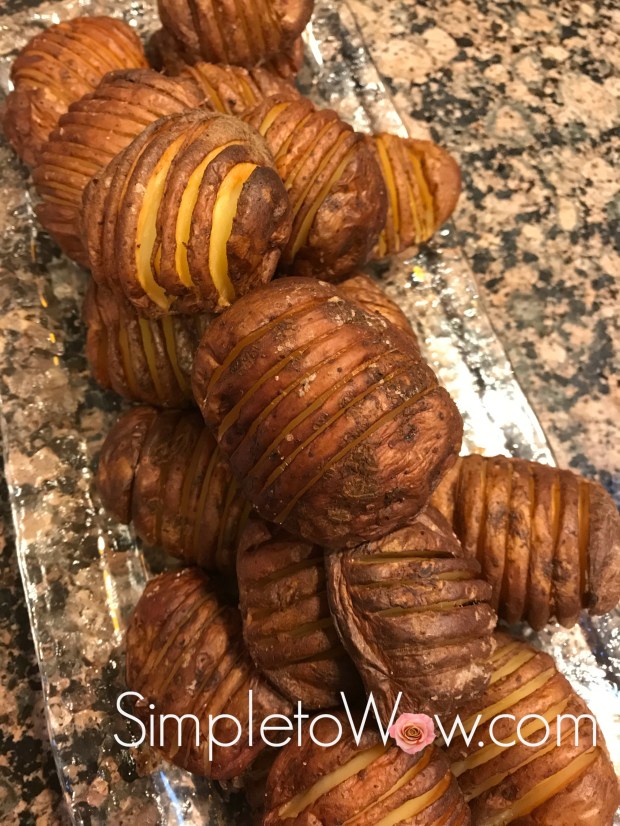
fan potatoes.jpg

When I was young, I vividly remember my mother preparing fan potatoes.  She did not serve them often.  They were a rare treat.

I can picture in my mind how the potatoes fanned out and how delicious they were: crisp on the outside. soft and buttery on the inside.  The fins of each fan potato created pockets of crispy caramelized deliciousness.  They were simple and perfectly salted.

After I had my own children, I asked my mother for the fan potatoes recipe.  My mother returned my request with a blank stare.

How did she not remember preparing or serving them?  They conjured such fond memories for me.  How could she not recall?  Worse yet, how could she not find the recipe?

Now that I have my own kitchen, I understand.  There are countless recipes that I made for a time and then forgot about.  Some of those for-a-time recipes were even shared with friends and they have found a permanent place in their homes.  How many times does someone mention that they still prepare my cranberry mold or my chocolate mousse cake and I have no recollection of preparing it, serving it or sharing the recipe?

A few years ago, one of my friends shared a cranberry-oatmeal souffle recipe with me.  I later found the same recipe that I had written in my own handwriting thirty years ago!

Despite it all, I was determined to recreate those fan potatoes of my childhood.  It is one those truly simple to wow recipes.  It has become part of my own family’s memory bank…and it is a here-to-stay recipe.

Yields 6-8 servings.

INGREDIENTS

Potatoes, scrubbed or peeled
Kosher or pink Himalayan salt salt
fresh garlic or minced garlic  (optional)
Olive oil or cooking spray

DIRECTIONS

Preheat oven to 450 degrees Fahrenheit

Grease/spray cookie sheet or line cookie sheet with parchment paper.

Half potatoes lengthwise. Place potato halves flat side down on cookie sheet.  Cut slits in each potato half starting at the round side but not cutting all the way through to the flat bottom.  If using garlic, coarsely chop and place between potato slits.

Drizzle lightly or spray generously with oil.  Sprinkle salt over the tops of the potatoes.

Roast in the oven for 45-65 minutes depending on the size of the potatoes. Potatoes should be golden brown when ready.

NOTES

These fan potatoes are best when eaten right away.  I usually prepare them late Friday afternoon and set them on the counter.  Most of them are devoured before Shabbos even begins.  The few that are left are still delicious for Friday night dinner, served hot.

Potatoes may be peeled or just scrubbed for this recipe.  Scrubbed potatoes will achieve a more rustic looking result, while the peeled potatoes will achieve a more refined result. They are delicious both ways!

Any potatoes may be used, but the results will differ.  Let your taste buds decide which type of potato is your favorite for this recipe.  Higher starch potatoes like Idaho or Russet will yield a firmer and mealier inside texture.  Lower starch potatoes like Red or Yukon Gold will yield a softer and creamier inside texture.

I have also served this recipe as an hors d’oeuvre using small potatoes and interesting toothpicks. It is simply delicious and beautiful both ways!

Perfectly Roasted and Seasoned Bok Choy

Bok choy is one of our favorite ingredients in leafy salads.  It is a powerhouse of nutrition, and has a signature taste and bold texture, making it the perfect ingredient for salads that are dressed in advance.  I have incorporated it into a number of salads already highlighted on the blog (see Simple, Colorful and Crunchy Baby Bok Choy Salad with Apples, Peppers, Tomatoes and Craisins).

Bok Choy is a cabbage-like green that can be found in most vegetable markets and green grocers.  For centuries, bok choy has been a staple of Chinese cuisine and medicine.   Bok choy is a rich leafy vegetable that has stalks similar to celery and leaves that are reminiscent of  Romaine lettuce.    Rich in vitamins  A, C and K, bok choy is an excellent sources of beta carotene, calcium, magnesium, potassium, manganese, and iron.

Until now, I have only enjoyed bok choy as a raw ingredient.  Kaitlyn suggested trying bok choy as a roasted vegetable.  I took Kaitlyn’s advice and roasted it with my Everything Bagel Seasoning and it was a huge hit.  It will now becom epart of my permanent roasting repertoire.

roasted bok choy

INGREDIENTS 

1-2 heads bok choy, cleaned and cut lengthwise into large spears (see kosher notes)
cooking spray
Everything Bagel Seasoning

DIRECTIONS

Preheat oven to 425 degrees F.  Line baking sheets with parchment paper or greased foil.

Spread bok choy spears in a single layer on baking sheet(s).  Lightly spray with cooking spray and  sprinkle with Everything Bagel Seasoning.

Roast for 25-35 minutes, checking that bok choy is slightly brown on top, but still moist and tender inside.

KOSHER NOTES

Kosher laws disallow the eating of  any whole insects and therefore greens like bok choy require a process of soaking and rinsing and.   Kashrut authorities differ on the proper checking of  these type of greens and some disallow its use altogether.  This blog was not designed to be your  kosher authority, so please consult your local rabbinic authority regarding using and preparing bok choy.

Simple Superstar Roasted Onions

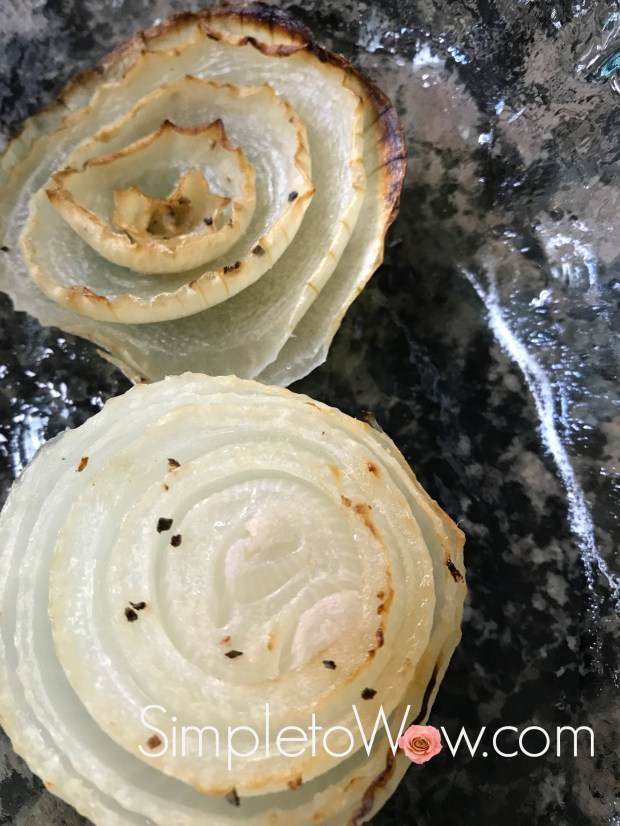
roasted onions up close

Onions are the ultimate team player.   They are used to start soups and sautes, taking very little credit for the impactful favor that they impart.  They are sprinkled atop salads or roasts, adding spiciness and satisfying juiciness wherever they are used.

They are the utility player that can be used here or there, always making the other ingredients taste a little better without taking credit themselves.  Fried or sauteed onions become the basis for great flavorful dishes.  Onions have the ability to make so many different types of recipes heartier, fuller and more delicious.

Onions are the unsung stars of so many dishes.

But, do onions not deserve to be superstars in their own right?

After all, there is nothing like a caramelized onion.  The decadent smell.  The charred sweet outside and the creamy soft inside is one of those texture combinations that is like no other.

This side dish is so simple.  So perfect.  And, so delicious.  And, it finally highlights the onion as the star of the game.

After preparing these roasted onions and certainly after tasting their distinctive creamy sweet flavor, you’ll be cheering for the onion to be your new favorite player, too!

roasted onions on plate


INGREDIENTS

3-4 large onions

oil spray
salt
pepper
minced or granulated garlic


DIRECTIONS

Line baking sheet with parchment paper. Cut onions crosswise into 1/2 inch sections. Line onions on pan and spray lightly with oil spray. Sprinkle with salt, pepper and garlic.

Roast at 400 degrees F for 45-55 minutes or until onions are golden brown on outside and soft and creamy on the inside.

roasted onions on baking sheet

Chana’s Low-Carb Broccoli Kugel

chana's low-carb brocolli kugel.jpg

Last Shabbos, we hosted my brother-in-law and sister-in-law and niece for Shabbos.    We always look forward to their visits.  Yisroel and Chana are some of my favorite guests, so helpful and appreciative.

We had a wonderful Shabbos, sharing divrei torah (words of Torah) and my father-in-law’s a’h favorite zemiros (Shabbos melodies) at our Shabbos table.  Don and his brother entertained us as they shared uproarious accounts of their childhood antics.   Chana regaled us with side-splitting stories, as Devora Brocha, their beautiful daughter kaH, acted out these anecdotes.

Since we only arranged to spend Shabbos together late Thursday afternoon, Chana offered to prepare and bring her delicious broccoli kugel.  That was an offer that was hard to refuse because I love Chana’s cooking and I am always happy to serve one more, delicious dish.

It did not disappoint.  This broccoli kugel is flavorful with excellent texture. Its creaminess and depth of flavor are perfect.  Best of all, it is gluten-free and low in carbs. Thanks, Chana!

INGREDIENTS

1 bag (24 oz) chopped broccoli, steamed for 10 minutes (see Kosher notes)
1 large onion and 2 cloves garlic, sautéed
2 eggs
1 1/2 heaping teaspoons mayonnaise
1/2 heaping teaspoon chicken soup mix or consomme
3/4 teaspoon salt
dash of black pepper

DIRECTIONS

Preheat oven 400 degrees F. Combine all ingredients and pour into a 9″ round pan. Bake for 40-50 minutes, until golden brown on top.

KOSHER NOTES

Kosher laws disallow the eating of any whole insects and therefore broccoli requires a process of soaking, rinsing and in some cases, pureeing, unless purchased with a reputable kosher hashgacha (certification).  Kashrut authorities differ on the proper checking of broccoli.  This blog was not designed to be your kosher authority, so please consult your local rabbinic authority regarding using and preparing broccoli.

TIPS
I eliminate the consomme and just increase the salt and pepper slightly.

Enjoy!

Cheesy Cabbage Steaks

This week, I decided to prepare a delicious, colorful and low-carb dairy dinner.  Since I had just returned from an overseas trip, I found my refrigerator and pantry low-stocked. With very few ingredients to choose from, I opted to use the head of cabbage that I found in the refrigerator to prepare these of, so wonderful cheesy cabbage steaks.

Cabbage has many health benefits.  It is low in calories and carbs and high in fiber and vitamins. Cabbage is low in saturated fat and boasts high levels of vitamin C and vitamin K.  Best of all, it is inexpensive and available year-round.

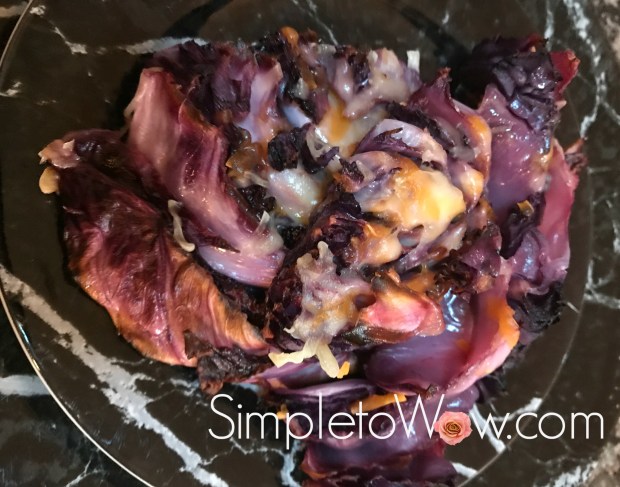
I used red cabbage for this recipe, but any cabbage may be used.  In this simple recipe, the red cabbage creates a stunning purple backdrop to the velvety melted cheese on top. It may be used to Passover and is gluten free, too.

Cheesy cabbage steaks

INGREDIENTS

Red cabbage, cleaned and cut into steaks

4 minced garlic cloves or granulated garlic
coarse salt
coarse ground black pepper
olive oil or cooking spray

shredded cheese


DIRECTIONS

Preheat oven to 375 degrees F.  Line baking sheets with parchment paper or greased foil.

Remove first 4-5 tough outer leaves of cabbage.  Clean cabbage and cut into 1/2 inch to 3/4 thick steaks.  Place cabbage steaks in a single layer on lined cookie sheets.   Drizzle with olive oil or generously spray with cooking spray.   Lightly sprinkle with salt, garlic and black pepper.

Roast for 40-45 minutes, checking that cabbage steaks are soft and just starting to brown before removing from oven.


Sprinkle shredded cheese over the cooked cabbage steaks.  Return to the oven for 10-15 minutes more until cheese is melted and gooey.

Enjoy!

Watermelon Jicama Salad

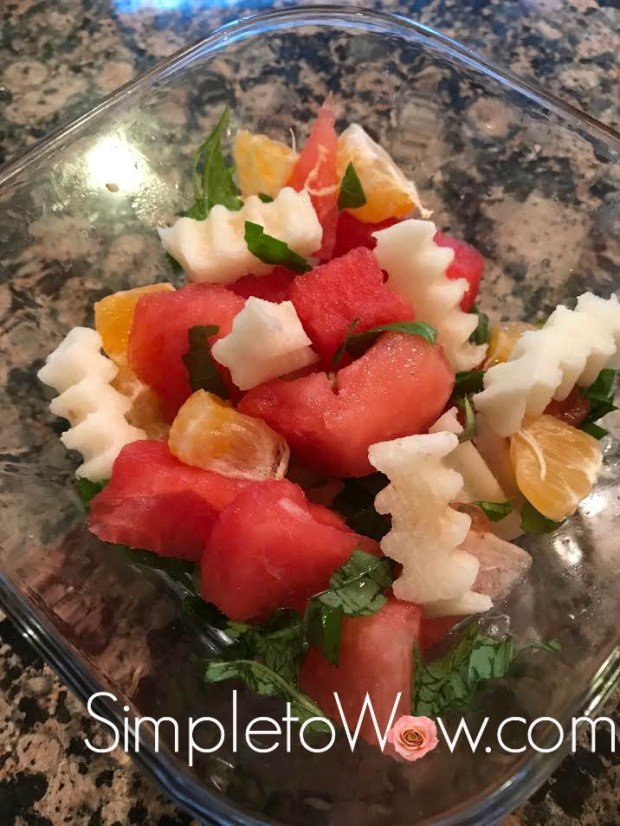
watermelon jicama salad


A few weeks ago, we had very hot weather on Shabbos.  It was one of those weeks that boasted a potpourri of  weather patterns.  We had rain, cold, overcast skies, bursts of sunshine and then a 40 degree rise in temperatures from Friday to Shabbos.

We just did not have enough time for our bodies to acclimate to nearly ninety degrees F on Shabbos.

I had bought a watermelon to greet the warm weather and Shabbos morning, on the spur of the moment, I decided to serve the watermelon as a salad rather than as a dessert.  I remembered having a delicious watermelon salad at my friend, Sallie’s house several years ago.  I didn’t remember anything about the other ingredients in Sallie’s salad, just that I had really enjoyed her watermelon salad.

I ran the idea of creating a watermelon salad by Ruti, our Shabbos house-guest from Jerusalem.

She had one word for the idea.  Muzar.  Strange.

That didn’t stop me.  I looked in my refrigerator.  I had jicama, mint, scallions and blood oranges in addition to the watermelon.  So, I cut everything up, placed the salad bowl in the refrigerator and waited for inspiration to set in for the dressing.

Inspiration is the mother of invention,  The salad was refreshing, delicious and beautiful.

Oh, and Sallie joined us with her family for Shabbos lunch.  At first all our guests remarked, “So, we’re the guinea pigs for the blog?”, to which I simply said “yes!”.

But then, Sallie tasted the salad and just said, “Wow!”

That made my day.  The ingredient combinations may be muzar, but Sallie’s declaration of wow confirmed that this recipe would be a keeper.

INGREDIENTS

watermelon, cut into cubes (about 4 cups)
jicama, peeled and cut into small cubes
scallions, washed and cut into 1″ sections
mint, soaked and rinsed (optional) (see kosher notes)
2 blood oranges, peeled and cubed

1-2 teaspoons kosher salt
dash of pepper
lemon juice or cider vinegar
drizzle of oil (optional)

SUPPLIES

wavy crinkle cutter


DIRECTIONS

Cube watermelon and cut jicama into small strips or cubes using  wavy crinkle cutter. Clean and rinse scallions and mint.  Sprinkle kosher salt and pepper over ingredients. Drizzle with lemon  juice or cider vinegar.  Lightly drizzle with oil.

Enjoy!

KOSHER NOTES

Kosher laws disallow the eating of  any whole insects and therefore most greens require a process of soaking, rinsing and in some cases, pureeing.  Kashrut authorities differ on the proper checking of herbs and some disallow the use of fresh herbs altogether.  This blog was not designed to be your  kosher authority, so please consult your local rabbinic authority regarding using and preparing herbs such as mint.

Firecracker Cauliflower

firecracker cauliflower.jpg

Every once in a while, I want to serve something that surprises everyone.  Cauliflower is one of those side dishes that everyone enjoys and is simply good for you.  When roasted, it has both delicious flavor and texture (see Rockstar Roasted Cauliflower).

This week, I decided to wake everyone’s taste buds up by adding some heat to my typical roasted cauliflower.  This recipe was inspired by Simply Spicy Firecracker Salmon.

INGREDIENTS

1-2 heads cauliflower, separated into florets and cleaned (see kosher notes)
Oil

Kosher Salt
Simple and Perfect Spicy Mayo
Lime juice (optional)

DIRECTIONS

Line baking sheets with parchment paper or greased foil.

Spread cauliflower in a single layer on baking sheet(s).  Sprinkle with kosher salt and lightly drizzle with spicy mayo.  Drizzle lightly with lime juice for a fresh flavor.

Roast at 425 degrees F for 40-50 minutes, checking that cauliflower is sot on inside and just turning brown on outside before removing from oven.

KOSHER NOTES

Kosher laws disallow the eating of any whole insects and therefore cauliflower require a process of soaking, rinsing and in some cases, pureeing. Kashrut authorities differ on the proper checking of cauliflower and some disallow its use altogether. This blog was not designed to be your kosher authority, so please consult your local rabbinic authority regarding using and preparing cauliflower.

Simple and Colorful Rainbow Carrot Salad

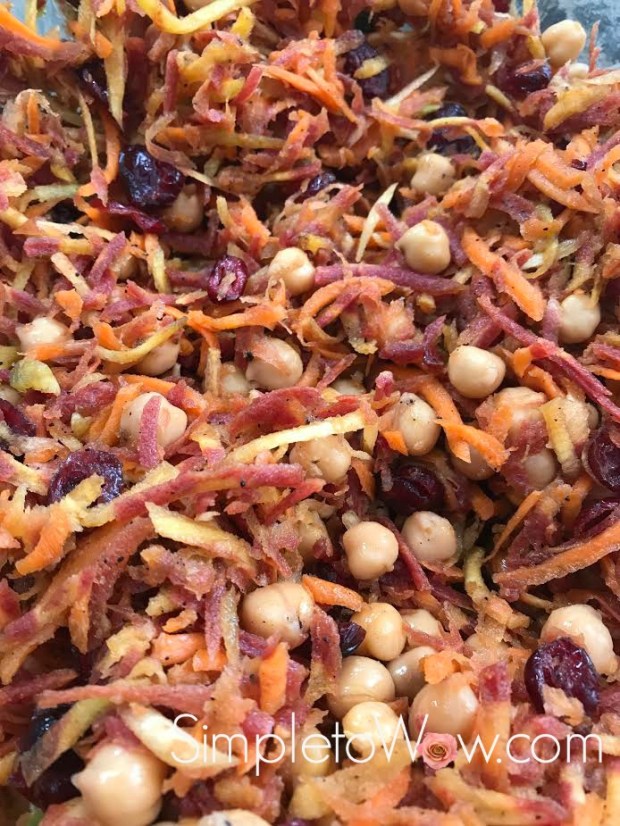
rainbow carrot saladI love using interesting and varied fresh ingredients in my recipes.  It used to be harder to find heirloom produce varieties, and I would have to scour farmer’s markets and specialty shoppes to find specialty produce.  In the past few years, our local supermarkets and stores like Trader Joe’s have begun stocking heirloom and specialty varieties of our favorite produce.

Many unusual color vegetable varieties lose their vivid color when heated, so I prefer to use these in salads and in fresh  preparations (Rainbow Carrot Curls: A Wow Garnish). Vegetables like heirloom tomatoes, red basil and rainbow carrots really add a beautiful and colorful wow factor to ordinary recipes.

This salad is hearty, satisfying and simple to prepare.   It can be made with orange carrots instead of rainbow carrots and will be equally tasty with just a few less colors of the rainbow to admire.  It boasts Garbanzo beans (chick peas) for a protein boost and almonds and scallions for color and texture.

This salad is best made several hours ahead and refrigerated until ready to serve.  I prefer to shred the carrots myself since unpeeled whole carrots stay fresher than ready-to-use shredded carrots.

INGREDIENTS

2 pounds of peeled rainbow carrots, or any color carrots, shredded
1/4 cup sliced or slivered almonds
1 can garbanzo beans (chick peas), drained well
1/4 cup dried cranberries
1 bunch of scallions, sliced thin

salt
pepper
squirt of mustard
drizzle of honey or agave syrup

DIRECTIONS

Shred carrots using the shredding blade of the food processor or using a hand grater or mandoline.  Add well-drained garbanzo beans, almonds, dried ranberries and scallions.  Sprinkle with salt and pepper and drizzle with mustard and honey.  Toss well and enjoy.

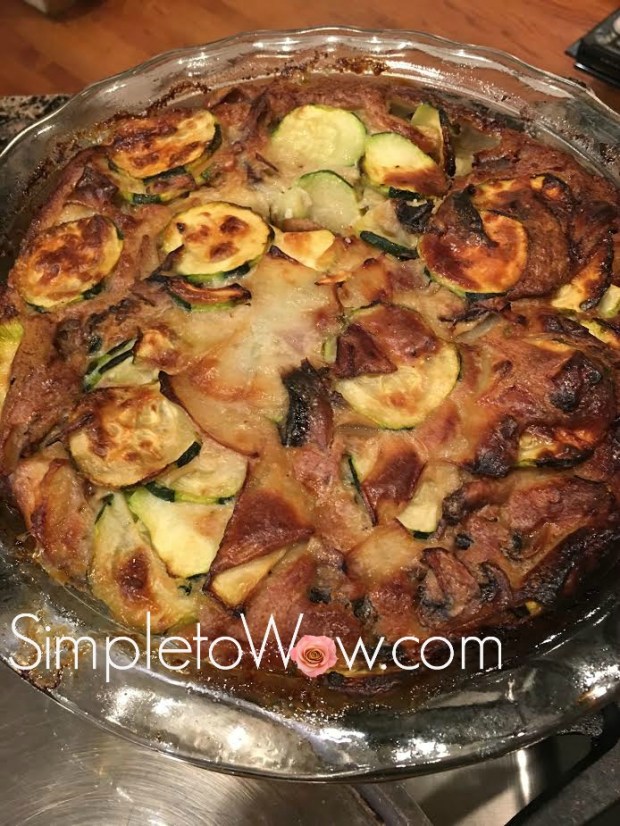
Zucchini Mushroom Kugel

zucchini mushroom kugel

Jewish cooking favors the preparation of kugels (casseroles), probably because of their versatility.  Since cooking is prohibited on Shabbos (Sabbath) and is limited on the Jewish holidays, the kugel has become a go-to solution.  It allows for make-ahead preparation and can be served hot or at room temperature.

Although I favor keeping my vegetables raw and simply prepared, this kugel has become one of my favorites.  It highlights a simple list of fresh ingredients and this kugel  is perfect for freezing in advance of a busy Yom Tov (holiday, lit: good day) like Pesach (Passover).  Although zucchini squash has a high water content and usually needs to be squeezed out, the sliced zucchini in this recipe needs no squeezing.  The moisture of the zucchini slices creates a satisfying textural compliment to the other ingredients and make for a soft and juicy kugel.

INGREDIENTS

1 large onion or 2 shallots, diced
2-3 garlic cloves, minced or garlic powder
3 large zucchini, thinly sliced
1 package mushrooms, sliced

1/2 cup potato starch
3 eggs
1/4 cup oil

1 teaspoon salt
dash pepper

DIRECTIONS

Grease a pie dish or line a baking dish with parchment paper.

Saute onions, garlic and mushrooms until soft and starting to brown.

Whisk eggs and combine with oil, seasonings, sauteed onion, garlic and mushrooms. Sprinkle zucchnii slices with potato starch.  Fold egg mixture into zucchini slices until just combined.

Fill baking dish with mixture and bake uncovered at  400 degrees F for 45 minutes to one hour.  Kugel should be golden brown and set when ready.


VARIATIONS

Flour and a tad of baking powder may be substituted for the potato starch for non-Passover cooking.

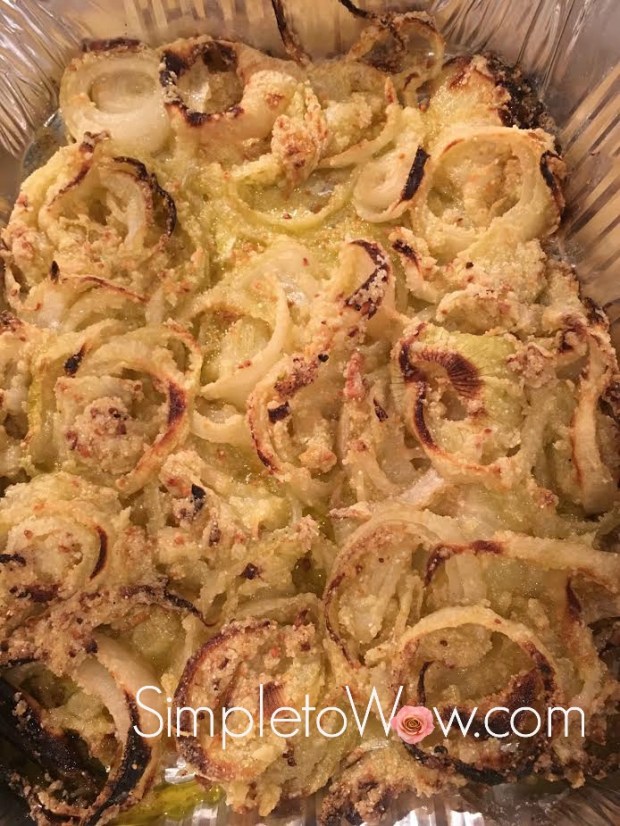
DIY Passover French Baked Onions

french fried onions for pesach

So many of my simple and moist recipes rely on french fried onions.  They add moisture and pizazz to even the simplest and leanest of fish, meats and poultry.  Recipes such as Onion-Battered Baked TilapiaSimple Onion Baked Chicken Cutlets and Low and Slow Oven Brisket require this as a key ingredient.

Year-round, this is a readily available ingredient with so many kosher brands to choose from.  For some reason the smaller packages of French’s do not carry an o-u kosher certification while the 26.5 ounce package of Family size french fried onions is available on Amazon with a reliable o-u certification.

Since these products have flour listed on the ingredient list, I understood that they would not acceptable for Passover use.    However, I was hoping to find a similar product this year that would be kosher for Passover.   Alas, I was unsuccessful.

That meant that I needed to develop a recipe for french fried onions similar enough to the store-bought ones.  I also wanted a recipe that would not require frying.  There is just too much to be done before Pesach (Passover) for me to be frying onions in small batches.

This recipe is good.  It is not as dry and crunchy as the original.  But, it does serve as a good replacement for these recipes.  And, it is simple.

I would love to hear your comments, especially if you found this recipe to be simple to wow.

INGREDIENTS

4 large yellow onions, thinly sliced
1/2 cup olive oil
1/2 cup potato starch
1/2 cup Passover crumbs
1 teaspoon salt
1/2 teaspoon garlic powder
1/2 teaspoon onion powder
1/2 teaspoon paprika
1/4 teaspoon pepper
olive oil or cooking spray

DIRECTIONS

Preheat oven to 450 degrees F.
Line a baking sheet with parchment paper or greased aluminum foil.

Separate thinly sliced onion rings into individual rings. In a large bowl, add the rest of the ingredients and toss to coat the onion rings.

Place the onion rings ton the baking sheet and drizzle olive oil or generously spray with cooking spray.

Bake for 25-35 minutes, frequently checking that the onions do not burn.  When ready, these onions should be just starting to turn golden brown.

Allow onions to come to room temperature before using.

Roasted Sweet Potato and Beet Salad

For our annual Purim seuda (festive meal),  I decided to prepare a new salad.

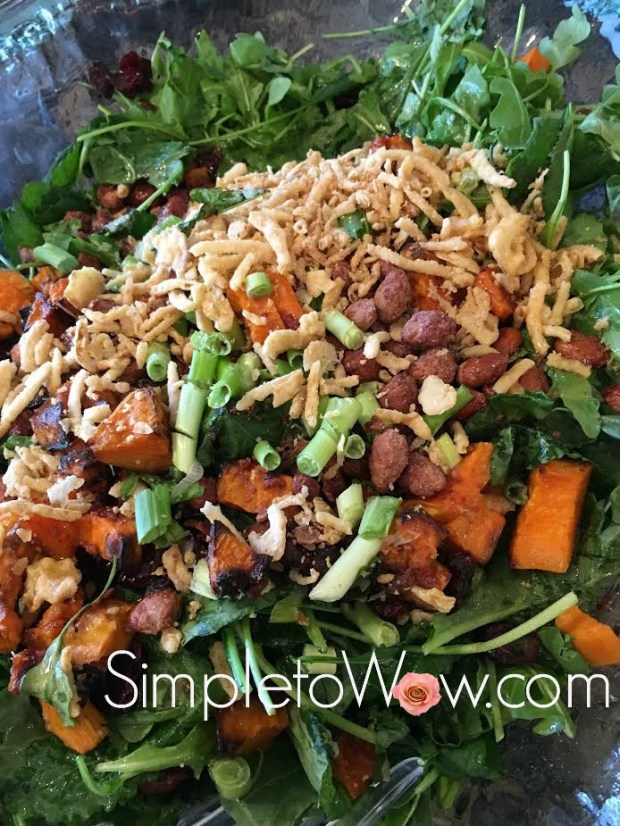
This salad took inspiration from a delicious battata (sweet potato) salad that I enjoyed at Cafe Greg in Rosh Pina in the Upper Galilee of Israel.  It combined the delicious colors, flavors and textures of roasted sweet potatoes, candied almonds and shredded fresh beets. All these were served atop a bed of arugula and baby kale and then tossed right before serving.

I prepared this salad as my feature salad, reserving my biggest salad bowl for this new recipe.

The only thing that took extra time was roasting the sweet potato cubes in advance.  It was well worth the effort.

It must have been delicious because it was the only item that I prepared for the seuda that was finished within the first hour.

INGREDIENTS

3 cups checked salad greens (see kosher notes)
2 cups roasted cubed sweet potatoes
2 cups shredded fresh beets
1/2 cup nuts
thinly sliced scallions
french fried onions (optional)

4 tablespoons olive oil
4 tablespoons cider vinegar or lemon juice
1 teaspoon Dijon mustard
1 teaspoon honey

DIRECTIONS

Preheat oven to 425 degrees F.  Line baking sheet with parchment paper or greased foil.

Peel sweet potato and cut into small cubes.  Place sweet potato cubes in a single layer on baking sheet. Drizzle with olive oil or spray with cooking spray and lightly sprinkle with kosher salt.

Roast for 35-55 minutes checking that sweet potato cubes are crisp on outside and soft on inside before removing from oven.  Cubes may be prepared in advance.  They may either be added to the salad warm or at room temperature.

Peel beets.  Using the shredder disk on the food processor, shred beets.

Combine, process or shake all dressing ingredients together.

Layer greens and shredded beets. Lightly drizzle dressing over the salad. Top with nuts, scallions and french fried onions.  Toss right before serving.


KOSHER NOTES

Kosher laws disallow the eating of  any whole insects and therefore most greens require a process of soaking, rinsing and in some cases, pureeing.  I have found that flat-leafed greens like baby spinach and flat-leaf  kale are much easier to check for insects than their curly-leaf counterparts.  Kashrut authorities differ on the proper checking of leafy vegetables and some disallow the use of spinach and kale altogether.  This blog was not designed to be your  kosher authority, so please consult your local rabbinic authority regarding using and preparing greens such as spinach and kale.


VARIATIONS

Cubed butternut squash or fresh pumpkin may be substituted for the sweet potatoes.


TIPS

When I prepare greens in advance, I place a few absorbent paper towels at the bottom of the bag or dish.  I then layer the greens over the paper towels.  These paper towels will absorb any extra moisture in the greens and will keep the green fresh. roasted sweet potato salad