When Kaitlyn’s friends started to get married, we realized that there were no places in our community to rent or borrow wedding shtick (items of whimsy to adorn the wedding dancing).
That left only one choice.
We quickly needed to figure out how to make our own.
And we did. The most popular item that we designed were our wedding arches.
After the traditional Jewish wedding chupah (Jewish canopy) ceremony, the Jewish bride and groom have a few moments alone called Yichud (seclusion) in order to enjoy each other’s company before entering the reception room.
As the bride and groom prepare to enter the reception room after Yichud, there is palpable excitement in the air. The band gets ready to perform a musical intro and the guests are on their feet waiting to dance the new couple into their lives together.
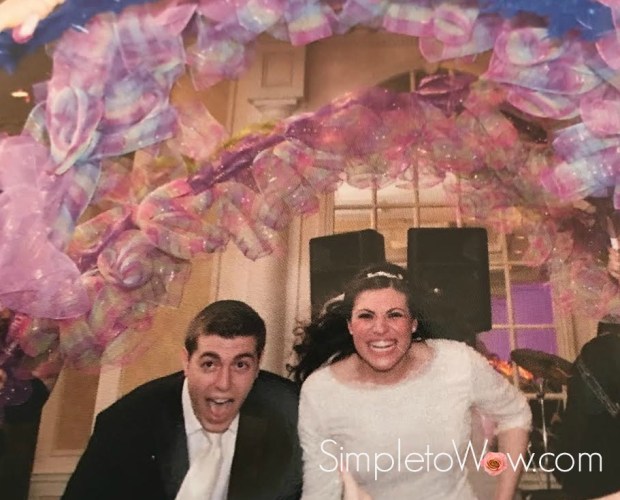
In the last few years, so many Jewish couples enter the reception by dancing under beautiful arches held by their friends and family. There is nothing in halacha (Jewish law) or minhag (Jewish custom) that explains the significance of these arches.
So, we are truly left to our imagination.
Perhaps, the arches mimic the idea of the chupah, a shelter representing their new home and they represent the doorway from the new couple’s status as individuals into a life of togetherness. Perhaps, these arches connect earth and heaven. Maybe, they incorporate the idea that the new couple is rooted in the friends and family that hold the arches.
Nonetheless, these arches carry the excitement and whimsy of an exciting new chapter just opened by this new Jewish couple.
And, that is what has guided the design of our wedding shtick.
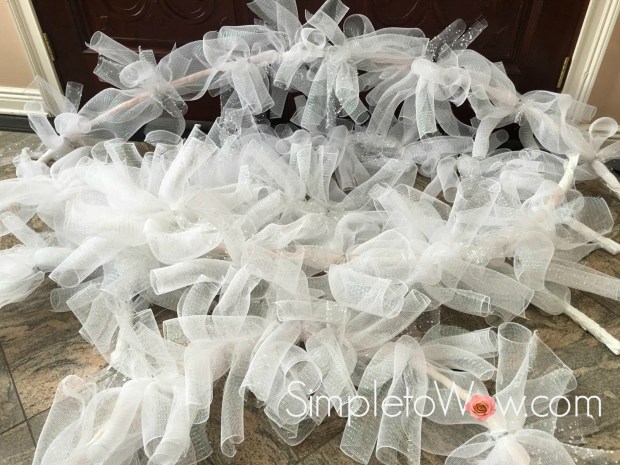
These arches can be designed in so many different ways. We have feathered and flower arches, but our most popular arches are our fluffy, curly and whimsical mesh arches.
We offer all of our wedding shtick with a donation to Camp HASC (Hebrew Academy for Special Children) in memory of Stephanie Cohen a’h. Stephanie was a very special friend of our daughter, Leah, and our family. Her dear parents, Lisa and Stuart, are like part of our own family. The joyfulness and whimsy of these arches were designed with Stephanie’s delightful character and joyful nature in mind.

Stephanie lived a life of joy and lit up the lives of all those who knew her. Although she was physically and cognitively challenged, she used every fiber of her body to bring happiness and whimsy to others. She taught everyone around her about being positive and happy in one’s life and she brought a smile to all who interacted with her. The original set of colorful mesh arches were designed using Stephanie’s favorite vibrant colors in order to raise money for the place that she loved most, Camp HASC.
Stephanie’s colorful arches have been and continued to be borrowed over and over and have raised a great deal of money for Camp HASC.
This week, I designed a new set of white and wow wedding arches to complement the colorful mesh arches that were designed several years ago. This time I documented the supplies and directions necessary to create their design.
Here we go!
SUPPLIES
hula hoop
heavy-duty scissors
scotch or cloth tape (optional)
duct tape or White Gorilla duct tape
21″ wide deco mesh (For each arch, I needed one 10-yard roll of deco mesh plus extra embellished mesh for accents)
pipe cleaners to match mesh or floral wire
white gloves (optional)
INSTRUCTIONS
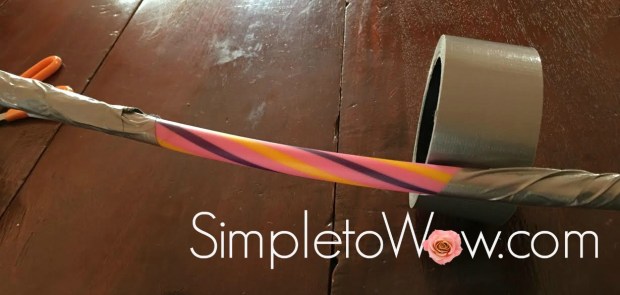
Carefully cut a hula hoop using strong scissors. Some hula hoops have beads inside to create hula hoop sound effects. If you would like to add those sound effects to a plain hula hoop, add a few beads to the inside of the cut hula hoop.
Cover the ends of the hula hoop with duct or cloth tape to prevent the beads inside from falling out. Use duct tape to coat the hula hoop from one end to the other. I find that the easiest way is to leave a 2-3 inch section of tape exposed on the roll and wrap the duct tape roll around and around the cut hula hoop.
Prepare pipe cleaners or cut wire into 12-16 inch sections.
Line up mesh near one end of the hoop. Begin securing the mesh to the hula hoop by using a pipe cleaner or mesh to secure the mesh to the hula hoop about 6 inches from the end of the hula hoop.
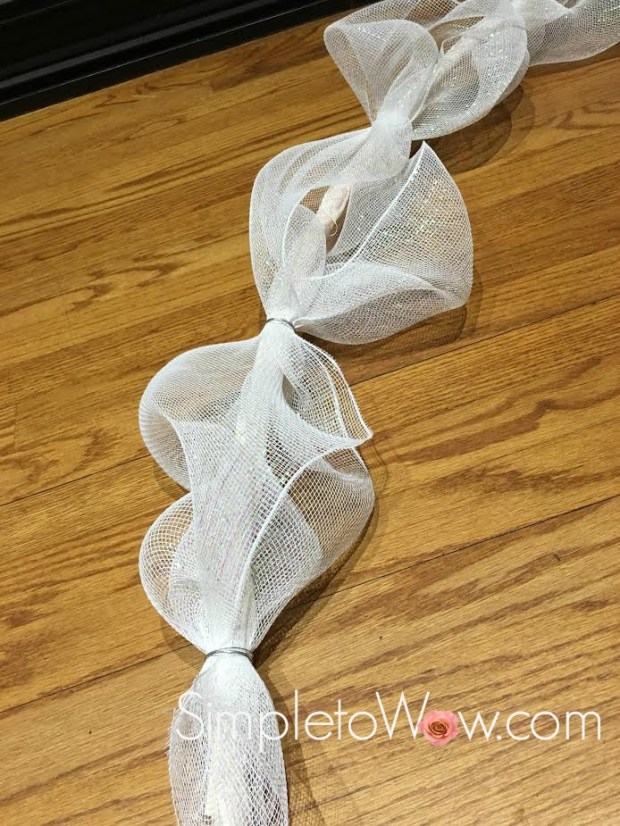
Making sure that the mesh covers both sides of the hula hoop, wrap the mesh around the hula hoop, twisting slightly to form a swelling effect. Secure mesh again to the hula hoop in about 12-15 inches.
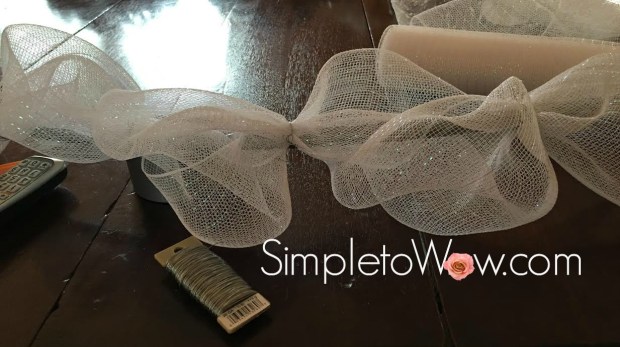
Continue to wrap the mesh around the hoop, securing it with the pipe cleaner or cut wire at equal intervals, making sure that the last interval before the end of the hula hoop is secured about 6 inches from the other end.
Cut the mesh close to the end of the hula hoop, leaving the same amount of space for a handle at both ends.
Using the deco mesh, cut 8-12 inch sections of mesh. The longer the sections, the more perfect your rolls will look. The shorter the sections, the more rolls you will have.
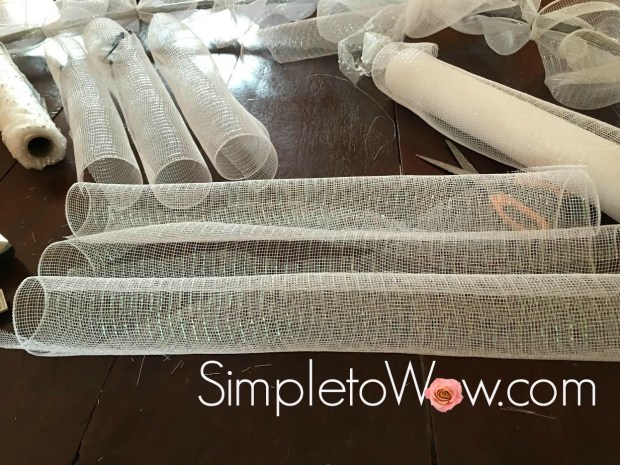

Prepare pipe cleaners or cut wire into 18-30 inch sections.
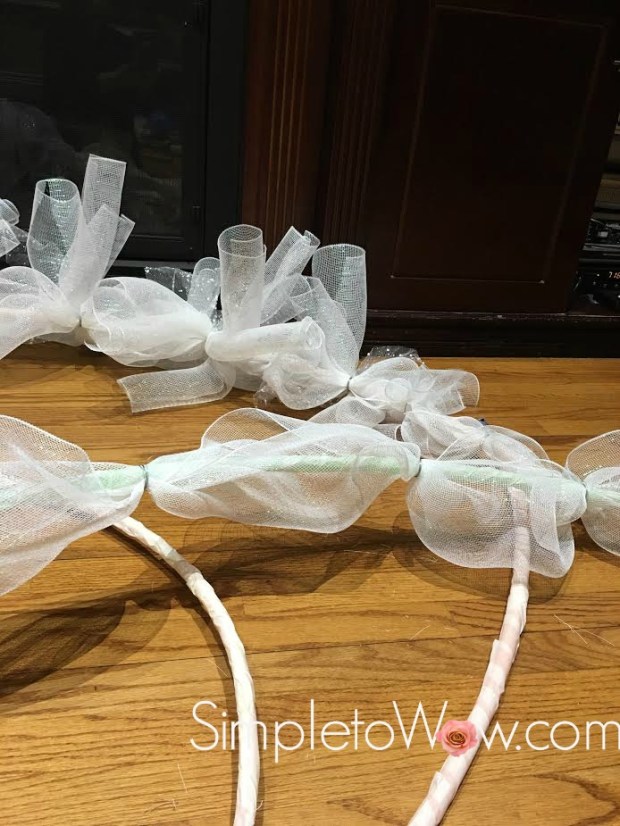
Take 3-4 deco mesh rolls and twist a pipe cleaner or wire section around the middle, forming a whimsical curly flower, making sure to twist the middle tightly, but to leave plenty of wire at the ends so that the curly flower can be securely fastened to the arch. Here is where you can be creative and incorporate different colors, textures, ribbons or media. For these arches, I used three white sparkly mesh rolls and one 4″ section of bubbly mesh for each curly flower.

Continue to cut deco mesh rolls and create at least as many curly flowers as you have secured intervals on your hula hoop arch. Each one of these flowers will cover the wire that you used to secure the mesh to the hula hoop.

I like to prepare a few extra curly flowers to fill in the middle of the arch, which will add whimsy and height to the final arch. I also sometimes prepare a few smaller curly flowers, made with only 2-3 curls to fill in areas where the arch needs some more volume.

Using the ends of the wire or pipe cleaner, secure each flower to the arch covering the exposed pipe cleaner or wire that you created when you secured the mesh to the hula hoop, making sure to twist tightly and secure all wire ends. Examine your arch carefully and critically, adjusting curly flowers to cover both sides of the hula hoop and making sire that the arc looks full. Add curly flowers to areas on your arch that look unadorned. To achieve a full look, each of these arches took 9-12 curly mesh flowers.

If necessary, cut the end of the deco mesh so that at least 2-3 inches at each end of the hula hoop can be handled. Use heavy duty duct tape, secure the ends of the deco mesh to the handle. Wrap the duct tape around and around so that the handle is neat, comfortable and secure.
To give the arches a more finished look, wrap matching pipe cleaners around all exposed wire securing the curly flowers to the mesh hula hoop.
If you would like to make a donation to Camp HASC or would like information on borrowing these arches for an upcoming wedding, please comment below or email me at simpletowow@gmail.com.
Please Note: This post contains affiliate links from Amazon, which means I earn a small commission if you click and make a purchase.