Fish

Peach Velvet Salmon

peach velvet salmon

I’ll share a little secret with you.

Last week’s leftover homemade dip or dressing becomes this week’s favorite marinade.  The reason is simple.  Dips have all the components needed in a marinade.  They have an oil base for moisture,  a flavor profile for taste and usually some acid for tenderizing.

I also like to use whatever seasonal items are on hand.  This week, peaches are plentiful and flavorful at the market and my planters are bursting with fresh chives.  These early summer flavors inspired this dish and my hungry family and friends approved it for publishing on the blog.

I used leftover Simple and Creamy Lemon Vinaigrette to coat the salmon fillets, but any dip, sauce or dressing will work.  I pressed freshly ripened peach slices and torn chives on top.

The salmon is simple and delicious with a taste of summer.  Enjoy!

INGREDIENTS

salmon fillets
Simple and Creamy Lemon Vinaigrette
1 ripe peach, scrubbed and sliced thin
Chives, torn for garnish

DIRECTIONS

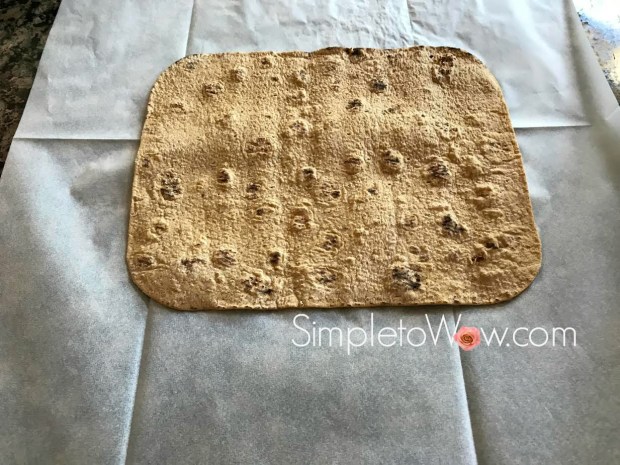
Line cooking sheet with parchment paper or foil.

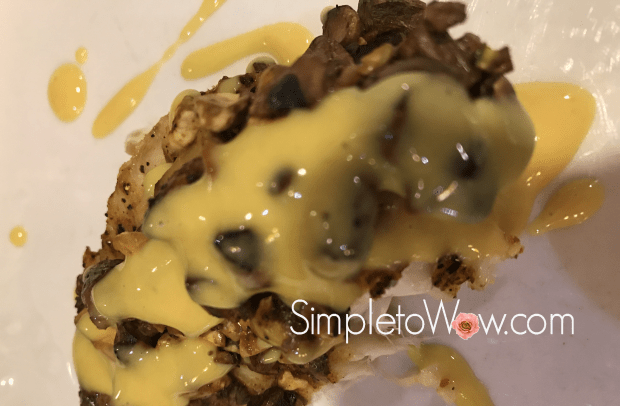
Brush salmon fillets generously with Simple and Creamy Lemon Vinaigrette or your favorite dressing or dip.   Press thin peaches slices and a few torn chives into salmon.

Bake at 350 degrees F for 45-55 minutes, until fish flakes easily with fork. Sprinkle some more fresh chives over salmon.

Onion-Smothered Salmon

salmon smothered with onions 2

I use salmon in a host of recipes.  I prepare it as a main dish for an easy weeknight dinner.  I prepare it or use in Shabbos appetizers like Individual Sushi Salads and others.  Salmon is versatile and popular.  Its distinctive taste makes it one of our family favorites.

Since I use salmon in so many different ways, I am always on the hunt for new preparations.   This past Shabbos, I made a Tex-Mex Shabbos appetizer.  The star of this appetizer was the onion-smothered salmon.   It was so delicious and yet, so simple.

While I normally roast salmon at a higher temperature, baking the fish at 350 degrees F yields a dish that is so delicious and so moist.   I normally saute a large batch of onions in advance of my marathon Shabbos or Yom Tov cooking.    I sometimes even freeze the leftover onions.  This dish is the perfect one to use these batch onions.


INGREDIENTS

salmon fillet
soy sauce
onions
oil
DIRECTIONS

Saute onions in oil or butter, just until soft and starting to brown.  Line a baking sheet with parchment paper or foil.  Lay salmon fillet on the lined sheet and brush with soy sauce.  Smother with sauteed onions.

Bake at 350 degrees F for 30-50 minutes, depending on size of the salmon fillet.  Salmon should be cooked through, thickly flaking and moist when ready.

salmon smothered with onions


Simple No-Cook Salmon Appetizer

no-cook salmon appetizers

There are times that a simple no-cook appetizer is the way to go.

Like, when there are six Yom Tov (holiday) meals in a row and you’re looking for a new creative way to serve an appetizer with minimal effort.  The upcoming Shavuos holiday comes on the heels of a Shabbos, calling for six consecutive festive meals.  And, because it is fish, this appetizer can be served pareve (non-dairy) or with crème fraîche on the side with a dairy meal.

It is simple.  It is beautiful.  That simple and beautiful combination is a wow!

SUPPLIES

wide vegetable peeler

no-cook salmon appetizers-ingredients.jpg

INGREDIENTS

Long Seedless cucumber
lox or smoked salmon, sliced thin

celery leaves (optional)
salmon caviar (optional)


DIRECTIONS

Using a wide vegetable peeler, carefully peel long, thin slices of seedless cucumber.

Spread each slice of cucumber flat and top with lox slice(s), lining up bottom edges of cucumber and lox.

no-cook salmon appetizers-ready to roll.jpg


Starting at end that has both cucumber and lox, carefully roll up to form a rose.

no-cook salmon appetizers-in progress


Stand up and unfurl lox petals for a delicate rose-like formation.

Optionally, garnish with celery leaves and salmon caviar.

Voila!

no-cook salmon appetizers.jpg

Please Note: This post contains affiliate links from Amazon, which means I earn a small commission if you click and make a purchase.

Pistachio Encrusted Cajun Tilapia

pistachio-encrusted tilapia-ready to cook

My two sisters-in-law, Yael and Chaya, share the same birthday.  Interestingly, it was the same birthday shared by my father-in-law a’H, too.  Last year, we went out for a woman’s-only dinner in celebration of the birthdays.   We enjoyed our time together so much that this year, in the ice and snow,  we once again trekked to a dairy restaurant in Brooklyn to celebrate the two birthdays.

My sisters-in-law ordered menu items that they knew and trusted: salmon, salad and Eggplant Parmesan.  Always looking for something new, I was entranced by the pistachio-encrusted salmon on the menu and was not disappointed when it was presented and devoured by me and my sisters-in-law.

So, I started thinking… Salmon is so flavorful and distinctive on its own.   Why don’t I try this encrusting technique on a blander fish like tilapia?  Tilapia is one of  those inexpensive fish ingredients that is always available at my local fish counter.  Its meaty flesh and mild taste make it suitable for kick-start cajun seasoning and nutty pistachio encrusting.

And so, for dinner the night after the birthday celebration, I prepared this dish.  And, both Don and Leah confirmed that it was blog-worthy.  Here it is!

INGREDIENTS
4 large tilapia filets
2 tablespoons Cajun seasoning
1 egg
1/2 cup chopped pistachios

oil or cooking spray

HONEY DIJON SAUCE (optional)
1/3 cup Dijon mustard
1 tablespoon wine vinegar
2 tablespoons oil
2 tablespoons honey

OPTIONAL SUPPLIES
food processor
pyrex pie plate

DIRECTIONS
Preheat oven to 400 degrees F.

Place cajun seasoning on a plate or pyrex pie plate.  Blend egg with fork in a separate plate or pyrex pie plate.   Place chopped pistachios on a third plate or pyrex pie plate.

pistachio-encrusted tilapia-prep plates

Lightly coat both sides of tilapia with Cajun seasoning and then dip into egg, coating both sides. Finally, coat each tilapia fillet with chopped pistachios.

Cover a baking sheet with foil or parchment paper.  If using foil, drizzle with a bit of oil or spray with cooking spray.  Place the encrusted tilapia fillets in a single layer, making sure not to crowd the dish.

pistachio-encrusted tilapia-ready to cook

Bake for 15-20 minutes or until the tilapia easily flakes with a fork.

In a food processor or with a whisk in a bowl, combine honey Dijon ingredients until smooth and creamy.

honey dijon sauce.jpg

Drizzle over fish before serving.

pistachio-encrusted tilapia-serving suggestion.jpg

Enjoy!

Please Note: This post contains affiliate links from Amazon, which means I earn a small commission if you click and make a purchase.

Red Velvet Salmon


cranberry salmon

I decided to name this salmon recipe red velvet for the color and texture of the cranberry glaze.   There really is something velvety about  this simple salmon recipe that takes cranberry sauce to a whole new level.

Cranberries are a fall and winter specialty item and I still have so many bags of cranberries in my freezer from Thanksgiving.  Every time I open my freezer, I think of cranberry and the many delicious ways to use this tart and distinctive berry.

So, when I was planning a new salmon dish, I thought to use cranberries as the centerpiece.   This recipe can be made with homemade cranberry sauce and that way you can adjust the sweetness of the glaze.  But, to keep things simple, I prepared with salmon recipe with store-bought cranberry sauce.  I used the jellied variety, but the whole berry variety will work just as well.

Enjoy!

INGREDIENTS

salmon fillet

glaze
3-4 tablespoons Worcestershire sauce
1 cup canned cranberry sauce
2 tablespoons fresh lemon or lime juice
1 tablespoon garlic powder
1 teaspoon ginger powder

garnishes (optional)
1/2 cup fresh cranberries
Celery Curls

DIRECTIONS
Preheat the oven to 375 degrees F.

In a small bowl whisk together the glaze ingredients, smoothing out the lumps in the cranberry sauce as much as possible.

Place the salmon on a baking sheet coated with foil or parchment.  Pat the marinade into the salmon.

Bake for 30-40 minutes.

Garnish with fresh cranberries and celery curls before serving.

Enjoy!

Pacman Gefilte Fish

pacman gefilte fish 1

Sometimes the wow is all in the presentation.  The presentation takes a simple menu item to a whole new level.   Just cutting something a different way or finding a unique manner to plate it creates a real wow.

Gefilte fish is a Jewish Shabbos and Yom Tov (holiday) staple.  It is like a meatloaf, except with ground fish.  And, traditionally, it is cut into slices and served with horseradish and beets.  This is a simple and unique way to serve gefilte fish.

I first saw this way of serving gefilte fish at my friend, Lori’s house many years ago.  I have served gefilte fish so many times this way and it never fails to bring a smile to the lips of my guests.  This Pacman presentation has received lots of mileage, especially with Avigail and Judah, my grandchildren.  They are too young to know what Pacman is, so we just call it “fish” gefilte fish and they look forward to it whenever they visit for Shabbos.

pacman gefilte fish 2

INGREDIENTS

one loaf of gefilte fish and 1-2 carrots, prepared according to directions


DIRECTIONS

Prepare gefilte fish and carrot according to package directions.  I used A&B Cut cooked gefilte fish loaf into slices.  Cut a notch out of the narrow end of each slice and remove it.  Move it to the other end of the slice, creating a fishtail.

Cut carrot into slices.  Place one over the notch cutout to resemble a fish eye.

Voila!


The Perfect Grilled Salmon Wrap

salmon tortilla wraps 2

Salmon is one of the staples in my house.  Just about everyone here (except my mother) really enjoys salmon, so it is often a go-to dinner.  Very often, I prepare a family pack of salmon, only to find that someone has already eaten dinner elsewhere.   I then repurpose the salmon for lunch the next day.

One of my favorite lunches is a grilled salmon wrap.  It is portable, delicious and very satisfying.  It is so simple to prepare once you know the way to roll the perfect wrap.


INGREDIENTS

large pliable tortillas or wraps

arugula (see Kosher notes)

Thinly sliced tomatoes  or other vegetables (optional)

grilled or baked salmon

Spicy Mayo


STEP BY STEP DIRECTIONS

Lay out the wrap on a flat surface.  I chose a rectangular wrap, but this can be made in exactly the same way using a round tortilla or wrap.  Just make sure to use a tortilla or wrap that is soft and pliable, not brittle.

tortilla wrap step 1

Choose your favorite dip or dressing or and spread it all over the wrap.  This gives extra flavor to the salmon and helps the fillings  adhere to the wrap.


Add the arugula by placing in a thin layer right over the sauce, making sure to cover about half of the tortilla.

tortilla wrap step 2

Add any other thinly sliced vegetables.   This will add another texture and/or moisture to your wrap.

Here I added beefsteak tomatoes from my garden.  Tomatoes will add favor and moisture to the wrap.  You can add thinly sliced cucumbers, peppers or jicama to add crunch.  Of course, you may omit this step if you are a purist about your wrap.

tortilla wrap step 3

Next, add the salmon.  If there are any bones, remove and lay in a single strip or flake and place atop the arugula and vegetables.

tortilla wrap step 4

Sprinkle on another thin layer of dressing or dip to keep the salmon flavorful.

tortilla wrap step 5

Next, fold your wrap carefully.

Before we begin, here are two important points:

  1. Make sure that you are using a pliable and soft wrap or tortilla.  Brittle tortillas or wraps will not work well for these wraps.
  2. You will be tempted to overfill your wrap.  Don’t give in to temptation,  It will make your wrap messy and impossible to roll up neatly.

Here are step-by-step instructions:

  1. Fold in the first sidetortilla wrap step 6
  2. Now, fold in the second side  tortilla wraps step 6a
  3. Start rolling wrap from bottom to top, carefully move the stuffing toward the bottom of the wrap as your roll, leaving a least 1 1/2 to 2 inches at the top of the wrap.   Roll the wrap all the way to the top.tortilla wrap step 7tortilla wrap step 8
  4. Wrap the parchment or wax paper around it.
  5. Using a very sharp knife, cut through the wrap on a diagonal.salmon tortilla wraps 2


Voila!


KOSHER NOTES

Kosher laws disallow the eating of any whole insects and therefore most greens require a process of soaking, rinsing and in some cases, pureeing. Kashrut authorities differ somewhat on the proper checking of leafy vegetables. This blog was not designed to be your kosher authority, so please consult your local rabbinic authority regarding using greens such as arugula.

Individual Sushi Salads


individual sushi salad 1

My kids all love sushi.   To them, having sushi as an appetizer Shabbos lunch is a real luxury.  While sushi is a fan favorite, I don’t feel that it has enough nutritional value as it is mostly rice.  Furthermore, sushi rolls do not stay fresh enough from Friday until Shabbos lunch to make for an appetizing appetizer.

So, I have been preparing individual sushi salads as a Shabbos lunch appetizer, instead.

And, sushi salads eliminate most of  the fussiness of rolling sushi.  I can choose the proportions of each element in the sushi salad, favoring more vegetables and fish than rice and nori.  The elements of the sushi salad can all be prepared in advance.   Furthermore, they are all simple ingredients that I can use in different ways for the Friday night Shabbos dinner.  And,  best of all, once assembled on Shabbos morning, the individual sushi salad ingredients stay perfectly fresh, simply delicious and gorgeous until ready to serve.

INGREDIENTS

1 cup sushi rice (I favor brown sushi rice) prepared in rice cooker

1/4 cup rice vinegar

baked or roasted salmon fillet, cubed or shredded

nori, cut into thin strips

1 medium avocado

1-2 zucchini or cucumber, diced or grated

1-2 Carrots, grated (optional)

Simple and Perfect Spicy Mayo


DIRECTIONS

Prepare sushi rice in a rice cooker, using 1 cup of rice to 1 cup of water.   Add 1/4 cup rice vinegar to prepared sushi rice.

Prepare salmon fillet.  Cube or shred.

Cube avocado and place in a solution of 1 cup water with juice of one lemon.

Grate cucumber, zucchini and/or carrots.

Gently roll nori sheets and cut thin strips with scissors.

In a clear glass or plastic bowl, layer cooked rice, salmon, nori, avocado, cucumber and carrot.  Drizzle spicy mayo on top and garnish with thin strips of nori drizzle of spicy mayo.

TIPS

For Shabbos lunch, prepare salmon, rice and grated vegetables before Shabbos.  Store each ingredient separately in a zipper bag.  Prepare Simple and Perfect Spicy Mayo and store in 16-oz wide-mouth squeeze bottles or 24-oz wide mouth squeeze bottles.

Before assembling, mix sushi rice with rice vinegar.  Cut or shred salmon.  Cube avocado and place in a solution of 1 cup water with juice of one lemon.

In a clear glass or plastic bowl, layer cooked rice, salmon, nori, avocado, cucumber and carrot.  Drizzle spicy mayo on top and garnish with thin strips of nori and drizzle of spicy mayo.


VARIATIONS

For Pesach, substitute quinoa for the sushi rice and cider vinegar for the rice vinegar.


PLATING TIPS

Use clear glass or plastic bowl and overlap thin strips of nori on top, creating an x or star for an impressive presentation.


individual sushi salad

Onion-Battered Baked Tilapia

My mother loves tilapia.  She has a difficult time finding kosher fresh tilapia in Cleveland, so it is something that she looks forward to enjoying when she visits.

Whenever she comes to visit, I try to prepare this favorite dish for her, battering it in breadcrumbs and frying it in a pan (Savta’s Favorite Breaded Tilapia).  It is one of those simply delicious main dishes that is flaky, satisfying and never disappoints.

My mother will be coming to visit next week as she prepares for hip revision surgery at the Hospital for Special Surgery during Chanukah.

And, my mother’s visit makes me think of tilapia.

I love dishes that can be prepared and then placed in the oven, preferably on a timer.   This allows me to do other things while the food is being cooked.

Fry-pan breaded tilapia does not meet those qualifications. And, baked fish just doesn’t have the crunchy outside and soft inside of fried fish that would satisfy my mother.  So, I put my thinking cap on.

And, this is what I came up with….simple, satisfying and a delicious wow!

onion-crusted-tilapia-in-oven

INGREDIENTS

1 cup French Fried Onions

1/2 cup creamy dressing.  I used Simple, Creamy and Perfect Homemade Balsamic Vinaigrette

4-6 tilapia fillets

DIRECTIONS

Preheat oven to 425 degrees F.  Line a baking sheet or pie plate with parchment paper.

Pulse french fried onions in the food processor using the S-blade or crush by rolling a rolling pin or pounding a mallet over zipper bag of french fried onions.

In a shallow dish or pie plate, coat each fillet with creamy dressing.   Dip each fillet into the crushed onions, making sure that the fillets are well coated.
Spread coated tilapia fillets on baking sheet and bake for 20-30 minutes.  Tilapia should be golden brown on outside and soft and flaky on the inside.
Enjoy!
onion-crusted-tilapia