Low-carb

Tomato Medley with Arugula Pesto

Don loves arugula.  He will eat a bag of arugula as a snack.

I love tomatoes.

In fact, my mother has told me that “tomato” was my first word.  I pronounced it as “apimanus” and would do anything for a tomato.  I still will.  I just think that the juiciness, sweetness and unique character of a tomato makes a salad complete.

And, nowadays, tomatoes are available in all shapes and colors.  There are yellow pear tomatoes and brown kumato tomatoes.  There are beefsteak and grape tomatoes, cherry and low-acid tomatoes.

And, most are available year-round in your local markets.  Best of all, tomatoes are very simple to check for kashrut (kosher status) as their structure rarely allows for insect infestation.

Recently, a group of our friends joined to prepare an exquisite and delicious Sheva Brochos (seven day wedding after-party) for our newly married children, Yitzchok Aaron and Hindy.   There was gorgeous china and stemware.  The tablecloths were elegant and beautiful.  Every delicious home-cooked dish was impeccably prepared and served.

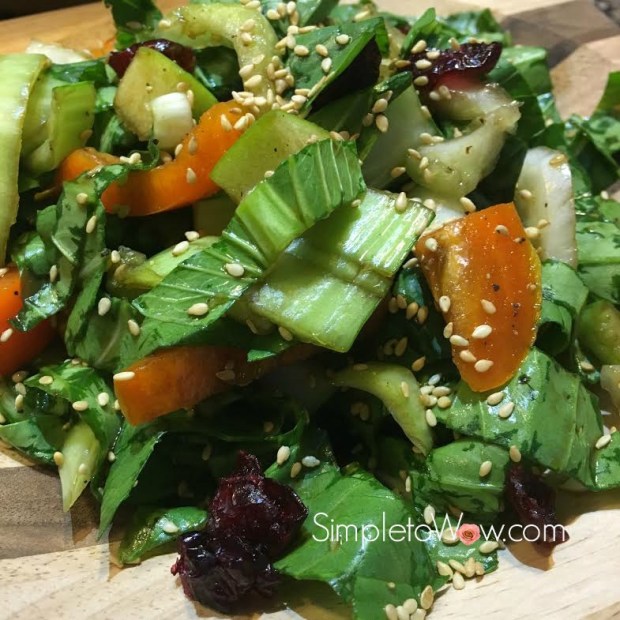
But, for me, the stand-out memory of the evening was the tomato salad.  It was a beefsteak tomato salad served in stout chunks with the most incredible pesto drizzled on top.  It was gorgeous, fresh and simply delicious.

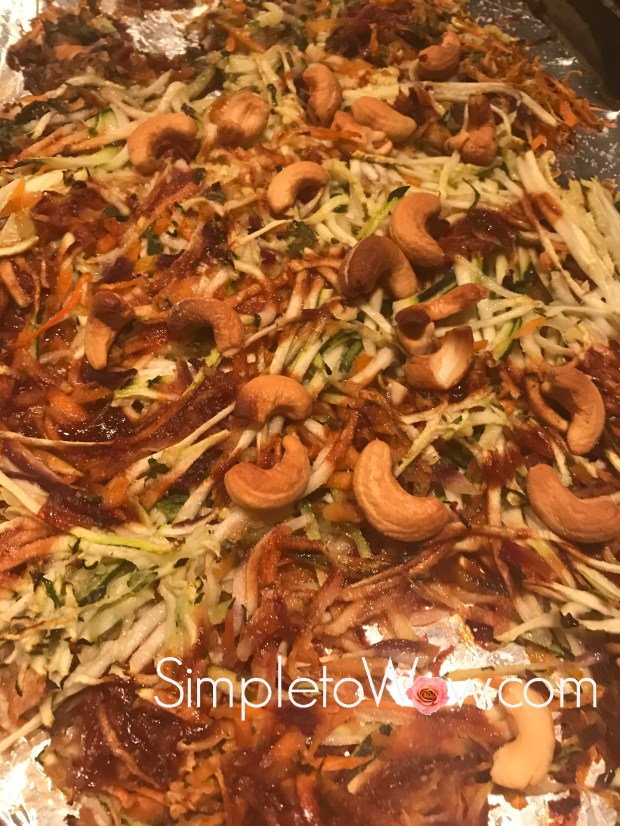
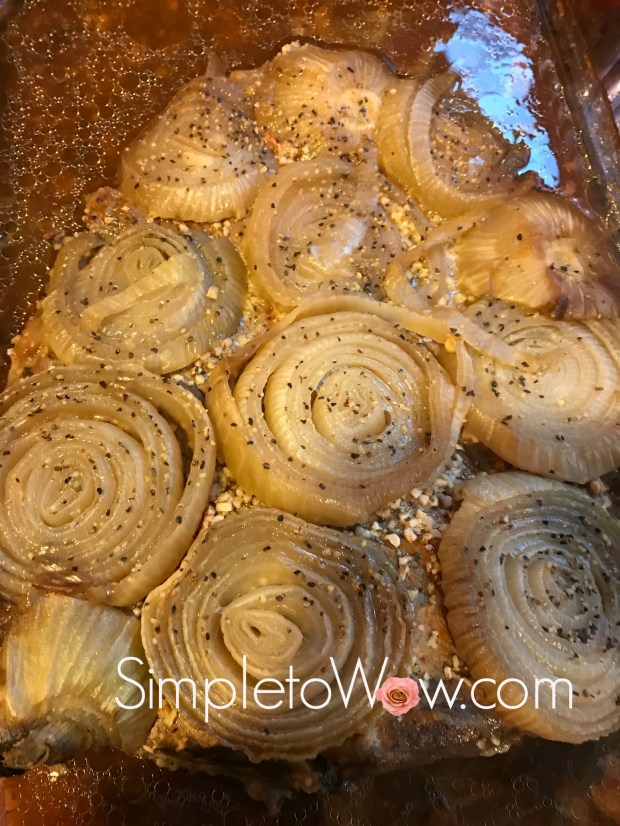
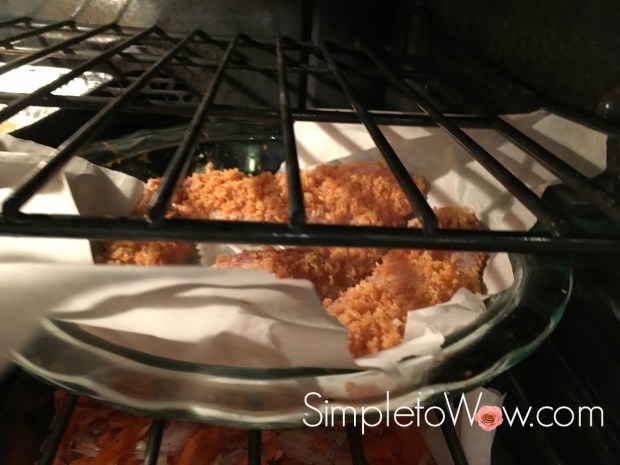
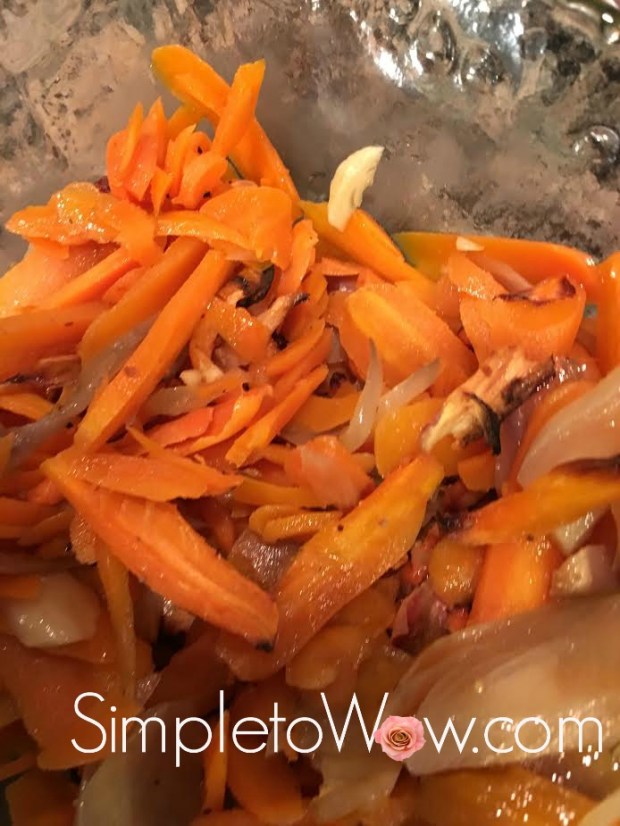
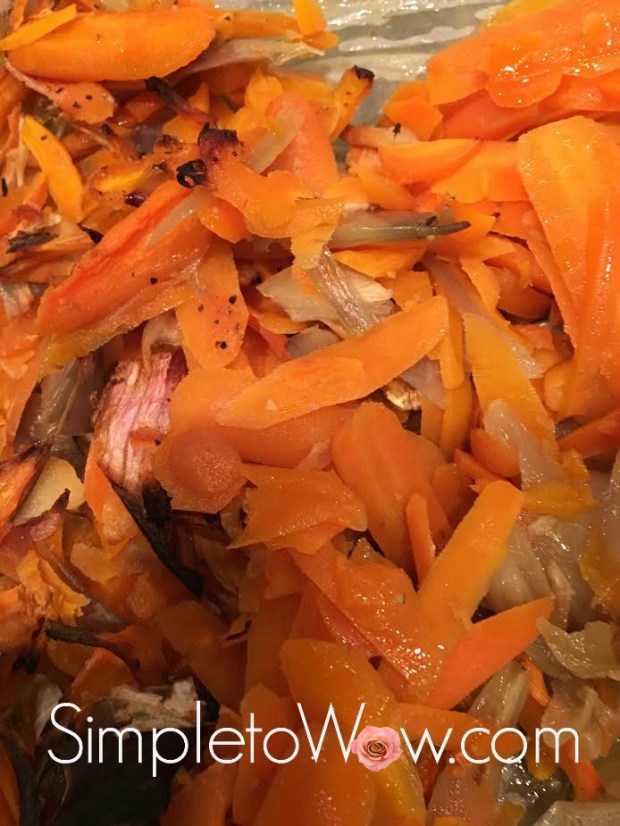
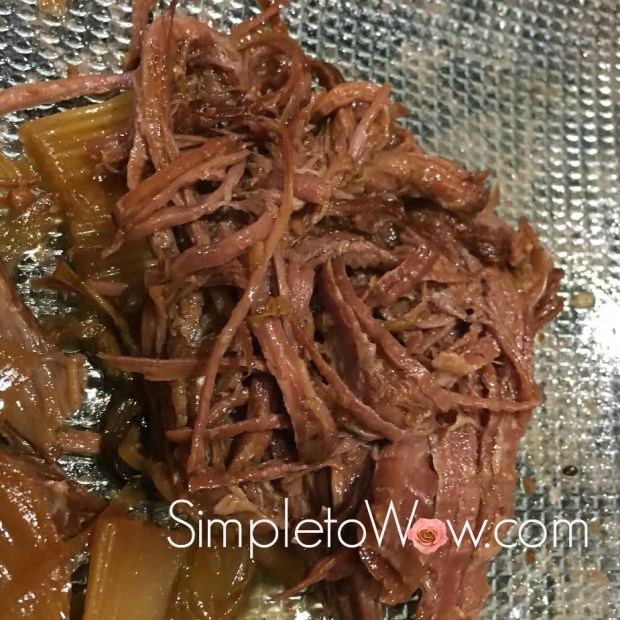
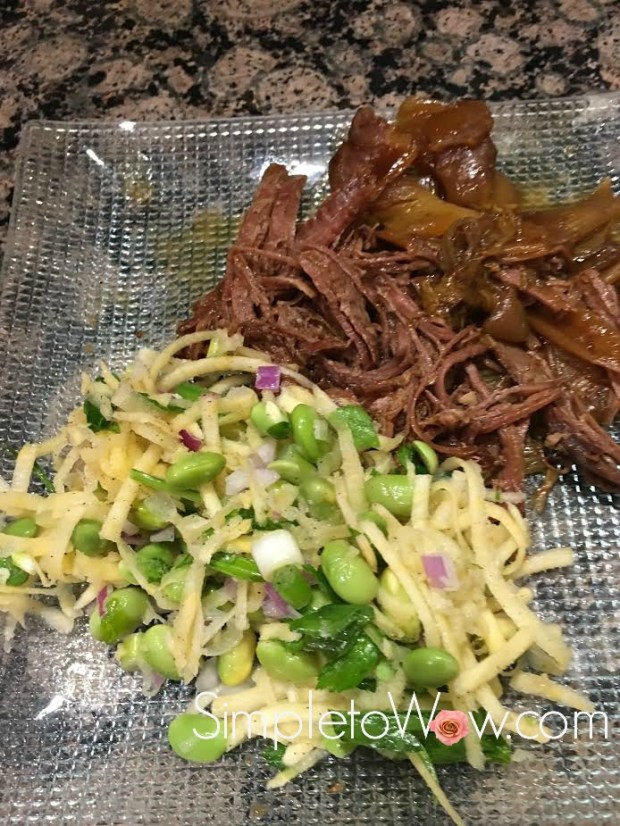
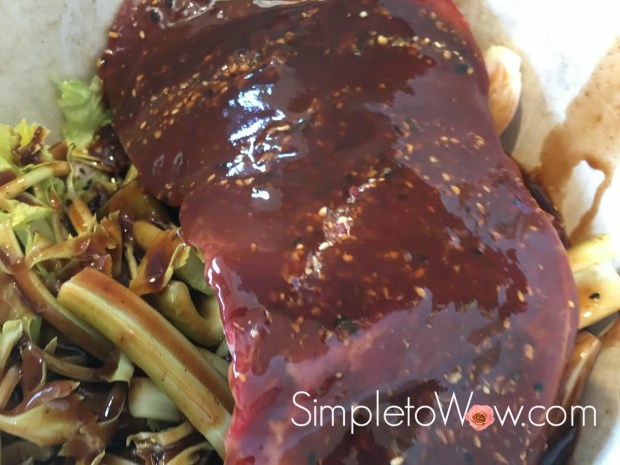
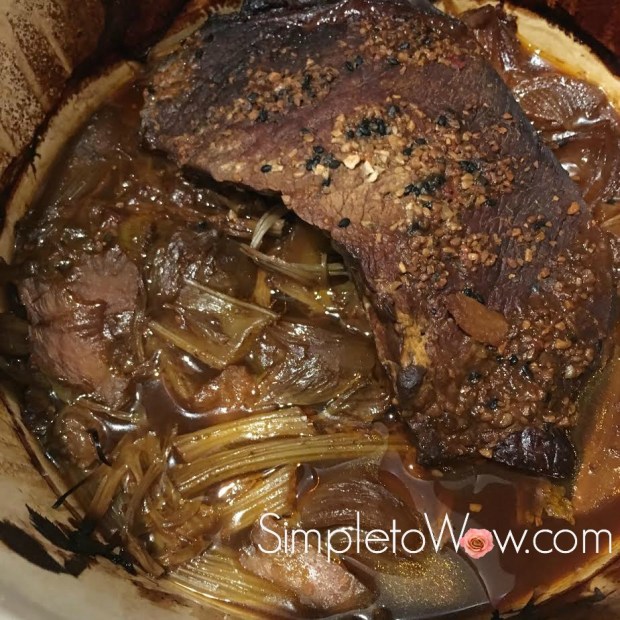
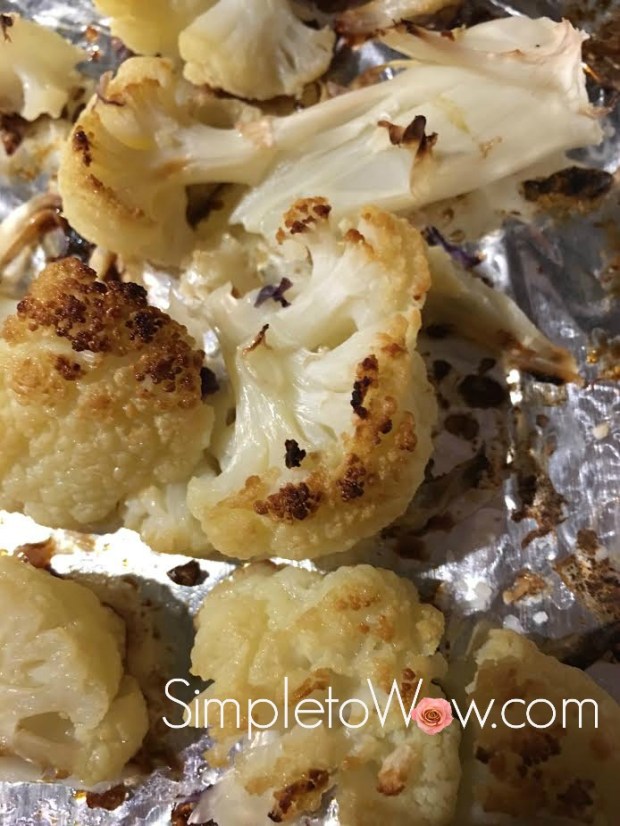
Last night, my aunt and uncle came to visit my parents who are living with us.  They were coming from quite a distance and were due to arrive around dinnertime.  I had been busy all day with my mother and we arrived home later than expected.  Before I left that morning, I had prepared a crockpot lentil soup and set a simple brisket  and Simple Rainbow Roasted Vegetables in my oven on time-bake.

What I had left for the end was the salad.  I knew that I had some pre-checked lettuce and other assorted vegetables in my refrigerator bin.  Thirty minutes before their arrival, I opened the bin to begin preparing the salad.  All my salad ingredients, including the checked lettuce were gone.  All that remained were tomatoes, onions and arugula.

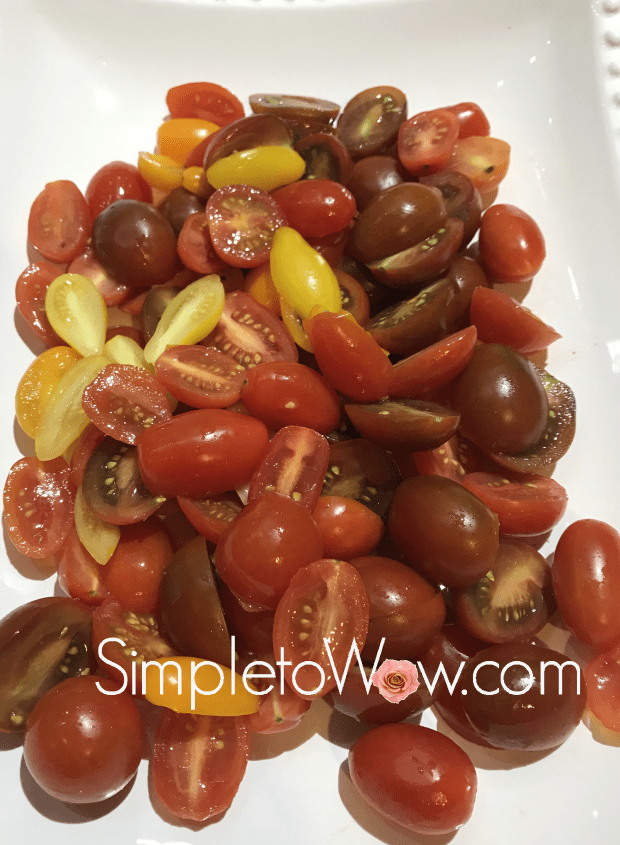
And, oh, there were tomatoes!  I had containers of every type of tomato imaginable.  There were yellow pear tomatoes and brown kumato tomatoes.  There were grape tomatoes and cherry tomatoes, but no beefsteak tomatoes. Last week, all the local markets had interesting tomatoes at great prices, so I had stocked up.  And, my salad thieves had barely touched the tomatoes.

So, what was there to do?  My mind raced back to the Sheva Brochos tomato fantasy.  I had never received the recipe, but in my mind, I knew exactly what to do.  And, the results were even better than the original and approved by all my guests.
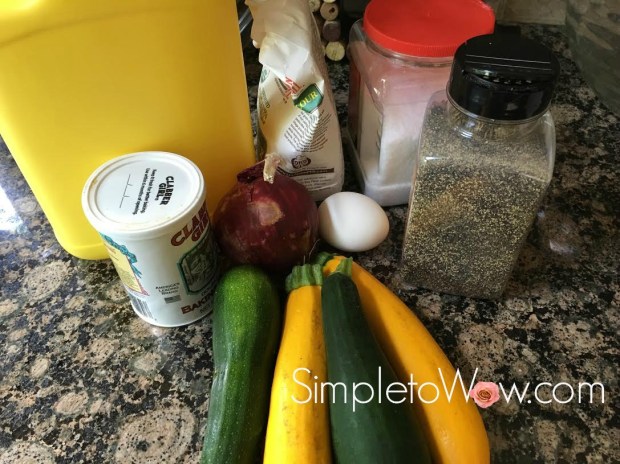
INGREDIENTS

Tomatoes, sliced

Arugula, washed and pat dry

1/2 onion, cut in chunks

juice of 1/2 lemon

1/2 cup extra virgin olive oil

1/2 teaspoon salt

 
DIRECTIONS

Wash and cut tomatoes.  If using large tomatoes, cut into thick slices.  Arrange in a bowl or on a serving platter.

heirloom tomatoes alone.jpg

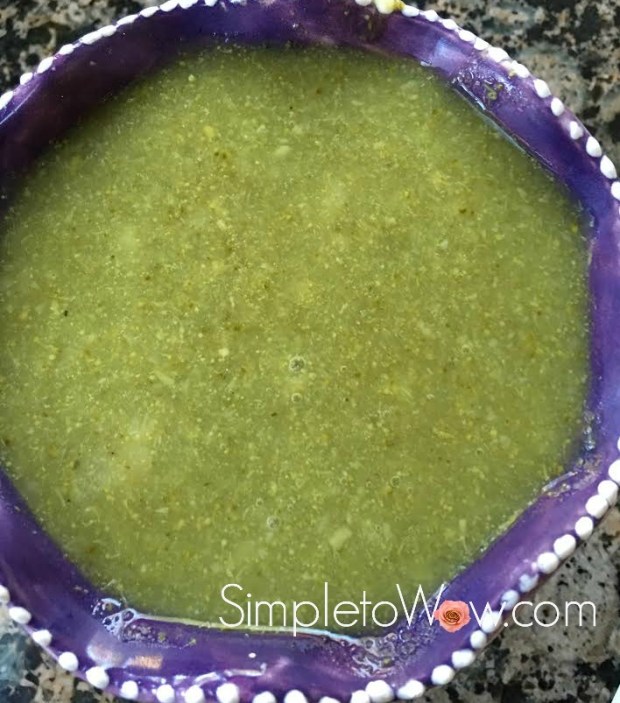
In the food processor fitted with the s-blade, pulse onion chunks and well-dried arugula.  Once the onion and arugula are completely broken down, add lemon, salt and oil and process until well combined.

arugula pesto.jpg

Right before serving, pour pesto over the tomatoes.  Enjoy!


heirloom tomatoes w arugula pesto on plate

KOSHER NOTES

Kosher laws disallow the eating of any whole insects and therefore most greens require a process of soaking, rinsing and in some cases, pureeing.  Kashrut authorities differ somewhat on the proper checking of leafy vegetables. This blog was not designed to be your kosher authority, so please consult your local rabbinic authority regarding using greens such as arugula.

SERVING SUGGESTION

For an interesting appetizer, side dish or buffet option, decant tomatoes into a glass.  Top with arugula pesto and garnish with a small bread stick or crouton.

heirloom tomatoes w arugula pesto in glass.jpg

Please Note: This post contains affiliate links from Amazon, which means I earn a small commission if you click and make a purchase.


Lemon Poppy Dressing

lemon poppy dressing

Salad dressings are basically comprised of the same three elements: oil, acid and flavor.  Some use olive oil for a distinctive oil taste.  Others use mayonnaise for  a creamy texture.  There are dressings that use citrus for its acid component and others that use wine or balsamic vinegar for its characteristic acidic kick.

This dressing adds another dimension to these elements that makes it delicious and oh, so memorable.  Poppy seeds add color to this dressing, but more importantly, they add a pop-in-your-mouth texture that is unforgettable.

I prepared this lemon poppy dressing last week for the salad bar at our Purim seuda.  I have used it to add flavor and pizzazz to so much else since.  I have drizzled some on grilled chicken, salads and baked salmon.

It is simple.  It is delicious.  It is beautiful.  And, it is so versatile.

Enjoy!

SUPPLIES

Cuisinart food processor

set of 16 oz wide-mouth squirt bottles

INGREDIENTS

1/2 cup lemon juice or juice of 4 lemons
1 tablespoon mustard
1/2 teaspoon salt
2 tablespoons mayonaaise
1 tablespoon poppy seeds

1/2 cup oil

DIRECTIONS

Using an s-blade in the food processor, combine all ingredients, saving oil for last. With machine running, slowly drizzle in oil and process until combined and smooth. Carefully decant into squeeze bottle.


Please Note: This post contains affiliate links from Amazon, which means I earn a small commission if you click and make a purchase.

Roasted Confetti Vegetables with Cashews

This is the perfect side dish for a weeknight.   It uses wholesome ingredients, takes minutes to prepare and requires only 20 minutes to roast. The meatiness of the cashews paired with the tender shreds of zucchini and rainbow carrots make this dish hearty, flavorful and satisfying.

confetti roasted vegetables.jpg

 INGREDIENTS

1-2 zucchini, shredded
1 package rainbow carrots, peeled and shredded
1 onion, shredded
handful of whole cashews

2 teaspoons kosher salt
flavored oil or olive oil

DIRECTIONS

Preheat oven to 450 degrees F. Line a baking sheet with foil or parchment paper.  Using the shredding blade of the food processor, shred onion, carrots and zucchini.

Spread vegetables atop the lined baking sheet. Drizzle with a scant amount of oil and sprinkle with salt. Sprinkle a handful of cashews over vegetables.

Roast for 15-20 minutes.

Toss and enjoy!

15 Minute Mushroom Soup

mushroom soup

The weather outside is frightfully cold and nothing warms the soul like a hot bowl of satisfying soup.   Although yesterday morning, I intended to start my  Crockpot Drunken Mushroom Soup in the crockpot,  I never did.  Instead, I got home late with only 15 minutes to get dinner on the table.   That meant that I needed to make the soup in a heavy-bottom pot using every shortcut possible.

I skimped on sauteing the onions and celery slowly and carefully.  Instead, I cut the onions and celery very small and started the soup by just sauteing the small bits of onions and celery for a few minutes.  I then shredded the mushrooms and zucchini in the food processor so that the tiny bits would cook quickly.  I skipped the wine and just added salt and pepper for flavor.

This soup was one of the best that I ever produced.  Sorry, kids!  Although my kids often chastise me for complimenting my own food, I subscribe to the belief that a cook may compliment or criticize their own handiwork.  Why not?

The soup was so flavorful and so silky that Don could not believe that there was no cream in this soup.  He loved this soup so much that he enjoyed three bowls of it.  So, guys, I didn’t even need to compliment my own soup.  Dad did it for me in word and in deed.  Indeed!


INGREDIENTS

2-3 tablespoons oil
1 onion, diced small
3 stalks celery, diced small
2 containers mushrooms, shredded
2-3 medium zucchini,shredded
1 1/2 teaspoons salt
dash pepper
4-6 cups of water

Celery Garnish (optional)


DIRECTIONS
In a heavy bottom pot over medium-high heat, saute onion and celery in oil for just a few minutes, until onions and celery are soft but not brown.

While vegetables are sauteing, shred the mushrooms and zucchini in the food processor using the s-blade or the shredding blade.

Add the shredded mushrooms and zucchini to the onions and celery. Add the salt and pepper and stir to combine. Add water and bring to a boil.  Simmer for a few minutes more until the soup is cooked through and silky.

Garnish with a celery curl.

Enjoy!


TIPS

To speed up recipes, cut, shred or dice ingredients into smaller pieces.   Smaller bits create more surface area for the heat and cooking media to enter.  Just take care, because the smaller the pieces of ingredients, the easier these ingredients are to overcook or to burn.

Nearly No-Carb Cheesecake with Mom’s Voice

Next week, Don and I will be heading to Israel for my mother-in-law’s ninth Yahrzeit, (commemoration of the anniversary of death) of my mother-in-law, Devorah bas Yitzchok Ahron a’H.  I loved my mother-in-law dearly.  While her physical presence is no longer in this world, her neshoma (soul) endures.  And, the Yahrzeit is the time to reflect on the lessons that she has imparted and continues to impart to us, her children.

My mother-in-law was brutally honest.  She was definitely not subtle.  Not in any way.

She would tell me and everyone else exactly what she thought.  And, exactly what she thought we should do.  She would tell my children that we weren’t taking good enough care of my furniture.  And, that my sister-in-law’s couches were holding up better than mine.   She offered advice to me on how to raise my children.  She couldn’t hold back when she thought someone was too fat or wearing clothing that was not flattering.  And, she always brought me just the items from the dollar store that she thought that I needed in my life.

Mom was absolutely right about most everything.  Her advice was truthful and blunt.  I heard what she said and yet I often rejected her words as harsh and unfair.  Because, in Mom’s lifetime, it was just too much information and it felt so negative.

Now that only her soul and her legacy remains, I interpret her words differently.  I accept them more and push back less.  Honestly, I just needed to learn to accept the criticism and own it.

Now that her physical presence is gone, I still hear her whispering in my ear.  Most amazingly, her voice has merged with my own inner voice.  And, it feels right and only positive now.

“It’s time to lose weight.” “Close the front door.”  “Don’t let the grandchildren play with play dough on the floor.”  “That outfit isn’t flattering.”   These are Mom’s lessons with my own inner voice whispering them.

So, with Mom’s voice as the impetus, we decided to do something exciting, frightening and wonderful on our  Yahrzeit visit to Israel this year.   We decided to jump-start healthier eating habits on this trip with the hope that these habits will last.  And, I feel that Mom has whispered this daunting plan into my ear.  Because, she always wanted her family to be slimmer, more fit and healthier.

Don’s two brothers will be joining us on this trip.  Don’s brother, Yisroel, has been on a modified Atkin’s diet successfully for two years.    He volunteered to be the mentor and coach.  I volunteered to be the cook and menu planner.  Yisroel keeps reminding me that it will be hard work.  And, I am up to the challenge, Mom!

Don’s brother, Mordechai, is on board with this new plan.  For this trip, he will be traveling without the love of his life, Yael.  But, he doesn’t want to give up another love of his life.   Cheesecake.

Don told Mordechai that we will find a way for him to have his cheesecake and eat it, too.   And, since I am in charge of the cooking and meal planning, I was determined to bake a cheesecake with nearly no carbs.

Therefore, I made a simple, crust-free cheesecake with Neufchâtel cream cheese and SPLENDA® .  Although, I generally do not use diet sugars or diet products,  I made an exception here due to the circumstances.   I hope that you love the cheesecake, Mordechai.

Thanks Mom, for that new inner voice!  May your dear neshoma be bound with the souls of the living.

no-carb cheesecake

SUPPLIES

spatula
food processor
mixer

glass pie plate

INGREDIENTS

2 pounds Neufchâtel or light cream cheese
3 large eggs
10 SPLENDA® packets (or to taste)
1/2 teaspoon vanilla extract

cooking spray

DIRECTIONS

It is best to bring the ingredients to room temperature before baking to prevent cracking, although I have made this recipe effectively with ingredients right out of the refrigerator.

Preheat oven to 350°F.

Prepare pie plate by generously spraying with cooking spray or lining with parchment paper .

In food processor fitted with an S-blade, beat cream cheese, eggs, SPLENDA® and vanilla in a food processor or with a mixer, just until smooth and creamy. You can also use a whisk to incorporate and beat all these ingredients. You will have to scrape sides of bowl to incorporate everything well until combined, smooth and creamy.

Pour mixture into pie plate.

Bake for 40 minutes. Turn oven off and leave in oven to another half-hour.

Remove from the oven and cool completely.  Chill for at least 2 hours before serving.

TIPS

If you would rather use less SPLENDA® , I would suggest just sprinkling a bit on top of the cheesecake when serving.  A sprinkle of SPLENDA®  or powdered sugar on top fools the palate and imparts sweetness to the whole serving.

Perfect Lean and Moist Brisket

low-carb brisket up close.JPG

This Shabbos, we were expecting a houseful of company. Our guests were a motley assortment of meat eaters and lean eaters. That left me in a quandary as to how to prepare a menu to satisfy all tastes.

I prepared a vast assortment of simple Rainbow Roasted Vegetables including cabbage, cauliflower, rainbow carrots, eggplant and zucchini.  As the main dishes for Friday night, I prepared lemon zinger chicken and this lean and moist brisket.

This recipe doesn’t require marination.  It also doesn’t call for any oil. What it needs, though, is time.  Plenty of time.  Three hours of cooking time.  Oh, and onions.  Plenty of onions to keep it moist.

The low and slow cooking keeps the flavor and moistness.  The sliced onions create a flavorful and tender blanket of moisture that replaces the fat and protects the tender beef.

This is a gluten-free and low-carb recipe that is suitable for Pesach (Passover), too.

Simple and moist onion-covered brisket

INGREDIENTS

3-4 pound top of the rib beef roast or lean brisket

2-3 onions, sliced thin

lemon juice
1/2 teaspoon salt
pepper
minced garlic or garlic powder
paprika
powdered ginger
onion powder

dash of cayenne pepper (optional)

1 cup zinger tea


DIRECTIONS

Make a cup of zinger tea, squeezing out the tea bag to release as much flavor as possible. Add half of the tea to the bottom of the pan. Place roast in pan. Pour rest of tea over roast and generously sprinkle seasonings on top of the roast.

Place fattier side of the brisket up so that fat keeps the meat tender during cooking. Smother the roast with a layer of very thinly sliced onions, pressing into the roast. Cover tightly with foil.

Let brisket come to room temperature or place in oven on delayed cook mode.

Set oven to cook for 3 hours on 300 degrees F. Let roast stay in oven until the oven cools down, at least for a half hour.

Remove from oven and allow to cool completely.   Refrigerate before slicing.

Perfectly Roasted and Seasoned Bok Choy

Bok choy is one of our favorite ingredients in leafy salads.  It is a powerhouse of nutrition, and has a signature taste and bold texture, making it the perfect ingredient for salads that are dressed in advance.  I have incorporated it into a number of salads already highlighted on the blog (see Simple, Colorful and Crunchy Baby Bok Choy Salad with Apples, Peppers, Tomatoes and Craisins).

Bok Choy is a cabbage-like green that can be found in most vegetable markets and green grocers.  For centuries, bok choy has been a staple of Chinese cuisine and medicine.   Bok choy is a rich leafy vegetable that has stalks similar to celery and leaves that are reminiscent of  Romaine lettuce.    Rich in vitamins  A, C and K, bok choy is an excellent sources of beta carotene, calcium, magnesium, potassium, manganese, and iron.

Until now, I have only enjoyed bok choy as a raw ingredient.  Kaitlyn suggested trying bok choy as a roasted vegetable.  I took Kaitlyn’s advice and roasted it with my Everything Bagel Seasoning and it was a huge hit.  It will now becom epart of my permanent roasting repertoire.

roasted bok choy

INGREDIENTS 

1-2 heads bok choy, cleaned and cut lengthwise into large spears (see kosher notes)
cooking spray
Everything Bagel Seasoning

DIRECTIONS

Preheat oven to 425 degrees F.  Line baking sheets with parchment paper or greased foil.

Spread bok choy spears in a single layer on baking sheet(s).  Lightly spray with cooking spray and  sprinkle with Everything Bagel Seasoning.

Roast for 25-35 minutes, checking that bok choy is slightly brown on top, but still moist and tender inside.

KOSHER NOTES

Kosher laws disallow the eating of  any whole insects and therefore greens like bok choy require a process of soaking and rinsing and.   Kashrut authorities differ on the proper checking of  these type of greens and some disallow its use altogether.  This blog was not designed to be your  kosher authority, so please consult your local rabbinic authority regarding using and preparing bok choy.

Lemon Zinger Chicken

Sometimes the best flavors are simple ones.  Lemon.  Garlic.  Chicken.   Tea.

Delicious food is simple food with no compromises in freshness, flavor, moistness and taste.

Today, I prepared chicken that was tangy, flavorful and succulent.  It took very little effort.  It used natural ingredients.  And its simplicity and taste made everyone take notice.

intense lemon chicken

INGREDIENTS

chicken parts

Lemon zinger tea

fresh lemon

minced or granulated garlic
paprika
cinnamon

DIRECTIONS

In a cup or measuring cup, add a lemon zinger tea bag to  1 cup of hot water, steeping tea well to create concentrated flavor.

Place chicken pieces in pan and pour tea over chicken.   Rinse whole lemons well and squeeze fresh lemon over chicken.  Generously sprinkle chicken with seasonings.

Tuck squeezed lemon in between chicken pieces.  Cover tightly with foil and cook at 400 degrees F for two hours.

Chana’s Low-Carb Broccoli Kugel

chana's low-carb brocolli kugel.jpg

Last Shabbos, we hosted my brother-in-law and sister-in-law and niece for Shabbos.    We always look forward to their visits.  Yisroel and Chana are some of my favorite guests, so helpful and appreciative.

We had a wonderful Shabbos, sharing divrei torah (words of Torah) and my father-in-law’s a’h favorite zemiros (Shabbos melodies) at our Shabbos table.  Don and his brother entertained us as they shared uproarious accounts of their childhood antics.   Chana regaled us with side-splitting stories, as Devora Brocha, their beautiful daughter kaH, acted out these anecdotes.

Since we only arranged to spend Shabbos together late Thursday afternoon, Chana offered to prepare and bring her delicious broccoli kugel.  That was an offer that was hard to refuse because I love Chana’s cooking and I am always happy to serve one more, delicious dish.

It did not disappoint.  This broccoli kugel is flavorful with excellent texture. Its creaminess and depth of flavor are perfect.  Best of all, it is gluten-free and low in carbs. Thanks, Chana!

INGREDIENTS

1 bag (24 oz) chopped broccoli, steamed for 10 minutes (see Kosher notes)
1 large onion and 2 cloves garlic, sautéed
2 eggs
1 1/2 heaping teaspoons mayonnaise
1/2 heaping teaspoon chicken soup mix or consomme
3/4 teaspoon salt
dash of black pepper

DIRECTIONS

Preheat oven 400 degrees F. Combine all ingredients and pour into a 9″ round pan. Bake for 40-50 minutes, until golden brown on top.

KOSHER NOTES

Kosher laws disallow the eating of any whole insects and therefore broccoli requires a process of soaking, rinsing and in some cases, pureeing, unless purchased with a reputable kosher hashgacha (certification).  Kashrut authorities differ on the proper checking of broccoli.  This blog was not designed to be your kosher authority, so please consult your local rabbinic authority regarding using and preparing broccoli.

TIPS
I eliminate the consomme and just increase the salt and pepper slightly.

Enjoy!

Weeknight Oven Roasted London Broil

Want a simple and no-fuss weeknight roast?  This one is for you.  It takes 3-4 hours of low-heat-cooking, so make sure to start it early.  It is one of my simple favorites and will become one of your favorites, too.

Our local kosher butchers all sell London broil.  It is an inexpensive and rather lean roast, though, technically, London Broil is not a cut of meat but rather refers to a cooking technique.  Kosher London Broil is typically cut from the shoulder or neck area and various butchers use different types of flank and shoulder steaks for their London Broils.

The tenderness of the meat very often depends on the source and cut of the London Broil. In general, I try to choose a London Broil that has some fat surrounding the meat and no gristle running down the center.  The fat protects the meat during cooking and either melts during cooking or can be trimmed afterward.  The thicker gristle often runs down the center of the steak and is difficult to remove.  Therefore, I try to find cuts that do not contain gristle running through.

Although London Broil is synonymous with fast cooking  over high heat, this recipe employs a quick marinade and spice rub and then slow low-temperature cooking.

INGREDIENTS

1 small (2 pound) London Broil
1 large onion, sliced
1/2 cup cranberry juice or other fruit juice

barbecue sauce

Coffee Spice Rub or your favorite rub

DIRECTIONS

Line baking dish with foil, leaving enough foil on sides so that foil can be folded over London Broil as a packet.  Place sliced onion at bottom of foil-lined pan.  Place London Broil on top of  onions, fattier side up.

Mix 1/2 cup juice with 1/4 cup barbecue sauce.  Pour liquid over London Broil , coating both sides. Pat with coffee rub.

Close foil packet around marinated London Broil , leaving room between London Broil and top of foil packet, but tightly closing foil.

Bake at 275 for 2-3 hours in foil packet.  London Broil should be fork tender at this point. Open foil, add some more barbecue sauce and bake uncovered for 1 hour more .

For cleaner slicing, allow meat to reach room temperature for at least 30 minutes.

Onion-Battered Baked Tilapia

My mother loves tilapia.  She has a difficult time finding kosher fresh tilapia in Cleveland, so it is something that she looks forward to enjoying when she visits.

Whenever she comes to visit, I try to prepare this favorite dish for her, battering it in breadcrumbs and frying it in a pan (Savta’s Favorite Breaded Tilapia).  It is one of those simply delicious main dishes that is flaky, satisfying and never disappoints.

My mother will be coming to visit next week as she prepares for hip revision surgery at the Hospital for Special Surgery during Chanukah.

And, my mother’s visit makes me think of tilapia.

I love dishes that can be prepared and then placed in the oven, preferably on a timer.   This allows me to do other things while the food is being cooked.

Fry-pan breaded tilapia does not meet those qualifications. And, baked fish just doesn’t have the crunchy outside and soft inside of fried fish that would satisfy my mother.  So, I put my thinking cap on.

And, this is what I came up with….simple, satisfying and a delicious wow!

onion-crusted-tilapia-in-oven

INGREDIENTS

1 cup French Fried Onions

1/2 cup creamy dressing.  I used Simple, Creamy and Perfect Homemade Balsamic Vinaigrette

4-6 tilapia fillets

DIRECTIONS

Preheat oven to 425 degrees F.  Line a baking sheet or pie plate with parchment paper.

Pulse french fried onions in the food processor using the S-blade or crush by rolling a rolling pin or pounding a mallet over zipper bag of french fried onions.

In a shallow dish or pie plate, coat each fillet with creamy dressing.   Dip each fillet into the crushed onions, making sure that the fillets are well coated.
Spread coated tilapia fillets on baking sheet and bake for 20-30 minutes.  Tilapia should be golden brown on outside and soft and flaky on the inside.
Enjoy!
onion-crusted-tilapia

Sliced Carrots with Garlic and Shallots

sliced-carrots-with-shallots-and-garlic-2

Did you ever have one of those marathon days?  This recipe was inspired by that type of day.

I had the whole day planned out perfectly.  I had to drop something off for signature on the way home from the office and there should be plenty of time to pick up some fish and vegetables.  It was Scotty’s last dinner at the house before he headed back to California to resume dental school.  He had been visiting for nearly a week while interviewing for dental residencies throughout the tri-state area.

I wanted dinner to be perfect and perfection takes time.  Only, holiday traffic intervened with perfection.

When there’s no time for perfection, simplicity takes over.  And, simplicity inspired this recipe.

I didn’t even have the time to peel the carrots, so I used a bag of peeled baby carrots, instead of the rainbow carrots that I envisioned.

I had no time to mince the garlic and dice the shallots, so I thinly sliced them both in the food processor right after the carrots.

I just spread the vegetables and sprinkled and drizzled the seasonings and marinade ingredients.

It may not have been perfect, but it certainly was delicious.

And, I think I would do it this way all over again even if I had the time for perfection!

INGREDIENTS

1-2 pounds of peeled carrots or 1 bag of baby carrots
2-3 shallots, peeled
1 head garlic, separated into peeled cloves

3-4 tablespoons oil
2-3 tablespoons brown sugar or agave syrup
kosher salt
pepper

DIRECTIONS

Preheat oven to 425 degrees F.

Line a casserole dish or baking sheet with parchment paper.

Using the slicer blade of the food processor, slice peeled carrots and then shallots and garlic gloves.

Toss gently right in the food processor bowl.

Spread sliced carrots, shallots and garlic in parchment-lined casserole or baking sheet.

Lightly drizzle oil and brown sugar or agave syrup over vegetables.  Lightly sprinkle with salt and pepper.

Roast uncovered for 40-45 minutes.

Enjoy!

Lazy Weeknight Pulled Beef

I really am lazy about cooking during the week.  Just ask my family.

I have learned to take just about every shortcut to the dinner table and love to prepare weeknight dinners that require very few ingredients, very little time and a minimum of effort.

To justify my weekday laziness, I make sure that weeknight dinners are not fussy or complicated.  I still try to use fresh ingredients, but I really downgrade the effort.

I have a repertoire of tried and true simple and delicious weeknight dinner recipes.  All require very little prep time.  Some cook or roast quickly.  Others cook all day.

This one is prepared in the morning, just before I start my day.  It is made in the crockpot and once the ingredients are placed, it requires virtually no attention.  It cooks all day, so that it greets you at the end of the day with the wonderful aroma and taste of slow cooked pulled beef.

The pulled beef is best pulled or shredded an hour or two before eating and then returned to the sauce in the crockpot.  It can also be pulled or shredded and eaten right before serving, but will yield a slightly drier product.  It is up to your schedule and taste.

It can be served on a roll or over a bed of pasta or rice.  I like it best served alongside a shredded or spiralized salad.  Here I have served it with a side of rutabaga and edamame salad.

pulled-beef-in-crockpot-plated

This recipe has the elements of a lazy dinner, but the taste of a most delicious and decadent weeknight dinner.

It is simple…and it truly infuses the lazy with wow.

pulled-beef-in-crockpot-on-plate

pulled-beef-in-crockpot-ingredients

INGREDIENTS

small boneless roast to fit your crockpot (I use a london broil or small brisket)
2-3 onions and/or shallots, peeled and cut into wedges
4-5 cloves garlic (optional)
3-4 stalks celery, cut into 1-2 inch sections (optional)
1/2 cup water or broth
1/3 cup barbecue sauce
2-3 tablespoons brandy (optional)

your favorite seasoning or rub (optional)

DIRECTIONS

Cut onions, shallots, celery and garlic and place on bottom of crockpot.  Place roast on top of vegetables.  If roast is larger than crockpot, just cut to fit and place in two layers, one on top of the other.  Dilute barbecue sauce with water or both.  Pour diluted barbecue sauce and brandy over roast.

pulled-beef-in-crockpot

Set crockpot to high or auto (see notes below) and cook for 6-8 hours.

pulled-beef-in-crockpot-before-shredding

About an hour before serving, remove beef from crockpot.  Place two forks in the center of the roasts, tines against tines and pull toward edges of roast.  Keep pulling until the roast is shredded.  Return roast to crockpot, ladle some sauce over the shredded beef and set to low or auto until ready to serve.

pulled-beef-in-crockpot-cooked

NOTES

Know your crockpot and which settings to use.  I cook this recipe on the high setting of my six quart crockpot for 6-8 hours and only turn it down to low or auto once the beef has been pulled and the pulled beef has been returned to the sauce.  Your crockpot may need to be set to auto for the duration of the cooking. If you are not sure, start this recipe at high. Check on the recipe after 4 hours.  If it tastes ready, then turn it down to auto or low until serving. If not, cook for longer, checking every hour.

Rockstar Roasted Cauliflower

Last week, I roasted cauliflower as a weekday side dish.  It is one of our favorite sides and it is the perfect accompaniment for most any main dish.  I have served it with all types of fish, poultry and meat.  It is always a star side dish, so well received at my table.

But, at last week’s dinner table, the roasted cauliflower was a rockstar.

rockstar-roasted-cauliflower

Each cauliflower floret was soft and velvety on the inside and crunchy and toasty on the outside.  Everyone around the table commented that it was a whole new level for roasted cauliflower.

And, I scratched my head to try and figure out just what made it so delicious.

I replayed the dinnertime meal preparation in my head.

It had been one of those hectic weeknights.  I had been working in my home office and instead of roasting the cauliflower on high heat from the beginning, I placed it in the oven on medium heat to cook alongside the Baked French Fried Onion Chicken until the chicken was ready.  Once the timer for the baked chicken sounded, I removed the chicken from the oven and increased the heat for the cauliflower to my normal 450 degrees F roasting temperature.

That seemed to be the magic.  I had started the cauliflower off at medium heat and had increased the heat after 25 minutes until it was finished.

I was determined to recreate the superstar cauliflower the next night.  And, I did!


INGREDIENTS 

1-2 heads cauliflower, separated into florets and cleaned (see kosher notes)
Oil
Kosher Salt
Granulated or fresh minced garlic (optional)


DIRECTIONS

Preheat oven to 375 degrees F.  Line baking sheets with parchment paper or greased foil.

Spread cauliflower in a single layer on baking sheet(s).  Drizzle with oil and lightly sprinkle with kosher salt and garlic.

Cook for 25 minutes and then increase temperature to 450 degrees F for 20-25 minutes more, checking that vegetables are soft and browned before removing from oven.


KOSHER NOTES

Kosher laws disallow the eating of  any whole insects and therefore  cauliflower require a process of soaking, rinsing and in some cases, pureeing.   Kashrut authorities differ on the proper checking of  cauliflower and some disallow its use altogether.  This blog was not designed to be your  kosher authority, so please consult your local rabbinic authority regarding using and preparing cauliflower.

Simple Crockpot Broccoli Soup

We returned home from our trip to Israel and found that Autumn has arrived in New Jersey.  Gone are the eighty-degree sunny Fall days in Israel.  Instead, we returned to crisp Fall days in the Northeast.

These cold mornings have me preparing crockpot soups.  This soup is so simple to prepare and makes for a delicious and hearty lunchtime broccoli soup.  It is flavorful, nutritious and low-carb.

broccoli soup unblended.jpgAfter lunch, I puree what is left in the crockpot for a smooth and filling dinner soup-two divine soups from one recipe with minimal effort.

broccoli-soup-in-purple-bowl

INGREDIENTS
2 pounds broccoli, fresh or frozen (see kosher notes)
1 onion or shallot, cut into chunks
4-6 cups water or  vegetable broth
1 tablespoon salt
4 cloves garlic or 1 tablespoons granulated garlic
1 1/2 teaspoons coarse ground pepper

DIRECTIONS

Fill crockpot with broccoli, onion and/or shallot and seasonings. Fill crockpot 3/4 to top with water and/or stock.  Cook on high for at least 4 hours. For a smooth texture, blend with a stick blender before serving.

VARIATIONS
Replace broccoli with cauliflower for another flavor alternative.

Saute onion or shallot before adding for more depth of flavor.

KOSHER NOTES

Kosher laws disallow the eating of  any whole insects and therefore broccoli and cauliflower require a process of soaking, rinsing and in some cases, pureeing.   Kashrut authorities differ on the proper checking of  broccoli and cauliflower and some disallow the use of these altogether.  This blog was not designed to be your  kosher authority, so please consult your local rabbinic authority regarding using and preparing broccoli and cauliflower.

Arugula Salad Wrapped and Upright

We recently attended a wedding and I was entranced by the appetizer.  It was an upright mesclun salad wrapped in a long slice of cucumber.  The dressing was poured into the tightly packed upright salad and the appetizer bowl where the salad was placed was garnished with gorgeous fruit.

upright wrapped salad with fruit

When the cucumber peel was uncurled, the salad opened up and it was coated with the dressing and was garnished by the fruit.

I loved the presentation, the flavors of the salad and the whole idea of serving a salad wrapped and upright.

Of course, I was determined to create my own version of this type of salad.  I decided to try it first with arugula, one of my favorites.  It was not even much of a challenge.  I nailed it on the first try.

Here it is:

INGREDIENTS

Arugula, soaked and rinsed (see kosher notes)
Lemon Vinagrette
Long Seedless cucumbers
fruit or tomato garnish

DIRECTIONS

Carefully peel long slices of seedless cucumber with a peeler or mandolin.

peeled-cucumbers

Soak and rinse arugula, shaking out all excess moisture and/or wrapping in paper towels to dry.  Wrap cucumber slice around bundle of arugula, securing with a toothpick or small skewer, if necessary.

Stand bundle of arugula up on appetizer plate or shallow bowl so that arugula leaves are standing up.  Squirt dressing into center of arugula bundle, directing the tip of the squirt bottle into the arugula bundle so that dressing is contained within bundle and does not disperse or color the arugula.  Garnish with slices or fruit or vegetables.

upright-arugula-salad-up-close

VARIATIONS

Substitute arugula with other greens like mesclun, kale, romaine lettuce or shredded cabbage.

KOSHER NOTES

Kosher laws disallow the eating of any whole insects and therefore most greens require a process of soaking, rinsing and in some cases, pureeing. Kashrut authorities differ somewhat on the proper checking of leafy vegetables. This blog was not designed to be your kosher authority, so please consult your local rabbinic authority regarding using greens such as arugula.


SERVING SUGGESTION

arugula salad in cucumber


Low-Carb Zucchini Pizza

Zucchini is one of those fresh ingredients that I almost always have on hand in my refrigerator.  I use it in a myriad of ways:  in my Simply the best chicken soup…ever!, in Warm Zucchini-Mushroom Salad with Almonds and Sunflower Seeds, in Simply the Best Low-Carb Zucchini Soup and a myriad of other recipes, many of which you will find on this blog.  Just about every member of the family likes zucchini.

But, who knew that you could make a delicious pizza crust from zucchini?

zucchini pizza up close.jpg

(more…)

Simple 4-Ingredient Homemade New Pickles

New pickles are my favorite.  They still have the crispness of a raw kirby with just a hint of pickling.  Kirby cucumbers are in season.  They are plentiful, inexpensive and make wonderful pickles with just four simple ingredients and 1-2 days of refrigeration.

homemade pickles

INGREDIENTS

4-6 medium Kirby cucumbers
2 cups unchlorinated or bottled water
2 tablespoons Kosher salt
3-4 cloves Fresh garlic

your favorite herbs (optional)

DIRECTIONS

Fill a mason jar with unchlorinated or bottled water.

Dissolve salt in the unchlorinated or bottled water.

Tightly pack whole or half kirby cucumbers into a glass jar and add garlic cloves.

Fill the jar with the salt water, making sure the cucumbers are completely covered. Cover the jar and refrigerate for 1-2 days or more.

VARIATIONS

Add your favorite flavors to customize your new pickles.  Try slices of jalapeno, peppercorns, hot pepper flakes or your favorite herbs and seasoning.

Colorado Salmon in an Omelet Maker

Don and I are in Colorado for a medical conference.  The Nine Days (nine sad days leading to Tisha B’av, day the Jewish Holy Temple was destroyed) have begun and it is customary not to eat meat products or drink wine during this period of national mourning.  Since we are not in close proximity to a major city, our food options are limited.

In the past, we have employed some very creative options to prepare our food while away from home.  On a ski vacation out West many years ago, Don heated up our last frozen portion of stuffed cabbage on the engine block of our rental car on the way from the ski resort back to the airport.  I still cannot believe that I ever allowed him to do that.  I still am not sure if we risked our lives with this crazy maneuver.  I recall that Don thought it was simply the best stuffed cabbage ever.  I am sure that I would NEVER recommend anyone preparing a frozen dinner that way, but it does make for a very memorable story.

For this vacation,  I brought along an inexpensive omelet maker.  An omelet maker is very similar to a sandwich maker but with smaller wells to contain the omelets.   I planned to use the omelet maker to prepare my morning breakfast and that we would just eat tuna and veggie burgers for dinner.

Aaron, who is traveling with us, insisted that we try to make fresh salmon in the omelet maker.  I was  a naysayer, but finally agreed to try it.  We purchased some small pieces of salmon.  We sprayed the omelet maker with cooking spray and placed a piece of salmon, sprinkled with a dry rub and some lime juice, in each well.  We cooked the salmon for about 10-15 minutes and enjoyed the most delicious fresh salmon.

salmon in omelet maker

They say that necessity is the mother of invention.  Thanks, Aaron, for planting the seed for this inventive recipe.  It was a winner.

INGREDIENTS

cooking spray

salmon fillets (see kosher notes)
seasoning or spice rub
fresh lemon or lime

DIRECTIONS

Spray wells of omelet maker, top and bottom.  Place a piece of salmon in each well.  Top with seasonings and a squeeze of citrus.  Close cover and cook for 15-20 minutes until salmon flakes easily.  Serve with a squeeze of lemon or lime.  Enjoy!

NOTES

I would assume that a sandwich maker would work well for this recipe, too.  It is similar to the omelet maker, but with larger wells.

KOSHER NOTES

Kosher laws require fish to have scales and fins in order to be kosher.  Some kashrut authorities allow the purchase of salmon even from a non-kosher purveyor because of its distinctive red flesh. This blog was not designed to be your kosher authority, so please consult your local rabbinic authority regarding using salmon in this way.


Colorful Farm to Table Confetti Salad

shredded salad


This week, we visited a wonderful U-pick farm in Fishkill, New York.

It was a glorious day, the sun was shining and the fields were lush and overflowing with produce.  Don and I really enjoyed picking vegetables directly from the fields and the produce was extraordinary.  We picked all types of summer squash, yellow tomatoes, green peppers and cucumbers.

tomato in gardens

We arrived home just in time for dinner and I threw together a quick salad from the produce that we had collected.  I soaked and rinsed the tomatoes and then scrubbed and rinsed everything else before shredding the vegetables in the food processor.  I added some shredded fresh beets and herbs that I already had in the refrigerator.

The salad was perfect.  It was delightfully colorful.  It was fresh from the farm delicious.

Here is the recipe:


INGREDIENTS

cherry or grape tomatoes, whole or halved
3 zucchini or summer squash, scrubbed
3 small cucumbers, scrubbed
2 peppers, scrubbed with centers removed
2 small beets, peeled (optional)
parsley, chives or cilantro (optional)

salt and pepper, to taste
a splash of balsamic vinegar
a light drizzle of olive oil (optional)


DIRECTIONS

Soak, scrub and rinse vegetables.

Place tomatoes in salad bowl.  Add all vegetables to food processor fitted with shredding blade. Shred vegetables and add to salad.  Sprinkle, splash and drizzle seasoning right over vegetables.

Toss.

Enjoy!

Low-Carb Summer Squash/Zucchini Kugel

The McCarthys just delivered another enormous batch of home-grown produce (see A Salad of Bounty and Inspiration), among which were some beautiful yellow and green squash.

mccarthy produce with squash

Dorothy sent me an Ina Garten recipe for zucchini pancakes, which looked delicious, but a bit too labor-intensive for my carefree summer frame of mind.

Instead, I just used the squash to make a simple and delicious zucchini kugel.  A kugel is a classic Jewish souffle made from sweet or savory ingredients.  This was so simple to prepare, so colorful and oh, so tasty.

I would suggest making this in an oven-to-table pan (like a Pyre pie plate or ceramic souffe dish).  Since squash has a very high water content, this kugel is crisp on top but rather mushy on bottom.  Therefore, it is best served directly in the crock in which it was baked.

zucchini kugel-ingredients


(more…)

Cauliflower Personal Pizza: Simple and Low-Carb

Davida has been my lunch-time cook and she made this delicious cauliflower pizza for me today for lunch.  She used cauliflower couscous to create the crust and then just layered sauce and cheese atop the crust.

cauliflower personal white pizza.jpg

It was relatively simple to prepare and delicious to eat.  Thanks, Davida!


INGREDIENTS

1/2 head of cauliflower, grated to couscous consistency (see kosher notes)
1 egg
1/2 cup grated or shredded cheese
1 clove garlic, minced or garlic powder
1/2 teaspoon kosher salt
Freshly ground black pepper

1 cup shredded cheese
1/2 cup marinara sauce (optional)


DIRECTIONS

Preheat oven to 450 degrees F.

Pulse the cauliflower in food processor or blender until grated to the consistency of couscous.

Microwave cauliflower on high for 4 minutes.  In a large bowl, combine microwaved cauliflower couscous, egg, cheese, and seasonings.

Line a baking sheet with parchment paper or spray generously with oil spray. Using a rubber spatula, spread the cauliflower mixture to personal size..

Bake until the cauliflower crust is golden and darker at the edges, about 20 minutes.

Remove the crust from the oven, drizzle with optional sauce and then sprinkle with shredded cheese. Bake for about 10 minutes more.

Allow to cool for several minutes before slicing or eating.


VARIATIONS

Replace cauliflower with broccoli for another flavor alternative.

Add toppings on top of cheese.  Suggested toppings include strips of peppers, diced onions or scallions, chives or basil.


KOSHER NOTES

Kosher laws disallow the eating of  any whole insects and therefore  cauliflower require a process of soaking, rinsing and in some cases, pureeing.   Kashrut authorities differ on the proper checking of  cauliflower and some disallow its use altogether.  This blog was not designed to be your  kosher authority, so please consult your local rabbinic authority regarding using and preparing cauliflower.

(more…)

Simple, Colorful and Crunchy Baby Bok Choy Salad with Apples, Peppers, Tomatoes and Craisins

baby bok choy salad with apples, craisins, peppers, tomatoes and toasted sesame seeds


Baby Bok Choy was on sale this week at our local market. I was determined to create a new colorful and crunchy salad using the baby bok choy as the base green. I added bright tomatoes and peppers for color and green apples for crunch. I finished the salad off with a sprinkling of dried cranberries and toasted sesame seeds. It was delicious with a surprising array of colors and textures.

It was a simple salad that create a wow for both the eye and the palate.  Bok Choy stands up well to dressing since it has a firmer texture than lettuce, so this salad can be prepared several hours in advance with dressing drizzled right atop the salad ingredients.  It is best to toss right before serving. (more…)

Crockpot Drunken Mushroom Soup

drunken mushroom soup ready to eat

I love the heartiness and depth of a wine-based mushroom soup.  Mushrooms and wine are a combination made in heaven, with the wine adding depth to the earthiness of this soup. Made in a crockpot, this drunken mushroom soup is a cinch to prepare and is simply divine.

drunken mushroom soup-preparation

INGREDIENTS

2-3 packages whole or sliced mushrooms
1 small onion or shallot, cut into chunks
1-2 zucchini, cup into 1 inch chunks
4 cups water or  vegetable broth
1 cup wine
1 tablespoon salt
4 cloves garlic or 1 tablespoons granulated garlic
1 1/2 teaspoons coarse ground pepper
dash ginger (optional)

DIRECTIONS

Fill crockpot with mushrooms, onion and/or shallot, zucchini, wine and seasonings. Fill crockpot 3/4 to top with water and/or stock.  Cook on high for at least 5 hours. For a smooth texture, blend with a stick blender before serving.  Garnish with fresh herbs.

drunken musroom soup-under glass liddrunken mushroom soup ready to eat

NOTES

Know your crockpot and which settings to use.  I cook my soup
on the high setting of my six quart crockpot for about 6 hours and only turn it down to low or auto once the soup has been completed.  Your crockpot may need to be set to auto for the duration of the cooking. If you are not sure, start your soup at high.  Check on the soup after 4 hours.  If it tastes ready, then turn it down to auto or low until serving. If not, cook the soup for longer, checking every hour.
For a creamy dairy variation, add 1/2 cup heavy cream to soup ingredients.
Use your favorite mushrooms.  For this  soup, I used a combination of baby bella and white mushrooms.  You can add them to the crockpot whole or sliced.Use your favorite wine.  For my soup, I used the rest of a bottle of  Merlot that was left over from Shabbos.  You can use white, red or any combination of wine.

MY FAVORITE AMAZON SUPPLIES FOR THIS RECIPE
Cuisinart Stick Blender

Stainless Steel 6 Quart Manual Crockpot

Simple Cheesy Zucchini Logs: Gluten Free and Low-Carb

Davida and her friend, Chava, made delicious calzones for Melave Malke a few weeks ago: Davida’s Easy and Delicious Calzones for a Melave Malka Feast. Although the calzones looked and smelled heavenly, Don and I were  only able to enjoy them vicariously. Since we are still on low-carb diets, we needed to find an alternative cheesy dish.

We scrubbed zucchini, cut them is half logs and roasted them for 12-15 minutes .  Once roasted, we scooped out some of the pulp and then filled them with cheese.  We put them into the oven for 5-10 minutes more and voila!

These will make a perfect and simple low-carb recipe for Shavuos (Countdown to Shavuos: Floral Inspirations and Dairy Recipes).  Enjoy!

zucchini logs-up close

(more…)