Gluten-free

Tomato Medley with Arugula Pesto

Don loves arugula.  He will eat a bag of arugula as a snack.

I love tomatoes.

In fact, my mother has told me that “tomato” was my first word.  I pronounced it as “apimanus” and would do anything for a tomato.  I still will.  I just think that the juiciness, sweetness and unique character of a tomato makes a salad complete.

And, nowadays, tomatoes are available in all shapes and colors.  There are yellow pear tomatoes and brown kumato tomatoes.  There are beefsteak and grape tomatoes, cherry and low-acid tomatoes.

And, most are available year-round in your local markets.  Best of all, tomatoes are very simple to check for kashrut (kosher status) as their structure rarely allows for insect infestation.

Recently, a group of our friends joined to prepare an exquisite and delicious Sheva Brochos (seven day wedding after-party) for our newly married children, Yitzchok Aaron and Hindy.   There was gorgeous china and stemware.  The tablecloths were elegant and beautiful.  Every delicious home-cooked dish was impeccably prepared and served.

But, for me, the stand-out memory of the evening was the tomato salad.  It was a beefsteak tomato salad served in stout chunks with the most incredible pesto drizzled on top.  It was gorgeous, fresh and simply delicious.

Last night, my aunt and uncle came to visit my parents who are living with us.  They were coming from quite a distance and were due to arrive around dinnertime.  I had been busy all day with my mother and we arrived home later than expected.  Before I left that morning, I had prepared a crockpot lentil soup and set a simple brisket  and Simple Rainbow Roasted Vegetables in my oven on time-bake.

What I had left for the end was the salad.  I knew that I had some pre-checked lettuce and other assorted vegetables in my refrigerator bin.  Thirty minutes before their arrival, I opened the bin to begin preparing the salad.  All my salad ingredients, including the checked lettuce were gone.  All that remained were tomatoes, onions and arugula.

And, oh, there were tomatoes!  I had containers of every type of tomato imaginable.  There were yellow pear tomatoes and brown kumato tomatoes.  There were grape tomatoes and cherry tomatoes, but no beefsteak tomatoes. Last week, all the local markets had interesting tomatoes at great prices, so I had stocked up.  And, my salad thieves had barely touched the tomatoes.

So, what was there to do?  My mind raced back to the Sheva Brochos tomato fantasy.  I had never received the recipe, but in my mind, I knew exactly what to do.  And, the results were even better than the original and approved by all my guests.

INGREDIENTS

Tomatoes, sliced

Arugula, washed and pat dry

1/2 onion, cut in chunks

juice of 1/2 lemon

1/2 cup extra virgin olive oil

1/2 teaspoon salt

 
DIRECTIONS

Wash and cut tomatoes.  If using large tomatoes, cut into thick slices.  Arrange in a bowl or on a serving platter.
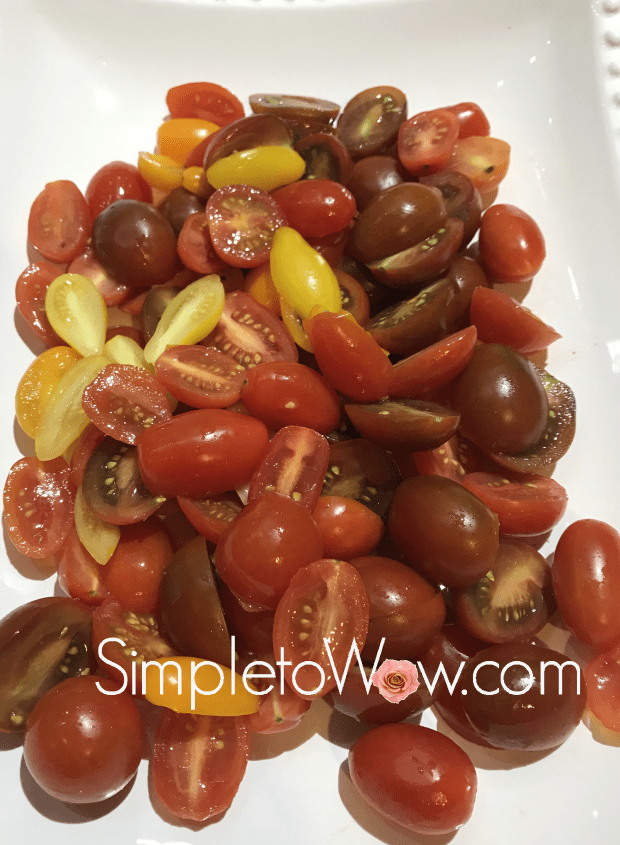
heirloom tomatoes alone.jpg

In the food processor fitted with the s-blade, pulse onion chunks and well-dried arugula.  Once the onion and arugula are completely broken down, add lemon, salt and oil and process until well combined.

arugula pesto.jpg

Right before serving, pour pesto over the tomatoes.  Enjoy!


heirloom tomatoes w arugula pesto on plate

KOSHER NOTES

Kosher laws disallow the eating of any whole insects and therefore most greens require a process of soaking, rinsing and in some cases, pureeing.  Kashrut authorities differ somewhat on the proper checking of leafy vegetables. This blog was not designed to be your kosher authority, so please consult your local rabbinic authority regarding using greens such as arugula.

SERVING SUGGESTION

For an interesting appetizer, side dish or buffet option, decant tomatoes into a glass.  Top with arugula pesto and garnish with a small bread stick or crouton.
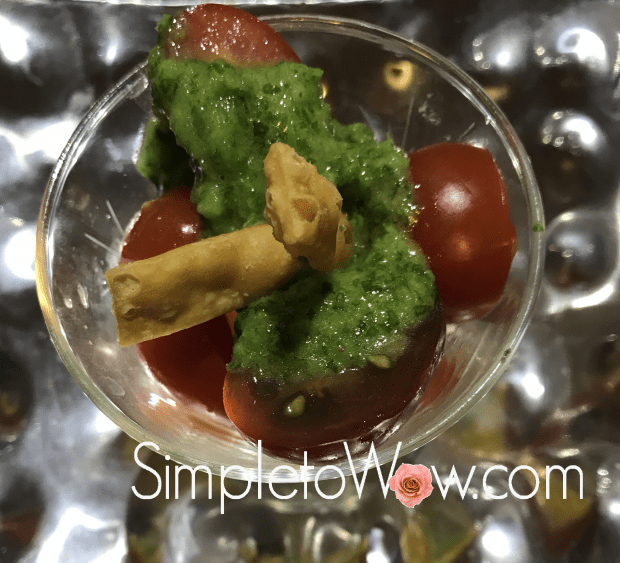
heirloom tomatoes w arugula pesto in glass.jpg

Please Note: This post contains affiliate links from Amazon, which means I earn a small commission if you click and make a purchase.


Crockpot Pulled Turkey


pulled turkey w logo

Every day is Thanksgiving.  That is my corollary to my mother’s cardinal rule of “every day is Mother’s Day.”  Feeling gratitude is an ongoing and essential goal and should not be limited to any one day of the year.  And,  I love so many of the traditional foods associated with Thanksgiving like  turkey, pumpkin  and cranberries.  As these ingredients begin to become available at our local markets, I buy them, hoping to find new and improved ways to use them.

Giving thanks is such a pivotal tenet in Judaism.  Each Jewish holiday commemorates something that has occured for which we are to feel gratitude.  The word for thanks in Hebrew is תודה, which is rooted in acknowledment, humility and praise.  The virtue of humility is based upon showing gratitude to G-d for what we have and not ascribing all that we have to our own strength and prowess.

This particular Thanksgiving season is poignant and special for me.  My father was diagnosed with pancreatic cancer several months ago and my parents have moved in with our family as my father undergoes his experimental chemotherapy treatments.  As challenging as these few months have been, they have been so beautiful, as well.  Going through each season with my parents and gleaning wisdom and life lessons from my parents has been a treasure and a privilege.   It is something for which I give eternal gratitude to G-d.  I pray for strength, support and positivity to help us traverse this challenge.  Focusing on the aspects for which to show gratitude has transformed these difficult times into an opportunity for Thanksgiving.

This morning, I bought the first fresh turkey breast for the season and I intended to make it memorable.  I placed the turkey breast in a crockpot and topped it with sliced Vidalia onions and a handful of garlic cloves.  I poured barbecue sauce and water over the top and set the crockpot temperature setting to high for eight hours.

I came home to the most delicious Thanksgiving aroma.  After removing the bones, I shredded the turkey.

Voila!

PULLED TURKEY SERVING SUGGESTION.jpg


INGREDIENTS

Half of a turkey breast on the bone
1-2 onions, peeled and cut into rings
8-10 medium garlic cloves
1 cup water
2/3 cup barbecue sauce

DIRECTIONS

Place all ingredients in the crockpot.  Set crockpot to high and cook for 6-8 hours.  Turkey should be falling off the bones when ready.

Remove and discard bines,  Using two large forks held tines to tines, shred or pull the turkey.  Add several tablespoons of extra water and barbecue sauce, if turkey needs to be moistened

SERVING SUGGESTIONS


Peach Velvet Salmon

peach velvet salmon

I’ll share a little secret with you.

Last week’s leftover homemade dip or dressing becomes this week’s favorite marinade.  The reason is simple.  Dips have all the components needed in a marinade.  They have an oil base for moisture,  a flavor profile for taste and usually some acid for tenderizing.

I also like to use whatever seasonal items are on hand.  This week, peaches are plentiful and flavorful at the market and my planters are bursting with fresh chives.  These early summer flavors inspired this dish and my hungry family and friends approved it for publishing on the blog.

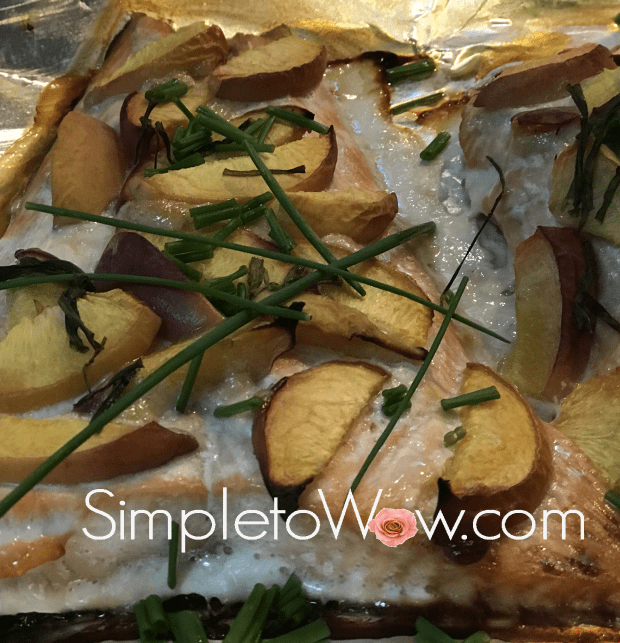
I used leftover Simple and Creamy Lemon Vinaigrette to coat the salmon fillets, but any dip, sauce or dressing will work.  I pressed freshly ripened peach slices and torn chives on top.

The salmon is simple and delicious with a taste of summer.  Enjoy!

INGREDIENTS

salmon fillets
Simple and Creamy Lemon Vinaigrette
1 ripe peach, scrubbed and sliced thin
Chives, torn for garnish

DIRECTIONS

Line cooking sheet with parchment paper or foil.

Brush salmon fillets generously with Simple and Creamy Lemon Vinaigrette or your favorite dressing or dip.   Press thin peaches slices and a few torn chives into salmon.

Bake at 350 degrees F for 45-55 minutes, until fish flakes easily with fork. Sprinkle some more fresh chives over salmon.

Sliders with Onion Slices and Frizzled Beets

slider with frizzled beets.jpg

Most of the time, we eat sliders without the bun.  And, most of the family enjoys their burgers and sliders very well-done.  That means that the burgers need some pretty exciting accessories to keep them moist and interesting.  This burger started out as an experiment and ended up with rave reviews.  It is a well-done burger that still has character and juiciness.

When thinking about how to dress up an ordinary burger, of course, onions came to mind.  After all, onions make just about everything exciting.  They are sweet and hearty, flavorful and versatile.

And, as you know,  I have become an unwitting ambassador for beets.  Beets are maligned and ignored, mostly because of the unfortunate texture that many people have encountered in their childhood.  Thankfully, beets are making a comeback, mostly because boiled beets are a very small part of the beet preparation pie-chart.  In reality, beets are beautiful and exciting with a variety of textures depending upon their preparation.  They are inexpensive, widely available and are best eaten raw or roasted.  Beets are truly are one of the most exciting vegetables available.

This recipe starts in a pan on the fire and ends in the oven.  It is forgiving and will wait for you.  The end product is a juicy well-done slider atop a soft, succulent onion slice with drizzled beets on the top.

Enjoy!


SUPPLIES

food processor

INGREDIENTS

1-2 beets, shredded
1-2 onions
all-beef sliders

DIRECTIONS

Preheat oven to 375 degrees F.

By hand or using the shredding blade on the food processor, shred or grate beets.

Slice the onions and place on the bottom of a baking dish.  Pour water to coat the bottom and halfway up the onion slices.  Place in hot oven.

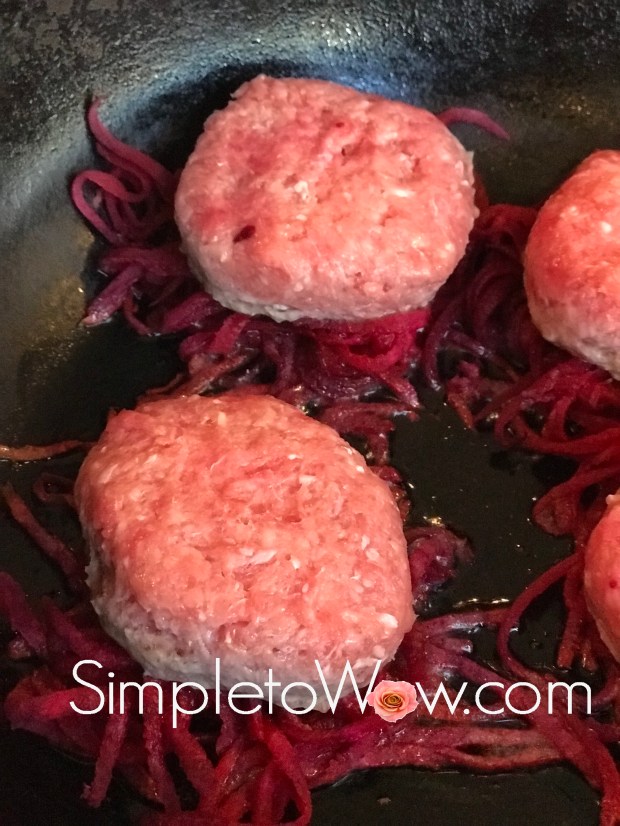
Heat sliders and shredded beets in fry pan.

sliders with frizzled beets in pan.jpg

Turn sliders until both sides are well-cooked.  Carefully place sliders, frizzled beets and some of the pan drippings on top of the onions in the baking dish and place bake in the oven.

Bake for 15 to 30 minutes in the preheated oven.

Broccoli Encrusted Baked Chicken Cutlets: A Basic Lesson in Sharing

broccoli encrusted chicken cutlets.jpg

I am on a forever quest to produce great meals with minimal effort.  In that endeavor, I have found many shortcuts.  One of my favorites is to prepare one starter and use it in multiple recipes and in different ways.  I convince myself that it is just another form of sharing, true collaboration between recipes.   I vehemently deny that it has anything to do with laziness.

On the most basic level, I use this sharing shortcut for sauteed onions and/or garlic.  Sauteed vegetables add an important depth of flavor to most recipes but can be time-consuming.  Therefore, I saute one large batch and then split the sauteed batch between the soup, side dishes and main dish within the same menu.   Any leftover sauteed vegetables are then moved to a zipper bag and placed in the freezer for future sharing.

This recipe is the next step in batter-sharing.  This recipe began as the batter for my Broccoli Kugel.  I was planning to prepare Baked Chicken Cutlets later on in the day.  While I was pulsing the Broccoli Kugel batter in my food processor, I thought, “why not use this batter to coat the baked chicken cutlets?”  After all, the batter incorporated so many of the ingredients necessary for moist baked chicken.  And, the addition of broccoli would add a moist barrier to the chicken while adding a new color and flavor profile!

And, so I applied the batter-sharing concept to my broccoli batter.  In a moment of boldness, I split off  some of the kugel batter for the coating of these chicken cutlets.

Wow!  Sharing can be daring, and oh, so delicious!

SUPPLIES
food processor
parchment paper

INGREDIENTS
4-6 boneless skinless chicken breasts, pounded or cut thin
1 cup cooked or thawed frozen broccoli (see kosher notes)
1 sauteed onion or 1/4 cup French Fried Onions
1 egg, beaten or 1/2 cup of your favorite dressing
1/2 teaspoon salt
dash pepper
Spicy Mayo (optional)

DIRECTIONS
Preheat oven to 400 degrees F.  Line a baking sheet with parchment paper or spray with cooking spray.

Pulse French Fried Onions soft broccoli, egg, salt and pepper.

Coat the thin chicken breasts in broccoli mixture.

Place chicken on parchment on prepared baking sheet.  Optionally, drizzle with Spicy Mayo

Bake chicken for 20-30 minutes or until chicken is fully cooked.

KOSHER NOTES
Kosher laws disallow the eating of any whole insects and therefore broccoli requires a process of soaking, rinsing and in some cases, pureeing, unless purchased with a reputable kosher hashgacha (certification). Kashrut authorities differ on the proper checking of broccoli. This blog was not designed to be your kosher authority, so please consult your local rabbinic authority regarding using and preparing broccoli.

Enjoy!


Please Note: This post contains affiliate links from Amazon, which means I earn a small commission if you click and make a purchase.

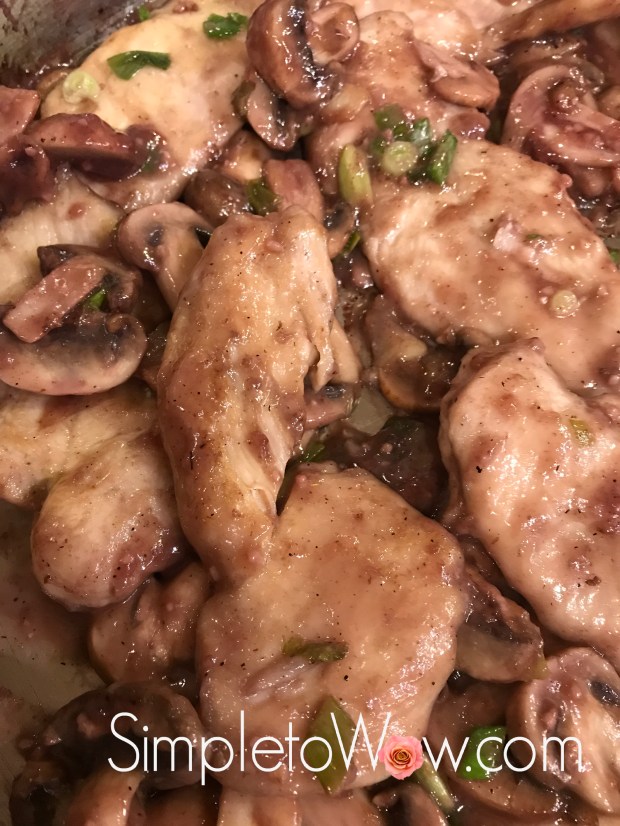
Passover Red Wine Chicken Marsala


pesach chicken marsala.JPG

This perfect for Pesach (Passover) recipe stars a red wine sauce and potato flour dredging for the chicken.   Although Marsala wine and flour are typically used in this recipe, I have adjusted the recipe to use red wine and Pesach gluten-free ingredients that pair so well with the flavors and themes of the Pesach seder experience.

Traditionally, we do not eat roasted meats at the seder, since the Karban Pesach (Passover sacrifice offering) was a roasted meat that was eaten at the time of the Holy Temple.  Since we no longer have the Holy Temple, it is customary not to eat roasted meat  on the evening of the seder.  This recipe is perfect for the seder.

We have a tradition of drinking four cups of wine at our Pesach (Passover) Seder.  After all, the majestic Seder venue commemorates our miraculous exodus from Egypt and the transformation of the Jewish nation from slavery to freedom.  What better drink than wine to celebrate freedom on a night replete with regal traditions?

We make a separate blessing on each of the four cups of wine at different parts of the seder.    The first cup of wine fills the role of kiddush (wine benediction) to sanctify the holiday of Pesach.   The second cup is associated with the lengthy telling of the story of the Exodus.  The third cup is associated with the Birkas Hamazon (Grace after Meals) and the fourth cup of wine is associated with the Hallel (songs of praise) that we sing toward the end of the seder.

Each of the four cups of wine symbolize one of the national exiles experienced by the Jewish nation and relate to one of the four expressions of redemption by G-d in the Exodus.

והוצאתי V’ho-tzaisi (and He took us out)
This expression of redemption symbolizes the Babylonian exile.

והצלתי  V’he-tzalti (and He saved us)
This expression of redemption symbolizes our oppression by Persia (further commemorated by Purim)

וגָּאלתי  V’ga-alti (and He redeemed us) This expression of redemption symbolizes our oppression by the Greeks (further commemorated by Chanukah)

ולקחתי  V’la-kachti (and He took us) This expression of redemption symbolizes the Roman exile.

This recipe tastes as good as the orginal and will wow your seder guests.  Enjoy!

INGREDIENTS

2 pounds boneless chicken breasts, cut or pounded thin
1/3 cup potato starch
salt and pepper to taste
6 tablespoons olive oil
2 packages mushrooms, sliced or 2 large cans mushrooms, drained
Juice of half a lemon or 2 tablespoons lemon juice
3/4 cup red wine
1/4 cup pareve milk (optional)

parsley (optional, for garnish)

DIRECTIONS

Place 1/3 cup of potato starch in a pie dish or a shallow bowl and season with salt and pepper.  Coat each piece of chicken with potato starch mixture.

Over medium-high heat, heat oil in a large frying pan or saute pan. Add the coated chicken. Cook each piece of coated chicken for 3-4 minutes on each side.  Work in batches, if necessary, making sure not to crowd the pan.

Slice mushrooms and cook for a few minutes in same pan, until mushrooms are soft and fragrant.

Add the wine and lemon juice, deglazing the pan with a wooden spoon by stirring in any brown bits left over from the cooking of the coated chicken.   Cook until the mushroom sauce is reduced to half.

Lower the heat to medium and add the pareve milk.  With a wooden spoon, stir well until the sauce is well-combined. Reduce heat to a simmer and simmer the sauce until the sauce is thick and glossy.

Return the cooked chicken to the pan and cook for 10-15 minutes more, until chicken is fragrant, soft, succulent and cooked through.

Add additional salt and pepper to taste, if necessary.  Optionally, garnish with chopped parsley.

Enjoy!


pesach chicken marsala on a plate


Pesach Onion Kugel

pesach onion kugel

I absolutely love a challenge!  In a comment on my Simply Amazing Onion Kugel, Pearl asked about adjusting this simple and delicious recipe to Pesach (Passover) cooking.  I worked on making this recipe suitable for Pesach and my family contends that this recipe is even better than the original.

I agree.

Our custom on Pesach is not to bruck (use matzo products with liquid), so it was not possible to merely substitute soaked matzo for the soaked bread in the original recipe.  I played with the recipe until I came up with this Pesach variation.

We all licked our plates clean.  It is a winner and it will be on our seder menu this year.

Have a Chag Kasher V’Samaech (Happy and Kosher Passover)!

SUPPLIES

food processor
pyrex pie plate


INGREDIENTS

4-5 onions

3 eggs
2/3 cup potato starch
1/4 cup oil
1/3 cup seltzer
1 teaspoon salt
pinch black pepper


DIRECTIONS

Preheat oven to 425 degrees F.

Coat a pyrex pie plate lightly with oil and place in oven.

While the oil is heating up, cut the onions into large chunks. Using the metal s-blade of the food processor, pulse the onions until they are shredded but not liquidy.  Add eggs, oil, seltzer,  salt and pepper. Pulse a few times to combine.

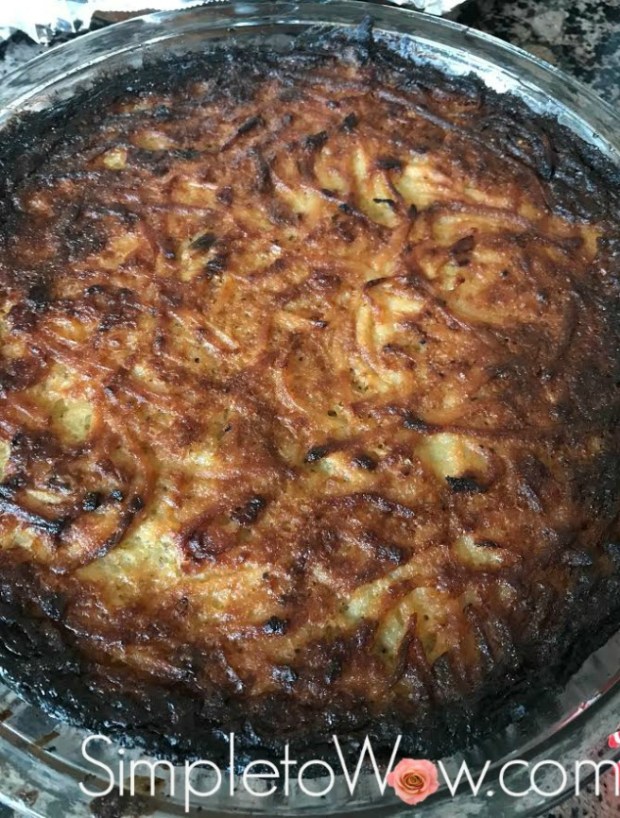
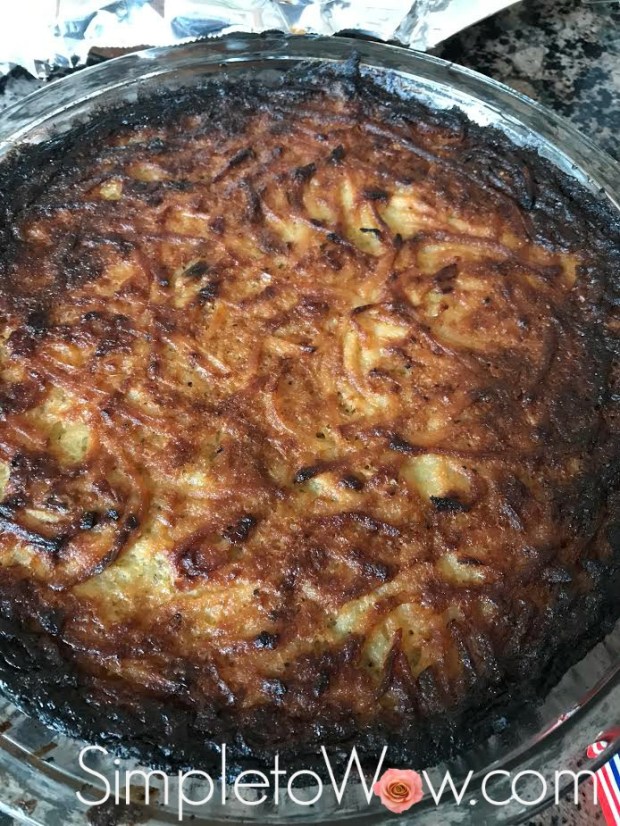
Carefully remove the sizzling pyrex pie plate from the oven. Pour the mixture directly from the food processor bowl into the pyrex pie plate and bake uncovered for one hour and ten minutes. When done, the onion kugel should be caramelized on top and bottom and soft and creamy on the inside.


TIPS

Because sulphuric gas released from the onion during cutting reacts with tear ducts, eyes feel irritated and release tears when cutting onions.  Heating the onion before cutting  breaks apart the enzymes that emit sulphuric gas to reduce and/or eliminate the tears.   The easiest way to heat the onions for this kugel is to microwave them on high for several minutes  in 30 second increments.  For best results, cool the microwaved onions before cutting into chunks.

Please Note: This post contains affiliate links from Amazon, which means I earn a small commission if you click and make a purchase.

Simple Cranberry Sorbet

cranberry sorbet

I’ll share a secret with you.

My Purim seuda (feast) menu is designed around the chametz (leavened products) that I must use up before Pesach (Passover).

This year, I found myself with lots of frozen challah, hence the stuffed chicken breasts and meatballs.  I found that I had three bags of fine egg noodles, and thus yerushalmi kugel was added to the menu. I found myself with way too many boxes of brownie mix, even after giving so many boxes away to the fastest respondents on our Cousins WhatsApp chat.  I created stunning pecan truffle cookies and made delicious Strawberry and Brownie Mini Trifles to use up the remaining boxes of brownie mix.

As I was sorting through the freezer, I found a few bags of frozen cranberries.  According to halacha (Jewish law),  cranberries are not chametz.  Therefore, they did not need to be consumed or discarded before Pesach, but after doing the math, I realized that they probably were already several months old.  After all, I usually buy fresh cranberries around Thanksgiving and then wash and freeze them in late November or early December.

I set a handful of cranberries aside to prepare Frosted Sugar-Coated Cranberries to be used as a garnish, but decided to prepare cranberry sorbet with the rest of the frozen cranberries.  I remember seeing a Cranberry Ice recipe posted by one of my favorite kosher bloggers, CookingfortheTimeChallenged and I used that as my inspiration for this recipe.

This recipe uses sweet soda or juice as the liquid base.  I found some flat soda left over from a Sheva Brochos that I recently hosted.  This is the perfect recipe to use up that leftover grape juice, orange juice or flat soda.

I love the sweet and savory flavor combination.  I garnished these ices with chives for a surprising bite, but other herbs like mint or basil may be blended right in for that stunning palate sensation.

INGREDIENTS

one can cranberry sauce, whole or jellied
1 cup soda or juice
1 bag frozen berries or 2 cups frozen grapes

herb garnish, such as basil, mint or chives (optional)

DIRECTIONS

Using the s-blade of the food processor, puree cranberry sauce, berries and liquid.

Freeze until solid or overnight.

Once frozen, remove from freezer and defrost just enough to scoop back into the food processor fitted with the s-blade.

Pulse sorbet in food processor just until smooth.  Refreeze.

To allow for simple entertaining, I usually defrost for 20-30 minutes before scooping.

Garnish with mint leaves and Frosted Sugar-Coated Cranberries

SUBSTITUTIONS

Any canned fruit may be substituted for the canned cranberry sauce.

Any frozen fruit may be substituted for the frozen berries.  Just make sure to taste puree and blend with enough soda or juice for optimal sweetness.  Honey may be added as well to sweeten the sorbet.

Blend your choice of fresh herbs like mint, basil or chives for that unusual sweet and savory flavor sensation.

TIPS

I scoop the sorbet into small cups in advance and freeze in the cups until ready to serve. That speeds up the serving of a frozen dessert and keeps everything tidy.    I add the garnish at the end so that the leaves stay fresh and green.

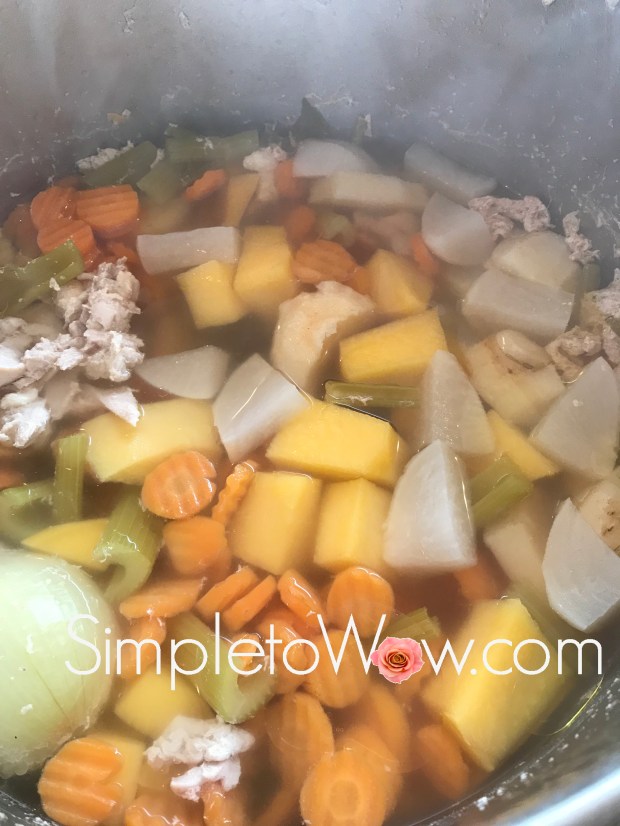
A Simple Chicken Soup Upgrade

upgraded chicken soup with rutabaga.jpg

I’ve been serving the same basic chicken soup recipe for more than thirty years. My family, even the “vegetarians” among them, look forward to chicken soup at the Friday night Shabbos dinner, rain or shine, winter or summer.

As far as changes over the years, they have been minimal.  I sometimes leave the vegetables whole and sometimes dice the vegetables.  When Kaitlyn visits, I add an extra onion and eliminate the celery.  When Michelle visits, I add extra zucchini.   Leah loves eating the dill sprigs that I remove from the soup before serving.   Aaron and Davida put no extra demands on the chicken soup and they enjoy the soup any way that it is served.

This winter I upgraded the chicken soup.  I added cubes of waxed turnip, also known as rutabaga.

I didn’t think that it was a big deal, until the first time I served the upgraded soup.

“What did you do differently to the soup?” asked Leah.  “Yeah” chimed in the rest of the family.

I braced myself.  After all, upgrading a thirty-year constant can be a big deal.

I need not have worried because they all loved the assertive flavor and color of the diced rutabaga.  It was just another distinctive character in the colorful combination of textures and flavors of my chicken soup.

And, that is perfectly fine.  The chicken soup is kind of like our family, our Shabbos table and our lives, a colorful blend of personalities.

INGREDIENTS

One pound of boneless, skinless chicken breast trimmings
1 white turnip, peeled and cubed
1 waxed turnip (rutabaga), well-peeled and cubed
1 parsnip, peeled and sliced
3-4 carrots, peeled and sliced
4 stalks celery (optional), scrubbed and cut into 1 inch sections
2 small onions (optional), peeled and left whole
2 tablespoons salt (more or less for taste)
1 teaspoon pepper
1-2 sprigs dill (optional)
2 zucchini, scrubbed and cut into 1 inch sections
water

DIRECTIONS

Peel and prepare vegetables. The rutabaga has a thick waxed coating, so peel carefully with a peeler or a paring knife, taking care to remove every bit of peel.


Place chicken and vegetables (except zucchini) in a large stock pot and fill 2/3 to the top with water. Bring soup to a rolling boil and then lower heat to medium and cook for one more hour.

Replace any water that has evaporated, making sure that the level of the soup broth is where it started before cooking. Add zucchini and increase flame to high.  Boil for 15-20 more minutes.

upgraded chicken soup with rutabaga

Enjoy!

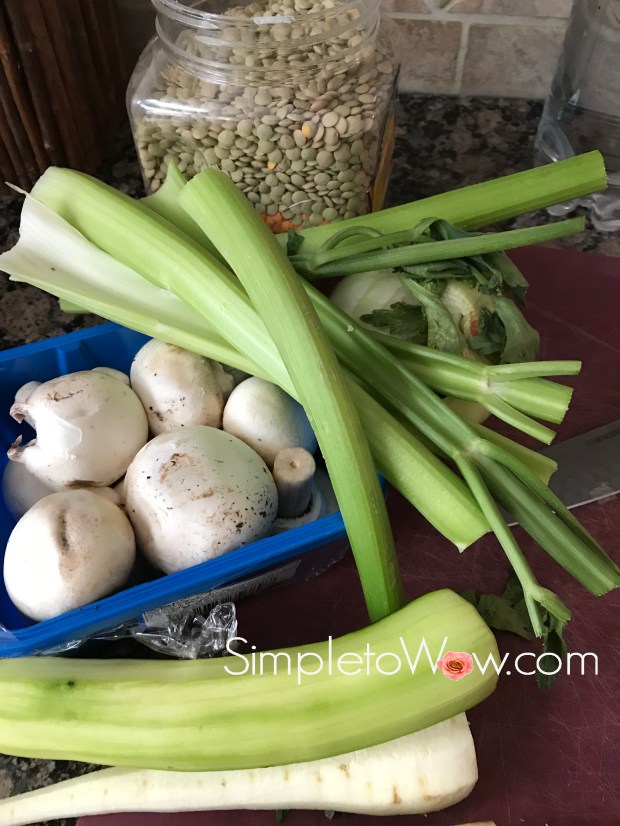
Set It and Forget It Lentil-Vegetable Soup

There is something so hearty and comforting about lentil soup.  And, there is something about taking just a few minutes to prepare a soup on these cold, snowy mornings and coming back at the end of the day to a warm, thick, velvety and delicious soup.  Ordinary lentils really have that magical texture, firm yet creamy.  Adding vegetables to the ingredient list just takes lentil soup to a whole new level.

For this soup, I used the most common brown lentil .  It has the seed hull intact and is most suitable for salads and soups that require the lentil to retain its shape.   If you are short on time, you can use red lentils, instead.   It will cut down on the cooking time and still yield a hearty and delicious soup with a less defined texture to the lentil base.

set it and forget it lentil soup in crock

INGREDIENTS
one bag lentils
1 1/2 teaspoons salt
dash of pepper
3-4 garlic cloves, minced or 1 teaspoon garlic powder

1 parsnip, cut into thin slices
1 package mushrooms, sliced thin
4 stalks celery, sliced thin
1 onion, diced
1 zucchini, diced
water

celery leaves, for garnish (optional)

set it and forget it lentil soup.jpg

DIRECTIONS

Place lentils, vegetables and seasonings into a crockpot. Fill crockpot 3/4 to top with water. Cook on high from morning to evening. If the soup is too thick, add up to a cup of water and stir well. Garnish with celery leaves right before serving.

SHORTCUTS
When in a hurry, I substitute red lentils and adjust the cooking time to 4 hours.  Right before serving, puree soup with a  stick blender for a creamy texture.

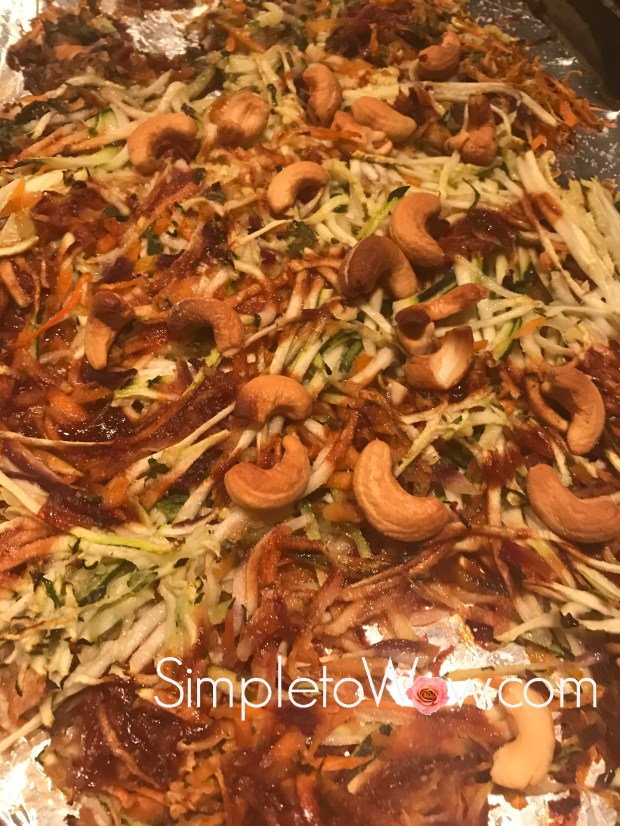
Roasted Confetti Vegetables with Cashews

This is the perfect side dish for a weeknight.   It uses wholesome ingredients, takes minutes to prepare and requires only 20 minutes to roast. The meatiness of the cashews paired with the tender shreds of zucchini and rainbow carrots make this dish hearty, flavorful and satisfying.

confetti roasted vegetables.jpg

 INGREDIENTS

1-2 zucchini, shredded
1 package rainbow carrots, peeled and shredded
1 onion, shredded
handful of whole cashews

2 teaspoons kosher salt
flavored oil or olive oil

DIRECTIONS

Preheat oven to 450 degrees F. Line a baking sheet with foil or parchment paper.  Using the shredding blade of the food processor, shred onion, carrots and zucchini.

Spread vegetables atop the lined baking sheet. Drizzle with a scant amount of oil and sprinkle with salt. Sprinkle a handful of cashews over vegetables.

Roast for 15-20 minutes.

Toss and enjoy!

15 Minute Mushroom Soup

mushroom soup

The weather outside is frightfully cold and nothing warms the soul like a hot bowl of satisfying soup.   Although yesterday morning, I intended to start my  Crockpot Drunken Mushroom Soup in the crockpot,  I never did.  Instead, I got home late with only 15 minutes to get dinner on the table.   That meant that I needed to make the soup in a heavy-bottom pot using every shortcut possible.

I skimped on sauteing the onions and celery slowly and carefully.  Instead, I cut the onions and celery very small and started the soup by just sauteing the small bits of onions and celery for a few minutes.  I then shredded the mushrooms and zucchini in the food processor so that the tiny bits would cook quickly.  I skipped the wine and just added salt and pepper for flavor.

This soup was one of the best that I ever produced.  Sorry, kids!  Although my kids often chastise me for complimenting my own food, I subscribe to the belief that a cook may compliment or criticize their own handiwork.  Why not?

The soup was so flavorful and so silky that Don could not believe that there was no cream in this soup.  He loved this soup so much that he enjoyed three bowls of it.  So, guys, I didn’t even need to compliment my own soup.  Dad did it for me in word and in deed.  Indeed!


INGREDIENTS

2-3 tablespoons oil
1 onion, diced small
3 stalks celery, diced small
2 containers mushrooms, shredded
2-3 medium zucchini,shredded
1 1/2 teaspoons salt
dash pepper
4-6 cups of water

Celery Garnish (optional)


DIRECTIONS
In a heavy bottom pot over medium-high heat, saute onion and celery in oil for just a few minutes, until onions and celery are soft but not brown.

While vegetables are sauteing, shred the mushrooms and zucchini in the food processor using the s-blade or the shredding blade.

Add the shredded mushrooms and zucchini to the onions and celery. Add the salt and pepper and stir to combine. Add water and bring to a boil.  Simmer for a few minutes more until the soup is cooked through and silky.

Garnish with a celery curl.

Enjoy!


TIPS

To speed up recipes, cut, shred or dice ingredients into smaller pieces.   Smaller bits create more surface area for the heat and cooking media to enter.  Just take care, because the smaller the pieces of ingredients, the easier these ingredients are to overcook or to burn.

Out of the Bowl Tiered Salad

Who says that salad must be served in a salad bowl and tossed?

out of the bowl salad-side view.png

One of the most exciting things about salad is its versatility.  A beautiful and delicious salad can incorporate so many disparate ingredients and the contrast of colors, textures and flavors makes each salad unique.

Today’s salad is about layering a gorgeous vessel with different vegetables and toppings.  Its effortless simplicity achieves an elegance that highlights the colorful and flavorful vegetables themselves.

This salad is prepared on a rose gold hammered elongated platter with the ingredients placed in long tiers.  The vibrant colors of the romaine lettuce, shredded fresh beets, rainbow peppers and heirloom tomatoes speak for themselves.

SUPPLIES

hammered elongated bowl (different than bowl pictured on blog post)

INGREDIENTS

romaine lettuce, shredded
raw red beets, peeled and shredded
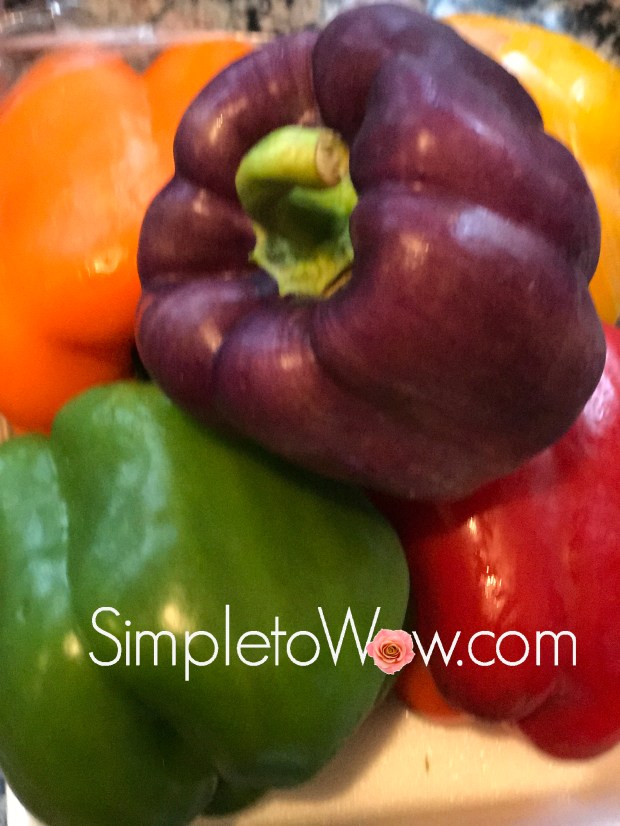
rainbow peppers, cut into small pieces
heirloom tomatoes
parsley and scallions, cut into tiny pieces

Balsamic Vinaigrette

DIRECTIONS

Place a layer of shredded romaine lettuce.  Top that with a layer of shredded red beets, overlapping the bottom layer so that the romaine lettuce can be viewed from the sides.

out of the bowl salad-layers 1 and 2.png

Top that with small pieces of rainbow peppers and small colorful tomatoes.

rainbow peppers

Garnish with shredded or sliced parsley and scallions.  Drizzle Balsamic Vinaigrette over the salad and serve.

out of the bowl salad partial view.png


This salad is truly simple to wow!

out of the bowl salad.png

Please Note: This post contains affiliate links from Amazon, which means I earn a small commission if you click and make a purchase.

Abracadabra Potato Kugel

My grandson, Judah, has learned a new word this summer.  Abracadabra.

Abracadabra is quite a mouthful for a two year old.    And, when Judah uses the word, he uses it with such flair.  He must have learned it from one of the many shows he enjoyed in summer camp.

I have been preparing potato kugel for as long as I remember and most kugels share similar ingredients.  I have two potato kugel recipes on this blog (Davida’s Awesome Potato Kugel,  Simply the Best Potato Kugel Ever and ) and they are both delicious, but rather similar.

There just doesn’t seem to be much new in potato kugel.

Until now.


abracadabra potato kugel

After I published Davida’s famous potato kugel recipe (Davida’s Awesome Potato Kugel), my aunt shared a secret tip to her fluffy and creamy potato kugel that proved to be wonderful.

It is a very simple and effective secret.  And, it is well-deserving of the simple to wow seal of approval and Judah’s favorite word, Abracadabra.

Wait for it….

Tante Sari adds seltzer to her potato kugel batter.  The effervescence of the seltzer  adds lightness and creaminess to the potato kugel.  I adapted my potato kugel recipe to accommodate the seltzer and after some tweaking (with plenty of happy taste-testers around), here is the simple to wow recipe.  It has received rave reviews from family and friends alike.

SUPPLIES

food processor
pyrex pie plates

INGREDIENTS

1 onion, quartered

1/3 cup of seltzer
1/3 cup oil
3 large eggs

1 teaspoon salt
1/4 teaspoon black pepper

4 medium to large potatoes, peeled and cut into chunks

DIRECTIONS

Set oven to 450°F degrees.

Coat a pyrex pie plate lightly with oil and place in oven (no preheating necessary).

While the oil is heating up, using the metal s-blade of the food processor, shred the onion.  Once the onion is shredded,  add oil, eggs, seltzer, salt and pepper.  Pulse a couple of times to combine.

Remove the s-blade and add the shredding blade to the food processor.  Shred the potatoes.  Pour everything into a large mixing bowl and stir to combine.   I like to use the stainless steel mixing bowl of my Kitchen Aid mixer, since it is a large, sturdy bowl with a handle for pouring,

Carefully remove the sizzling pyrex pie plate from the oven.  Pour the mixture into the pyrex pie plate and bake uncovered for one hour.

Please Note: This post contains affiliate links from Amazon, which means I earn a small commission if you click and make a purchase.
Perfect Lean and Moist Brisket

low-carb brisket up close.JPG

This Shabbos, we were expecting a houseful of company. Our guests were a motley assortment of meat eaters and lean eaters. That left me in a quandary as to how to prepare a menu to satisfy all tastes.

I prepared a vast assortment of simple Rainbow Roasted Vegetables including cabbage, cauliflower, rainbow carrots, eggplant and zucchini.  As the main dishes for Friday night, I prepared lemon zinger chicken and this lean and moist brisket.

This recipe doesn’t require marination.  It also doesn’t call for any oil. What it needs, though, is time.  Plenty of time.  Three hours of cooking time.  Oh, and onions.  Plenty of onions to keep it moist.

The low and slow cooking keeps the flavor and moistness.  The sliced onions create a flavorful and tender blanket of moisture that replaces the fat and protects the tender beef.

This is a gluten-free and low-carb recipe that is suitable for Pesach (Passover), too.

Simple and moist onion-covered brisket

INGREDIENTS

3-4 pound top of the rib beef roast or lean brisket

2-3 onions, sliced thin

lemon juice
1/2 teaspoon salt
pepper
minced garlic or garlic powder
paprika
powdered ginger
onion powder

dash of cayenne pepper (optional)

1 cup zinger tea


DIRECTIONS

Make a cup of zinger tea, squeezing out the tea bag to release as much flavor as possible. Add half of the tea to the bottom of the pan. Place roast in pan. Pour rest of tea over roast and generously sprinkle seasonings on top of the roast.

Place fattier side of the brisket up so that fat keeps the meat tender during cooking. Smother the roast with a layer of very thinly sliced onions, pressing into the roast. Cover tightly with foil.

Let brisket come to room temperature or place in oven on delayed cook mode.

Set oven to cook for 3 hours on 300 degrees F. Let roast stay in oven until the oven cools down, at least for a half hour.

Remove from oven and allow to cool completely.   Refrigerate before slicing.

Fan Potatoes and Family Memories

fan potatoes.jpg

When I was young, I vividly remember my mother preparing fan potatoes.  She did not serve them often.  They were a rare treat.

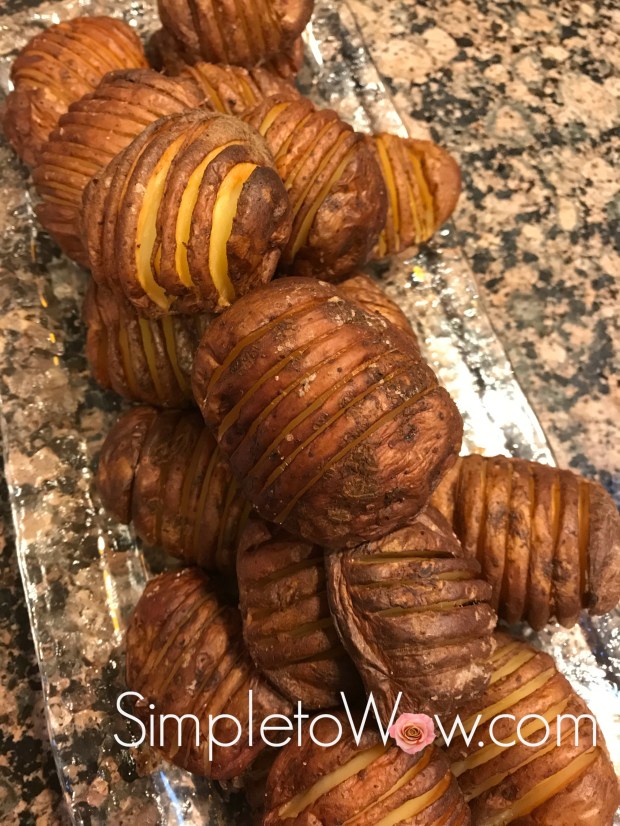
I can picture in my mind how the potatoes fanned out and how delicious they were: crisp on the outside. soft and buttery on the inside.  The fins of each fan potato created pockets of crispy caramelized deliciousness.  They were simple and perfectly salted.

After I had my own children, I asked my mother for the fan potatoes recipe.  My mother returned my request with a blank stare.

How did she not remember preparing or serving them?  They conjured such fond memories for me.  How could she not recall?  Worse yet, how could she not find the recipe?

Now that I have my own kitchen, I understand.  There are countless recipes that I made for a time and then forgot about.  Some of those for-a-time recipes were even shared with friends and they have found a permanent place in their homes.  How many times does someone mention that they still prepare my cranberry mold or my chocolate mousse cake and I have no recollection of preparing it, serving it or sharing the recipe?

A few years ago, one of my friends shared a cranberry-oatmeal souffle recipe with me.  I later found the same recipe that I had written in my own handwriting thirty years ago!

Despite it all, I was determined to recreate those fan potatoes of my childhood.  It is one those truly simple to wow recipes.  It has become part of my own family’s memory bank…and it is a here-to-stay recipe.

Yields 6-8 servings.

INGREDIENTS

Potatoes, scrubbed or peeled
Kosher or pink Himalayan salt salt
fresh garlic or minced garlic  (optional)
Olive oil or cooking spray

DIRECTIONS

Preheat oven to 450 degrees Fahrenheit

Grease/spray cookie sheet or line cookie sheet with parchment paper.

Half potatoes lengthwise. Place potato halves flat side down on cookie sheet.  Cut slits in each potato half starting at the round side but not cutting all the way through to the flat bottom.  If using garlic, coarsely chop and place between potato slits.

Drizzle lightly or spray generously with oil.  Sprinkle salt over the tops of the potatoes.

Roast in the oven for 45-65 minutes depending on the size of the potatoes. Potatoes should be golden brown when ready.

NOTES

These fan potatoes are best when eaten right away.  I usually prepare them late Friday afternoon and set them on the counter.  Most of them are devoured before Shabbos even begins.  The few that are left are still delicious for Friday night dinner, served hot.

Potatoes may be peeled or just scrubbed for this recipe.  Scrubbed potatoes will achieve a more rustic looking result, while the peeled potatoes will achieve a more refined result. They are delicious both ways!

Any potatoes may be used, but the results will differ.  Let your taste buds decide which type of potato is your favorite for this recipe.  Higher starch potatoes like Idaho or Russet will yield a firmer and mealier inside texture.  Lower starch potatoes like Red or Yukon Gold will yield a softer and creamier inside texture.

I have also served this recipe as an hors d’oeuvre using small potatoes and interesting toothpicks. It is simply delicious and beautiful both ways!

Perfectly Roasted and Seasoned Bok Choy

Bok choy is one of our favorite ingredients in leafy salads.  It is a powerhouse of nutrition, and has a signature taste and bold texture, making it the perfect ingredient for salads that are dressed in advance.  I have incorporated it into a number of salads already highlighted on the blog (see Simple, Colorful and Crunchy Baby Bok Choy Salad with Apples, Peppers, Tomatoes and Craisins).

Bok Choy is a cabbage-like green that can be found in most vegetable markets and green grocers.  For centuries, bok choy has been a staple of Chinese cuisine and medicine.   Bok choy is a rich leafy vegetable that has stalks similar to celery and leaves that are reminiscent of  Romaine lettuce.    Rich in vitamins  A, C and K, bok choy is an excellent sources of beta carotene, calcium, magnesium, potassium, manganese, and iron.

Until now, I have only enjoyed bok choy as a raw ingredient.  Kaitlyn suggested trying bok choy as a roasted vegetable.  I took Kaitlyn’s advice and roasted it with my Everything Bagel Seasoning and it was a huge hit.  It will now becom epart of my permanent roasting repertoire.

roasted bok choy

INGREDIENTS 

1-2 heads bok choy, cleaned and cut lengthwise into large spears (see kosher notes)
cooking spray
Everything Bagel Seasoning

DIRECTIONS

Preheat oven to 425 degrees F.  Line baking sheets with parchment paper or greased foil.

Spread bok choy spears in a single layer on baking sheet(s).  Lightly spray with cooking spray and  sprinkle with Everything Bagel Seasoning.

Roast for 25-35 minutes, checking that bok choy is slightly brown on top, but still moist and tender inside.

KOSHER NOTES

Kosher laws disallow the eating of  any whole insects and therefore greens like bok choy require a process of soaking and rinsing and.   Kashrut authorities differ on the proper checking of  these type of greens and some disallow its use altogether.  This blog was not designed to be your  kosher authority, so please consult your local rabbinic authority regarding using and preparing bok choy.

Lemon Zinger Chicken

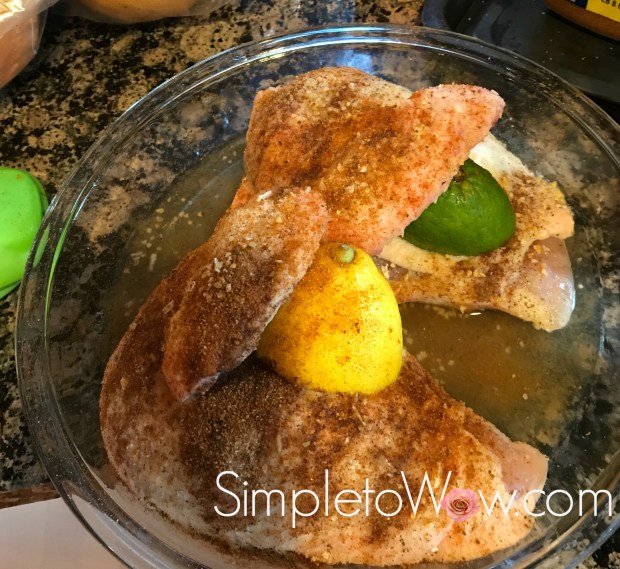
Sometimes the best flavors are simple ones.  Lemon.  Garlic.  Chicken.   Tea.

Delicious food is simple food with no compromises in freshness, flavor, moistness and taste.

Today, I prepared chicken that was tangy, flavorful and succulent.  It took very little effort.  It used natural ingredients.  And its simplicity and taste made everyone take notice.

intense lemon chicken

INGREDIENTS

chicken parts

Lemon zinger tea

fresh lemon

minced or granulated garlic
paprika
cinnamon

DIRECTIONS

In a cup or measuring cup, add a lemon zinger tea bag to  1 cup of hot water, steeping tea well to create concentrated flavor.

Place chicken pieces in pan and pour tea over chicken.   Rinse whole lemons well and squeeze fresh lemon over chicken.  Generously sprinkle chicken with seasonings.

Tuck squeezed lemon in between chicken pieces.  Cover tightly with foil and cook at 400 degrees F for two hours.

Simple Superstar Roasted Onions

roasted onions up close

Onions are the ultimate team player.   They are used to start soups and sautes, taking very little credit for the impactful favor that they impart.  They are sprinkled atop salads or roasts, adding spiciness and satisfying juiciness wherever they are used.

They are the utility player that can be used here or there, always making the other ingredients taste a little better without taking credit themselves.  Fried or sauteed onions become the basis for great flavorful dishes.  Onions have the ability to make so many different types of recipes heartier, fuller and more delicious.

Onions are the unsung stars of so many dishes.

But, do onions not deserve to be superstars in their own right?

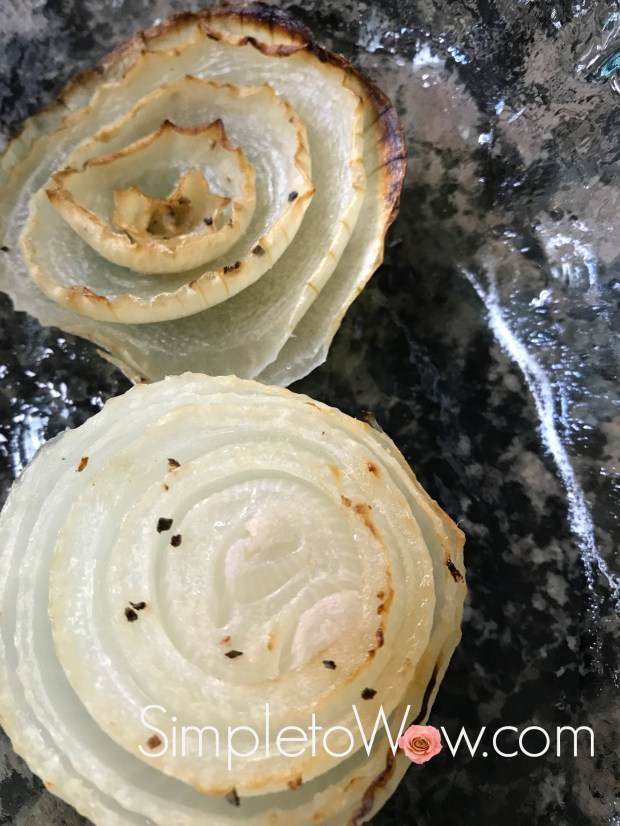
After all, there is nothing like a caramelized onion.  The decadent smell.  The charred sweet outside and the creamy soft inside is one of those texture combinations that is like no other.

This side dish is so simple.  So perfect.  And, so delicious.  And, it finally highlights the onion as the star of the game.

After preparing these roasted onions and certainly after tasting their distinctive creamy sweet flavor, you’ll be cheering for the onion to be your new favorite player, too!

roasted onions on plate


INGREDIENTS

3-4 large onions

oil spray
salt
pepper
minced or granulated garlic


DIRECTIONS

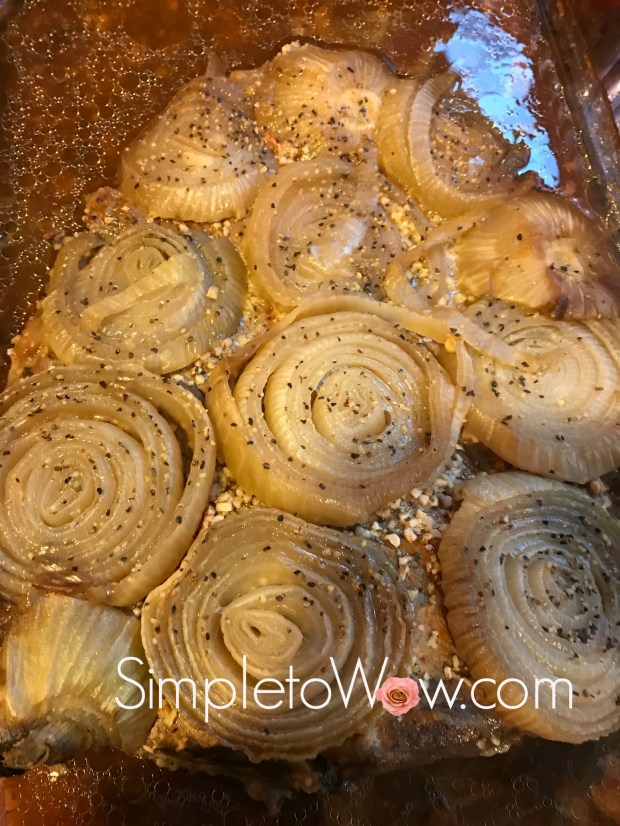
Line baking sheet with parchment paper. Cut onions crosswise into 1/2 inch sections. Line onions on pan and spray lightly with oil spray. Sprinkle with salt, pepper and garlic.

Roast at 400 degrees F for 45-55 minutes or until onions are golden brown on outside and soft and creamy on the inside.

roasted onions on baking sheet

Chana’s Low-Carb Broccoli Kugel

chana's low-carb brocolli kugel.jpg

Last Shabbos, we hosted my brother-in-law and sister-in-law and niece for Shabbos.    We always look forward to their visits.  Yisroel and Chana are some of my favorite guests, so helpful and appreciative.

We had a wonderful Shabbos, sharing divrei torah (words of Torah) and my father-in-law’s a’h favorite zemiros (Shabbos melodies) at our Shabbos table.  Don and his brother entertained us as they shared uproarious accounts of their childhood antics.   Chana regaled us with side-splitting stories, as Devora Brocha, their beautiful daughter kaH, acted out these anecdotes.

Since we only arranged to spend Shabbos together late Thursday afternoon, Chana offered to prepare and bring her delicious broccoli kugel.  That was an offer that was hard to refuse because I love Chana’s cooking and I am always happy to serve one more, delicious dish.

It did not disappoint.  This broccoli kugel is flavorful with excellent texture. Its creaminess and depth of flavor are perfect.  Best of all, it is gluten-free and low in carbs. Thanks, Chana!

INGREDIENTS

1 bag (24 oz) chopped broccoli, steamed for 10 minutes (see Kosher notes)
1 large onion and 2 cloves garlic, sautéed
2 eggs
1 1/2 heaping teaspoons mayonnaise
1/2 heaping teaspoon chicken soup mix or consomme
3/4 teaspoon salt
dash of black pepper

DIRECTIONS

Preheat oven 400 degrees F. Combine all ingredients and pour into a 9″ round pan. Bake for 40-50 minutes, until golden brown on top.

KOSHER NOTES

Kosher laws disallow the eating of any whole insects and therefore broccoli requires a process of soaking, rinsing and in some cases, pureeing, unless purchased with a reputable kosher hashgacha (certification).  Kashrut authorities differ on the proper checking of broccoli.  This blog was not designed to be your kosher authority, so please consult your local rabbinic authority regarding using and preparing broccoli.

TIPS
I eliminate the consomme and just increase the salt and pepper slightly.

Enjoy!

Cheesy Cabbage Steaks

This week, I decided to prepare a delicious, colorful and low-carb dairy dinner.  Since I had just returned from an overseas trip, I found my refrigerator and pantry low-stocked. With very few ingredients to choose from, I opted to use the head of cabbage that I found in the refrigerator to prepare these of, so wonderful cheesy cabbage steaks.

Cabbage has many health benefits.  It is low in calories and carbs and high in fiber and vitamins. Cabbage is low in saturated fat and boasts high levels of vitamin C and vitamin K.  Best of all, it is inexpensive and available year-round.

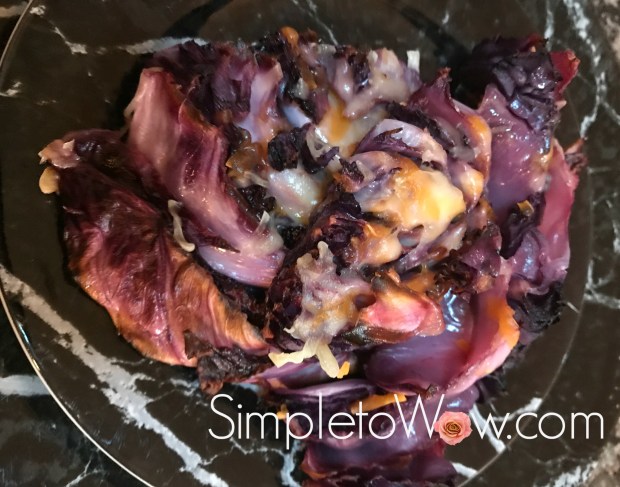
I used red cabbage for this recipe, but any cabbage may be used.  In this simple recipe, the red cabbage creates a stunning purple backdrop to the velvety melted cheese on top. It may be used to Passover and is gluten free, too.

Cheesy cabbage steaks

INGREDIENTS

Red cabbage, cleaned and cut into steaks

4 minced garlic cloves or granulated garlic
coarse salt
coarse ground black pepper
olive oil or cooking spray

shredded cheese


DIRECTIONS

Preheat oven to 375 degrees F.  Line baking sheets with parchment paper or greased foil.

Remove first 4-5 tough outer leaves of cabbage.  Clean cabbage and cut into 1/2 inch to 3/4 thick steaks.  Place cabbage steaks in a single layer on lined cookie sheets.   Drizzle with olive oil or generously spray with cooking spray.   Lightly sprinkle with salt, garlic and black pepper.

Roast for 40-45 minutes, checking that cabbage steaks are soft and just starting to brown before removing from oven.


Sprinkle shredded cheese over the cooked cabbage steaks.  Return to the oven for 10-15 minutes more until cheese is melted and gooey.

Enjoy!

Simple Chicken Vegetable Packets

I devone of those hot and humid days that were exhausting.  I just had very little energy left at the end of the day to prepare dinner.  I had defrosted chicken breasts earlier to use for dinner and needed inspiration to create a simple and delicious meal.

I wanted no fuss and very little effort.    I didn’t even want the extra effort of preheating the oven.  I wanted to use at-hand ingredients and easy cleanup.

Packet cooking seemed like the perfect solution.

I have prepared packet meals with salmon (Low-Carb Cajun Salmon Fillets in Foil Packets) and decided to try it with the chicken breasts.   To keep the meal hearty and fuss-free, I decided to add an assortment of fresh and frozen vegetables that I had on hand to the packets, too.

This really was simple.  And, yes, it was a wow!

INGREDIENTS

4 chicken breasts

barbecue sauce
soy sauce

frozen green beans
tomatoes
peppers

DIRECTIONS

Cut four square pieces of heavy duty foil. On each piece of foil, place one chicken breast and then lightly drizzle with soy sauce and then barbecue sauce. Layer tomatoes and peppers and then sprinkle with a few frozen green beans. Seal foil into packets.

Bake at 400 degrees F for 30-40 minutes. Open foil packets carefully to let steamm escape and serve immediately.

Davida’s Awesome Potato Kugel

It is so wonderful to have Davida back from Israel.  The house is a more joyful abode and Davida and her friends fill our house with laughter, music and good food.  No matter how chaotic things are, Davida seems to have just the right lighthearted joke and is always willing and able to prepare delicious food for all.

Whatever Davida prepares is not only delicious, but perfectly executed, as well.   Her challahs are beautifully braided, her salads are impeccably tossed and her food just begs to be enjoyed.

When we visited Israel for Pesach (Passover),  Davida prepared this delicious kugel for us.  This past winter, Davida first tried this recipe when she prepared a Shabbos in Jerusalem  for Michelle, Scotty and their gluten-free guests.

The original recipe is from Susie Fischbein’s Pesach cookbook.   Davida tweaked and simplified it just a bit.   It contains a small amount of sugar and when I scoffed at that, Davida admitted that she tried it without the sugar and it just wasn’t the same.

This past Shabbos, Davida prepared this potato kugel again and it was another winner.

Welcome home, Davida!

davidas awesome potato kugel

SUPPLIES

food processor
2 pyrex pie plates

INGREDIENTS

1⁄2 cup  oil
8 medium potatoes, peeled and cut into chunks
2 medium onions, peeled and quartered
1 tablespoon salt
1 teaspoon black pepper
2 tablespoons sugar
5 large eggs

DIRECTIONS

Preheat oven to 425°F degrees.

Using the metal s-blade of the food processor,  shred the onions and then place in a large mixing bowl.  I like to use the stainless steel mixing bowl of my Kitchen Aid mixer, since it is a large, sturdy bowl with a handle for pouring,

Using the metal s-blade of the food processor,  shred the peeled potato chunks until almost smooth.  Add the potatoes to the mixing bowl

Add the salt, pepper, and sugar to the potato-onion mixture and then add the eggs.  Stir until completely combined.

Coat each pyrex pie plate with 1/4 cup of oil and place in preheated oven. When the oil sizzles, carefully remove each pyrex pie plate from oven and spoon some of the sizzling oil into the waiting potato mixture to add fluffiness to the kugel.  Incorporate the sizzling oil into the mixture until well combined.   Pour the mixture into the 2 pyrex pie plates and bake uncovered for one hour.

Enjoy this delicious kugel with music and laughter!

Please Note: This post contains affiliate links from Amazon, which means I earn a small commission if you click and make a purchase.
Watermelon Jicama Salad

watermelon jicama salad


A few weeks ago, we had very hot weather on Shabbos.  It was one of those weeks that boasted a potpourri of  weather patterns.  We had rain, cold, overcast skies, bursts of sunshine and then a 40 degree rise in temperatures from Friday to Shabbos.

We just did not have enough time for our bodies to acclimate to nearly ninety degrees F on Shabbos.

I had bought a watermelon to greet the warm weather and Shabbos morning, on the spur of the moment, I decided to serve the watermelon as a salad rather than as a dessert.  I remembered having a delicious watermelon salad at my friend, Sallie’s house several years ago.  I didn’t remember anything about the other ingredients in Sallie’s salad, just that I had really enjoyed her watermelon salad.

I ran the idea of creating a watermelon salad by Ruti, our Shabbos house-guest from Jerusalem.

She had one word for the idea.  Muzar.  Strange.

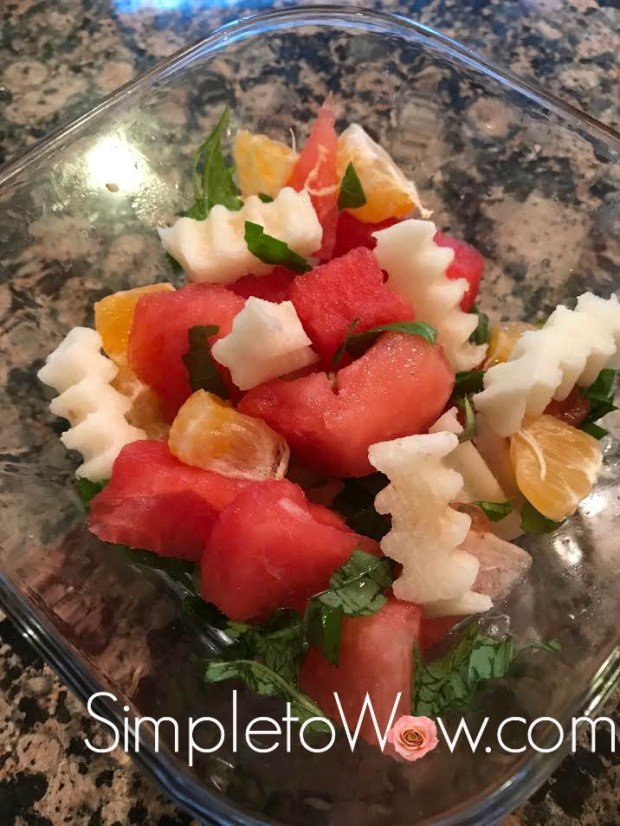
That didn’t stop me.  I looked in my refrigerator.  I had jicama, mint, scallions and blood oranges in addition to the watermelon.  So, I cut everything up, placed the salad bowl in the refrigerator and waited for inspiration to set in for the dressing.
Inspiration is the mother of invention,  The salad was refreshing, delicious and beautiful.

Oh, and Sallie joined us with her family for Shabbos lunch.  At first all our guests remarked, “So, we’re the guinea pigs for the blog?”, to which I simply said “yes!”.

But then, Sallie tasted the salad and just said, “Wow!”

That made my day.  The ingredient combinations may be muzar, but Sallie’s declaration of wow confirmed that this recipe would be a keeper.

INGREDIENTS

watermelon, cut into cubes (about 4 cups)
jicama, peeled and cut into small cubes
scallions, washed and cut into 1″ sections
mint, soaked and rinsed (optional) (see kosher notes)
2 blood oranges, peeled and cubed

1-2 teaspoons kosher salt
dash of pepper
lemon juice or cider vinegar
drizzle of oil (optional)

SUPPLIES

wavy crinkle cutter


DIRECTIONS

Cube watermelon and cut jicama into small strips or cubes using  wavy crinkle cutter. Clean and rinse scallions and mint.  Sprinkle kosher salt and pepper over ingredients. Drizzle with lemon  juice or cider vinegar.  Lightly drizzle with oil.

Enjoy!

KOSHER NOTES

Kosher laws disallow the eating of  any whole insects and therefore most greens require a process of soaking, rinsing and in some cases, pureeing.  Kashrut authorities differ on the proper checking of herbs and some disallow the use of fresh herbs altogether.  This blog was not designed to be your  kosher authority, so please consult your local rabbinic authority regarding using and preparing herbs such as mint.

Firecracker Cauliflower

firecracker cauliflower.jpg

Every once in a while, I want to serve something that surprises everyone.  Cauliflower is one of those side dishes that everyone enjoys and is simply good for you.  When roasted, it has both delicious flavor and texture (see Rockstar Roasted Cauliflower).

This week, I decided to wake everyone’s taste buds up by adding some heat to my typical roasted cauliflower.  This recipe was inspired by Simply Spicy Firecracker Salmon.

INGREDIENTS

1-2 heads cauliflower, separated into florets and cleaned (see kosher notes)
Oil

Kosher Salt
Simple and Perfect Spicy Mayo
Lime juice (optional)

DIRECTIONS

Line baking sheets with parchment paper or greased foil.

Spread cauliflower in a single layer on baking sheet(s).  Sprinkle with kosher salt and lightly drizzle with spicy mayo.  Drizzle lightly with lime juice for a fresh flavor.

Roast at 425 degrees F for 40-50 minutes, checking that cauliflower is sot on inside and just turning brown on outside before removing from oven.

KOSHER NOTES

Kosher laws disallow the eating of any whole insects and therefore cauliflower require a process of soaking, rinsing and in some cases, pureeing. Kashrut authorities differ on the proper checking of cauliflower and some disallow its use altogether. This blog was not designed to be your kosher authority, so please consult your local rabbinic authority regarding using and preparing cauliflower.