Wow ideas for Simple Items

Marshmallow Tulips

marshmallow flowers in arrangement.jpg

On Shabbos Bereishis (Genesis), we were still in Israel after spending Sukkos and Simchas Torah there.  Our favorite shul (synagogue) is located in the Jerusalem Municipality complex and is attended by a mix of neighborhood residents and guests.  It is such an awesome cross-section of the various types of Jews living and visiting nearby.  It is a potpourri of Chassidim, Yeshivish families and Modern Orthodox Jews and every type of Jew philosophically in-between.  Our shul hosts people from all parts of the world, all walks of life and all ages.  Best of all, there is a warm connection between all those who pray within.  It is a tiny oasis of tefilla (prayer) and friendship in the holy city of Jerusalem.

On that particular Shabbos, there was a Bar Mitzvah being hosted in the shul.  As the Bar Mitzvah boy was called to the Torah, his nine siblings stood at attention for his aliyah (calling to the Torah).  In the woman’s balcony rising above the bimah (Torah table) were his proud mother and six identically dressed sisters, ranging in age from two to twelve years old.  The older sisters brought candies which they showered down upon their brother.  Carefully displayed in plastic bags were candy flowers that were hand-designed and distributed to the young girls in the women’s balcony section.   They were simple colorful marshmallows, each skewered with a sour belt sepal.

The flowers were colorful and gorgeous.  They piqued my interest because they were so simple and yet so beautiful.   Their beauty belies the unity of the ingredients and the simplicity of their design. And, yet, these flowers transport me instantly to that special place in Jerusalem that, for me,  represents its own blend of unity and beauty.

marshmallow flower

INGREDIENTS AND SUPPLIES

colorful marshmallows

green sour belts

short wooden skewers


DIRECTIONS

On each skewer, fold each end of the sour belt toward the center, securing both ends on the pointy end of the skewer. leaving close to an inch at the top for the marshmallow.

Place a marshmallow at the tip of the pointed end of the skewer, gently pushing downward until secure.


Please Note: This post contains affiliate links from Amazon, which means I earn a small commission if you click and make a purchase.

Pink Baby Carriage Cookies: Simple to Wow

For Charley’s kiddush, Davida prepared these adorable carriage cookies.

They really were Simple to Wow!

baby girl carriages

INGREDIENTS

Hadar-Tirosh chocolate half-moon biscuits
Paskesz mini Oreo cookies
frosting
Pink piping or frosting

DIRECTIONS

Using a small spatula coated with frosting, adhere two half-moon cookies together at right angles to create base of carriage.  Since these cookies are double-sided,  use the vanilla side for the base of the carriage and the chocolate-side for the carriage hood.

With a dab of frosting, adhere two wheels to front of cookie carriage.  Pipe lines on hood of carriage for additional decoration.

baby girl carriages

DIY Sanding Sugar

Sanding sugar adds a wow to so many of my simplest desserts.  While some recipes call for sanding sugar in colors that are impossible to find, others call for such minute or such immense quantity that it makes no sense to purchase.   And, sanding sugar is so simple to create in exactly the hue that you need using two simple ingredients.

Wow!


INGREDIENTS
1 cup sugar
food coloring

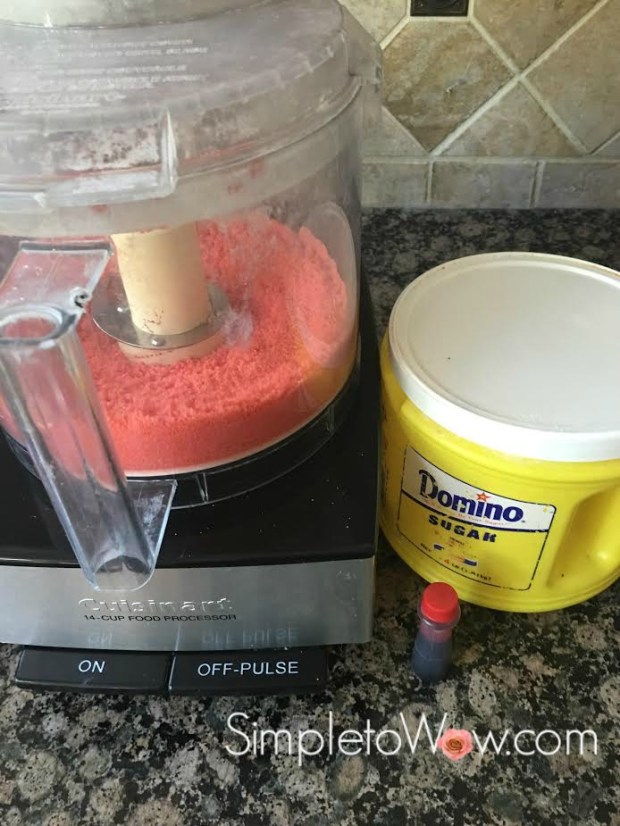
Combine 1 cup of sugar with food coloring, adding drops of food coloring until the desired hue and depth of color is reached.  Either pulse in food processor, using the s-blade or combine in a ziploc bag, kneading on outside of bag until well-combined.

Sukka Clouds of Glory

IMG_4857.jpg

Sunday night is the beginning of the holiday of Sukkos,  סוכות.  We are preparing for the holiday in Jerusalem amid a flurry of shopping, building and cooking.  To commemorate Sukkos, we constructed a temporary home called a Sukka that we use during this week-long holiday.   Our Sukka is built to commemorate the protective clouds of glory provided by G-d for the Jews in their sojourn in the desert after leaving Egypt.   These clouds of glory were miraculous in that they protected the jewish nation on all sides as they traveled through the inhospitable desert for forty years.

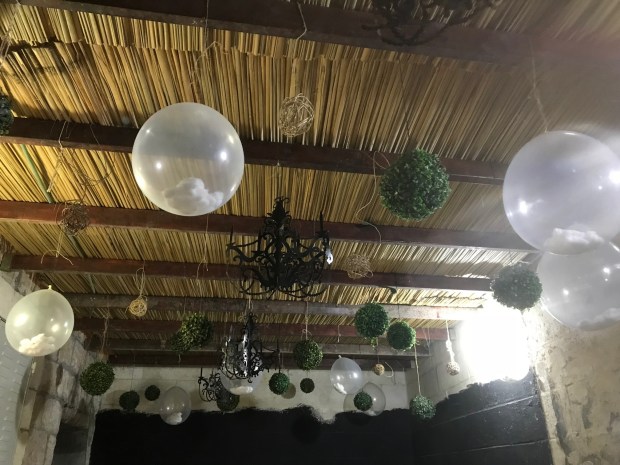
It is customary to decorate the Sukka by hanging decorations.   Every year, I add to my Sukka decoration repertoire.   This year, I decided to decorate the Sukka with clouds of glory.   The implementation really was simple.   And, I think the symbolic significance is a wow.

IMG_4856

SUPPLIES

12″ clear balloons
white cotton balls
fish line or twine

DIRECTIONS

For each balloon, take 7-10 cotton balls and stretch them to make them look cloud-like.

Holding the balloon at the neck, stretch the balloon neck and stuff the stretched-out cotton into the base of the balloon.

Blow up the cotton-stuffed balloon to the desired size.   Tie at the neck and secure to the Sukka..

Happy Sukkos!

A Bouquet of Cupcakes with Purpose

cupcake bouquet.png

Davida volunteered to host a Shavuos bake sale at our home next Wednesday night, May 16th, 2018  from 8:00 PM to 10:30 PM.  It comes right on the heels of Mother’s Day and right before the Jewish holiday of Shavuos.


Screen Shot 2018-04-29 at 8.28.45 PM

Both Mother’s Day and Shavuos are days associated with flowers, so Davida and I prepared a few cupcake bouquets for the bake sale.  All proceeds will benefit families in need and will satisfy both the food and decorative aspects of the upcoming holiday.  

Davida is the go-to person in the family for any baking or cooking tasks.  She is a master at baking and decorating and her baked goods are both delicious and beautiful.  This one is no exception.  It uses items that you would have on hand and is simple to assemble.


SUPPLIES

7 cupcakes

7 cups
stapler
green cocktail napkins
green tissue paper

glue stick
ribbon
container

DIRECTIONS

Frost seven cupcakes with icing to resemble flowers.

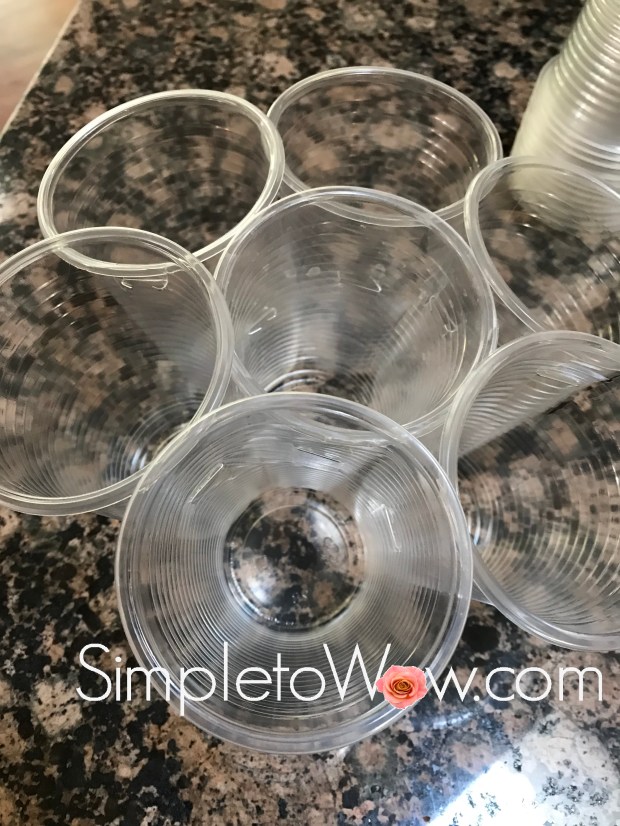
Find plastic or paper cups that will allow each cupcake to fit snugly inside.

Staple the seven cups together in the following way to easily form a bouquet base with places to hold the flower cupcakes:

  • Staple three cups in a row.
  • Staple another two cups to each other.
  • Staple the last two cups to each other.
  • Staple the three cups to one pair of two stapled cups.  Staple the other pair of two cups to the three cups on the other side.  This will form a base for your seven cupcakes with one cup in the middle and six cups all around.

cupcake bouquet-cups only

Fit the plastic cup base into a basket or bowl that fits snugly.  I found a farmer’s market basket that fit perfectly.

Cut the green tissue paper in half and wrap around the basket, gluing it into place.  Tie a ribbon around the basket and secure with glue, if necessary.

Cut each cocktail napkin into a large circle.  Tuck the napkin remnants between each cup to fill in gaps.

cupcake bouquet assembled with greenery ready

Wrap each cupcake in a napkin circle and fit each floral cupcake snugly into each plastic cup.

Voila!

cupcake bouquet


Kate Spade Black Pink and Gold Armoire

Davida has finally arrived home from camp!

Her birthday was last Sunday.  Originally, the project was supposed to be a surprise for her birthday.  Instead, Davida surprised me by arriving home for her day off as I was in the throes of this messy project (A Bench Fit for Kate Spade (and Davida)). Davida arrived home to find her childhood pink and white furniture on the curb, her juvenile gymnast border half steamed off the walls and everything in the middle of  her bedroom. True to Davida, she took it all in stride.

After all, as the youngest child, Davida has learned the value of patience and resourcefulness.  She was the child who wrote her own yearbook ad when her delinquent parents kept forgetting to submit one for her.  She is the one who cooks, organizes and plans while I take all the credit (right, Davida?)

I have spent the past few weeks redecorating her room .  This project was truly a labor of love with much shlepping, (Yiddish for lugging things around) sanding, stapling and painting.

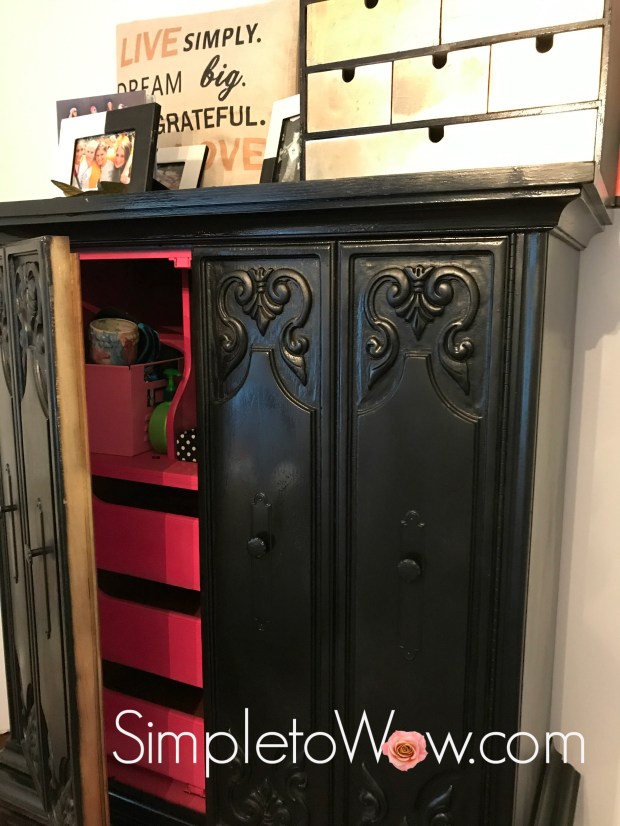
The centerpiece of the project is her new Kate Spade inspired armoire.  In its former life, it was a gorgeous antique walnut armoire owned by a lovely family in nearby Fair Lawn. I found it on CraigsList and fell in love with the vintage dovetailed drawers and lovely carving.  It had such good bones and was perfect for her new room.

kate spade armoire

I sprayed the interior a hot pink color.  I then closed the doors and sprayed all the exterior surfaces in a metallic gold paint.  The finished product seemed a bit too gilded for the look that I was trying to achieve.  I left some gold accents around the edges of the doors, but sprayed the exterior black, instead.  That was a more perfect fit for the Kate Spade inspiration.

davidas new kate spade room.jpg

Best, of all, Davida came home and admired it.  She promptly showered and took a nap in her new Kate Spade inspired bedroom.  I’m so glad that even with all the changes, it still feels like home to her.

kate spade armoire

SUPPLIES and TOOLS

one solid-wood armoire

screwdriver
knobs and drawer pulls (optional)
hand sander
damp rag

metallic spray paint
hot pink spray paint

INSTRUCTIONS

Using a damp rag, clean the armoire. Make sure to clean all the nooks and crannies and insides and backs of the doors and drawers. Turn the unit over and clean the bottom and all sides.

Using a screwdriver, remove all hardware.   Using a hand sander, sand the nightstand and the wood until all the surfaces are smooth, paying special attention to the corners and edges of the armoire.

Remove the drawer(s) and sand separately. Using a damp rag, wipe the entire unit clean and allow to dry.

kste spade armoire after sanding and cleaning


Using painters tape, tape all metal surfaces, hinges and hardware that could not be removed.    Wrap edges of hardware very carefully so that paint does not bleed onto hardware.

Wrap exterior corners and edges so that interior paint does not affect the exterior.  Spray all interior surfaces with hot pink spray paint and allow to dry completely .  Remove the drawers from the armoire before spraying the interior of the drawers.

Wrap interior exterior corners and edges so that exterior paint does not affect the interior.   Spray all exterior surfaces of the nightstand with metallic spray paint.  Spray the exterior of the drawers separately and allow to dry completely before placing drawers back into the armoire.

kate spade armoire up close.jpg

Floating Gerber Daisies in Series

I am enchanted by simple floral arrangements that highlight the beauty, intricacy and detail of individual blossoms.  From my very first blog post entitled  It’s all about the arrangement (psst….even with last week’s roses)until now, I have advocated for using a few blossoms to create inexpensive and stunning floral arrangements.

When there are many blossoms in an arrangement, very often the individual detail of each flower is lost.  It’s hard to tell the trees from the forest, or rather the flowers from the arrangement.  In an arrangement where a few blossoms rule, it is important to choose full-bodied blossoms like open roses, gerber daisies or large chrysanthemums.

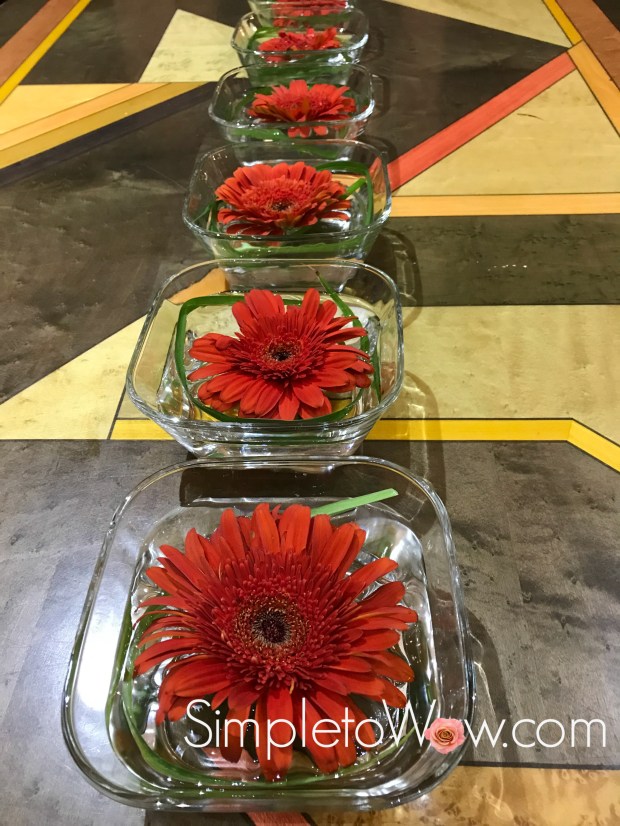
Here I simply floated gerber daisy blossoms cut right below the blossom in square glass bowls.  For a little extra pizzazz, I encircled each blossom with tall leaves that I snipped from my lily bushes.

Voila!

floating gerbers.JPGfloating gerber daisies up close.JPGfloating gerber daisies in series.JPG

Simple Layered Iris Arrangement

For last Shabbos, I decided to pamper myself with some flowers other than the roses that Don brings home ever Friday morning.  I picked up some beautiful irises at Trader Joe’s on Friday afternoon and arranged them using Dusty Miller and Hosta leaves from my garden.

Here it is:

iris arrangement

TIPS

For effective layering, use tall straight flowers for the top layer.  Good choices for the top layer are tall roses, irises, allium, tulips, gladiolas, birds of paradise or lilies.  For the bottom layer, use large leaves that fan out creating a base that covers the top of your floral container or vase  For the middle layer, use leaves or flowers that create a color or textural contrast between the bottom and top layers.  Great choices for the middle layer are hydrangea, dusty miller, herbs and filler flowers.

A Vinegar Pantry Tutorial

Vinegar is one of the most versatile ingredients. It is characterized by its acidic taste and is known best for the pungent flavor it imparts to salads.   For centuries, vinegar has been valued for its health benefits.  Vinegar comes in many different tastes and colors and has a wide variety of uses beyond the salad bowl.

vinegar tutorial 1

Adding a splash of an acidic ingredient like vinegar is an excellent way to brighten all types of salads and other dishes.  There are so many varieties and each one has a distinct personality and flavor.

I reserve the standard white variety for cleaning uses, since it boasts a very pungent and sharp taste that can be overly assertive.  It can be used for weed control and cleaning purposes.

My go-to vinegar is cider vinegar since it imparts a medium acidic taste while still tasting fruity and fresh.

Different vinegars impart a variety of  flavors and can change the way that you prepare and enjoy your food.   Feel free to experiment with different vinegars to find the ones that you enjoy most.

My pantry boasts a large variety of vinegars and here are some of my favorites:


Cider vinegar: Cider vinegar is fashioned from apples.  This brownish clear vinegar stands up well to hardy salads and is the go-to ingredient in marinades.  It is perfect for recipes like: Roasted Sweet Potato and Beet Salad,  Cowboy Caviar: A Simple and Hearty Salad with Attitude and Simply the Best Marinade: A Science Lesson

White vinegar: White vinegar is assertive and clear.  It is distilled from grain and can be used with sturdy greens.  It has a very assertive flavor that sticks to the back of my throat, so I tend to reserve it for cleaning (When Crayons Must Learn Boundaries: Simple Ways to Clean Crayon Marks on Walls) and garden tasks like (At War with Weeds: A Homemade Non-Toxic Weed-Killer)

Wine vinegar:  Wine vinegar comes in red and white varieties.  Heinz manufactures an assortment of delicious wine vinegars that carry the o-u-p (kosher for Passover) certification year-round.  This type of vinegar is light and delicious and can be used in dressings for a variety of light and pungent salads.   Typically, wine vinegar comes in a shaker bottle and should be shaken sparingly directly on salad.   Wine vinegar is perfect for recipes like Warm Zucchini-Mushroom Salad with Almonds and Sunflower Seeds and Etty’s Simple Basil-Dijon Vinaigrette

Rice vinegar:  Rice vinegar is an excellent alternative to cider or white vinegar.  I used it in a variety of Asian-inspired dishes.  It combines perfectly with soy sauce and sesame oil.  Try it is dishes like Individual Sushi Salads and Asian Red Cabbage Salad…Simple and Wow

Balsamic vinegar:  Balsamic vinegar is one of my favorites, too.  It is dark brown in color and imparts a sweet, syrupy flavor.  Balsamic vinegar is not a tye of wine vinegar, but is rather made from grape pressings that have not been allowed to ferment.  This vinegar imparts a very distinctive flavor and should be used sparingly, often just dotted onto salads, vegetable and protein dishes and fruit.  This vinegar is delicious in Simple, Creamy and Perfect Homemade Balsamic Vinaigrette and Roasted Rainbow Skewers.


A Nightstand Workbench for Ju-Ju

I walk most mornings again with my friend, Linda.  The hour walk goes by quickly as we share ideas, inspirations and tidbits of each other’s lives.   Linda offers me lots of recipe and shopping tips and shortcuts and I cherish her sage advice.  I find the walks healthy for my body and inspiring for my mind.

My kids think that the daily walks have nothing to do with exercise or friendship.

They often tell me that the early morning walks are really about scouring the neighborhood for cast-off furniture and other treasures to be recycled and upcycled.

They may just be right.

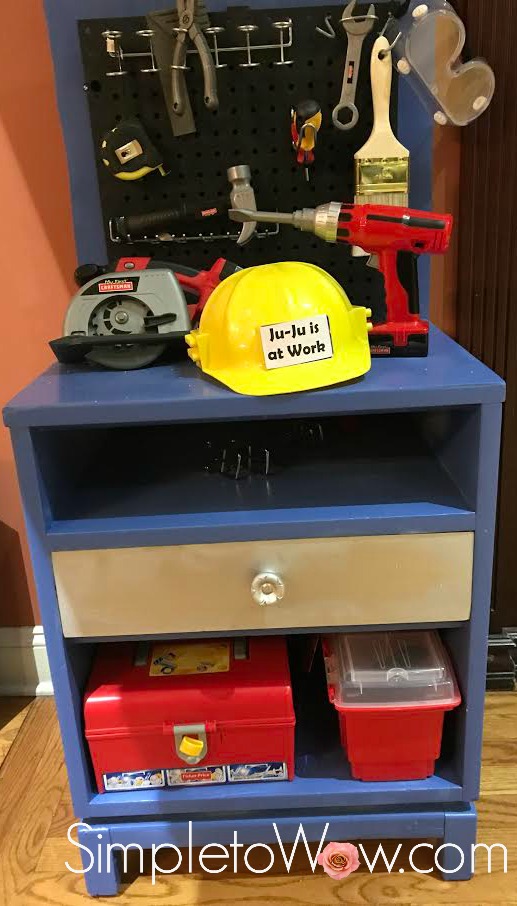
I had been thinking of designing a workbench for two-year old Ju-Ju.   Two weeks ago, I came across the perfect solid wood nightstand on the curb while walking with Linda.  The white nightstand was covered in dust and cobwebs, but was solidly constructed.  The one drawer featured intact hardware and dovetail construction.  It was perfect for my project.

I was delighted!  After the walk, I drove back to where I had seen the nightstand and loaded into my car.  I placed it right next to my front door and I just couldn’t wait to begin my newest project.

JuJu's nightstand workbench-before pic 2

Leah arrived home that evening and wasn’t too happy to see another dusty, worn castoff adorning our front porch.  She reminded me once again that my morning walks are really all about the hunt to find garbage.

I couldn’t have agreed more.

I cleaned the piece with a damp rag and turned it upside down.  I cleaned all the nooks and corners of the nightstand until it was perfectly clean.  I looked around until I found a square-ish piece of plywood that was the same width as the nightstand to use as a backsplash for the nightstand.

Using my inexpensive hand sander, I sanded the nightstand and the plywood down until all the surfaces were smooth, then sprayed the surfaces with blue spray paint.  I removed the drawer and sprayed that with silver metallic spray paint.

juju's nightstand workbench metallic drawer 2

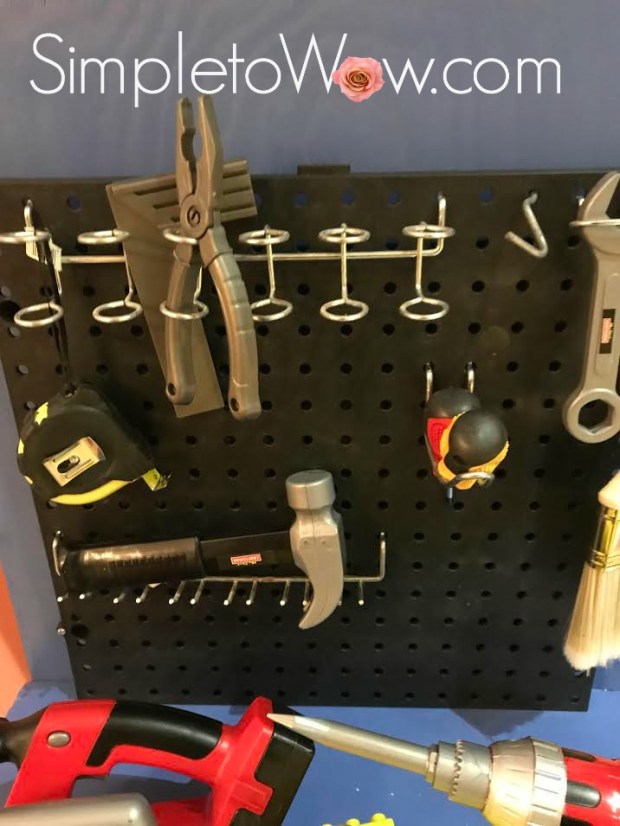
I then ordered a square 16″ plastic pegboard and assorted pegboard accessories.   Don screwed the finished backsplash into the nightstand workbench and installed the pegboard.  I added a few good hooks on the sides to hang additional workbench accessories.

juju's nightstand workbench

I checked the toy boxes and scoured the dollar store for some play tools, safe real tools and tool boxes.  I ordered some kid-friendly power-tools and even personalized a hardhat for Ju-Ju.

Ju-Ju and Avigail loved the workbench and Leah even quizzed me on what I was thinking for the next upcycled project would be.

I just smiled mysteriously.  Let the morning walks continue…

juju's nightstand workbench metallic drawer top view


SUPPLIES and TOOLS

one solid-wood nightstand

1 square-ish piece of plywood the same width as the nightstand

hand sander

blue spray paint

silver metallic spray paint.

square 16″ plastic pegboard

assorted pegboard accessories

1 1/4″ round screws with nuts

small adhesive hooks


INSTRUCTIONS

Using a damp rag, clean the nightstand.  Make sure to clean all the nooks and crannies and insides and backs of the doors and drawers.  Turn the unit over and clean the bottom and all sides.

Find or purchase a square-ish piece of wood that is the same width as the nightstand for a backsplash.

Using a hand sander, sand the nightstand and the wood down until all the surfaces are smooth, paying special attention to the corners and edges of the nightstand and backsplash.

Remove the drawer(s) and sand separately.  Using a damp rag, wipe the entire unit clean and allow to dry.

Spray all surfaces of the nightstand and backsplash with blue spray paint.   Spray the drawer with silver metallic spray paint.

Screw the backspash into the back of the nightstand and then screw the  square 16″ plastic pegboard into the backsplash.  For the pegboard, we used 1 1/4″ round screws with nuts screwed from the back to the front.

Adhere small adhesive hooks to the sides of he nightstand workbench to hang additional hardware accessories like measuring tape, goggles and helmet.

Place assorted pegboard accessories into the pegboard and hang toy tools and safe real tools.  Fill small toolboxes with additional toy hardware and store in the workbench.

Get to work!


Roses in a Grid


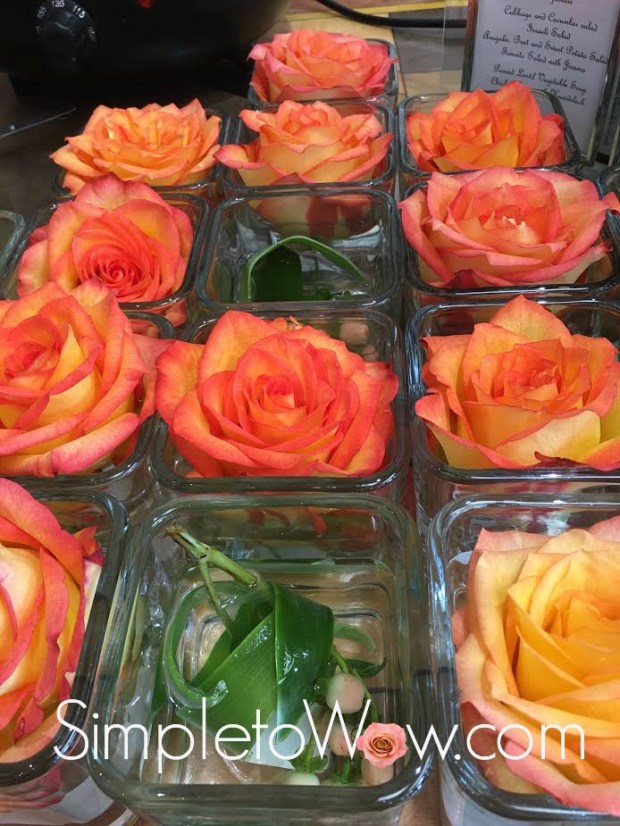
Just about one year ago, this blog started with a simple arrangement of rose heads floating in a grid-like pattern: It’s all about the arrangement (psst….even with last week’s roses)  I have mixed things up by using floating roses in so many different ways.  I have mixed rose blossoms with lanterns in Roses and Lanterns: A Simple and Stunning Centerpiece and with plenty of white space over spray-painted wooden planks in An arrangement of Single Roses: Simple, Upcycled and Breathtaking.

Admittedly, roses have never been one of my favorite flowers.  They just seemed so….ordinary.  I have learned to embrace their beauty by admiring these blossoms for their variety of colors, soft petals and classic style.  I have discovered that by floating rose blossoms in different types of arrangements, it allows the viewer to see the majesty of each unique petal on each individual rose.

This is yet another simple wow arrangement that highlights the special qualities of the lovely rose.

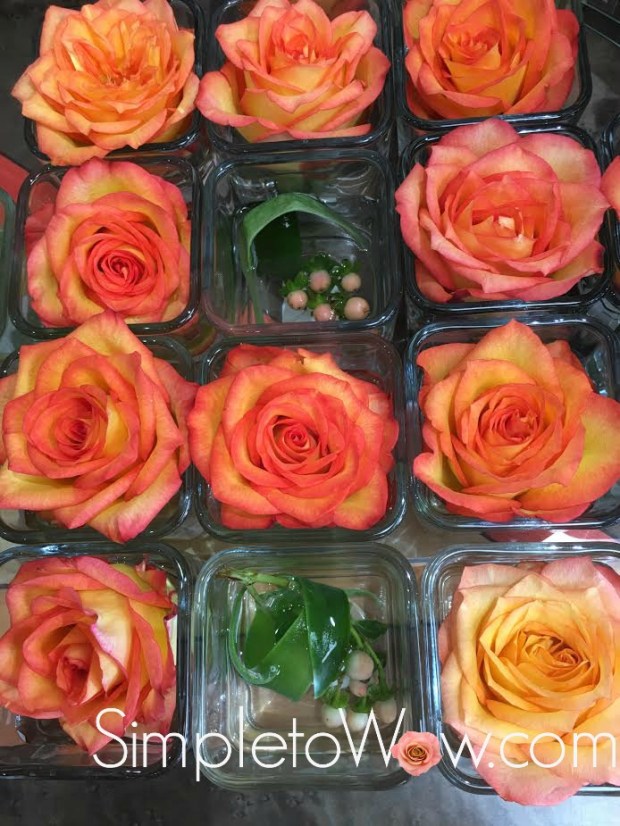
This arrangement was created quite by accident.  I had just finished clearing up the dining room from our Purim seuda (festive meal).  For the seuda, I had set up individual square vases with floating roses alternating with individual vases with submerged orange berries and tulip petal swirls.  I placed all the vases that I had collected on my kitchen table and was contemplating what to do with the flowers.  When I looked down, I realized that I had inadvertently formed a beautiful, albeit haphazard collection of individual roses interspersed with submerged berries and tulip petals.

Here it is!

roses in a grid 1


Sheva Brochos To-Go Station


Last week, in preparation for Goldie and Tuvia’s Sheva Brochos (one of seven wedding after-parties, each with seven blessings), I purchased a large box of hamentaschen (triangular Purim pastries) to add to the Viennese table. While I was setting up, Don mentioned that we should set up a to-go station similar to those that we had at our daughters weddings. He thought that we should set out the hamentaschen individually wrapped along with tea and coffee.

I thought that was a wonderful idea.

Except, the weather was unseasonably warm.

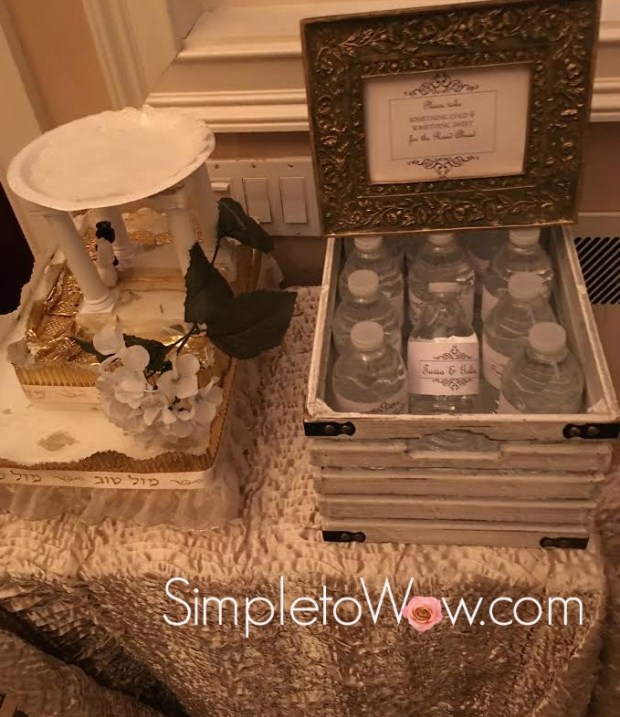
So, we set up a water bottle and hamentaschen to-go station with personalized labels for the hamentaschen and water bottles.

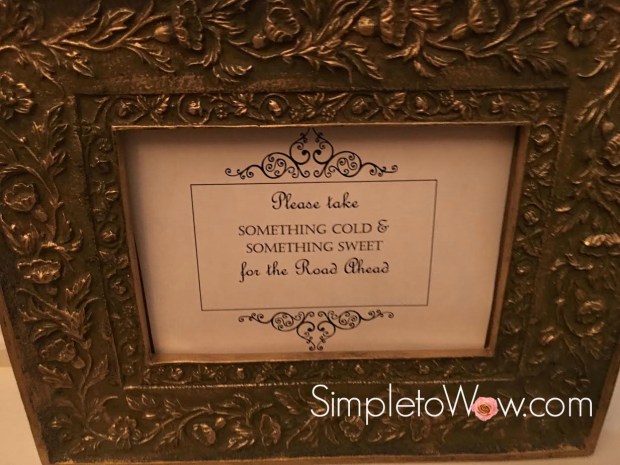
I covered an old desk with an elegant tablecloth and inserted a printed sign into a vintage frame that read:

“Please take
something cold and something sweet
for the road ahead”

Our guests loved it.  It really was simple to wow them.

And, we plan to do this again at our next home celebration.

Great idea, Don!

to-go-station-complete

White and Wow Wedding Arches

white-and-wow-arches

When Kaitlyn’s friends started to get married, we realized that there were no places in our community to rent or borrow wedding shtick (items of whimsy to adorn the wedding dancing).

That left only one choice.

We quickly needed to figure out how to make our own.

And we did. The most popular item that we designed were our wedding arches.

After the traditional Jewish wedding chupah (Jewish canopy) ceremony, the Jewish bride and groom have a few moments alone called Yichud (seclusion) in order to enjoy each other’s company before entering the reception room.

As the bride and groom prepare to enter the reception room after Yichud, there is palpable excitement in the air.  The band gets ready to perform a musical intro and the guests are on their feet waiting to dance the new couple into their lives together.

In the last few years, so many Jewish couples enter the reception by dancing under beautiful arches held by their friends and family.  There is nothing in halacha (Jewish law) or minhag (Jewish custom) that explains the significance of these arches.

So, we are truly left to our imagination.

Perhaps, the arches mimic the idea of the chupah, a shelter representing their new home and they represent the doorway from the new couple’s status as individuals into a life of togetherness. Perhaps, these arches connect earth and heaven.  Maybe, they incorporate the idea that the new couple is rooted in the friends and family that hold the arches.

Nonetheless, these arches carry the excitement and whimsy of an exciting new chapter just opened by this new Jewish couple.

And, that is what has guided the design of our wedding shtick.

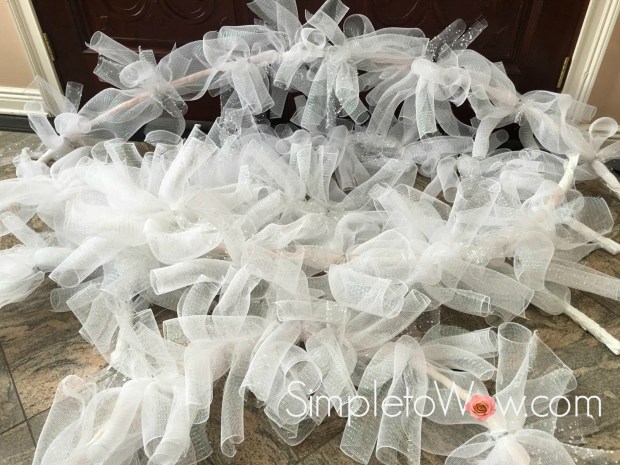
These arches can be designed in so many different ways.  We have feathered and flower arches, but our most popular arches are our fluffy, curly and whimsical mesh arches.

We offer all of our wedding shtick with a donation to Camp HASC (Hebrew Academy for Special Children) in memory of Stephanie Cohen a’h. Stephanie was a very special friend of our daughter, Leah, and our family.  Her dear parents, Lisa and Stuart, are like part of our own family.  The joyfulness and whimsy of these arches were designed with Stephanie’s delightful character and joyful nature in mind.

stephanie-cohen

Stephanie lived a life of joy and lit up the lives of all those who knew her.  Although she was physically and cognitively challenged, she used every fiber of her body to bring happiness and whimsy to others.  She taught everyone around her about being positive and happy  in one’s life and she brought a smile to all who interacted with her.  The original set of colorful mesh arches were designed using Stephanie’s favorite vibrant colors in order to raise money for the place that she loved most, Camp HASC.  

arches-with-michelle-and-scotty

Stephanie’s colorful arches have been and continued to be borrowed over and over and have raised a great deal of money for Camp HASC.

This week, I  designed a new set of white and wow wedding arches to complement the colorful mesh arches that were designed several years ago. This time I documented the supplies and directions necessary to create their design.

Here we go!

SUPPLIES

hula hoop
heavy-duty scissors
scotch or cloth tape (optional)
duct tape or White Gorilla duct tape
21″ wide deco mesh (For each arch, I needed one 10-yard roll of deco mesh plus extra embellished mesh for accents)
pipe cleaners to match mesh or floral wire
white gloves (optional)

INSTRUCTIONS

Carefully cut a hula hoop using strong scissors.  Some hula hoops have beads inside to create hula hoop sound effects.  If you would like to add those sound effects to a plain hula hoop, add a few beads to the inside of the cut hula hoop.

Cover the ends of the hula hoop with duct or cloth tape to prevent the beads inside from falling out.  Use duct tape to coat the hula hoop from one end to the other.  I find that the easiest way is to leave a 2-3 inch section of tape exposed on the roll and wrap the duct tape roll around and around the cut hula hoop.
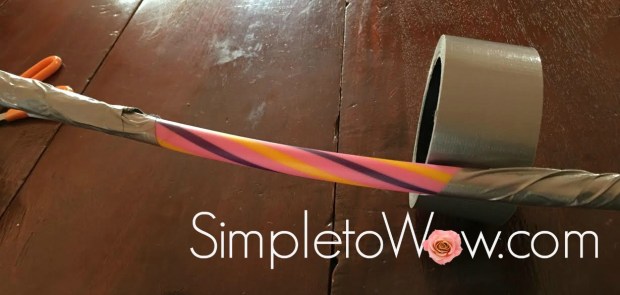
mesh-wedding-arches-hula-hoop-covered-in-duct-tape

Prepare pipe cleaners or cut wire into 12-16 inch sections.

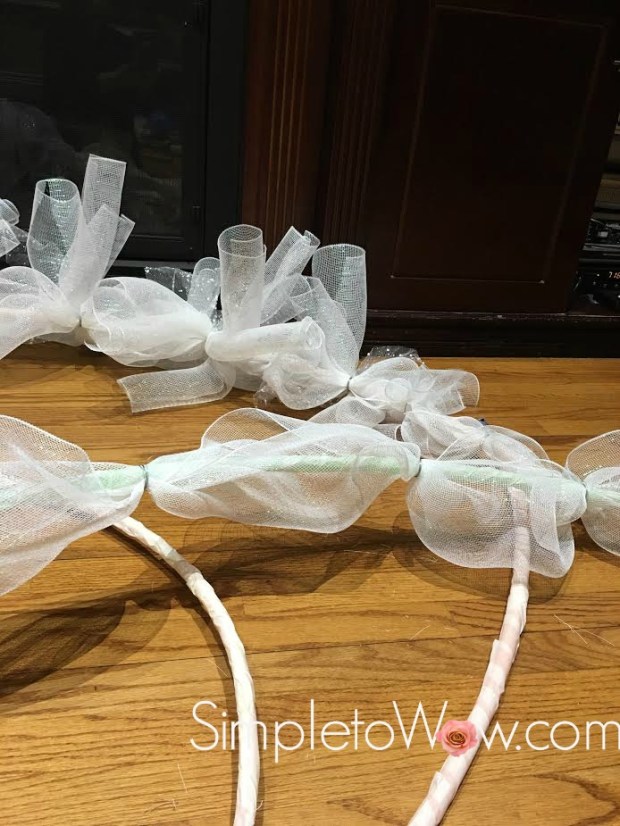
Line up mesh near one end of the hoop.  Begin securing the mesh to the hula hoop by using a pipe cleaner or mesh to secure the mesh to the hula hoop about 6 inches from the end of the hula hoop.

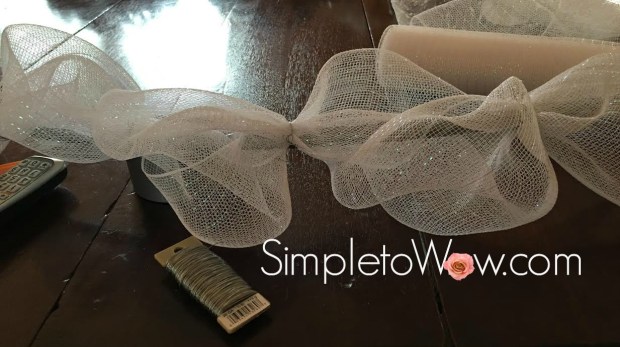
Making sure that the mesh covers both sides of the hula hoop, wrap the mesh around the hula hoop, twisting slightly to form a swelling effect.  Secure mesh again to the hula hoop in about 12-15 inches.
mesh-wedding-arches-mesh-wrapped-around-hula-hoop

deco-mesh-arches-hula-hoops-covered-in-duct-tape

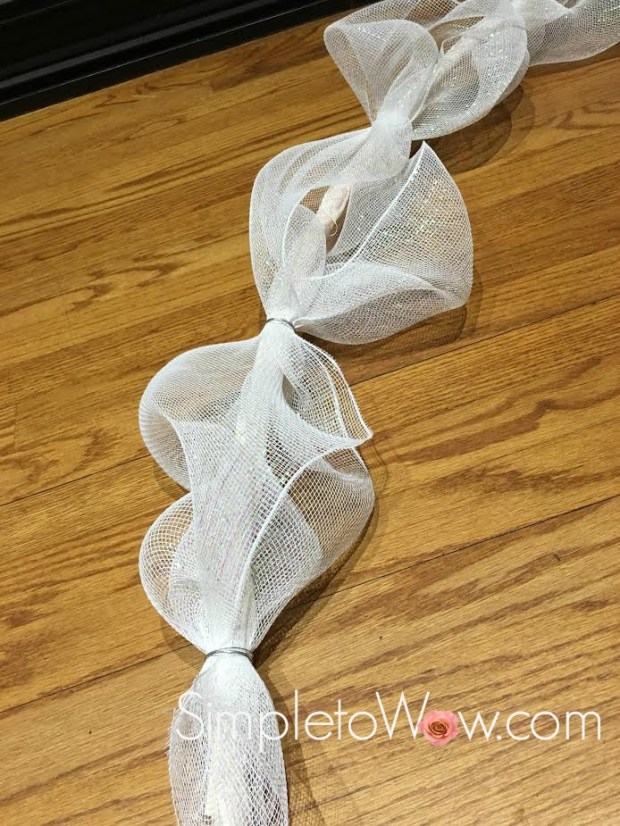
Continue to wrap the mesh around the hoop, securing it with the pipe cleaner or cut wire at equal intervals, making sure that the last interval before the end of the hula hoop is secured about 6 inches from the other end.
deco-mesh-arches-wired-at-even-intervals

Cut the mesh close to the end of the hula hoop, leaving the same amount of space for a handle at both ends.

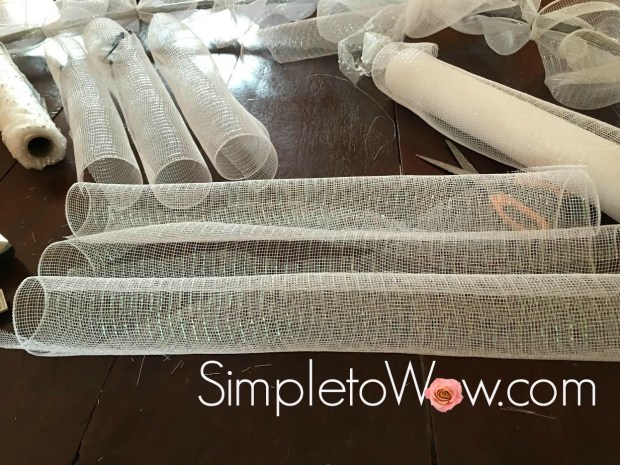
Using the deco mesh, cut 8-12 inch sections of mesh.  The longer the sections, the more perfect your rolls will look.  The shorter the sections, the more rolls you will have.
mesh-wedding-arches-mesh-tubes

deco-mesh-arch-rolled-mesh

Prepare pipe cleaners or cut wire into 18-30 inch sections.

Take 3-4 deco mesh rolls and twist a pipe cleaner or wire section around the middle, forming a whimsical curly flower, making sure to twist the middle tightly, but to leave plenty of wire at the ends so that the curly flower can be securely fastened to the arch.  Here is where you can be creative and incorporate different colors, textures, ribbons or media.  For these arches, I used three white sparkly mesh rolls and one 4″ section of bubbly mesh for each curly flower.

deco-mesh-arch-flourish-with-wire

Continue to cut deco mesh rolls and create at least as many curly flowers as you have secured intervals on your hula hoop arch.  Each one of these flowers will cover the wire that you used to secure the mesh to the hula hoop.

deco-mesh-arch-flourish

I like to prepare a few extra curly flowers to fill in the middle of the arch, which will add whimsy and height to the final arch.  I also sometimes prepare a few smaller curly flowers, made with only 2-3 curls to fill in areas where the arch needs some more volume.

mesh-wedding-arches-in-parts

Using the ends of the wire or pipe cleaner, secure each flower to the arch covering the exposed pipe cleaner or wire that you created when you secured the mesh to the hula hoop, making sure to twist tightly and secure all wire ends.  Examine your arch carefully and critically, adjusting curly flowers to cover both sides of the hula hoop and making sire that the arc looks full.  Add curly flowers to areas on your arch that look unadorned.  To achieve a full look, each of these arches took 9-12 curly mesh flowers.

deco-mesh-arch

If necessary, cut the end of the deco mesh so that at least 2-3 inches at each end of the hula hoop can be handled.  Use heavy duty duct tape, secure the ends of the deco mesh to the handle.  Wrap the duct tape around and around so that the handle is neat, comfortable and secure.

To give the arches a more finished look, wrap matching pipe cleaners around all exposed wire securing the curly flowers to the mesh hula hoop.

If you would like to make a donation to Camp HASC  or would like information on borrowing these arches for an upcoming wedding, please comment below or email me at simpletowow@gmail.com.

Please Note:  This post contains affiliate links from Amazon, which means I earn a small commission if you click and make a purchase.

An arrangement of Single Roses: Simple, Upcycled and Breathtaking

roses-in-sequence

Last week, I hosted Sheva Brochos (one of seven wedding after-parties, each with seven blessings) for the children of my dear friends, Andrea and Michael.  The chosson (groom) and kallah (bride), Davidi and Efrat, are a gorgeous and young couple.

The Sheva Brochos was hosted together with five other couples, all close friends of Andrea and Michael.  Since this Sheva Brochos was toward the end of the week of partying, we created a theme and menu that would be lighthearted, interesting and youthful.

We decided to host the Sheva Brochos as a Spanish fiesta and it was wonderful!

We set up a taco bar with pulled beef, pulled chicken,  chili, an assortment of taco shells and rice choices.  There were lots of toppings and salad choices for the vegetarian and diet-conscious guests, too.  Over the next weeks, I will share recipes, menu and table setting inspirations from this wonderful Sheva Brochos.

As a backdrop to the Sheva Brochos fiesta, I challenged myself to create centerpieces to reflect the youth and glamour of this couple and the fun inspired by the fiesta theme.

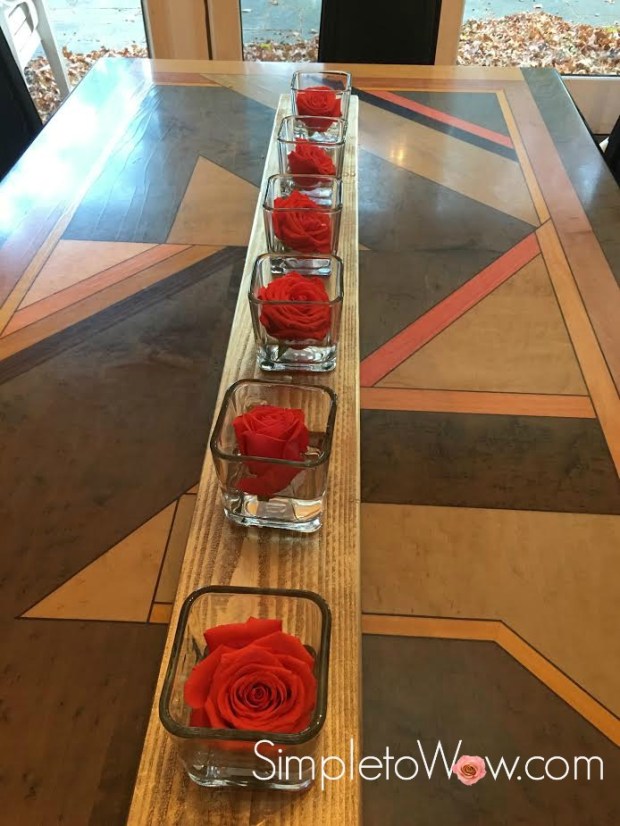
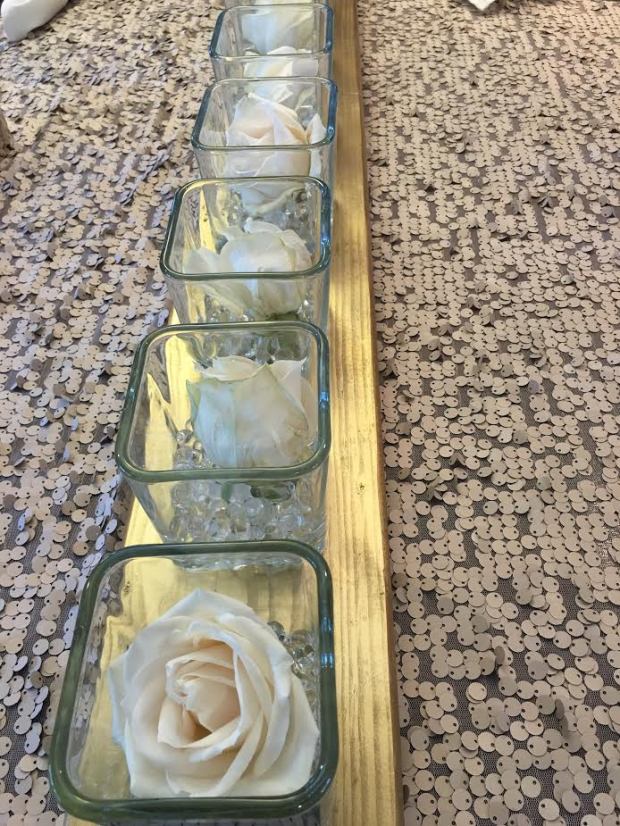
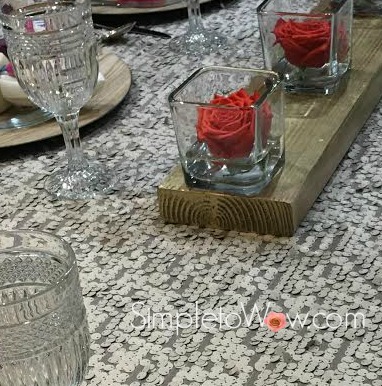
Since we had not allocated much of a budget for centerpieces, I created centerpieces that were inexpensive but sensational.  I set up long rectangular tables and round tables.  For each long table, its  centerpiece spanned four feet in length, six inches in width and amazingly, only required six flowers that I had upcycled from last week’s floral bouquet.  For each round table, its centerpiece spanned two feet in length, six inches in width and amazingly, only required three flowers that I had upcycled from last week’s floral bouquet.

For the floral arrangements, I selected the straightest two  inch by six inch by eight foot lumber beams from my local Home Depot.  Since I was using both long and round tables, I purchased two eight foot length beams and had the lumber cutter at Home Depot cut them.  I cut one beam into two four-foot beams and the other into one four-foot beam and two two-foot beams.

I now had three four-foot beams and two two-foot beams.  On an outside table, I sanded the wood with my hand sander, paying particular attention to the area that had been cut at Home Depot. The sanding took only a few moments per beam, but really smoothed the beams, removing all splinters and jagged edges.

I then sprayed the top and the sides of each beam with metallic gold spray paint and let it dry for several hours.

Finally, I lined up 6 clear 4″ square glass vases at equal intervals along the beam.  I placed a floral blossom in each vase with just an inch of clear water pearls

Voila!

roses-in-series-on-sequin-tablecloth

SUPPLIES

6 large open-blossoms
four foot section of 2″x6″ wood beam
metallic gold spray paint
6 clear 4″ square glass vases
clear water pearls (optional) or water

TOOLS

hand sander

INSTRUCTIONS

Sand rough edges of beam.

Spray paint the top and all sides of the beams in your favorite color.  I used metallic gold spray paint

wilted-roses

Cut  blossoms off of stem.

Set up glass vases at equal intervals along beam, aligning first and last vases with the edges of the beam.

Add one inch of water or  clear water pearls to each vase.

Carefully place each blossom in each vase.

roses-in-series-on-sequin-tablecloth
Please Note:  This post contains affiliate links from Amazon,
which means I earn a small commission if you click and make a purchase.

Simple Coffee Spice Rub

simple-coffee-rub


I am not a coffee drinker.  I just never developed a taste for coffee.  To me, it tastes bitter and unpleasant.  Thankfully, I wake up with enough energy that I don’t need the boost that coffee provides.

Interestingly, though, I love the aroma of coffee.  While the taste does not please me, the aroma of coffee is something I really enjoy.

There isn’t another member of my extended family that shares my distaste for coffee.  In fact, it is rare that I meet someone else who does not start their day with a cup of coffee.

Despite my not drinking coffee, we stock quite a varied supply of coffee in our home to satisfy the different but obligatory morning coffees of our family.  Some like dark roast, others light roast; some enjoy favored coffees and we have some visitors that actually prefer instant coffee.

Since we do not brew coffee on Shabbos (our Saturday Sabbath), our coffee drinkers either brew it in advance, buy cold brew coffee or use instant coffee for their Shabbos java.

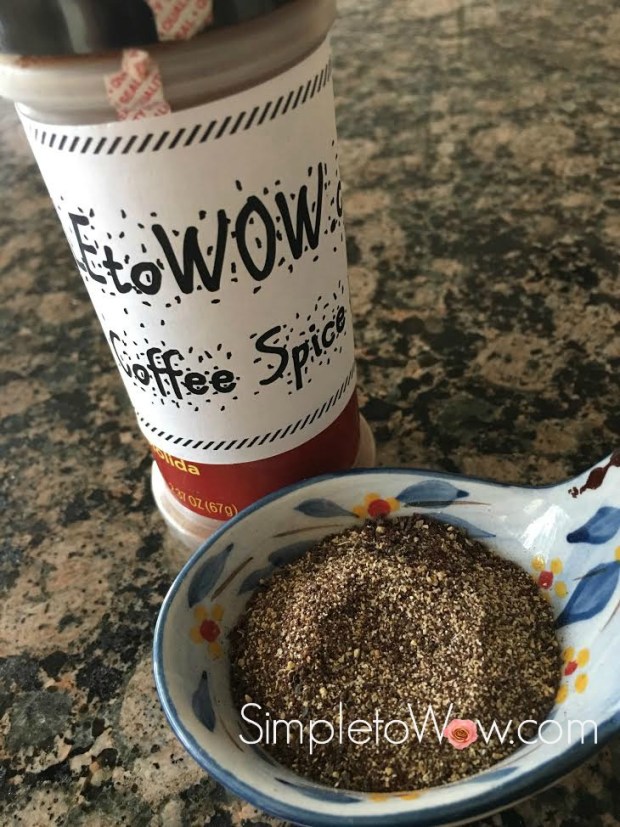
I find that I have lots of leftover instant coffee, not fresh enough for the morning brew, but with enough aroma and flavor for a spice rub.  I store this instant coffee in the freezer until I am ready to use it.  Once I make the spice rub, I store the coffee rub in a spice container or ziploc bag in the freezer, as well.

The aroma and texture of this rub really adds that special wow to a roast. This spice rub imparts an amazing quality and flavor, even to my coffee-impaired taste buds.

If you are concerned about the caffeine in the coffee rub, feel free to use decaf coffee, instead.

INGREDIENTS

4 tablespoons ground coffee, regular or decaf
1 teaspoon kosher salt
2 tablespoons granulated garlic
1 heaping teaspoon black pepper
1/2 teaspoon cinnamon
1/2 teaspoon ground ginger

DIRECTIONS

Combine by shaking in container or ziploc bag.  Cover tightly and store leftovers in freezer

london-broil-spice-rub


A Homemade Warm Compress

I woke up earlier this week with a stiff neck that just seems to get achier.  Today, the pain radiated to my shoulder and down my arm. It seems like I may have pinched a nerve.

The pain and stiffness really needs some warm relief.  My husband, Don, suggested that I design a microwavable compress to ease the pain.

I did some internet research and found that it is quite simple to fashion a compress filled with uncooked rice, beans, oatmeal, barley or flaxseed.   The filler is placed into a cotton (non-synthetic) sack and tied, velcroed or sewn closed.

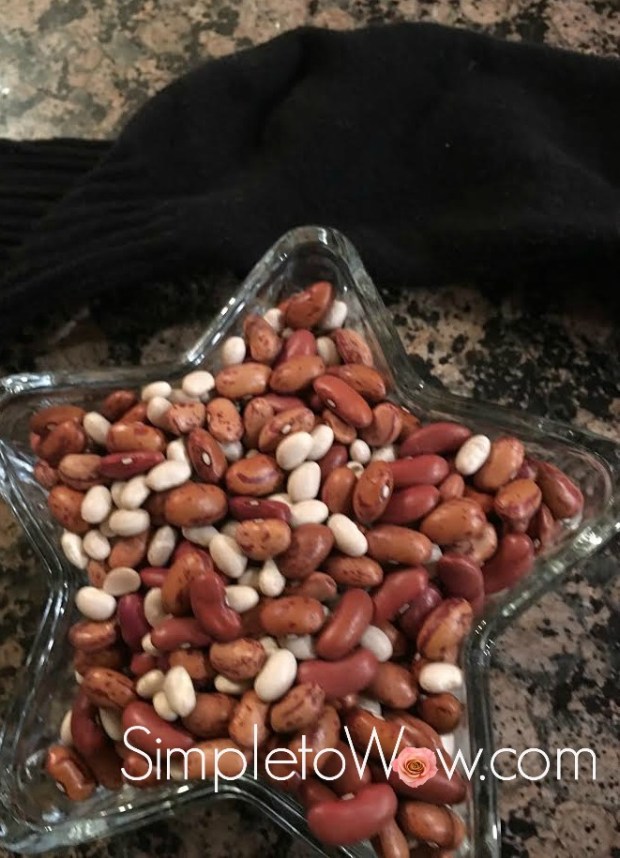
I looked around the house and found that I had plenty of raw beans, a brand new oven mitt and a variety of cotton socks.

With just a few moments of prep time, I was sitting at my desk writing this blog post with a warm compress soothing my neck and shoulder.


SUPPLIES

Cotton sock or oven mitt

Beans, uncooked rice or barley

Naturally dried herbs, essential oils, contents of an aromatic tea bags or spices for fragrance (optional)


DIRECTIONS

Fill a sock or oven mitt at least halfway with beans, rice or barley.  I found that it was easiest to use a stack of coffee filters to move the beans into my compress.

homemade-hot-compress-beans-in-coffee-filters

For a pleasant aroma, you can add a bit of dried herbs, fragrant powder or oils to your compress.

Seal the compress by tying a knot, placing a resealable velcro strip or sewing the ends shut.  For a firm compress, seal it with very little empty space.  For a looser compress, leave empty space before closing your compress.  A looser compress will allow for draping it around your neck and moving the beans to conform to your painful area.

Heat compress in microwave for about one minute, keeping an eye on the microwave during heating just in case the filler or compress starts to smoke.

Before applying compress, check that it is not too hot.  If it feels too hot, shake it and wait until it is just the right temperature for your aches and pains.


NOTES

Be careful!  Check that the compress is not too hot before applying it.  It is hard to tell how hot the microwaved compress will get, so please check before applying to your skin.

For extra safety against burns, place a layer of cloth (like a towel or t-shirt) between your skin and the compress.

Do not use heat therapy for acute injuries or if you are pregnant or have diabetes, poor circulation, high blood pressure or heart disease.   If you are not sure, consult with a doctor before using a warm compress to ease muscle or joint pain.

Bobby’s Homemade Bubbles and Wands

Avigail and Juju are attending “Bobby Camp” and one of the favorite morning activities is playing with the water table on my front porch.  After breakfast and our morning walk, when the two of them are still in pajamas, we fill up the water table and have a good and messy time playing with all the water toys.  Best of all, when we are finished, everyone gets bathed and then changed and dressed for the day.

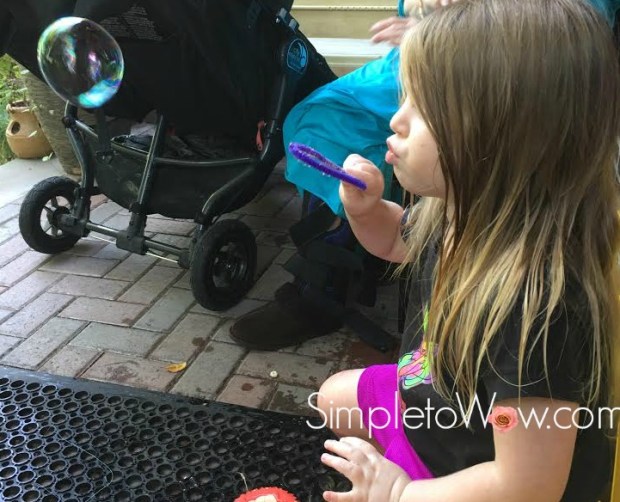
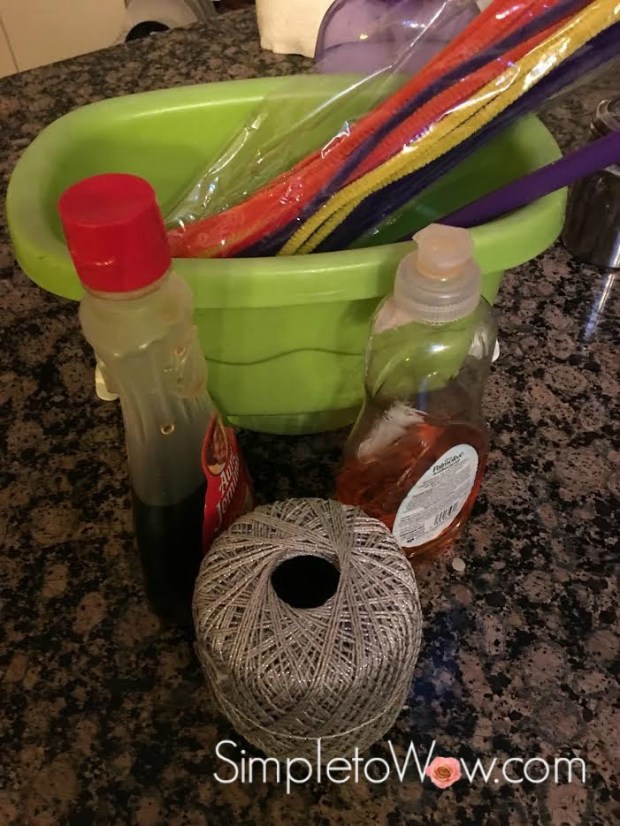
While we were outside playing, the kids asked Davida to blow bubbles or as seventeen month old Juju likes to say, “Bubboos”.  I did not have any bubbles or bubble wands, so we decided to make our own.  Davida fashioned some bubble wands out of pipe cleaners, straws and string.  Avigail was delighted that one of them was purple, her favorite color. We mixed water, dish detergent and pancake syrup, stirred gently…and voila.  The magic of bubbles was added to our messy water activities.

This was one of those simple things that created a wow of a time at the water table.

homemade bubbles for avigail and juju

We sang as we blew and popped bubbles…”Avigail is a bubble blower, bubble blower, bubble blower!”  “JuJu is a bubble popper, bubble popper, bubble popper…”

bubble supplies

SUPPLIES

container with a flat bottom

3 cup water

1/2 cup dish soap

drizzle of pancake or corn syrup (about 2-3 tablespoons)

scissors

straws

string

Pipe cleaners

bubbles with wands

DIRECTIONS

Place water in a bowl or container.  Carefully add soap and syrup, stirring gently, being careful not to foam up the bubble mixture.

Create bubble wands using pipe cleaners that are looped.  You can create different size loops to form differ size bubbles.

bubbles and bubble wands

Create large bubble wands by cutting straws in half and tying string around each of the straws, top and bottom.  To secure the string, cut a small slit near the end of each straw for the knotted string to rest.  This will keep the string from coming off the end of the straw.

bubble wand from straws and string.jpg


DIY Nightstand Play Kitchen for JuJu

Seventeen month old Judah (or JuJu as he is sometimes called) loves to play in our play cupcake kitchen when he comes to visit us.  He doesn’t have a play kitchen at home, so I decided to surprise him with his own one.

diy kitchen 2

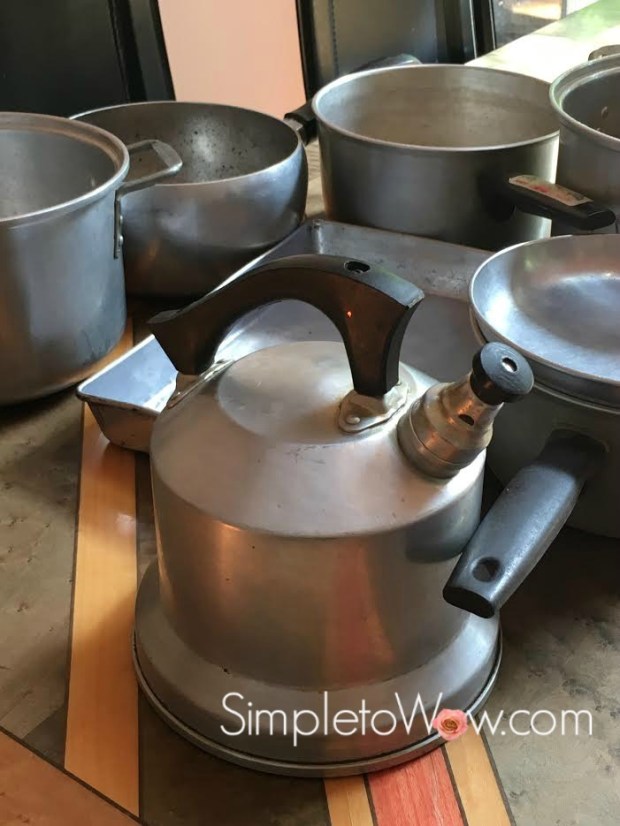
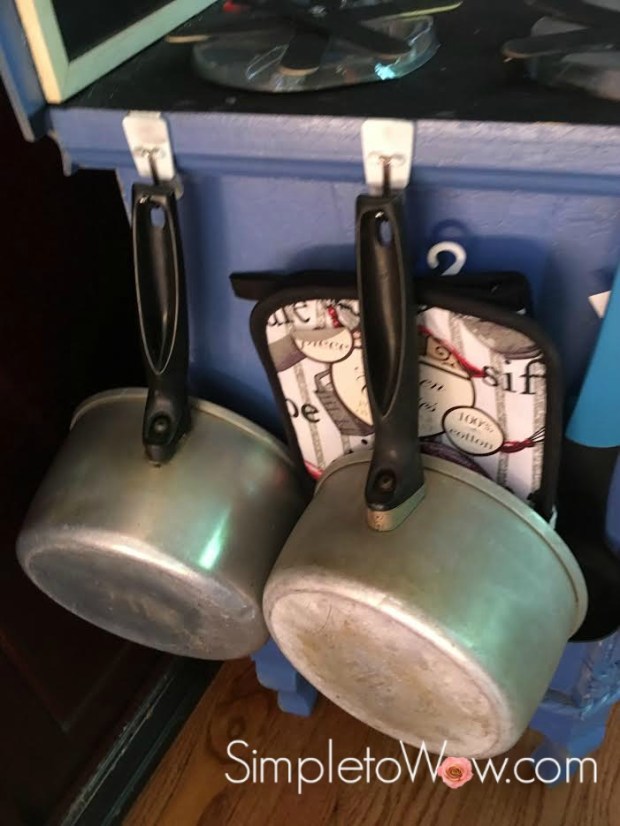
My mother-in-law a’H was fond of repurposing cast-off items, so she would have just loved this new, but old kitchen.  When we cleaned out my in-laws’ home several years ago, my sister-in-law begged me to take home Mom’s lightweight aluminum pots.  I had them in storage in a box in my basement since then.  They were perfect for use in this play kitchen.  Mom would kvell (Yiddish for feel proud)!

diy kids kitchen-bubby's pots

I found an old nightstand on the curb near Kaitlyn’s apartment two months ago and brought it home.  Kaitlyn showed me some adorable furniture to play kitchen adaptations on Pinterest that I used as inspiration for this upcycled nightstand castoff to vintage play kitchen redo.

Here is what the original nightstand looked like:


diy kids kitchen-original with painters tape.jpg

I taped the outer part of the cabinet door and first painted the interior black to resemble an oven:

diy kids kitchen-oven and restoration blue

I chose a restoration blue color spray paint and painted the shell.

diy kids kitchen-tape and restoration blue

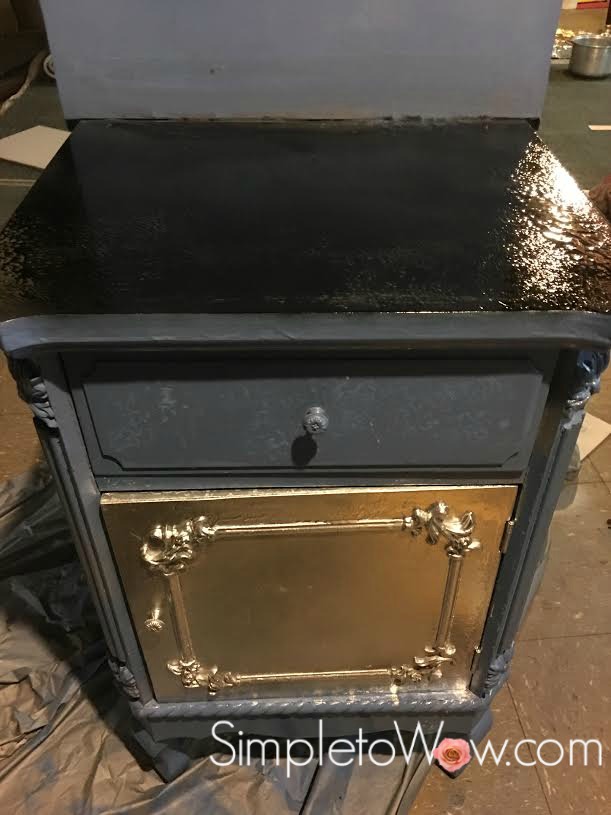
I had Aaron attach a piece of wood to the back of the nightstand to resemble a backsplash and painted all the vertical surfaces blue.  I painted the top surface chalkboard black for a sink and cooktop area.

I repainted the oven silver to resemble an art-deco stainless steel look.

diy kids kitchen-painted

I visited my hardware cabinet and local dollar store for accessories to stock the kitchen.

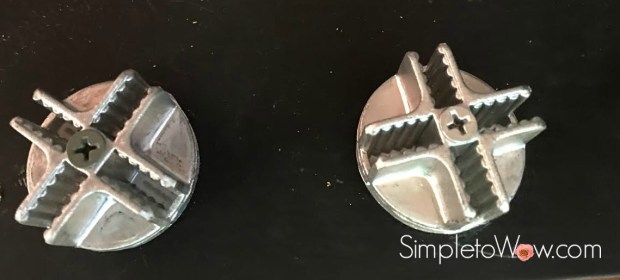
I found some old plastic foosball table feet that I sprayed silver and had Aaron attached with long screws.  They even turn!

diy kids kitchen--oven knobs

Aaron screwed a large screw into place to hold the kitchen timer.  The timer hooks on and off in case JuJu wants to use his timer for something else.
I used an old hose spray nozzle for the faucet that I sprayed silver and attached with  heavy duty contractors’ adhesive.  I bought a silver toilet paper holder that I separated into two pieces.  Aaron attached those with screws for the faucet handles.
Aaron drilled holes into a small dog water dish and secured them with screws.

I bought a plastic shower organizer, sprayed it silver and secured it with heavy duty contractors’ adhesive to the backsplash.

I glued an old chalkboard to the backsplash and glued an alarm clock to the chalkboard.

diy kids kitchen-cooktop


I glued a touch LED light from the dollar store to the inside of the oven for light inside the oven.


diy kids kitchen-inside of oven

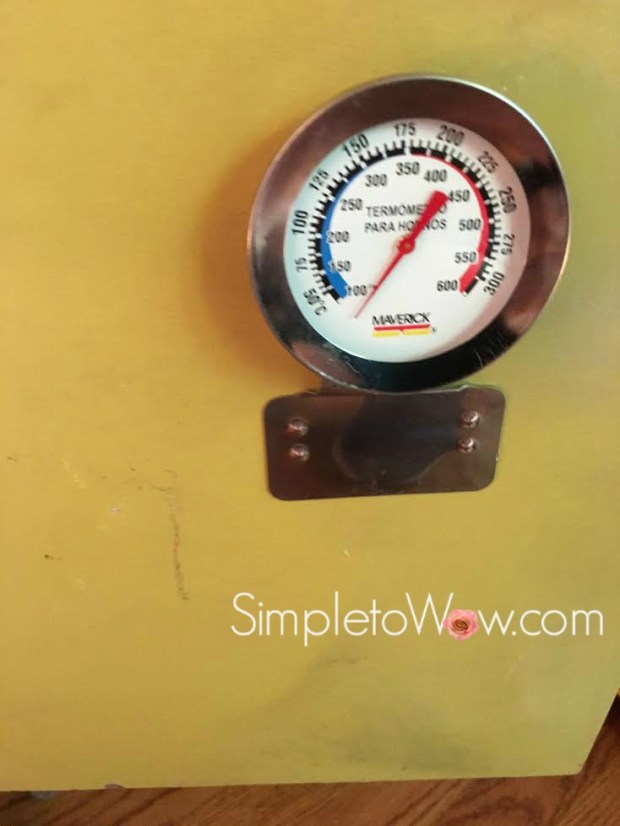
I glued an oven thermometer to the inside of the kitchen door.

diy kids kitchen-oven thermometer

I fashioned cooktop grates out of craft sticks secured to CD’s covered with upside down plant saucers.  Aaron secured the grates with long screws so that they spin.

diy kids kitchen-cooktop grates

For a little extra fun, I glued an old unbreakable mirror to the outside of the oven door.

diy kids kitchen -outside oven door

I bought and repurposed lots of accessories and kitchen gadgets including: a hand broom and dustpan, tongs, strainer, oven mitt, ladle, plastic food, squeegee, plastic cups and martini glasses and even a plastic vase with a flower fashioned from a bottle stopper.

diy kitchen-hooks on side


diy kids kitchen-plastic vase

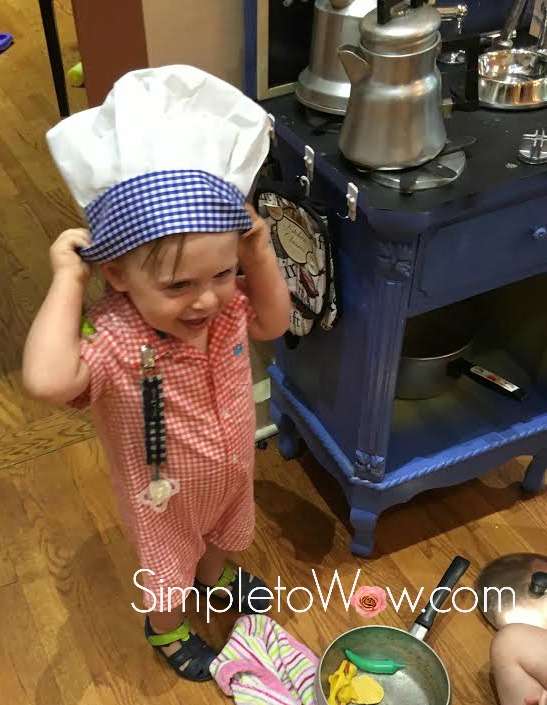
Juju just adores this new kitchen.  He has been perfecting his chicken soup and I am loving it!


diy kids kitchen--juju's chicken soup.jpg


jujus-play-kitchen

Oil in Squirt Bottles with Free Printable Labels

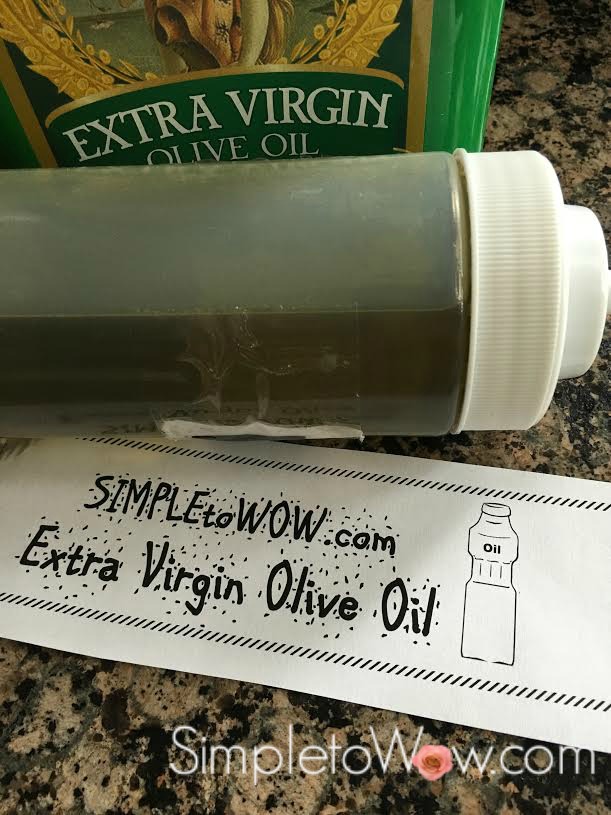
For most recipes, I use one of two types of oil: extra virgin olive oil and/or canola oil.  I like to buy these oils in large quantities and the containers tends to be large and unwieldy with a way-too-large pouring spout.  I find it easiest to decant the oil into a small squirt bottle for easy drizzling and squirting. I just refill the squirt bottle when necessary.

oil squirt bottles with label

I use oil for so many things and for most of them, I just need a bit of oil squirted in just the right amount in just the right place.  This counts for frying my morning omelet, dressing salads, sprinkling on roasted vegetables, starting a saute and most everything else.

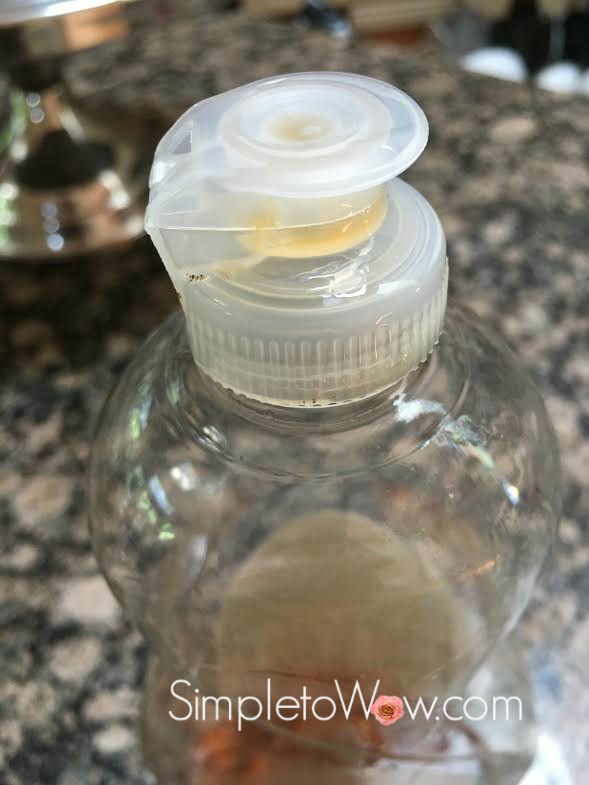
For decades, my parents have been repurposing a dishwashing detergent bottle with a squirt top for this use.  You can easily use this type of bottle or a sport-top water bottle, washed and dried well, of course.
I prefer the thin, longer nozzle of a purchased squirt bottle.  I have so many of these type of bottles, so I am always happy to use two of them for decanting my olive oil and my canola oil.  So that I don’t get them mixed up, I just label the oil bottles with my SimpletoWow customized squirt bottle label.

I leave the heavy oil bottles on the shelf for use only for recipes that called for measured oil or for refilling my oil squirt bottles.  I keep the smaller squirt bottles of oil with my spices.  The thin nozzle on these squirt bottles is perfect for drizzling and squirting and the bottle fits perfectly in my spice drawer.

To prepare each oil squirt bottle, all I do is decant the oil carefully and apply the squirt bottle label with packing tape or glue stick.

This has been a great tool for me and I hope that it is for you, too.


.

Magic Tip: Keeping the Lid on a Pot of Chicken Soup

Leah decided to spend Shabbos at Kaitlyn’s.  Avigail was barely able to contain her excitement, telling everyone that “Tante Reah” was coming to visit her and would be sleeping in the bed right next to hers.  Don and I were empty-nesters for Shabbos.

Although it is not the first time this summer that Don and I are home alone for Shabbos,  I still haven’t figured out how to cook for two people.

My batch of Simply the Best Challah Recipe…ever!is enough for 6 challahs, my Simply the best chicken soup…ever!still feeds 8-10, Perfect Salmon with Roasted Vegetables is enough for 10 and Cowboy Caviar: A Simple and Hearty Salad with Attitude is enough for a large family.

That left me with a great idea.  I could cook an entire batch of our Shabbos favorites and send most of it for Kaitlyn, Aaron, Leah and the kids to enjoy.  That way, I need not alter any of my recipes and two households will enjoy the Shabbos delicacies with only one cooking spree.

There left only one question: How do we transport the chicken soup in its pot?

That was easy.

I found some long and strong rubber bands that fit over the pot. I secured each band under one pot handle.  I stretched each rubber band over the lid and secured the other end under the second pot handle.  I did that three times so that in case one or two rubber bands snapped, the lid was still secure.

chicken soup with rubber bands

Perfect.  Now all that’s left to do is to teach Avigail to call Leah, “Tante Leah”.


Growing Lettuce in TopSoil Bags

When Aaron was a little boy, he loved to join me in shopping for our summer annuals and vegetable plants. We would peruse the aisles of the local garden center, looking for unusual plants and interesting planting combinations and techniques.

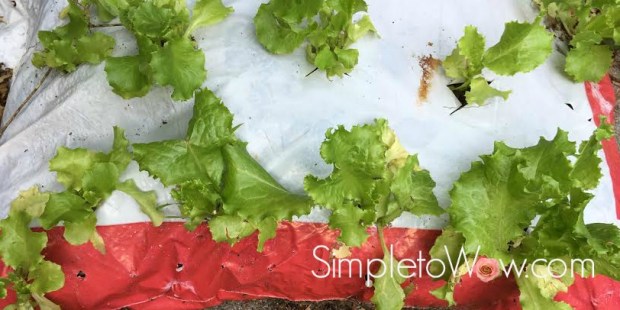
We discovered that our local nursery started some of their lettuce and leafy vegetables right inside topsoil bags. We couldn’t wait to try this technique ourselves. We tried it and it worked beautifully, producing vibrant plants with minimal care. Best of all, once we harvested the leafy plants, we would reuse the topsoil for our vegetable garden. It seemed like a win-win.

We have been using this technique for spring gardening for the past many years.

topsoil planters for lettuce  supplies upside down


SUPPLIES
bag of top soil, potting soil or mixed soil
a knife or box cutter
seeds

DIRECTIONS

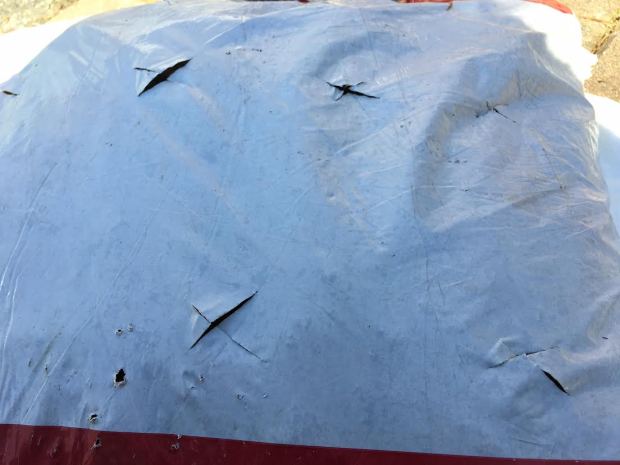
Place bag of topsoil in a sunny area.  Using the box cutter or knife, cut x’s in 12-15 inch intervals.  Pour one or two seeds into each hole created by the x.

topsoil planters for lettuce with xs cut

Make sure that the soil bag is damp, but not wet.  Seeds should sprout within a week or 10 days.

lettuce in soil bags
.

A Gallery Wall of Playgroup Art

Kaitlyn created a gallery wall for Avigail’s art.  Two-year old Avigail is a budding artist with so many art projects and pictures to display.   The gallery wall allows Kaitlyn a way to rotate all the different playgroup art that Avigail brings home from playgroup.

Kaitlyn used empty old frames and sprayed them all the same color blue to create a cohesive collection.  To each frame, she attached a thick string with a clothespin or two so that she can easily add and remove art as needed.

This gallery wall transformed the study area in their apartment and is the perfect spot for Avigail to display her art.

Here it is:

blue gallery wall for avigail's art

SUPPLIES

old frames

spray paint

Thick string or twine

small wooden clothespins

Assorted Command Strips for Picture Hanging

DIRECTIONS

Spray paint frames in well-ventilated area.  Allow to dry. Attach a length of twine using staple gun to backs of wood frames.

Use Command strips to attach frames to gallery wall, following directions on package. Attach clothespins to string.  Hang pictures using clothespins.

Voila!


At War with Weeds: A Homemade Non-Toxic Weed-Killer

weed killer spray

Our nineteen year old son, Aaron, is our resident landscaper.  Aaron has always been a budding entrepreneur and handy around the house and yard.  When he was thirteen years old, he took some of the monetary gifts that he had  received for his Bar Mitzvah celebration and purchased a bright red lawn tractor.  He convinced us to hire him as our resident gardener to earn back the cost of the tractor and he has acquired other garden tools since then, too.   For the past six years, Aaron has used his tractor to manicure our lawn and yard, his tiller to turn our flower and vegetable garden areas and his edger to edge our lawn.

Problem is…Aaron is studying in yeshiva this year in Israel.  We have had to manage without him and we have had to find easy solutions to our gardens’ overgrown messes. Don has been driving the tractor around the lawn and yard to cut the grass.  I have been planting the vegetable garden and mulching the flower beds.    Aaron will be home for a few weeks in the summer and we have lots of landscaping and maintenance waiting for his expert care.

One of the biggest problems is battling the weeds.   In the past, Aaron has tilled the garden beds with his gas-powered tiller which has cut down on the weeds.   This year, Don and I have had to figure all of it out on our own.  I have discovered this amazing homemade weed killer that does the job without the toxins found in most commercially available products.  This solution works best when used on a hot, sunny day and sprayed in the morning.  The sun will wither the sprayed weeds as long as there is no rain expected within the next 24 to 48 hours.

Here it is:

(more…)

Wow Uses for a Simple Dish Detergent Bottle

My mother has always been the ultimate recycler, decades before recycling and upcycling became fashionable.

My mother still decants oil from a large container into a clean dish detergent squirt bottle. The squirt nozzle is perfect for squirting oil onto salads, roasted vegetables and a saute pan.  It keeps the oil contained and helps place the oil exactly where you want it. You can also use a sport-top water bottle for most of these uses, but the water bottles tend to be constructed of a thinner and less robust plastic, not intended for extended use.

squirt bottle uses


Here  are some other wonderful uses for a simple dish detergent bottle. Just make sure to mark the bottle with the contents and the date that it was prepared.  You can print a squirt bottle label and adhere it to the bottle using glue stick.  This can avoid any dangerous mixups:

(more…)

A Salad Bar for the Entire Week

Our family loves salads and we try to spread the love to the rest of the world. From the time that the kids were eating solids, salads became a mainstay in the Respler home. It is rare that we make the same salad twice because there are SO many options.

salad bar in jars-CROPPED,jpg

Most recently, when I entertain, I have been creating a salad bar. A salad bar encourages guests to create their own custom salads and it is a great solution for guests with different diets and allergies. The best perk is that when the dust settles and it is time to put everything away, the salad ingredients have not been dressed, so they are still fresh enough for leftovers. My family clamors to create their own lunches for the next few days from what is left over from the salad bar.

In the past, I have been less than successful in creating the perfect salad bar. I had found that the salad ingredients were messy and unruly, with everyone breathing on and touching everything. I have finally found a good solution to creating a neat and orderly salad bar.

I purchased gallon and half-gallon glass candy jars online that can be seated vertically or on an angle. Each jar has a metal lid and plastic tongs that hang right on the lid.

SALAD BAR JARS WITH TONGS

(more…)