Main Dishes

Pulled Turkey Pizza

pulled turkey pizza slice with sauce

This recipe is simple to prepare and is perfect for those Thanksgiving leftovers.  It is a fleishig (meat) version of pizza and is really a cinch to make.  The first time that I prepared it, I served it for Shabbos lunch to the rave reviews of my guests.

You can easily substitute any type of pulled chicken or pulled beef.

pulled turkey pizza

INGREDIENTS

one refrigerated pizza dough

2 cups of Crockpot Pulled Turkey

water

3 roasted sweet potatoes or 1 large can yams

1/2 cup sautéed onions or french fried onions

arugula (optional)

DIRECTIONS

On a pan lined with parchment paper, roll out pizza dough to a large circle or to rectangle.

Arrange roasted sweet potatoes or canned yams on top of rolled dough.  Mash sweet potatoes or yams until the entire crust is covered, spreading mashed yams to the edge of the dough.

Bake at 400 degrees for 20-25 minutes until the dough is firm.

Add water to pulled turkey until turkey is very moist but not dripping with liquid.

Scatter pulled turkey over sweet potato mash.  Sprinkle with sautéed or fried onions.

Optionally, scatter wilted arugula leaves and your favorite sauce over pizza.

Enjoy!


Creamy Mushroom Tortellini Soup

This blog is about preparing simple things that create a wow.  Simplifying recipes and preparations without sacrificing taste and presentation has really become an art form for me.

One of the “aha” things that I have discovered is that simple really is better.  It really is best to prepare a few delicious signature dishes with just enough variations to keep things interesting.  And, sometimes, a memorable meal can be created from just one recipe.

It creates less mess.  It creates less stress. And, it creates less waste.

This recipe is just that.  It is simple enough.  It is delicious and hearty.  And, the wow factor is that it is an entire meal in one bowl.

Enjoy!

INGREDIENTS
2 tablespoons oil or butter
2-3 onions, diced
2 cloves garlic, chopped
1-2 cartons mushrooms, sliced
1/2 cup wine
4-6 cups water
1/2 cup milk or cream
4-6 ounces frozen cheese tortellini
1 tablespoon salt
dash black pepper
directions

DIRECTIONS
Over medium-high heat, heat oil in a heavy-bottom stock pot. Add onions and garlic and cook until just starting to turn golden brown. Add sliced mushrooms and cook until mushrooms have softened and are releasing some liquid, about 10-15 minutes. Add wine and water and stir until combined and soup is just beginning to boil. Reduce heat to low and add milk or cream and stir until slightly thickened, a few minutes.

Carefully add tortellini and turn heat to high. Once tortellini float to top, lower heat to medium and cook for several minutes more, until tortellini are cooked through. Shut heat and cover pot until ready to serve.

Pulled Beef Babka

pulled beef babka ready to eat.jpg

Today’s stormy and snowy weather in the Northeast was already predicted several days ago.  The first snow of the season is exciting, especially when it greets us before Thanksgiving.  Although Thursdays typically are spent in the car, I sorted out my day to start early and finish in the early afternoon, before the storm was to hit.

I arrived home just as the snow was beginning to accumulate and I headed to the kitchen.   My kitchen faces the backyard and as I cook,  I can enjoy the snowflakes and the changing landscape.   With my head full of new recipe ideas and the snowflakes arriving furiously, I began to cook in the snow.

snowy backyard.jpg

The idea of a savory pulled beef babka has been consuming me.  I had already prepared pulled beef to serve Friday night and I had been mulling over the simplest way to transform some of the pulled beef into a savory babka to serve for Shabbos lunch.  One of my favorite shortcuts is to prepare one dish and serve it in a multitude of different ways.  Pulled beef is that type of recipe.

I thought long and hard about how to prepare this simply with minimal cleanup.  And, I think I nailed it.  Because, it really was simple to prepare.  And, it was easy to clean up afterward.  Best of all, the pulled beef babka was delicious and gorgeous.

Now, let’s see what my fifteen Shabbos guests say!

INGREDIENTS

1 lb. pizza dough or challah dough
1/2 cup barbecue sauce
2 cups thinly shredded  Pulled Beef


DIRECTIONS

Preheat oven to 375 degrees.

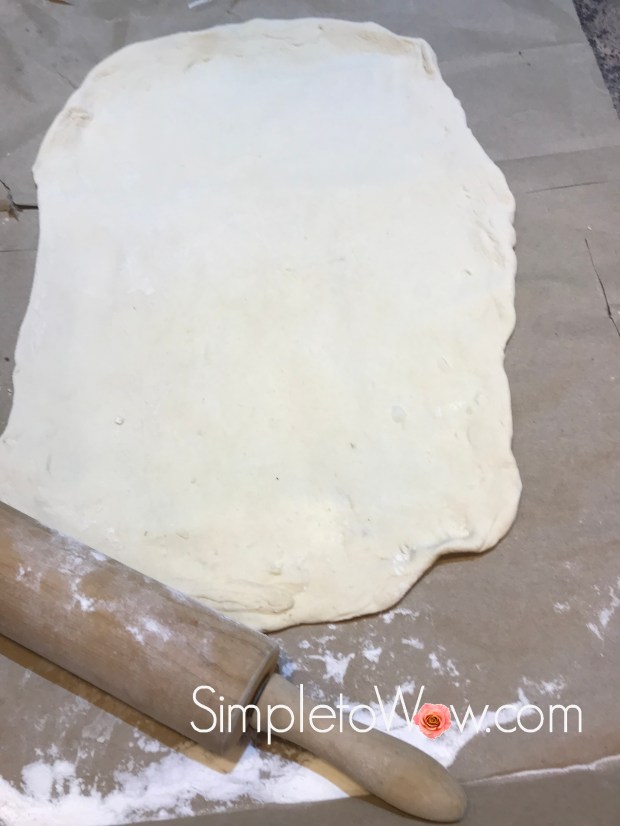
On a large piece of parchment paper, roll the pizza dough out into the thinnest rectangle that you can.

pulled beef dough rolled out.jpg

Spread the pulled beef onto the top of the rolled-out dough, leaving up to an inch of dough all around.

pulled beef babka spread over dough.jpg

Roll the dough jelly-roll style until completely rolled up.

Cut the roll in two lengthwise down the center.

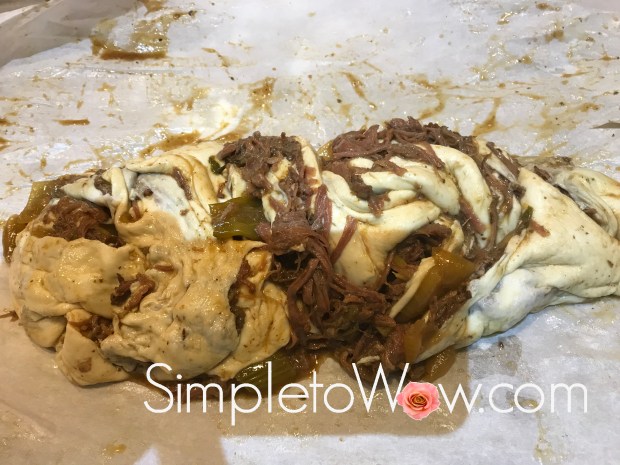
Carefully twist the two jelly roll logs together, trying to keep the twists together as much as possible.  If some of the pulled beef protrudes, don’t worry.  Those pulled beef pieces on the surface will caramelize during baking and will add extra flavor and texture.

pulled beef babka twisted and ready for loaf pan.jpg

Carefully place the parchment paper into a loaf pan, trimming the edges if necessary.  Stick some extra pulled beef and brush extra barbecue sauce on top.

Bake until golden brown, about 40-50 minutes.

pulled beef babka ready to eat

Remove from the loaf pan and slice. Serve warm.

pulled beef babka slice.jpg

TIPS

Prepare a large batch of  Pulled Beef and serve the rest over rice or farfel

Tear open a paper bag and work over the inside of the bag.  Roll everything up after this messy preparation to save cleaning up loose flour and dough bits.


Sliders with Onion Slices and Frizzled Beets

slider with frizzled beets.jpg

Most of the time, we eat sliders without the bun.  And, most of the family enjoys their burgers and sliders very well-done.  That means that the burgers need some pretty exciting accessories to keep them moist and interesting.  This burger started out as an experiment and ended up with rave reviews.  It is a well-done burger that still has character and juiciness.

When thinking about how to dress up an ordinary burger, of course, onions came to mind.  After all, onions make just about everything exciting.  They are sweet and hearty, flavorful and versatile.

And, as you know,  I have become an unwitting ambassador for beets.  Beets are maligned and ignored, mostly because of the unfortunate texture that many people have encountered in their childhood.  Thankfully, beets are making a comeback, mostly because boiled beets are a very small part of the beet preparation pie-chart.  In reality, beets are beautiful and exciting with a variety of textures depending upon their preparation.  They are inexpensive, widely available and are best eaten raw or roasted.  Beets are truly are one of the most exciting vegetables available.

This recipe starts in a pan on the fire and ends in the oven.  It is forgiving and will wait for you.  The end product is a juicy well-done slider atop a soft, succulent onion slice with drizzled beets on the top.

Enjoy!


SUPPLIES

food processor

INGREDIENTS

1-2 beets, shredded
1-2 onions
all-beef sliders

DIRECTIONS

Preheat oven to 375 degrees F.

By hand or using the shredding blade on the food processor, shred or grate beets.

Slice the onions and place on the bottom of a baking dish.  Pour water to coat the bottom and halfway up the onion slices.  Place in hot oven.

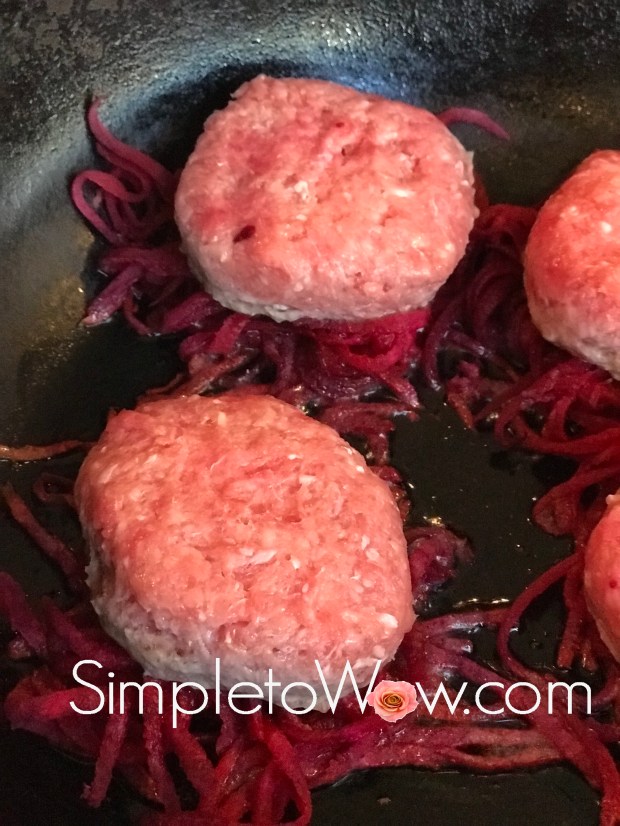
Heat sliders and shredded beets in fry pan.

sliders with frizzled beets in pan.jpg

Turn sliders until both sides are well-cooked.  Carefully place sliders, frizzled beets and some of the pan drippings on top of the onions in the baking dish and place bake in the oven.

Bake for 15 to 30 minutes in the preheated oven.

Onion-Smothered Salmon

salmon smothered with onions 2

I use salmon in a host of recipes.  I prepare it as a main dish for an easy weeknight dinner.  I prepare it or use in Shabbos appetizers like Individual Sushi Salads and others.  Salmon is versatile and popular.  Its distinctive taste makes it one of our family favorites.

Since I use salmon in so many different ways, I am always on the hunt for new preparations.   This past Shabbos, I made a Tex-Mex Shabbos appetizer.  The star of this appetizer was the onion-smothered salmon.   It was so delicious and yet, so simple.

While I normally roast salmon at a higher temperature, baking the fish at 350 degrees F yields a dish that is so delicious and so moist.   I normally saute a large batch of onions in advance of my marathon Shabbos or Yom Tov cooking.    I sometimes even freeze the leftover onions.  This dish is the perfect one to use these batch onions.


INGREDIENTS

salmon fillet
soy sauce
onions
oil
DIRECTIONS

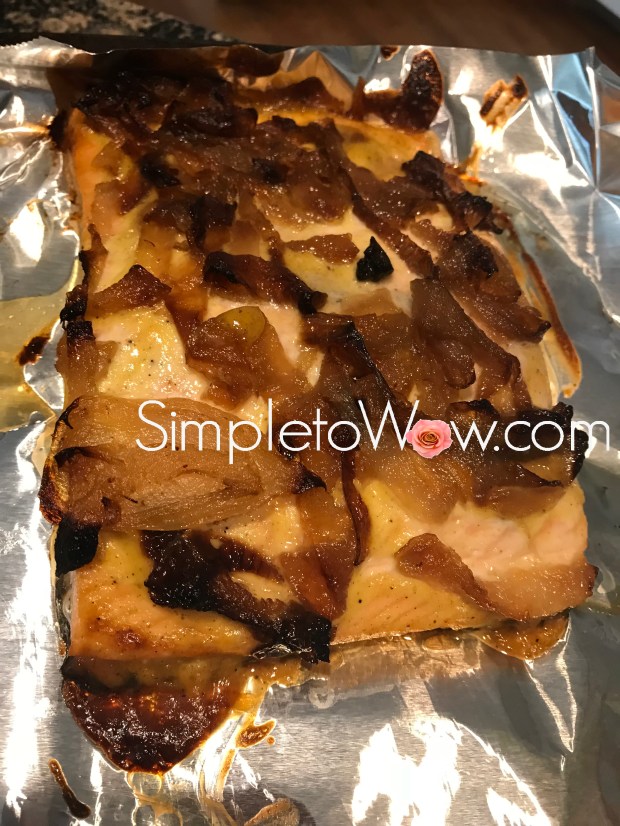
Saute onions in oil or butter, just until soft and starting to brown.  Line a baking sheet with parchment paper or foil.  Lay salmon fillet on the lined sheet and brush with soy sauce.  Smother with sauteed onions.

Bake at 350 degrees F for 30-50 minutes, depending on size of the salmon fillet.  Salmon should be cooked through, thickly flaking and moist when ready.

salmon smothered with onions


Broccoli Encrusted Baked Chicken Cutlets: A Basic Lesson in Sharing

broccoli encrusted chicken cutlets.jpg

I am on a forever quest to produce great meals with minimal effort.  In that endeavor, I have found many shortcuts.  One of my favorites is to prepare one starter and use it in multiple recipes and in different ways.  I convince myself that it is just another form of sharing, true collaboration between recipes.   I vehemently deny that it has anything to do with laziness.

On the most basic level, I use this sharing shortcut for sauteed onions and/or garlic.  Sauteed vegetables add an important depth of flavor to most recipes but can be time-consuming.  Therefore, I saute one large batch and then split the sauteed batch between the soup, side dishes and main dish within the same menu.   Any leftover sauteed vegetables are then moved to a zipper bag and placed in the freezer for future sharing.

This recipe is the next step in batter-sharing.  This recipe began as the batter for my Broccoli Kugel.  I was planning to prepare Baked Chicken Cutlets later on in the day.  While I was pulsing the Broccoli Kugel batter in my food processor, I thought, “why not use this batter to coat the baked chicken cutlets?”  After all, the batter incorporated so many of the ingredients necessary for moist baked chicken.  And, the addition of broccoli would add a moist barrier to the chicken while adding a new color and flavor profile!

And, so I applied the batter-sharing concept to my broccoli batter.  In a moment of boldness, I split off  some of the kugel batter for the coating of these chicken cutlets.

Wow!  Sharing can be daring, and oh, so delicious!

SUPPLIES
food processor
parchment paper

INGREDIENTS
4-6 boneless skinless chicken breasts, pounded or cut thin
1 cup cooked or thawed frozen broccoli (see kosher notes)
1 sauteed onion or 1/4 cup French Fried Onions
1 egg, beaten or 1/2 cup of your favorite dressing
1/2 teaspoon salt
dash pepper
Spicy Mayo (optional)

DIRECTIONS
Preheat oven to 400 degrees F.  Line a baking sheet with parchment paper or spray with cooking spray.

Pulse French Fried Onions soft broccoli, egg, salt and pepper.

Coat the thin chicken breasts in broccoli mixture.

Place chicken on parchment on prepared baking sheet.  Optionally, drizzle with Spicy Mayo

Bake chicken for 20-30 minutes or until chicken is fully cooked.

KOSHER NOTES
Kosher laws disallow the eating of any whole insects and therefore broccoli requires a process of soaking, rinsing and in some cases, pureeing, unless purchased with a reputable kosher hashgacha (certification). Kashrut authorities differ on the proper checking of broccoli. This blog was not designed to be your kosher authority, so please consult your local rabbinic authority regarding using and preparing broccoli.

Enjoy!


Please Note: This post contains affiliate links from Amazon, which means I earn a small commission if you click and make a purchase.
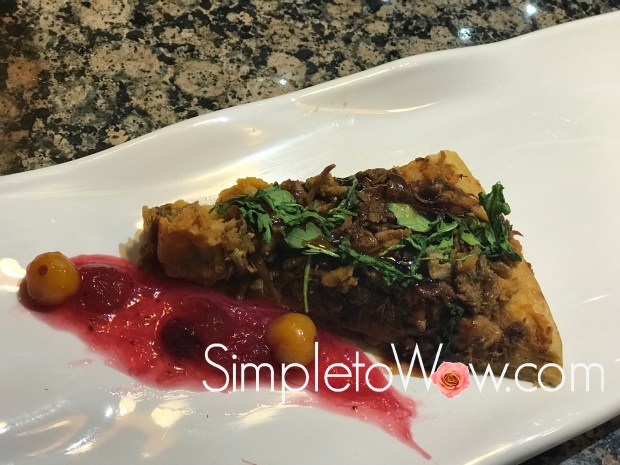
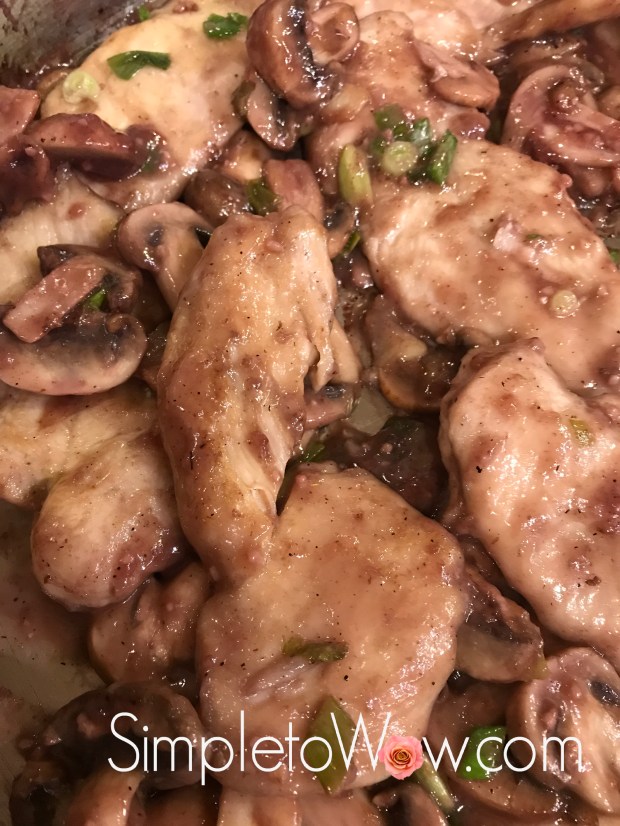
Passover Red Wine Chicken Marsala


pesach chicken marsala.JPG

This perfect for Pesach (Passover) recipe stars a red wine sauce and potato flour dredging for the chicken.   Although Marsala wine and flour are typically used in this recipe, I have adjusted the recipe to use red wine and Pesach gluten-free ingredients that pair so well with the flavors and themes of the Pesach seder experience.

Traditionally, we do not eat roasted meats at the seder, since the Karban Pesach (Passover sacrifice offering) was a roasted meat that was eaten at the time of the Holy Temple.  Since we no longer have the Holy Temple, it is customary not to eat roasted meat  on the evening of the seder.  This recipe is perfect for the seder.

We have a tradition of drinking four cups of wine at our Pesach (Passover) Seder.  After all, the majestic Seder venue commemorates our miraculous exodus from Egypt and the transformation of the Jewish nation from slavery to freedom.  What better drink than wine to celebrate freedom on a night replete with regal traditions?

We make a separate blessing on each of the four cups of wine at different parts of the seder.    The first cup of wine fills the role of kiddush (wine benediction) to sanctify the holiday of Pesach.   The second cup is associated with the lengthy telling of the story of the Exodus.  The third cup is associated with the Birkas Hamazon (Grace after Meals) and the fourth cup of wine is associated with the Hallel (songs of praise) that we sing toward the end of the seder.

Each of the four cups of wine symbolize one of the national exiles experienced by the Jewish nation and relate to one of the four expressions of redemption by G-d in the Exodus.

והוצאתי V’ho-tzaisi (and He took us out)
This expression of redemption symbolizes the Babylonian exile.

והצלתי  V’he-tzalti (and He saved us)
This expression of redemption symbolizes our oppression by Persia (further commemorated by Purim)

וגָּאלתי  V’ga-alti (and He redeemed us) This expression of redemption symbolizes our oppression by the Greeks (further commemorated by Chanukah)

ולקחתי  V’la-kachti (and He took us) This expression of redemption symbolizes the Roman exile.

This recipe tastes as good as the orginal and will wow your seder guests.  Enjoy!

INGREDIENTS

2 pounds boneless chicken breasts, cut or pounded thin
1/3 cup potato starch
salt and pepper to taste
6 tablespoons olive oil
2 packages mushrooms, sliced or 2 large cans mushrooms, drained
Juice of half a lemon or 2 tablespoons lemon juice
3/4 cup red wine
1/4 cup pareve milk (optional)

parsley (optional, for garnish)

DIRECTIONS

Place 1/3 cup of potato starch in a pie dish or a shallow bowl and season with salt and pepper.  Coat each piece of chicken with potato starch mixture.

Over medium-high heat, heat oil in a large frying pan or saute pan. Add the coated chicken. Cook each piece of coated chicken for 3-4 minutes on each side.  Work in batches, if necessary, making sure not to crowd the pan.

Slice mushrooms and cook for a few minutes in same pan, until mushrooms are soft and fragrant.

Add the wine and lemon juice, deglazing the pan with a wooden spoon by stirring in any brown bits left over from the cooking of the coated chicken.   Cook until the mushroom sauce is reduced to half.

Lower the heat to medium and add the pareve milk.  With a wooden spoon, stir well until the sauce is well-combined. Reduce heat to a simmer and simmer the sauce until the sauce is thick and glossy.

Return the cooked chicken to the pan and cook for 10-15 minutes more, until chicken is fragrant, soft, succulent and cooked through.

Add additional salt and pepper to taste, if necessary.  Optionally, garnish with chopped parsley.

Enjoy!


pesach chicken marsala on a plate


Pistachio Encrusted Cajun Tilapia

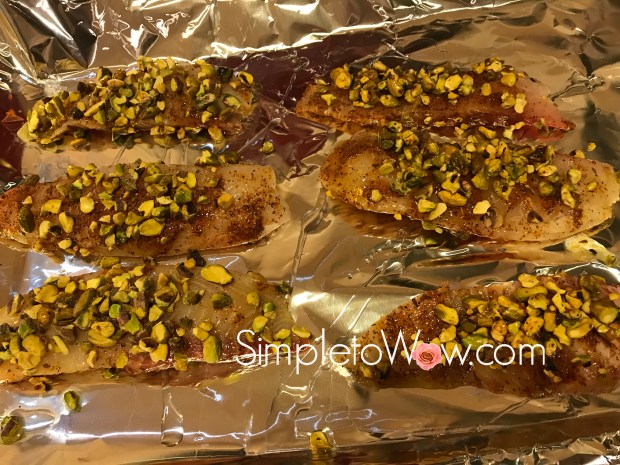
pistachio-encrusted tilapia-ready to cook

My two sisters-in-law, Yael and Chaya, share the same birthday.  Interestingly, it was the same birthday shared by my father-in-law a’H, too.  Last year, we went out for a woman’s-only dinner in celebration of the birthdays.   We enjoyed our time together so much that this year, in the ice and snow,  we once again trekked to a dairy restaurant in Brooklyn to celebrate the two birthdays.

My sisters-in-law ordered menu items that they knew and trusted: salmon, salad and Eggplant Parmesan.  Always looking for something new, I was entranced by the pistachio-encrusted salmon on the menu and was not disappointed when it was presented and devoured by me and my sisters-in-law.

So, I started thinking… Salmon is so flavorful and distinctive on its own.   Why don’t I try this encrusting technique on a blander fish like tilapia?  Tilapia is one of  those inexpensive fish ingredients that is always available at my local fish counter.  Its meaty flesh and mild taste make it suitable for kick-start cajun seasoning and nutty pistachio encrusting.

And so, for dinner the night after the birthday celebration, I prepared this dish.  And, both Don and Leah confirmed that it was blog-worthy.  Here it is!

INGREDIENTS
4 large tilapia filets
2 tablespoons Cajun seasoning
1 egg
1/2 cup chopped pistachios

oil or cooking spray

HONEY DIJON SAUCE (optional)
1/3 cup Dijon mustard
1 tablespoon wine vinegar
2 tablespoons oil
2 tablespoons honey

OPTIONAL SUPPLIES
food processor
pyrex pie plate

DIRECTIONS
Preheat oven to 400 degrees F.

Place cajun seasoning on a plate or pyrex pie plate.  Blend egg with fork in a separate plate or pyrex pie plate.   Place chopped pistachios on a third plate or pyrex pie plate.

pistachio-encrusted tilapia-prep plates

Lightly coat both sides of tilapia with Cajun seasoning and then dip into egg, coating both sides. Finally, coat each tilapia fillet with chopped pistachios.

Cover a baking sheet with foil or parchment paper.  If using foil, drizzle with a bit of oil or spray with cooking spray.  Place the encrusted tilapia fillets in a single layer, making sure not to crowd the dish.

pistachio-encrusted tilapia-ready to cook

Bake for 15-20 minutes or until the tilapia easily flakes with a fork.

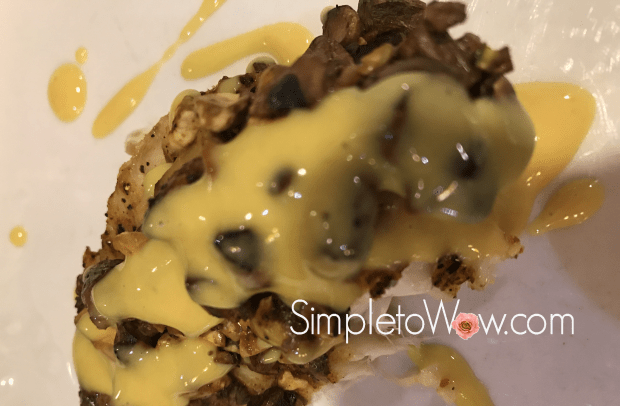
In a food processor or with a whisk in a bowl, combine honey Dijon ingredients until smooth and creamy.

honey dijon sauce.jpg

Drizzle over fish before serving.

pistachio-encrusted tilapia-serving suggestion.jpg

Enjoy!

Please Note: This post contains affiliate links from Amazon, which means I earn a small commission if you click and make a purchase.

Simply Magical London Broil

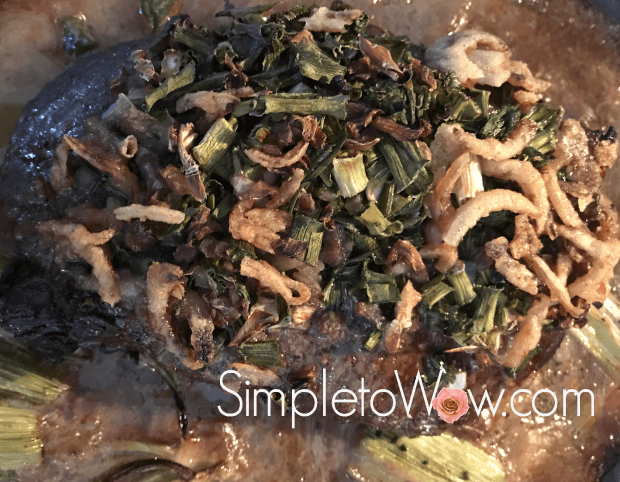
There are some dishes that need garnishing and extra sauces once cooked.  This is not one of them.   This London Broil roast is ready to serve and self-garnished with baked onions and scallions.  It is simple enough for a weekday dinner and “wow” enough for Shabbos or that special celebration.  It uses the simplest of ingredients, technique and presentation and yet, it is delicious, succulent and beautiful.

Magical baked london broil with Celery on cutting board.png

INGREDIENTS
1 small (2-3 pound) London Broil
1 red onion, diced small
1-2 bunches scallions, cut small
handful of french fried onions (optional)
juice of one lemon or lime
4 stalks celery
salt
pepper
1/3 cup water

DIRECTIONS

Let London Broil come to room temperature.

Slice celery into thick chunks.

In a roasting pan or pyrex dish, place celery chunks and then place London Broil fattier side up.  Squeeze citrus on both sides of London broil and season with salt and pepper.

Pour 1/3 cup of water around London Broil and then top London Broil with diced onion and scallions.

Magical baked london broil with Celery-raw.png

Cover pan tightly with foil.

Bake at 300 degrees F for 3 hours. London Broil should be fork tender when done.   Allow meat to rest for at least 10 minutes before slicing on the bias.

Magical baked london broil with Celery.png

Red Velvet Salmon


cranberry salmon

I decided to name this salmon recipe red velvet for the color and texture of the cranberry glaze.   There really is something velvety about  this simple salmon recipe that takes cranberry sauce to a whole new level.

Cranberries are a fall and winter specialty item and I still have so many bags of cranberries in my freezer from Thanksgiving.  Every time I open my freezer, I think of cranberry and the many delicious ways to use this tart and distinctive berry.

So, when I was planning a new salmon dish, I thought to use cranberries as the centerpiece.   This recipe can be made with homemade cranberry sauce and that way you can adjust the sweetness of the glaze.  But, to keep things simple, I prepared with salmon recipe with store-bought cranberry sauce.  I used the jellied variety, but the whole berry variety will work just as well.

Enjoy!

INGREDIENTS

salmon fillet

glaze
3-4 tablespoons Worcestershire sauce
1 cup canned cranberry sauce
2 tablespoons fresh lemon or lime juice
1 tablespoon garlic powder
1 teaspoon ginger powder

garnishes (optional)
1/2 cup fresh cranberries
Celery Curls

DIRECTIONS
Preheat the oven to 375 degrees F.

In a small bowl whisk together the glaze ingredients, smoothing out the lumps in the cranberry sauce as much as possible.

Place the salmon on a baking sheet coated with foil or parchment.  Pat the marinade into the salmon.

Bake for 30-40 minutes.

Garnish with fresh cranberries and celery curls before serving.

Enjoy!

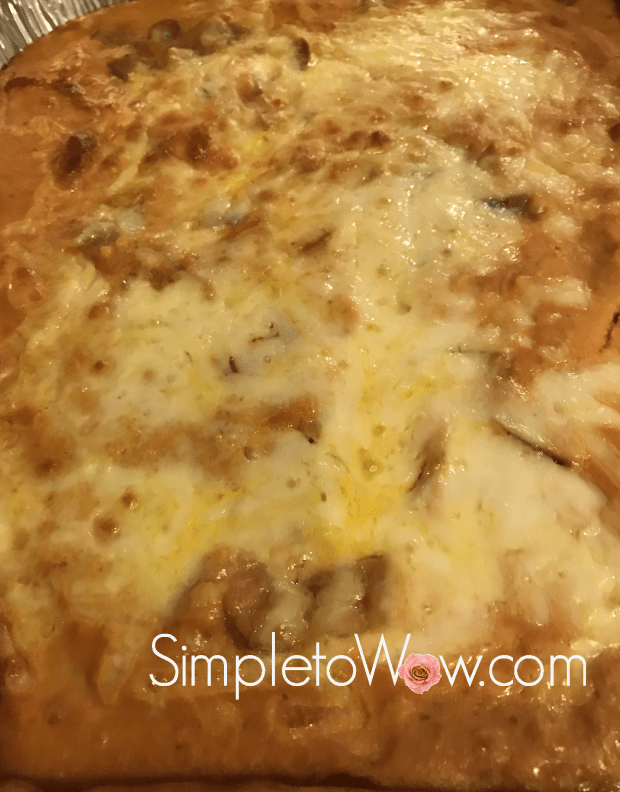
Pumpkin Quiche for a Dairy Thanksgiving

pumpkin quiche

We normally celebrate Thanksgiving with a delicious heimeshe (traditional Jewish style) turkey and meat dinner at our niece’s house.  Michal and Shui open their beautiful home and prepare an assortment of delicious foods for this occasion.  After all, the theme of hakaras hatov (thanksgiving) is of paramount importance to our Jewish faith and Thanksgiving is an excellent opportunity to get the family together  to express our appreciation for all that we have been given.  Michal’s dinner is one that the whole family anticipates and enjoys.

This year is different.  This Shabbos, right after Thanksgiving, Michal and Shui will be hosting the entire family for their son’s Bar Mitzvah.  And, the energy and excitement for a wonderful Shabbos all together with aunts, uncles and cousins is palpable.

So, we are left to make our own plans for Thanksgiving.   And, this year, Thanksgiving day comes on the heels of Michelle’s birthday.  And Michelle loves milchig (dairy) foods.

We are changing things up this year and having a dairy Thanksgiving feast with many of Michelle’s favorite foods.  There will be Onion Quiche, fettuccine alfredo (stay tuned for the recipe), Lasagna and plenty of salads.  Of course there will be a Carvel ice cream cake, Michelle’s favorite, and some Cheesecake for dessert.

And, in celebration of Thanksgiving, I will be serving this awesome pumpkin quiche.  After all, we have to keep some tradition in this festive dairy birthday feast.

INGREDIENTS

2 tablespoons oil
2-3 onions
2-3 cloves garlic, minced
1/2  teaspoon salt
dash of black pepper

4 eggs
1/4 cup cream
1/2 cup milk
1 large can of pumpkin puree
8 ounces shredded or grated cheese

DIRECTIONS
Preheat oven to 400 degrees F.

Over medium-high heat, heat oil and add onions and seasonings. Stir occasionally until the onions are soft. Reduce the heat to medium-low and cook until the onions are light brown, stirring occasionally.

Place half of the cheese in the quiche pan. Combine the eggs, cream, milk and pumpkin puree. Pour into the quiche pan over the cheese. Sprinkle the sauteed onions and garlic over the egg mixture and top with the remaining shredded cheese.

Bake uncovered for 45 minutes or until the top of the quiche is golden-brown.

Happy Thanksgiving!

Simple as Pie Pretzel Pizza

simple as pie pretzel pizza.JPG

Now that they have changed the clock, Shabbos starts and ends an hour earlier. Traditionally, we eat a meal called a Melave Malke (literally, Escorting the Queen) to accompany the Shabbos queen from our homes.

Typically, after the meat-based Shabbos meals, the Melave Malke meal is dairy.  Aaron, who has been our official Melave Malke cook is in Cleveland, so I am mostly on my own to prepare Motzei Shabbos (Saturday night).  Some family favorite Melave Malka delicacies are Baked Spaghetti Squash with Sauce and Cheese and Calzones.  

On the first Motzei Shabbos after changing the clock, I decided to change things up.  Rather than order or prepare from-scratch pizza, I decided to layer on-hand ingredients to prepare something delicious and different.

I prepared a pizza pretzel pie.  It started with frozen pretzels.  I spread the pretzels out atop a bed of wraps.  I then layered sauce and sprinkled a blend of shredded mozzarella and cheddar cheese.  I baked it all for 20 minutes and voila! We had simple as pie pretzel pizza.

INGREDIENTS

wheat wraps or flour tortillas
frozen pretzels (like Superpretzel)
marinara sauce
shredded cheese

DIRECTIONS
Preheat oven to 400 degrees F.

Line a pizza pan with parchment paper. Spread a layer of tortillas or wraps, overlapping slightly, until the entire pizza pan is covered. Place pretzels on top and then brush with sauce and sprinkle with cheese. Optionally, sprinkle with topping such as sesame seeds, fresh garlic or chopped vegetables.

Bake for 15-30 minutes, until the cheese has melted.

Shavuah Tov! (good week)

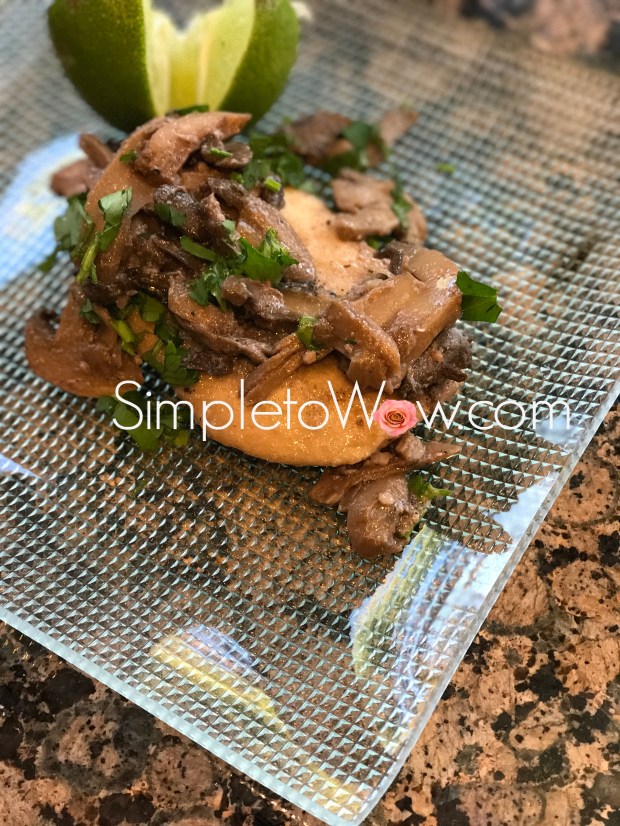
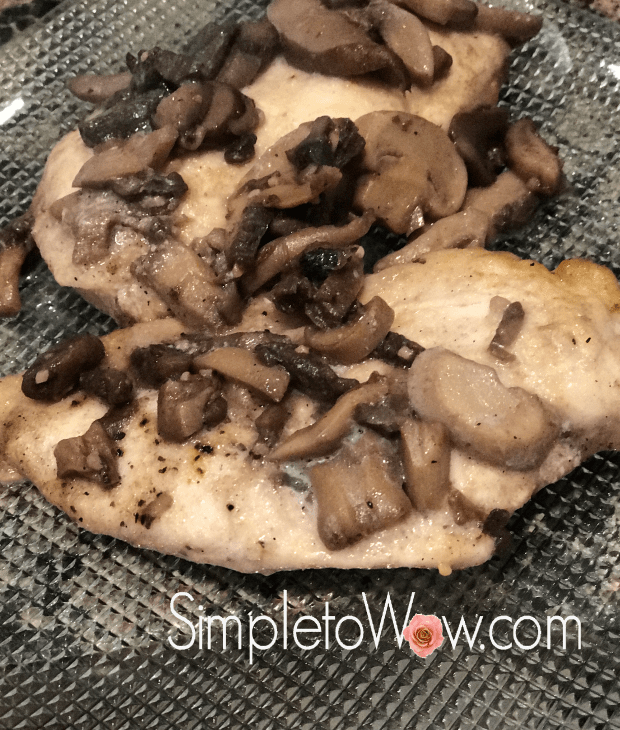
Drunken Mushroom Lime Chicken

drunken mushroom lime chicken on plate.png

For the last thirty years, I have prepared my family-favorite One pot roast chicken for Friday night dinner.  There is something about roasted chicken and potatoes prepared alongside the chicken that really feels like a Shabbos dinner.

Or,  so I thought.

The last couple of weeks, I have been noticing that the Friday night chicken has not been touched.

Leah has been campaigning that we skip the main course on Friday night.  After all, we start our evening Shabbos meal with kiddush over wine.  We then enjoy challah with an assortment of dips.  We move on to chicken soup, still a family favorite.  And, Leah is absolutely right.  There  just is no room for the heavy  one pot roast chicken.

So, I decided to change things up a bit for this Shabbos and prepare a lighter chicken dish.

It starts with boneless chicken breasts, a lighter option than whole roast chicken.  It uses wine and lime juice for the perfect balance of flavor and freshness.  Oh, and it is smothered with lots and lots of mushrooms.  It is fragrant and moist with loads of flavor and texture.

Now, the only question is…Will we skip the main course this Friday night?

INGREDIENTS

2 pounds boneless chicken breasts, cut or pounded thin
dusting of flour (I used whole wheat flour)
salt and pepper to taste
4 tablespoons oil (I used olive oil)
2 packages mushrooms, sliced or 2 large cans mushrooms, drained
Juice of half a lime or 2 tablespoons lime juice
3/4 cup red wine
1/4 cup soy or almond milk

DIRECTIONS

Place 1/4 cup of flour in a pie dish or a shallow bowl and season with salt and pepper.  Coat each piece of chicken with flour.

Over medium-high heat, heat oil in a large frying pan or saute pan. Add the flour-coated chicken. Cook each piece of coated chicken for 3-4 minutes on each side.  Work in batches, setting cooked chicken aside wrapped in foil to keep warm until the rest of the coated chicken has been cooked.

Once all the chicken has been cooked, remove from pan.  Add mushrooms and cook for a few minutes, until mushrooms are soft and fragrant.

Add the wine and juice of half a lime, deglazing the pan with a wooden spoon by stirring in any brown bits left over from the cooking of the coated chicken.   Cook until the mushroom sauce is reduced to half.

Lower the heat to medium and add the pareve milk.  With a wooden spoon, stir well until the sauce is well-combined. Reduce heat to a simmer and simmer the sauce until the sauce is thick and glossy.

Return the cooked chicken to the pan and cook for 10-15 minutes more, until chicken is fragrant, soft, succulent and cooked through.

drunken mushroom chicken

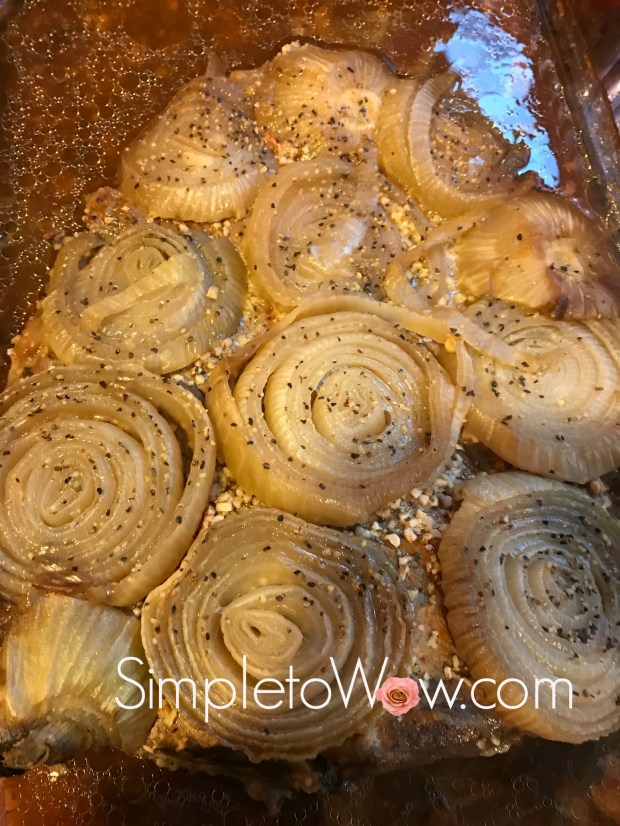
Perfect Lean and Moist Brisket

low-carb brisket up close.JPG

This Shabbos, we were expecting a houseful of company. Our guests were a motley assortment of meat eaters and lean eaters. That left me in a quandary as to how to prepare a menu to satisfy all tastes.

I prepared a vast assortment of simple Rainbow Roasted Vegetables including cabbage, cauliflower, rainbow carrots, eggplant and zucchini.  As the main dishes for Friday night, I prepared lemon zinger chicken and this lean and moist brisket.

This recipe doesn’t require marination.  It also doesn’t call for any oil. What it needs, though, is time.  Plenty of time.  Three hours of cooking time.  Oh, and onions.  Plenty of onions to keep it moist.

The low and slow cooking keeps the flavor and moistness.  The sliced onions create a flavorful and tender blanket of moisture that replaces the fat and protects the tender beef.

This is a gluten-free and low-carb recipe that is suitable for Pesach (Passover), too.

Simple and moist onion-covered brisket

INGREDIENTS

3-4 pound top of the rib beef roast or lean brisket

2-3 onions, sliced thin

lemon juice
1/2 teaspoon salt
pepper
minced garlic or garlic powder
paprika
powdered ginger
onion powder

dash of cayenne pepper (optional)

1 cup zinger tea


DIRECTIONS

Make a cup of zinger tea, squeezing out the tea bag to release as much flavor as possible. Add half of the tea to the bottom of the pan. Place roast in pan. Pour rest of tea over roast and generously sprinkle seasonings on top of the roast.

Place fattier side of the brisket up so that fat keeps the meat tender during cooking. Smother the roast with a layer of very thinly sliced onions, pressing into the roast. Cover tightly with foil.

Let brisket come to room temperature or place in oven on delayed cook mode.

Set oven to cook for 3 hours on 300 degrees F. Let roast stay in oven until the oven cools down, at least for a half hour.

Remove from oven and allow to cool completely.   Refrigerate before slicing.

Lemon Zinger Chicken

Sometimes the best flavors are simple ones.  Lemon.  Garlic.  Chicken.   Tea.

Delicious food is simple food with no compromises in freshness, flavor, moistness and taste.

Today, I prepared chicken that was tangy, flavorful and succulent.  It took very little effort.  It used natural ingredients.  And its simplicity and taste made everyone take notice.

intense lemon chicken

INGREDIENTS

chicken parts

Lemon zinger tea

fresh lemon

minced or granulated garlic
paprika
cinnamon

DIRECTIONS

In a cup or measuring cup, add a lemon zinger tea bag to  1 cup of hot water, steeping tea well to create concentrated flavor.

Place chicken pieces in pan and pour tea over chicken.   Rinse whole lemons well and squeeze fresh lemon over chicken.  Generously sprinkle chicken with seasonings.

Tuck squeezed lemon in between chicken pieces.  Cover tightly with foil and cook at 400 degrees F for two hours.

Simple Chicken Vegetable Packets

I devone of those hot and humid days that were exhausting.  I just had very little energy left at the end of the day to prepare dinner.  I had defrosted chicken breasts earlier to use for dinner and needed inspiration to create a simple and delicious meal.

I wanted no fuss and very little effort.    I didn’t even want the extra effort of preheating the oven.  I wanted to use at-hand ingredients and easy cleanup.

Packet cooking seemed like the perfect solution.

I have prepared packet meals with salmon (Low-Carb Cajun Salmon Fillets in Foil Packets) and decided to try it with the chicken breasts.   To keep the meal hearty and fuss-free, I decided to add an assortment of fresh and frozen vegetables that I had on hand to the packets, too.

This really was simple.  And, yes, it was a wow!

INGREDIENTS

4 chicken breasts

barbecue sauce
soy sauce

frozen green beans
tomatoes
peppers

DIRECTIONS

Cut four square pieces of heavy duty foil. On each piece of foil, place one chicken breast and then lightly drizzle with soy sauce and then barbecue sauce. Layer tomatoes and peppers and then sprinkle with a few frozen green beans. Seal foil into packets.

Bake at 400 degrees F for 30-40 minutes. Open foil packets carefully to let steamm escape and serve immediately.

The Perfect Grilled Salmon Wrap

salmon tortilla wraps 2

Salmon is one of the staples in my house.  Just about everyone here (except my mother) really enjoys salmon, so it is often a go-to dinner.  Very often, I prepare a family pack of salmon, only to find that someone has already eaten dinner elsewhere.   I then repurpose the salmon for lunch the next day.

One of my favorite lunches is a grilled salmon wrap.  It is portable, delicious and very satisfying.  It is so simple to prepare once you know the way to roll the perfect wrap.


INGREDIENTS

large pliable tortillas or wraps

arugula (see Kosher notes)

Thinly sliced tomatoes  or other vegetables (optional)

grilled or baked salmon

Spicy Mayo


STEP BY STEP DIRECTIONS

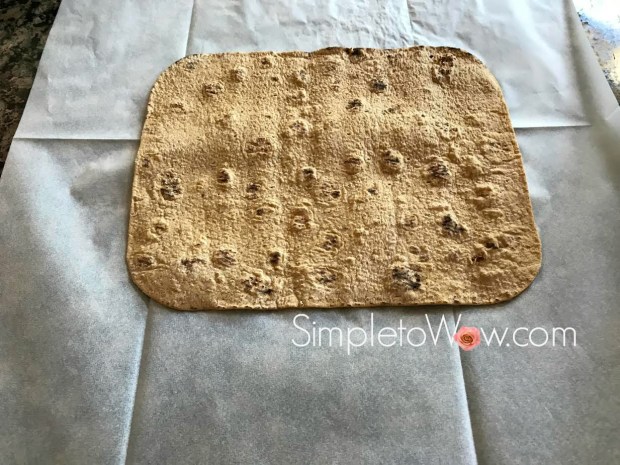
Lay out the wrap on a flat surface.  I chose a rectangular wrap, but this can be made in exactly the same way using a round tortilla or wrap.  Just make sure to use a tortilla or wrap that is soft and pliable, not brittle.

tortilla wrap step 1

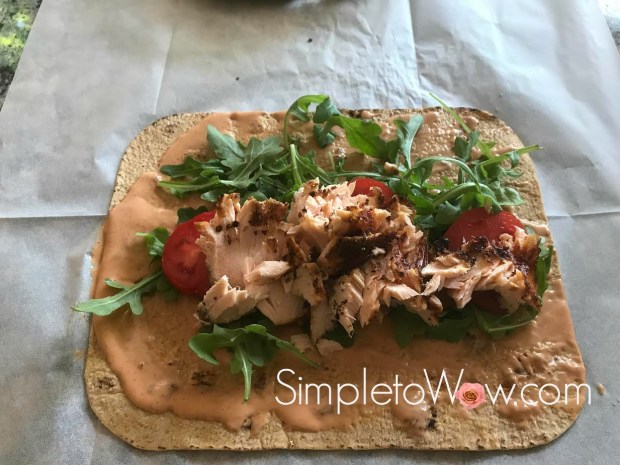
Choose your favorite dip or dressing or and spread it all over the wrap.  This gives extra flavor to the salmon and helps the fillings  adhere to the wrap.


Add the arugula by placing in a thin layer right over the sauce, making sure to cover about half of the tortilla.

tortilla wrap step 2

Add any other thinly sliced vegetables.   This will add another texture and/or moisture to your wrap.

Here I added beefsteak tomatoes from my garden.  Tomatoes will add favor and moisture to the wrap.  You can add thinly sliced cucumbers, peppers or jicama to add crunch.  Of course, you may omit this step if you are a purist about your wrap.

tortilla wrap step 3

Next, add the salmon.  If there are any bones, remove and lay in a single strip or flake and place atop the arugula and vegetables.

tortilla wrap step 4

Sprinkle on another thin layer of dressing or dip to keep the salmon flavorful.

tortilla wrap step 5

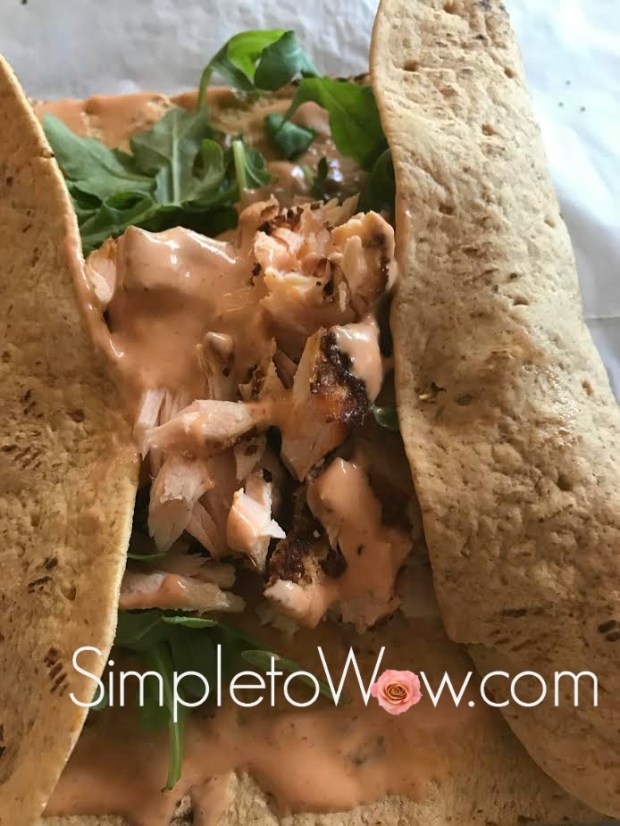
Next, fold your wrap carefully.

Before we begin, here are two important points:

  1. Make sure that you are using a pliable and soft wrap or tortilla.  Brittle tortillas or wraps will not work well for these wraps.
  2. You will be tempted to overfill your wrap.  Don’t give in to temptation,  It will make your wrap messy and impossible to roll up neatly.

Here are step-by-step instructions:

  1. Fold in the first sidetortilla wrap step 6
  2. Now, fold in the second side  tortilla wraps step 6a
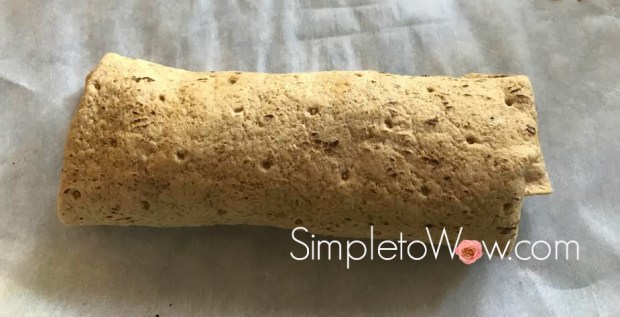
  3. Start rolling wrap from bottom to top, carefully move the stuffing toward the bottom of the wrap as your roll, leaving a least 1 1/2 to 2 inches at the top of the wrap.   Roll the wrap all the way to the top.tortilla wrap step 7tortilla wrap step 8
  4. Wrap the parchment or wax paper around it.
  5. Using a very sharp knife, cut through the wrap on a diagonal.salmon tortilla wraps 2


Voila!


KOSHER NOTES

Kosher laws disallow the eating of any whole insects and therefore most greens require a process of soaking, rinsing and in some cases, pureeing. Kashrut authorities differ somewhat on the proper checking of leafy vegetables. This blog was not designed to be your kosher authority, so please consult your local rabbinic authority regarding using greens such as arugula.

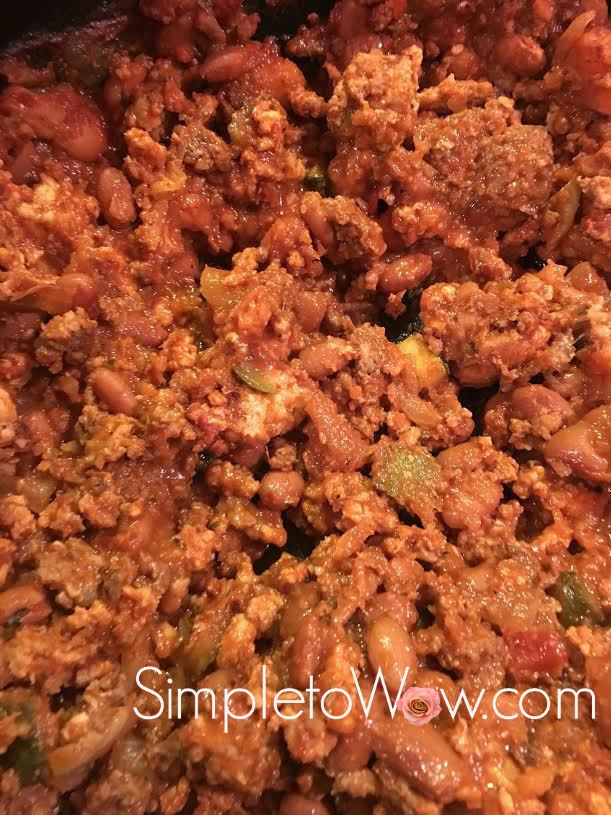
Kaitlyn’s Simple and Delicious Chili Recipe

Kaitlyn loves to make chili for her family.    Her husband, Aaron, has some Texas roots and that may account for her family’s penchant for chili.

Aaron loves his chili with plenty of cayenne pepper and Avigail and Yehuda don’t seem to mind the heat in their chili, either.

Kaitlyn refers to their chili as cholent (traditional beef stew served on Shabbos) and the kids devour it.    After all cholent is a beef casserole and so is chili.  Perhaps we can even consider cholent to be a Shabbos chili.

If  prefer milder chili, you can easily adjust or eliminate the hot pepper, chili seasoning and cayenne pepper to accommodate your heat index.

This recipe has become of of my favorites because it is simple to prepare and can be served in so many ways.  Best of all, it freezes well.

chili-up-close

(more…)

Pastrami Sandwich Chicken Rolls

pastrami sandwich chicken


Last night, we had deli for dinner.

Pastrami. Rye bread. Mustard. Deli pickles. Cole Slaw. The whole deli shebang.

Every once in a while, we just need a deli fix. And, last night was it.

It was so delicious.  And, maybe, just maybe, I wanted a bit more deli in my life.

This morning, I looked at the thin cut chicken breasts that I bought for Shabbos and thought, “How about deli sandwich chicken rolls for Friday night dinner?”.

Here it is!

INGREDIENTS

2 pounds thin-cut chicken cutlets

deli or dijon mustard
mayonnaise

stuffing

2 cups of rye bread, cut into large cubes
1 large onion, diced and sauteed with 4 minced garlic cloves
8 ounces of pastrami, sliced or diced thin
salt and pepper to taste

stuffing
1/2 cup cornflake or bread crumbs
1 cup crushed french fried onions
salt and pepper to taste

DIRECTIONS

On a plate or pie dish, combine mustard and mayonnaise.

Saute onion and garlic until just starting to brown. Soften bread by soaking in water and then squeezing out extra water. In a separate plate or pie dish, combine rye bread, pastrami, sauteed onion and garlic and seasonings to form stuffing mixture.

On a third plate or pie dish, combine crumbs and seasonings.

Preheat oven to 375 degrees F.

Line a baking sheet with parchment paper or greased foil.

Open each chicken cutlet and fill with a golf-size clump of stuffing. Using a silicone brush, brush each stuffed cutlet with mustard/mayo mixture and then coat generously with crumbs/french fried onions. Place seam side down on lined baking sheet. Leave a bit of space in between chicken cutlet rolls, taking care not to crowd the cutlets.

Lightly drizzle olive oil or spray with cooking spray. Bake for 30 minutes, cutting largest stuffed chicken roll open to ascertain that chicken is no longer pink on the inside.

Individual Sushi Salads


individual sushi salad 1

My kids all love sushi.   To them, having sushi as an appetizer Shabbos lunch is a real luxury.  While sushi is a fan favorite, I don’t feel that it has enough nutritional value as it is mostly rice.  Furthermore, sushi rolls do not stay fresh enough from Friday until Shabbos lunch to make for an appetizing appetizer.

So, I have been preparing individual sushi salads as a Shabbos lunch appetizer, instead.

And, sushi salads eliminate most of  the fussiness of rolling sushi.  I can choose the proportions of each element in the sushi salad, favoring more vegetables and fish than rice and nori.  The elements of the sushi salad can all be prepared in advance.   Furthermore, they are all simple ingredients that I can use in different ways for the Friday night Shabbos dinner.  And,  best of all, once assembled on Shabbos morning, the individual sushi salad ingredients stay perfectly fresh, simply delicious and gorgeous until ready to serve.

INGREDIENTS

1 cup sushi rice (I favor brown sushi rice) prepared in rice cooker

1/4 cup rice vinegar

baked or roasted salmon fillet, cubed or shredded

nori, cut into thin strips

1 medium avocado

1-2 zucchini or cucumber, diced or grated

1-2 Carrots, grated (optional)

Simple and Perfect Spicy Mayo


DIRECTIONS

Prepare sushi rice in a rice cooker, using 1 cup of rice to 1 cup of water.   Add 1/4 cup rice vinegar to prepared sushi rice.

Prepare salmon fillet.  Cube or shred.

Cube avocado and place in a solution of 1 cup water with juice of one lemon.

Grate cucumber, zucchini and/or carrots.

Gently roll nori sheets and cut thin strips with scissors.

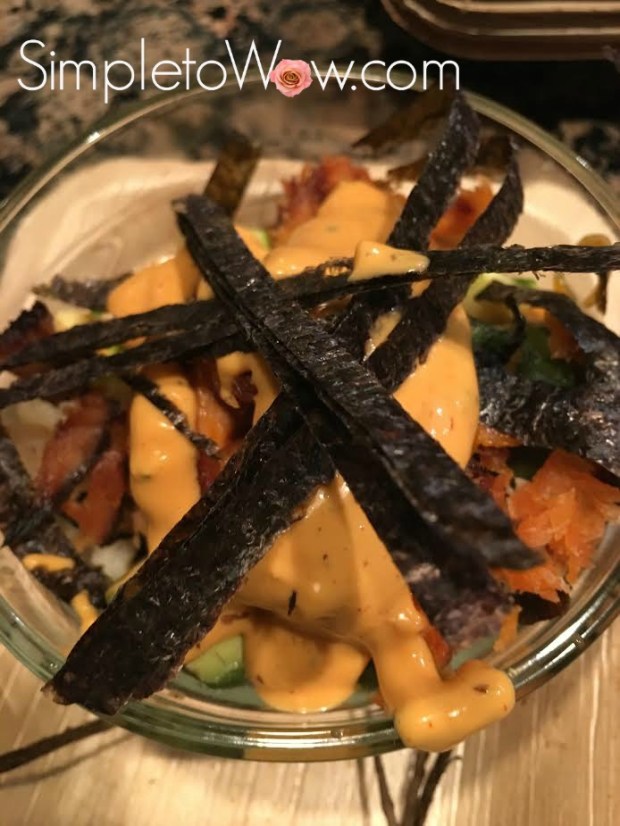
In a clear glass or plastic bowl, layer cooked rice, salmon, nori, avocado, cucumber and carrot.  Drizzle spicy mayo on top and garnish with thin strips of nori drizzle of spicy mayo.

TIPS

For Shabbos lunch, prepare salmon, rice and grated vegetables before Shabbos.  Store each ingredient separately in a zipper bag.  Prepare Simple and Perfect Spicy Mayo and store in 16-oz wide-mouth squeeze bottles or 24-oz wide mouth squeeze bottles.

Before assembling, mix sushi rice with rice vinegar.  Cut or shred salmon.  Cube avocado and place in a solution of 1 cup water with juice of one lemon.

In a clear glass or plastic bowl, layer cooked rice, salmon, nori, avocado, cucumber and carrot.  Drizzle spicy mayo on top and garnish with thin strips of nori and drizzle of spicy mayo.


VARIATIONS

For Pesach, substitute quinoa for the sushi rice and cider vinegar for the rice vinegar.


PLATING TIPS

Use clear glass or plastic bowl and overlap thin strips of nori on top, creating an x or star for an impressive presentation.


individual sushi salad

Perfectly Moist Baked Stuffed Chicken

baked stuffed chicken cut in half

For the Purim seuda (feast) this year, Don did almost all of the shopping for ingredients. My mother had emergency surgery shortly before Purim and I spent the week with her in Cleveland.  That meant that I would not have the time to shop and fully prepare for the seuda.  Don offered to help by doing the shopping for me.

Don did an awesome job shopping for the meat and chicken.  He bought thin sliced chicken cutlets for me to grill as one of the main dishes.   When I saw how thin the cutlets were, I was nervous that they would overcook easily.   So, I decided to develop a recipe that would accommodate cutlets that were butterflied and very thin.

I also had a bagful of frozen rice from a previous dinner party and lots of leftover frozen bread.  Keeping in mind that Pesach (Passover) was around the corner, I was eager to create a stuffing recipe that would use my leftover rice and bread.

And, so this stuffed chicken recipe was developed.

(more…)

Simple Lean Kosher for Passover Brisket

pesach FF onion brisket

Last week, I prepared my meats for Pesach (Passover).  The briskets that I purchased were leaner than I expected and I was nervous that they would cook up tough. When this happens, I usually smother the roast in fresh or french fried onions. This creates a blanket of moisture that replaces the fat and protects the tender beef.

This simple and perfect low temperature recipe is reminiscent of Low and Slow Oven Brisket: No Braising Necessary.  It has been adapted for Pesach and truly yielded the perfectly moist and tender brisket with very little effort.

INGREDIENTS

3-4 pound first cut brisket or top of the rib

wine
olive oil
lemon juice
garlic and/or onion powder

very thinly diced onions or baked french fried onions

DIRECTIONS

Pierce the brisket with a fork all over on both sides. Place in roasting pan and pour wine, oil and lemon juice over brisket, just until absorbed.

Turn roast over and repeat piercing, drizzling and sprinkling on the second side.

Place fattier side of the brisket up so that fat keeps the meat tender during cooking. Brush the top of the brisket with a light layer of olive oil and then smother with a layer of very thinly sliced onions or baked french fried onions, pressing into the roast.  Cover tightly with foil.

Let brisket come to room temperature or place in oven on delayed cook mode.

Set oven to cook for 3 hours on 325 degrees F. Let roast stay in oven until the oven cools down, at least for a half hour.

Remove from oven and allow to cool completely. Refrigerate before slicing.

Passover Meat Muffins

meat muffins

During the past March snowstorm, I began cooking for Pesach.

One of my favorite shortcuts is to prepare one batter and then use it to prepare a host of different menu items.  This time, I prepared one ground beef batter and used it to prepare baked meatballs, stuffed cabbage and these delicious and adorable meat muffins,

Meat muffins are just individual meatloaves prepared in round ramekins and topped with mashed potato or sweet potato icing.  They are whimsical enough to entice the children and delicious enough for even the adults to try.

INGREDIENTS

2 pounds ground beef
2 eggs
1/2 cup potato starch
1/2 Passover crumbs
1-2 onions, grated or diced small
2-3 garlic cloves or 2 tablespoons minced or granulated garlic
1 small can of tomato sauce or paste
1 squirt of ketchup

Mashed Potato Icing

4 large potatoes or sweet potatoes
½ cup vegetable stock or water
2 tablespoons olive or canola oil
Salt and pepper to taste

SUPPLIES

Piping Set for Icing
Disposable Ramekins
Wilton Large Piping Tip Set
Heavy Duty 16″ Disposable Piping Bags
Wood and Silicone Spatula
jumbo zipper bags

DIRECTIONS

Preheat oven to 375 degrees F.

In large mixing bowl or extra large ziploc bag, combine all ingredients, kneading until just combined.  Be careful not to overmix.

Using a Wood and Silicone Spatula, press meat batter into individual ramekins or disposable round ramekins.  Bake for 35-40 minutes until meat muffins are no longer pink in center.  Pour grease off of each ramekin right after removing from the oven.

Cool to room temperature before icing.

Mashed Potato Icing

Peel and dice potatoes or sweet potatoes.   Steam or boil until soft.  Drain, then add oil and liquid.

Mash until smooth and creamy but stiff enough to spread or pipe onto the Meat Cupcakes. To pipe, fill piping bag fitted with tip or large ziploc bag with one cut corner.

NOTES

You can use any combination of ground veal, ground lamb, ground chicken and/or ground turkey.

TIPS

Double or triple the meatball batter and use to make meatloaf, stuffed cabbage and baked meatballs.

Mixing the meatball batter by hand is best, but if you would rather not, use a jumbo zipper bag instead.  Just place all ingredients inside bag and close zipper, releasing any air.  Knead batter from the outside of the bag.

To fill mashed potato icing most easily and without making much of a mess, cuff bag over tall jar or glass.  Use a stiff rubber spatula to load puree into piping bag or zipper bag.

Please Note: This post contains affiliate links from Amazon, which means I earn a small commission if you click and make a purchase.

Pesach Pesto Stuffed Chicken

Stuffed chicken is the perfect way to prepare a main dish and side dish all in one.  I find that it is a main dish that can be served hot or at room temperature and makes for great leftovers.
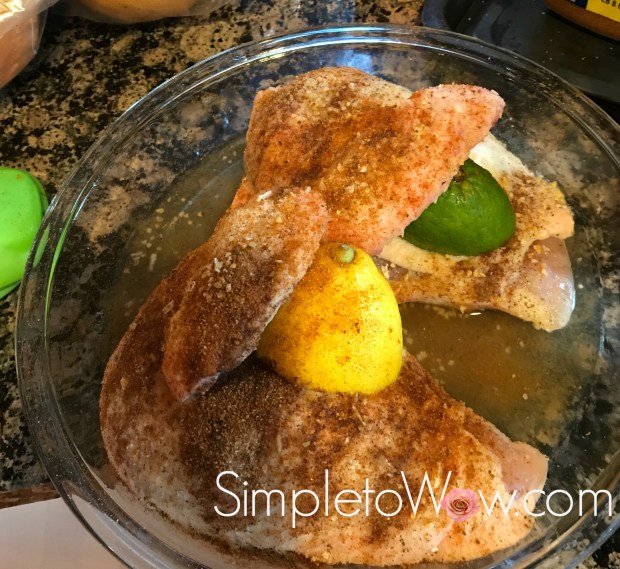
I developed this stuffed chicken recipe in honor of Rachel.  Last week, after the big snowstorm, I offered to prepare a few Shabbos foods for Rachel’s family.  Rachel placed a request for me to prepare grilled pesto chicken.  I had prepared pesto grilled chicken for Rachel in the past and it has become one of her favorites.   I had already marinated the chicken for the grill and was ready to go outside to grill the chicken, when I realized that it just wasn’t possible to grill.

The snow was too high and the grill was entombed in layers and layers of ice.  So, I had to rethink the grilled pesto chicken idea.  And, I did.   I prepared some sauteed vegetables for stuffing and baked the pesto chicken in the oven, instead.

And, I’m hoping that this new recipe will become one of Rachel’s favorites, too. The fact that her mom asked if it will be on this blog sounded promising.

Necessity really is the mother of invention.  I hope you will love this recipe.  It is simple enough and doesn’t require going out to an ice-encased grill.


INGREDIENTS

1 package chicken cutlets

basil pesto
1/3 cup oil
1/2 cup basil leaves
2-3 garlic cloves or 2 tablespoons garlic powder
3 tablespoons vinegar or lemon juice
salt and pepper to taste

stuffing
1 large onion
2-3 cloves garlic minced or garlic powder
1-2 cups shredded cabbage and carrots
potato starch (optional)
salt and pepper to taste

french fried onions (optional)


DIRECTIONS

In food processor fitted with an s-blade or in a blender, pulse pesto ingredients until smooth. Reserve half of the pesto for later and reserve a bit for serving, taking care not to reuse pesto that has been in contact with the raw chicken.

In a zipper bag, marinate chicken with pesto marinade for at least one hour.

Saute onion and garlic until just starting to brown.  Add cabbage and carrots until wilted and fragrant. Optionally, dust with potato starch to absorb the moisture.

Preheat oven to 375 degrees F.

Line a baking sheet with parchment paper or greased foil.

Open each chicken cutlet and fill with a golf-size clump of stuffing.  Roll chicken cutlet around stuffing and place seam side down on lined baking sheet.  Leave a bit of space in between chicken cutlet rolls taking care not to crowd the cutlets.

Using a silicone brush, brush each stuffed cutlet with some of the reserved pesto. Optionally, press some french fried onions on top.

Lightly drizzle olive oil or spray with cooking spray.  Bake for 30 minutes, cutting largest stuffed chicken roll open to ascertain that chicken is no longer pink on the inside.  If pink, bake for a few minutes longer.

Passover Stuffed Cabbage

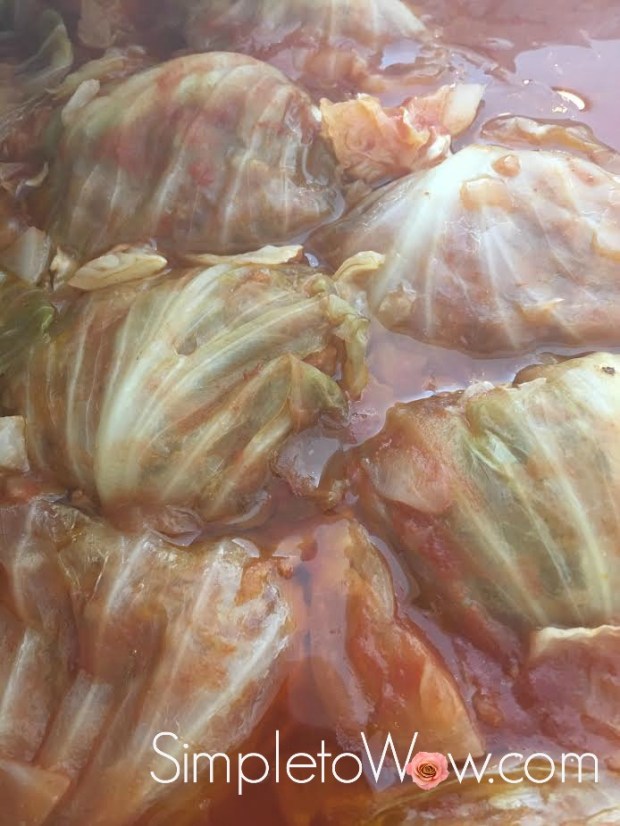
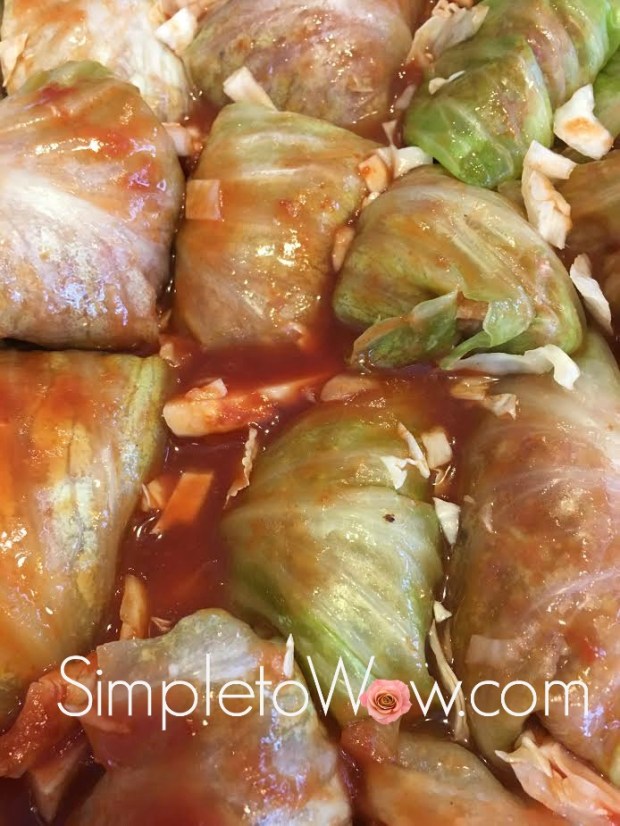
passover stuffed cabbage

Last week, I began cooking and freezing for Pesach (Passover).  With the furious and beautiful backdrop of a March snowstorm, I prepared most of my main dishes for the week of Passover.

It may sound a bit compulsive, but this just helps me manage the fury and beauty of the Passover holiday.

We travel to Israel for the holiday where we have a tiny kitchen and doll-sized appliances. The smallness of the food preparation facilities stand in direct contrast to the number of guests and family members that join us for the Passover seder and meals.

I have discovered that cooking the main dishes in advance really takes the edge off of the frenzy of Erev Pesach (Passover eve) and helps our family enjoy the beautiful surroundings of Jerusalem with some measure of serenity.

It certainly helps me appreciate the purity of the holiday and the freshness of the spring season.  It allows me to focus on the theme of this holiday that is so central to Judaism.  I can savor the beautiful traditions of Pesach, all to remind us of the birth of the Jewish nation as we miraculously left Egypt so many centuries ago.

Many women note that they feel enslaved by the enormity and difficulty of Passover cooking and that reminds them more than anything at the seder of the bondage of Jewish nation in Egypt.  I would rather celebrate the freedom from slavery by planning ahead and leaving time and energy to enjoy the traditions and themes of Passover.  It makes for a better me and it allows me to enjoy this wonderful spring holiday.

I have been making stuffed cabbage for many, many years.  Traditionally, rice is used as a filler.  Jews of Ashkenazic (Eastern European)  origin do not eat rice on Passover while those of  Sephardic (originally from Iberian Peninsula) background eat certain types of rice during the holiday.  For this use, you can either substitute quinoa for the rice or skip the rice altogether.

Last year, I did not prepare my cooktop for Passover advance cooking so I was unable to boil the heads of cabbage.  Instead, I froze the heads of cabbage and found it to be a simpler way to prepare the cabbage leaves for stuffing.  Best of all, it meant one less pot to clean at the end.  So, this year I wouldn’t prepare my cabbage leaves any other way.

Stuffed cabbage is one of those menu items that takes some time, but makes enough for many meals.  This year’s stuffed cabbage made enough for two Passover meals with some extras to deliver to some of my friends for their Passover meals.

Stuffed cabbage freezes so well.  The cabbage rolls can be frozen either with or without the suace.  I freeze the cabbage rolls in freezer bags and just take out as many as needed for the next meal.

INGREDIENTS

2 heads of cabbage

2 pounds ground beef
2 eggs
1/2 cup potato starch
1/2 Passover crumbs
1 cup quinoa (optional)
1-2 onions, grated or diced small
2-3 garlic cloves or 2 tablespoons minced or granulated garlic
1 small can of tomato sauce or paste
1 squirt of ketchup

sweet and sour sauce

2 cans tomato sauce
2/3 cup sugar or honey
1/2 cup lemon juice
1/2 cup raisins or craisins (optional)

SUPPLIES

Wood and Silicone Spatula
jumbo zipper bags

DIRECTIONS

Carefully remove the first 4-6 leaves of the cabbage and freeze the cabbage for at least 12 hours.

Defrost cabbage for several hours and/or microwave the frozen cabbage heads in 4 minute increments until leaves are soft and pliable enough to remove from head.

Preheat oven to 375 degrees F.

In large mixing bowl or extra large ziploc bag, combine all meat batter ingredients, kneading until just combined.  Be careful not to overmix.

Using a Wood and Silicone Spatula, press a golf ball size of meat batter into each cabbage leaf.  Roll soft cabbage leaf around meat, tucking ends under.  Place cabbage rolls seam side down in baking dish or pan.

Cut leftover cabbage into bite size pieces and toss among the cabbage rolls.

Prepare sauce by combining all ingredients and heating in sauce pan or microwave.   Pour sweet and sour sauce over cabbage rolls.

Bake tightly covered for 90 minutes.


NOTES

You can use any combination of ground veal, ground lamb, ground chicken and/or ground turkey.


TIPS

Double or triple the meatball batter and use to make meatloaf, meat muffins and baked meatballs.

Mixing the meatball batter by hand is best, but if you would rather not, use a jumbo zipper bag instead.  Just place all ingredients inside bag and close zipper, releasing any air.  Knead batter from the outside of the bag.


Please Note: This post contains affiliate links from Amazon, which means I earn a small commission if you click and make a purchase.