Garnishes

Baby Stroller Fruit Display

fruit.png


There are events that just make you stop and take note.  This past Shabbos, our family was part of one of those life events.

My best friend, Lori, welcomed her first grandchild into this world on Shabbos, Parshas (Torah portion)  Shelach.  Since the baby was born on Shabbos, the Shalom Zachor (festive gathering on first Friday night after birth of baby boy) and Bris (circumcision) were held back-to-back this past Shabbos, Parshas Korach.  To complicate matters, our shul’s social hall was already booked for a Bar Mitzvah, so Lori opted to host both events at her home.

I so wanted to help Lori pull this together because Lori is like the sister that I never had.  I called her daily asking for an assignment, but Lori assured me that the whole family was pulling together to prepare for these exciting and daunting celebrations.    So, I took matters into my own hands.  Actually, I took matters into the capable hands of my youngest daughter, Davida.  And, of course, I wasn’t disappointed.

Davida carved a watermelon into this baby stroller complete with a nectarine baby sipping his bottle.  It was not too complicated to prepare and it really created a wow at the celebration.

Thank you, Davida!

Mazel tov, Lori!

SUPPLIES

1″ baby bottle
Mini-skewers or heavy toothpicks
Permanent marker 
melon baller
paring knives

INGREDIENTS

one oval-shaped watermelon
honeydew or cantaloupe
peach or nectarine
4 oranges or clementines

DIRECTIONS

Using a heavy knife, cut watermelon in half to create base of stroller.

Using a melon baller, scoop out the two halves of the watermelon and other melon(s) and place in a large bowl.  Using melon baller and paring knives, clean out the cavity of the two watermelon halves so that cavities are smooth.

Reserve the larger watermelon half for the stroller cavity.

Using a heavy knife, cut the other half of the watermelon in two to create the stroller hood.  Cut v-shaped notches to create a decorative edge on the larger half.  On the smaller half, cut a small band to use as the stroller handle.  Discard the rest of the watermelon.

Carefully secure the hood to the stroller cavity using Mini-skewers or heavy toothpicks inserted into the middle of the rind of each section.  If skewers are too large,  trim so that they are the right length to secure the watermelon sections together.   Secure the stroller handle to the front of the stroller cavity in the same way.

Carefully secure citrus “wheels” to stroller using  Mini-skewers or heavy toothpicks.

Draw eyelashes on the nectarine or peach and carefully push the baby bottle into the “mouth”.

Refill the watermelon with the melon balls, leaving a small space for the nectarine baby.  Place the baby into the melon carriage.


Simple No-Cook Salmon Appetizer

no-cook salmon appetizers

There are times that a simple no-cook appetizer is the way to go.

Like, when there are six Yom Tov (holiday) meals in a row and you’re looking for a new creative way to serve an appetizer with minimal effort.  The upcoming Shavuos holiday comes on the heels of a Shabbos, calling for six consecutive festive meals.  And, because it is fish, this appetizer can be served pareve (non-dairy) or with crème fraîche on the side with a dairy meal.

It is simple.  It is beautiful.  That simple and beautiful combination is a wow!

SUPPLIES

wide vegetable peeler

no-cook salmon appetizers-ingredients.jpg

INGREDIENTS

Long Seedless cucumber
lox or smoked salmon, sliced thin

celery leaves (optional)
salmon caviar (optional)


DIRECTIONS

Using a wide vegetable peeler, carefully peel long, thin slices of seedless cucumber.

Spread each slice of cucumber flat and top with lox slice(s), lining up bottom edges of cucumber and lox.

no-cook salmon appetizers-ready to roll.jpg


Starting at end that has both cucumber and lox, carefully roll up to form a rose.

no-cook salmon appetizers-in progress


Stand up and unfurl lox petals for a delicate rose-like formation.

Optionally, garnish with celery leaves and salmon caviar.

Voila!

no-cook salmon appetizers.jpg

Please Note: This post contains affiliate links from Amazon, which means I earn a small commission if you click and make a purchase.

Simple Cranberry Sorbet

cranberry sorbet

I’ll share a secret with you.

My Purim seuda (feast) menu is designed around the chametz (leavened products) that I must use up before Pesach (Passover).

This year, I found myself with lots of frozen challah, hence the stuffed chicken breasts and meatballs.  I found that I had three bags of fine egg noodles, and thus yerushalmi kugel was added to the menu. I found myself with way too many boxes of brownie mix, even after giving so many boxes away to the fastest respondents on our Cousins WhatsApp chat.  I created stunning pecan truffle cookies and made delicious Strawberry and Brownie Mini Trifles to use up the remaining boxes of brownie mix.

As I was sorting through the freezer, I found a few bags of frozen cranberries.  According to halacha (Jewish law),  cranberries are not chametz.  Therefore, they did not need to be consumed or discarded before Pesach, but after doing the math, I realized that they probably were already several months old.  After all, I usually buy fresh cranberries around Thanksgiving and then wash and freeze them in late November or early December.

I set a handful of cranberries aside to prepare Frosted Sugar-Coated Cranberries to be used as a garnish, but decided to prepare cranberry sorbet with the rest of the frozen cranberries.  I remember seeing a Cranberry Ice recipe posted by one of my favorite kosher bloggers, CookingfortheTimeChallenged and I used that as my inspiration for this recipe.

This recipe uses sweet soda or juice as the liquid base.  I found some flat soda left over from a Sheva Brochos that I recently hosted.  This is the perfect recipe to use up that leftover grape juice, orange juice or flat soda.

I love the sweet and savory flavor combination.  I garnished these ices with chives for a surprising bite, but other herbs like mint or basil may be blended right in for that stunning palate sensation.

INGREDIENTS

one can cranberry sauce, whole or jellied
1 cup soda or juice
1 bag frozen berries or 2 cups frozen grapes

herb garnish, such as basil, mint or chives (optional)

DIRECTIONS

Using the s-blade of the food processor, puree cranberry sauce, berries and liquid.

Freeze until solid or overnight.

Once frozen, remove from freezer and defrost just enough to scoop back into the food processor fitted with the s-blade.

Pulse sorbet in food processor just until smooth.  Refreeze.

To allow for simple entertaining, I usually defrost for 20-30 minutes before scooping.

Garnish with mint leaves and Frosted Sugar-Coated Cranberries

SUBSTITUTIONS

Any canned fruit may be substituted for the canned cranberry sauce.

Any frozen fruit may be substituted for the frozen berries.  Just make sure to taste puree and blend with enough soda or juice for optimal sweetness.  Honey may be added as well to sweeten the sorbet.

Blend your choice of fresh herbs like mint, basil or chives for that unusual sweet and savory flavor sensation.

TIPS

I scoop the sorbet into small cups in advance and freeze in the cups until ready to serve. That speeds up the serving of a frozen dessert and keeps everything tidy.    I add the garnish at the end so that the leaves stay fresh and green.

Simple Celery Ribbons

I am fascinated with garnishes, especially simple garnishes constructed from ordinary ingredients.  After all, simple garnishes put the wow into a dish.  This one is fast and simple, using just celery and cold water.

celery ribbons.png

INGREDIENTS

celery
cold water

DIRECTIONS

Remove a stalk from a head of celery and wash well.  Using a peeler, peel long ribbons of celery off of the celery stalk.

Drop the celery ribbons into cold water and submerge completely for at least 20 minutes or refrigerate overnight.

celery ribbons in ice water.jpg

Voila!

Simple No-Bake Sorbet cakes

no-bake sorbet cake 2.JPG

Desperate times call for desperate measures.

A few weeks ago, I had finished preparing a simple Shabbos menu when we found out that we were about to have a houseful of Shabbos company.  I had plenty of real food, but I needed to create an impressive dessert for the next day…quickly and with ingredients already on hand.

I had been planning to serve some cut-up watermelon for dessert and that just wouldn’t do for this audience.  I looked around the house for dessert ingredients that required no baking.  I found a few  pints of  fruit sorbet, chocolate ices, pareve pizzelle cookies and whipped cream.  I had some beautiful variegated basil in the garden and  a pint of strawberries in my refrigerator.  And, this is what I created.

no-bake sorbet cake

SUPPLIES

cupcake pan

cupcake liners

rubber spatulas

INGREDIENTS

ice cream, sorbet or ices
whipped cream, whipped with some vanilla sugar

fresh mint, basil or other herb for garnish
fancy cookies
strawberries

pizzelle cookies or other fancy-shaped cookies


DIRECTIONS

Partially defrost ice cream, sorbet or ices on the counter or using the defrost mode on the microwave.  It should be thin enough to remove with rubber spatulas but not a drippy liquid.

Prepare whipped cream by whipping cream with a tablespoon of vanilla sugar until almost stiff.

Line cupcake pan with cupcake liners.  If the cupcake liners are thin, double them so that they will stand up to the sorbet filling.

With a teaspoon or  rubber spatulas, drop a small bit of each flavor of ices, sorbet, ice cream and whipped cream into the cupcake liners until they are almost  filled to the top. Freeze for several hours or overnight.

Remove sorbet cupcakes from freezer and peel away cupcake liners so that the ridges of the cupcake liners are visible.  Garnish with herbs, strawberries, whipped cream and pizzelle cookies cut in half.


TIPS

I peel away the cupcake liners in advance and refreeze the sorbet cakes until firm.  This allows for a faster and neater serving procedure.

To create a strawberry rose, cut thin slices on the strawberry without cutting through the bottom.  Fan the cut strawberry out to create a rose effect.

I garnish the plates before placing the sorbet cakes.  They melt quickly!

Please Note:  This post contains affiliate links from Amazon, which means I earn a small commission if you click and make a purchase.

Individual Sushi Salads


individual sushi salad 1

My kids all love sushi.   To them, having sushi as an appetizer Shabbos lunch is a real luxury.  While sushi is a fan favorite, I don’t feel that it has enough nutritional value as it is mostly rice.  Furthermore, sushi rolls do not stay fresh enough from Friday until Shabbos lunch to make for an appetizing appetizer.

So, I have been preparing individual sushi salads as a Shabbos lunch appetizer, instead.

And, sushi salads eliminate most of  the fussiness of rolling sushi.  I can choose the proportions of each element in the sushi salad, favoring more vegetables and fish than rice and nori.  The elements of the sushi salad can all be prepared in advance.   Furthermore, they are all simple ingredients that I can use in different ways for the Friday night Shabbos dinner.  And,  best of all, once assembled on Shabbos morning, the individual sushi salad ingredients stay perfectly fresh, simply delicious and gorgeous until ready to serve.

INGREDIENTS

1 cup sushi rice (I favor brown sushi rice) prepared in rice cooker

1/4 cup rice vinegar

baked or roasted salmon fillet, cubed or shredded

nori, cut into thin strips

1 medium avocado

1-2 zucchini or cucumber, diced or grated

1-2 Carrots, grated (optional)

Simple and Perfect Spicy Mayo


DIRECTIONS

Prepare sushi rice in a rice cooker, using 1 cup of rice to 1 cup of water.   Add 1/4 cup rice vinegar to prepared sushi rice.

Prepare salmon fillet.  Cube or shred.

Cube avocado and place in a solution of 1 cup water with juice of one lemon.

Grate cucumber, zucchini and/or carrots.

Gently roll nori sheets and cut thin strips with scissors.

In a clear glass or plastic bowl, layer cooked rice, salmon, nori, avocado, cucumber and carrot.  Drizzle spicy mayo on top and garnish with thin strips of nori drizzle of spicy mayo.

TIPS

For Shabbos lunch, prepare salmon, rice and grated vegetables before Shabbos.  Store each ingredient separately in a zipper bag.  Prepare Simple and Perfect Spicy Mayo and store in 16-oz wide-mouth squeeze bottles or 24-oz wide mouth squeeze bottles.

Before assembling, mix sushi rice with rice vinegar.  Cut or shred salmon.  Cube avocado and place in a solution of 1 cup water with juice of one lemon.

In a clear glass or plastic bowl, layer cooked rice, salmon, nori, avocado, cucumber and carrot.  Drizzle spicy mayo on top and garnish with thin strips of nori and drizzle of spicy mayo.


VARIATIONS

For Pesach, substitute quinoa for the sushi rice and cider vinegar for the rice vinegar.


PLATING TIPS

Use clear glass or plastic bowl and overlap thin strips of nori on top, creating an x or star for an impressive presentation.


individual sushi salad

Frosted Candied Grapes

Grapes are featured prominently at the annual Pesach (Passover) seder (festive meal, lit: order).  After all, we drink four cups of wine or grape juice and the seder ceremony begins with the kiddush (santification) over the first cup of wine (or grape juice).  Wine is featured in the charoset (fruit and nut dip symbolizing mortar) for the maror (bitter herbs).

The seder is a mixture of tradition and whimsy.  It is the only night on the Jewish calendar when we sing Hallel (songs of praise) and tell the story of Egypt at length.  It is an evening in which we engage the children and pass these Jewish traditions from generation to generation.  In fact, so much of the elements of the seder are intended to pique the interest of our children.

Which brings me to candied grapes.  We are taught that parents are to give their children special foods and gifts in order to engage them at the seder.  So, why not combine the elements of tradition and whimsy in creating these adorable and delicious candied grapes?

One note of caution, though.  The round shape of the grapes  can create a choking hazard for small children.  These grapes should not be given to young children, unless they are quartered.

These grapes can make a delicious snack or the perfect garnish for desserts.

 
candied grapesINGREDIENTS

1 box jello
grapes

 
DIRECTIONS

Rinse individual grapes thoroughly in a colander. Spread jello powder in a pie plate or large plate.  Coat grapes with powder.    Place on waxed or parchment paper to dry.
Refrigerate for 1 hour to allow gelatin to set.

NOTES

The round shape of the grapes  can present a choking hazard for small children.  These grapes should not be given to young children, unless they are quartered.

Pomegranate Truffles

pomegranate-truffles

There is something about pomegranate seeds that are oh, so delicious and create such a taste and texture sensation.  The soft outside and the pop in your mouth juiciness is something so unique and so wonderful.  The bright red color is reminiscent of a red heart and what better ingredient to pair with pomegranate seeds than chocolate?

As we just celebrated Tu Beshvat over the past weekend, we took time to pause and reflect on the vast assortments of fruit that grace our world.  The pomegranate, whose seed bursts are the only edible part of the fruit truly symbolize the dormant and vast potential in each one of us.

This simple recipe is quite a palate sensation.  It combines the decadence of chocolate with the juiciness of pomegranate.  It takes moments to prepare and will simply wow you.

INGREDIENTS
seeds of one pomegranate
6 ounces of good chocolate
sea salt (optional)

INSTRUCTIONS

Line a baking sheet with parchment paper.  Melt chocolate and with a spoon or spatula, place mounds of chocolate on the parchment paper, reserving a small amount of melted chocolate.  Place a small mound of pomegranate seeds atop each chocolate mound.  Drizzle the rest of the chocolate over the truffles using a fork or a piping bag.

Optionally, garnish each pomegranate truffle with a few sea salt crystals.

These may be prepared a day in advance, but should be stored in the refrigerator.

Frosted Sugar-Coated Cranberries

frosted-cranberries-with-chocolate

My sister-in-law, Suzy, is an excellent and adventurous cook.  My kids always look forward to Suzy’s signature salads and we know that we are in for a treat whenever we are invited to Itzy and Suzy’s house.  Even when Suzy just prepares a “simple” meal, we are always impressed by her delicious dishes.

Years ago, we were guests at Suzy’s Thanksgiving dinner.  Suzy’s brined turkey was the moistest turkey ever and she served so many delicious and creative side dishes.  What I remember the fondest, though, were the frosted cranberries that Suzy placed on the bundt cake for dessert.

The inner cranberry core of these frosted cranberries still retained the tart taste and pop-in-your mouth texture.  The outer frosted layer packed a sweet taste with a firm sugar bite.

There was something about the clash of textures, firm and pop-in-your mouth.

There was something about the clash of flavors, sweet and tart.

Oh, and they were so beautiful.

Suzy is great about sharing recipes. It really is…simple to wow!

This has become my favorite winter dessert garnish.  I think it will become yours, too.


INGREDIENTS:

1  bag fresh cranberries

1/2 cup sugar
1/2 cup water

1/2 to 1 cup sugar for tossing


DIRECTIONS

Check and rinse an entire bag of cranberries, discarding any soft or shriveled ones.

Create a simple syrup by dissolving 1/2 cup sugar in 1/2 cup water in a microwave safe glass dish or on the stovetop. Remove simple syrup from heat and stir cranberries into simple syrup until well coated. Using a slotted spoon, transfer cranberries to a wax-paper coated tray or to a wire rack. Allow sugared cranberries to air-dry for several hours.

frosted-cranberries-after-simple-syrup

Place an additional cup of sugar in a shallow bowl or pie plate.  By the handful, toss cranberries in sugar until well coated.   Add sugar, if necessary.  Spread coated cranberries on wax paper and allow to air-dry for at least 1 hour.

frosted-cranberries

Serve as a sweet-tart dessert or as a dessert garnish.

Simple Radish Flower Garnish

A simple vegetable garnish can really make an appetizer, serving dish or hors d’oeuvres   platter look spectacular.   I like to create garnishes with simple ingredients and ordinary tools.  This radish flower garnish is a simple one to create and can be used in dozens of wow ways.

I demonstrate this garnish with a red radish.  It can easily be created with any type of radish, although I find that the best results are with red radishes that are tall and narrow. Very round radishes will also work but will not open up as much as the tall, narrow ones..

radish-bunch


INGREDIENTS

radishes
ice water
plastic container or mason jar


INSTRUCTIONS


Scrub the radish and carefully trim the root end of the radish creating a flat bottom. Position the radish with the flat root end on the bottom


Score the radish making scallop-shaped cuts as close to the peel as possible from just below the tip to just above the bottom of the radish.  Be careful not to make the cut all the way to the bottom or the radish cuts will not hold together.

Turn the radish and keep making scallop-shaped cuts, overlapping each cut and going around the radish.  The closer to the peel that the cuts are made, the more decoratively the radish flower will open when soaked.


Prepare a mason jar or plastic container with ice water and soak the radish garnishes for at least 20 minutes.


The radishes will open up to resemble flowers.

radish-garnish-open-many

Simple Kiwi Flower Garnish

kiwi garnish with single golden kiwi 2

A simple, yet beautiful garnish adds elegance and whimsy.  This one is so simple and only takes 30 seconds to prepare.  It uses the whole kiwi with no waste and needs only a small paring knife as a kitchen tool.

It would make a gorgeous centerpiece for a fruit platter, fruit pie or as a kiwi garnish accompaniment to a plated dessert.  With green and golden kiwis available right now, this garnish can be easily prepared in either color.  Just take care to use kiwis that are firm .

This kiwi garnish resembles a water lily lotus flower.  It would look gorgeous on an edible leaf like a lemon leaf with just a few chocolate truffles as an accompaniment. (more…)

Fruit Salad: It’s All About that Boat

I recently sent over fruit salad for a refreshing summer dessert in honor of our friends’ simcha (happy occasion).  The fruit salad was so simple to prepare.  I just sliced the pineapple, using an  all-metal pineapple corer and slicer and I used a melon baller to create uniform spheres of watermelon, cantaloupe and honeydew.

For a contemporary twist, I often opt to serve festive food on long and narrow platters that are lightweight and unique.  For fruit, I usually opt for a serving dish that has some depth to catch any dripping juices.  I found just the right serving dish.

It was a hammered bronze metal elongated bowl with a jagged edge, just big enough to make a statement and just small enough to fit in my friend’s refrigerator until time to serve.

I added a few interesting 4″ bamboo toothpicks and voila!

fruit salad in metal bowl


Patriotic Chocolate Bark: Simple and Pareve

Chocolate bark is one of the easiest dessert creations.  It takes moments to prepare, is a canvas for creativity and can be served in a myriad of different ways.  This one is perfect for a patriotic July 4th celebration.

It is a combination of chocolate, nuts, sprinkles and colorful fruit.  It can be served whole to resemble a brushed version of the American flag.  It can be cut into squares or can be broken into chards to garnish desserts.  Either way, this simple dessert will delight you  with the red, white and blue colors that are so patriotic and oh, so sweet!

INGREDIENTS

1 bag of chocolate chips or chocolate pieces

blueberries or black grapes sliced in half, carefully soaked and rinsed or confectionery stars
strawberries, carefully soaked and rinsed (see kosher notes), freeze-dried strawberries or craisins
almonds, candied ginger or white marshmallows, mini or  cut into strips

patriotic chocolate bark 2

DIRECTIONS

Melt chocolate in microwave or over a double boiler until smooth.   I used the microwave to melt chocolate  on a flat microwave-proof plate for 6-8 minutes on the timed defrost cycle.

Pour chocolate over a parchment paper-lined baking sheet or wax paper, spreading with a rubber or silicone spatula to about 1/8 or 1/4-inch thick.  I like to spread the chocolate as thin as possible without being translucent.

While still hot, decorate the chocolate with the fruit and nuts for a creative rendition of the American flag.  Place blueberries, grapes or stars in a grid fashion on the left corner of the chocolate to represent the stars.   Create rows of sliced strawberries or craisins and almonds, ginger or marshmallows to create the stripes of the flag . Carefully set each piece of fruit and nut into place by gently pushing into the warm chocolate.

Allow bark to cool on counter or in refrigerator, until chocolate hardens.

If serving in squares, score with a knife before chocolate hardens,  If breaking into chards, wait until chocolate has cooled and hardened.

patriotic chards

Store in ziploc bag or wrap individual pieces in plastic bags.

patriotic chocolate bark with blue white stars

KOSHER NOTES

Kosher laws disallow the eating of any whole insects and therefore strawberries require a process of soaking, rinsing and in some cases, pureeing. Kashrut authorities differ somewhat on the proper checking of strawberries and some disallow the eating of strawberries, altogether. This blog was not designed to be your kosher authority, so please consult your local rabbinic authority regarding the use of strawberries.


SERVING SUGGESTIONS

Place chards or squares atop cheesecake,  brownies or ice cream.

patriotic chard over brownie

Simple Chocolate Bark with Flowers and Dried Fruit

Chocolate bark has become one of my favorite simple and beautiful dessert embellishments.  This week, I created a sweet and delicious bark that was sweet, bright and beautiful with some surprisingly savory ingredients, as well.  I melted a combination of white and milk chocolate and added fresh pansies from my flowerpots, mint and rosemary from my garden and an assortment of salted nuts and craisins.  I served this bark as the perfect accompaniment to small squares of Simply the Best Flourless Chocolate Cake.  I plan to also served this as a wow garnish for simple pieces of cheese cake for Shavuos.

chocolate bark with nut mint and pansies up close with logo

(more…)

Simple Mini Cheesecakes with Gorgeous Garnishes

Shavuos is on its way!  Cheesecake is one of the staples of the upcoming holiday of Shavuos, since we are commanded to eat dairy foods at our festive meals (Countdown to Shavuos: Floral Inspirations and Dairy Recipes) on Shavuos.

This year, Don and I are still on a low-carb diet.    We didn’t want to forego cheesecake, but I wanted to make sure to use a minimum of carbs in my cheesecake preparation.  I decided to create portion-size cheesecakes to keep the portion size well-controlled.  This will allow us to enjoy a taste of heaven without feeling deprived, but keeping our diet “cheating” to a minimum.

Best of all, I skipped the carb-heavy crust and created some beautiful and tasty garnishes to embellish these simple and delicious mini cheesecakes.  They are light, delicious, fresh-tasting, gluten-free and simply divine.

This recipe does not require a springform pan or a water bath for baking.  It is best to bring the ingredients to room temperature just before preparation.  Preparation takes a few minutes and the baking takes less than 20 minutes.  It is best made in disposable or porcelain ramekins.  It makes 6 medium size or 12 mini ramekins.


Supplies

3-4 inch ramekins Set of 6 three ounce ramekins or aluminum disposable mini ramekins 39mm


Ingredients

1 pound cream cheese
1/2 cup sugar
Pinch of salt
1 teaspoon vanilla extract
2 large eggs
1/3 cup sour cream
1/3 cup heavy whipping cream

mini cheese cakemini cheese cake with strawberry and chocolate garnishmini cheese cake with chocolate barkmini cheese cake with chocolate bark only

Directions

It is best to bring the ingredients to room temperature before baking to prevent cracking, although I have made this recipe effectively with ingredients right out of the refrigerator.

Preheat oven to 325°F.

Spray ramekins with cooking spray.

Beat  cream cheese with eggs with a whisk, in a food processor or with a mixer, just until smooth and creamy.  Add rest of ingredients, beating and incorporating well.  You may have to scrape sides of bowl to incorporate everything well until combined, smooth and creamy.

Pour mixture into ramekins, filling 2/3 of the way to the top.  I find it easiest to pour the mixture from a glass measuring cup with a spout..

Bake mini ramekins for 15 minutes, 3-4″ ramekins for about 18-20 minutes.  Cheesecake will rise slightly.  Centers should be set, although the cheese cake will appear to be slightly jiggly.

Remove from the oven and  cool completely.  Chill the cheesecakes in the ramekins for at least 2 hours or overnight.

The cheese cakes can be served directly  in the ramekins or can be removed from the ramekins and served upside side.  If removing from the ramekins, carefully turn over on a serving plate.  Allow cheese cake to rest for a few minutes before garnishing.

Garnish with fruit, berries, edible leaves and flowers, chocolate bark (Chards of Colorful Chocolate Bark: Whimsical and Delicious)or whole or crumbled cookies.


Variations

This recipe can be made as a small single cheesecake.  Generously grease a round baking pan.  Prepare ingredients as above and pour ingredients into greased round pan.  Increase baking time to 30 minutes or until center is set.  Garnish as above.


Prepare a crust by crumbling 1 cup of  your favorite cookies with 3 tablespoons of melted butter or coconut oil.  Press into the bottom of each ramekin and bake in a preheated 350 degrees F oven for 10 minutes.  Allow to cool before pouring cheesecake batter over the crust.  Continue to bake as above.  You may have to gently coax cheesecake out of ramekin or pan using a smooth knife to unseat the edges of the crust.

mini cheese cake with crust and edible pansies

Chards of Colorful Chocolate Bark: Whimsical and Delicious

Chocolate Bark is so versatile and beautiful.  The finished product can be elegant, playful or whimsical, depending upon the ingredients selected.   The background can be any type of chocolate, dairy or pareve.  The embellishments can be any combination of sweet or savory to create beautiful colors, tastes and textures.

I have tried so many different types of barks and every one has been a winner.  I like to spread the chocolate as thin as possible, so that a little bit of chocolate creates the thinnest piece of luxurious decadence.  Once the bark has cooled, I break it into asymmetric chards.  I serve these by themselves or as an embellishment to fudgy brownies or ice cream.

chocolate bark confetti as embellishment


(more…)

Scallion Confetti Curls: A Simple Garnish

Garnishes put the wow into a dish.  This one is fast and simple.

scallion-garnish-ingredients.jpg


Cut green part of scallion into three to four inch sections.  Slice narrow and long ribbons with a sharp paring knife.

scallion granisj-cut small

Separate scallion pieces into thinnest slivers possible using knife or by hand.

scallion-garnish-in-ice-water

Drop the green onion slivers into ice water and submerge completely for at least 20 minutes or refrigerate overnight.


Voila!


scallion-garnish-finished

Simple Chocolate Bark with Flowers and Dried Fruit

I love thin and delicious chocolate bark embellished with all my favorites.  It is a simple dessert and also makes a perfect garnish for a simple cake or mousse.  It is the perfect accompaniment to Simply the Best Flourless Chocolate Cake

chocoalte bark cut into sections on cake

As your bark background, you can use your favorite chocolate: white, milk or dark.  The embellishments can be any combination of edible flowers, dried fruit, candied fruit or ginger and/or all types of nuts and seeds.

For this chocolate bark, I used semisweet chocolate chips and white chocolate chips. I added raisins, craisins, candied pineapple bits and fresh pansy petals.

chocolate bark with pansies and raisins (more…)

Edible Ginger Candy Spoons

I love ginger in all shapes and forms. I use ginger as a spice in many dishes. I love ginger ale, candied ginger and pickled sushi ginger.  Whenever we eat sushi, I become the lucky recipient of everyone’s pickled sushi ginger and I love it.

I especially love ginger with my tea.  For a recent dinner party, I prepared ginger spoons to serve with dessert and  tea. They were simple to prepare, delicious  and just gorgeous.

ginger-spoons-supplies

SUPPLIES

Ginger drops (or any type of hard candy)
Silicone Baking Spoon Mold
Hammer or heavy mallet

INSTRUCTIONS

Purchase a molded silicone spoon design baking mold  suitable for 300 degrees F heat.  I prefer one that has a thick stem for each molded spoon, since the weakest point of the molded spoon will be the piece right underneath the cup of the spoon, The thicker the spoon base and stem is, the less likely it will be to crack when unmolding.

Preheat oven to 300°F.
Unwrap candies and place in a thick zipper bag. Use a small hammer or mallet to crush the candies into small pieces.

ginger-spoons-ingredients-with-mallet

Thickly heap the small pieces of ginger into the molds, placing the thickest amount of crushed candy right where the stem meets the base of the cup of the spoon. Make sure that the candy is layered in thick and brush the area between the spoons back into the spoon molds.

Bake at 300 for 10 minutes. Shut the oven and leave in the oven for 10-20 minutes more. Allow to cool completely before unmolding.

Voila!

ginger-spoons

ginger-spoons-with-tea-setup

VARIATIONS

Use any type of hard candy in place of the ginger drops.  Use lemon drops, butterscotch candies, peppermints or your favorite hard candy.

Use your favorite baking silicone mold to fashion candy into different shapes.  This simple technique yield extraordinary candy garnishes for desserts.

NOTES

These spoons are gorgeous when placed on a dessert buffet with assorted teas and coffee. They are spectacular served with hot apple cider, too.

If you have loose shards of crushed candy left over before or after baking these spoons, sprinkle them on top of  frosted cupcakes for a delicious surprise.

A Simple, Delicious and Beautiful Flourless Fruit Tart

When I entertain, I love to serve a fruity dessert. Few can resist a dessert topped with fresh fruit. Berries are in season and this Pesach (Passover) fruit tart can be made with your favorite assortment of berries and fruit.

I made mine using a combination of frozen blueberries, strawberries and cranberries.  I topped mine with a mango rose.  This tart is simple to prepare and is a show-stopper.

It is simple, delicious and gorgeous.

mango rose tart complete (more…)

Rainbow Carrot Curls: A Wow Garnish

Trader Joe’s sells bags of organic rainbow carrots.  The carrots come in all hues of the rainbow: dark red, white, bright yellow and the “ordinary” orange carrots.  It is a small splurge, but well worth it in the “wow” factor.

rainbow carrots ingredients

These carrots are low in calories and powerful in vitamin A and antioxidants. Rainbow carrot curls will add a pop of color and a delicious flavor to your plating.  Here is the simple technique to create rainbow carrot curls.


(more…)

Curly Scallion Garnish: Simple and Wow

scallions
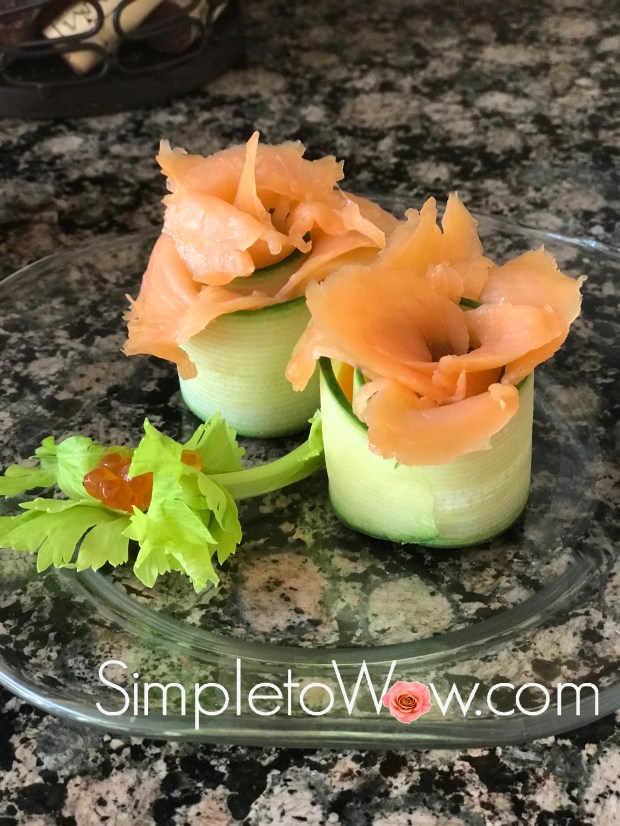
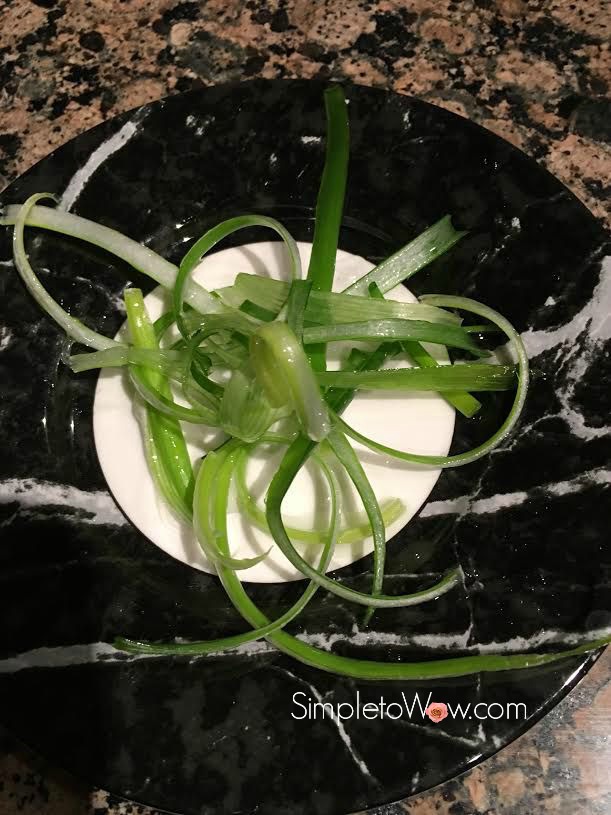
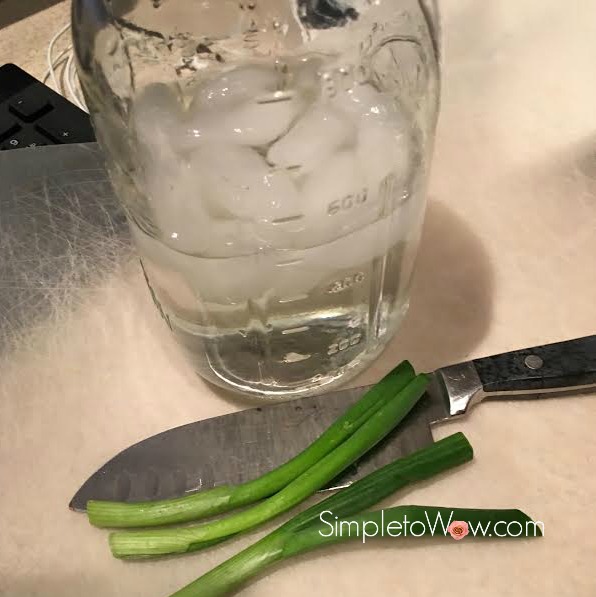
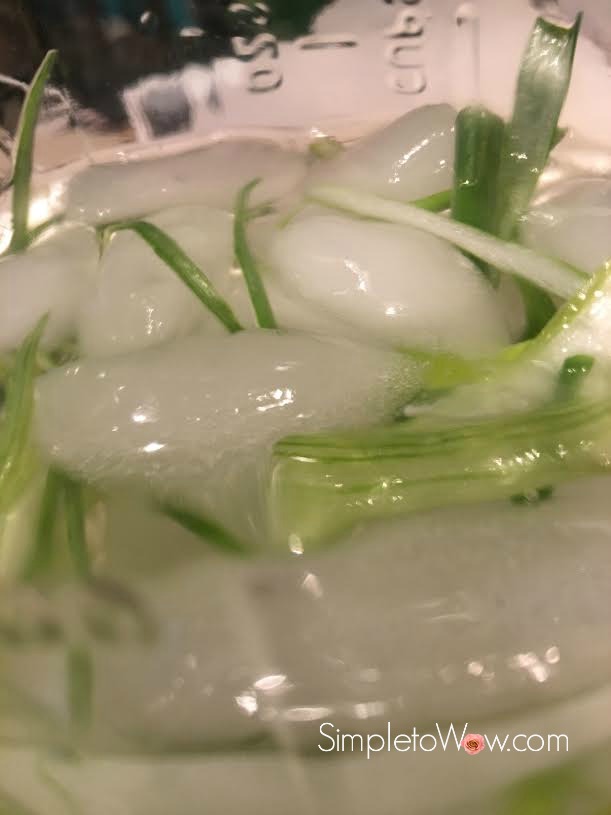
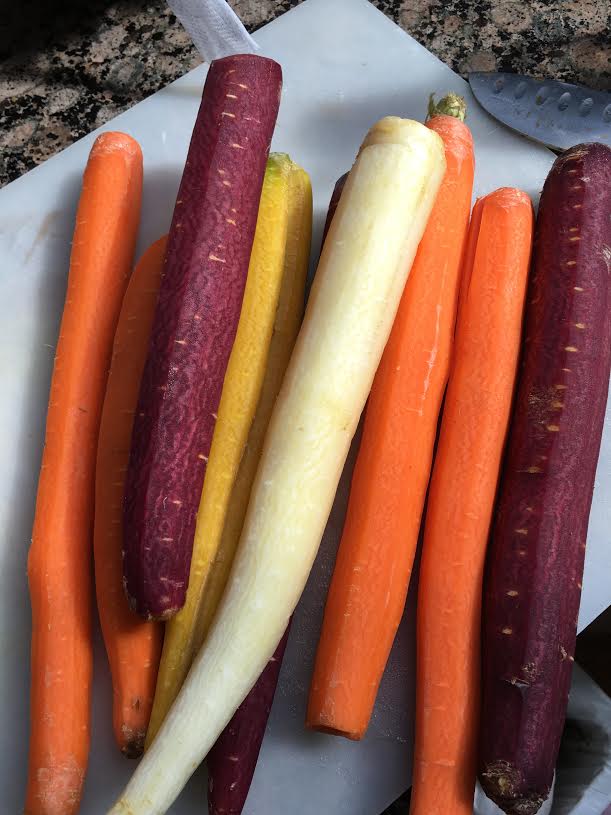
Vegetable garnishes can take a plated appetizer or serving platter from simple to wow.  I like to create garnishes with ordinary ingredients and tools.  There are so many garnishes that can be created using simple tools that you already own.

This garnish elevates a simple scallion (green onion) to a wow garnish with the use of a regular paring knife and ice water. Try it!

(more…)