Recipes

Same-Day Ciabatta is in the Bag

For those weeks when you remember to start the ciabatta the night before, my no-knead ciabatta recipe is perfect.  It requires no kneading, very little effort in preparation and produces a delicious ciabatta bread with a crusty exterior and large air pocket holes on the inside.  The only downside to this recipe is that it requires slow overnight rising of at least 12 hours.

Every once in a while, I intend to start the ciabatta the night before and life just gets in the way.   This past week was one of those weeks.

I woke up Friday morning and still wanted to prepare ciabatta, but just didn’t have enough time for the slow-rise method.

So, I had to adapt another recipe that would be ready in a lot less time.

Oh, and, while I was experimenting, I decided to prepare it in a zipper bag to eliminate most of the mess.

It worked out perfectly.

This original The Crepes of Wrath recipe was sent to me by Kaitlyn last year.  I simplified the preparation and adapted it to my measurement and temperature preferences.  Best of all, I adapted the recipe to be prepared in a zipper bag.

And, yes, without the overnight rise it still produces the enviable crust, so chewy inside with those oh, so wonderful air pockets.

Here it is.

ciabatta in the oven.jpg

(more…)

Leah’s Crunchy Chopped Salad

When Leah read the recent blog post on her chocolate chip cookies, she felt inspired to share some new salad recipes.  After all, she felt it necessary to validate her title as “Salad Queen”.

One evening, on the night before I planned to clean out the refrigerator and then restock my fruits and vegetables, Leah created this chopped salad with the slim pickings in our fridge.

This salad is the perfect combination of crunchy and smooth.  It boasts vegetables of all colors and textures.  She savored every bite and I’m sure that you will, too.

Here’s to Leah Primavera!


INGREDIENTS

1-2 cups red cabbage, shredded
3-4 stalks celery, sliced
2-3 green scallions, sliced
1-2 red peppers, cut in chunks
1 ripe avocado
handful of shelled roasted sunflower seeds

2 tablespoons Simply the Best Caesar Dressing
1 tablespoon balsamic vinegar

1 teaspoon sesame seeds


DIRECTIONS

Layer vegetables and sunflower seeds in order of ingredients listed above.  Drizzle Caesar Dressing and balsamic vinegar.  Gently toss.   Sprinkle sunflower and sesame seeds on top.

Enjoy!


Frosted Sugar-Coated Cranberries

frosted-cranberries-with-chocolate

My sister-in-law, Suzy, is an excellent and adventurous cook.  My kids always look forward to Suzy’s signature salads and we know that we are in for a treat whenever we are invited to Itzy and Suzy’s house.  Even when Suzy just prepares a “simple” meal, we are always impressed by her delicious dishes.

Years ago, we were guests at Suzy’s Thanksgiving dinner.  Suzy’s brined turkey was the moistest turkey ever and she served so many delicious and creative side dishes.  What I remember the fondest, though, were the frosted cranberries that Suzy placed on the bundt cake for dessert.

The inner cranberry core of these frosted cranberries still retained the tart taste and pop-in-your mouth texture.  The outer frosted layer packed a sweet taste with a firm sugar bite.

There was something about the clash of textures, firm and pop-in-your mouth.

There was something about the clash of flavors, sweet and tart.

Oh, and they were so beautiful.

Suzy is great about sharing recipes. It really is…simple to wow!

This has become my favorite winter dessert garnish.  I think it will become yours, too.


INGREDIENTS:

1  bag fresh cranberries

1/2 cup sugar
1/2 cup water

1/2 to 1 cup sugar for tossing


DIRECTIONS

Check and rinse an entire bag of cranberries, discarding any soft or shriveled ones.

Create a simple syrup by dissolving 1/2 cup sugar in 1/2 cup water in a microwave safe glass dish or on the stovetop. Remove simple syrup from heat and stir cranberries into simple syrup until well coated. Using a slotted spoon, transfer cranberries to a wax-paper coated tray or to a wire rack. Allow sugared cranberries to air-dry for several hours.

frosted-cranberries-after-simple-syrup

Place an additional cup of sugar in a shallow bowl or pie plate.  By the handful, toss cranberries in sugar until well coated.   Add sugar, if necessary.  Spread coated cranberries on wax paper and allow to air-dry for at least 1 hour.

frosted-cranberries

Serve as a sweet-tart dessert or as a dessert garnish.

Leah’s Awesome Pareve Chocolate Chip Cookies

Leah’s reputation in our kitchen as a salad maker is legendary. She is known for her creative and unique salad ingredient combinations. For years, we have referred to Leah as our salad queen and we still often append “primavera” to her name just for fun.

So, we were all a bit surprised when Leah decided to bake cookies with Avigail and JuJu this past weekend.

leahs-chocolate-chip-cookies

Michelle and Davida are our cookie bakers. Leah is our salad maker. It is an awkward moment when the salad maker tries to become a cookie baker.

We all found it entertaining that Leah wanted to bake. Avigail and Juju were on board and ready to roll up their sleeves. I couldn’t wait to see how this would play out.

I sat back and watched this unfold.

Leah asked questions like, “how does the Kitchen Aid mixer work?” “where do we have a cookie sheet?” and “what is a cookie scoop?”

The questions were mostly answered quite competently by three-year old Avigail.

And, I couldn’t help but chuckle.

But, Leah really had the last laugh. Because, these chocolate chip cookies were the best chocolate chip cookies, ever.

Leah started with Betty Crocker’s Ultimate Chocolate Chip Cookie recipe and made a few modifications. Here is Leah’s recipe:

INGREDIENTS

1 1/2 cups granulated sugar
1 1/2 tablespoons honey , corn or maple syrup
2/3 cup margarine, softened
1 teaspoon vanilla
1 egg
2 1/4 cups flour
1 teaspoon baking soda
3/4 teaspoon salt
1 cup slivered almonds
12 oz package real chocolate chips

DIRECTIONS

Preheat oven to 375ºF. Line baking sheet with parchment paper.

Using paddle attachment on mixer, combine sugar, honey or syrup, margarine, vanilla and egg. Stir in flour, baking soda and salt and then gently add almonds and chocolate chips. The dough will be stiff.

Drop dough by small rounded tablespoonfuls or small cookie scoop onto parchment-lined cookie sheet.

Bake 8 to 10 minutes or until light brown. Centers will be soft when removed from oven. Allow to cool on parchment paper.

Enjoy!

Please Note:  This post contains affiliate links from Amazon, which means I earn a small commission if you click and make a purchase.

Beet Horseradish Dipping Sauce

There is a local restaurant that serves a horseradish sauce with their burgers. The sauce is tantalizingly pink with just the right amount of assertive flavor and sweet bite.

I was determined to recreate this sauce. I tried designing this recipe several times until I got it just right.

I served this newly minted sauce one Shabbos. Some tried it with their challah, others with the fish appetizer and I loved it with the grilled chicken and London broil.   I returned the rest in the refrigerator to enjoy with left-overs.

And, enjoy it we did!

Our son-in-law, Scotty, was visiting that week and he really loved this sauce. He even asked me for the recipe. I told him that I would like to try preparing this recipe once more before putting it out on the blog.

I prepared it again for last Shabbos and it once again received rave reviews.

So, here’s to you, Scotty!

beet-horseradish-sauce

INGREDIENTS

1/2 cup of mayonnaise
1/4 cup beet horseradish
4 tablespoons lemon juice or juice of one lemon
2 cloves of garlic or 1 tablespoon granulated garlic
1/2 cup oil
squeeze of mustard
squeeze of agave syrup or honey (optional) (see notes)

DIRECTIONS

Using the s-blade in the food processor, combine all ingredients, saving oil for last. With machine running, slowly drizzle in oil and process until combined and smooth. Carefully decant into squeeze bottle.

NOTES

If you use a more savory beet horseradish (like the Gold’s brand), you may enjoy this sauce without adding honey or agave syrup. If you would like a sweeter sauce, use a beet horseradish with a higher sugar content or add honey or agave to this recipe.

Decant the dressing into an empty sport-top water bottle or wide-mouth squeeze bottle.

Add a unique label to this Beet Horseradish Dipping Sauce. Using glue stick or clear packing tape, adhere a custom beet-horseradish-sauce-dip-label to an empty squeeze bottle. If you would like to print your own simpletowow vinaigrette label, feel free print out this beet-horseradish-sauce-dip-label. The paper label also allows you to jot down the date when you prepared the dressing so that you can track the preparation date.

Enjoy!

Please Note:  This post contains affiliate links from Amazon, which means I earn a small commission if you click and make a purchase.

Simple Radish Flower Garnish

A simple vegetable garnish can really make an appetizer, serving dish or hors d’oeuvres   platter look spectacular.   I like to create garnishes with simple ingredients and ordinary tools.  This radish flower garnish is a simple one to create and can be used in dozens of wow ways.

I demonstrate this garnish with a red radish.  It can easily be created with any type of radish, although I find that the best results are with red radishes that are tall and narrow. Very round radishes will also work but will not open up as much as the tall, narrow ones..

radish-bunch


INGREDIENTS

radishes
ice water
plastic container or mason jar


INSTRUCTIONS


Scrub the radish and carefully trim the root end of the radish creating a flat bottom. Position the radish with the flat root end on the bottom


Score the radish making scallop-shaped cuts as close to the peel as possible from just below the tip to just above the bottom of the radish.  Be careful not to make the cut all the way to the bottom or the radish cuts will not hold together.

Turn the radish and keep making scallop-shaped cuts, overlapping each cut and going around the radish.  The closer to the peel that the cuts are made, the more decoratively the radish flower will open when soaked.


Prepare a mason jar or plastic container with ice water and soak the radish garnishes for at least 20 minutes.


The radishes will open up to resemble flowers.

radish-garnish-open-many

Simply Spicy Firecracker Salmon


Most of my salmon recipes use a teriyaki-type glaze and cook at a high temperature.

This one is quite different.

It starts with a spicy marinade and is cooked at 375 degrees F to get that perfectly soft flakiness and to set the spicy glaze.

I prepared this new recipe for dinner while my son-in-law, Scotty, was visiting and studying nearby.  He couldn’t help but comment on how delicious the salmon smelled as it was cooking.  The taste didn’t disappoint, either.

This recipe is appropriately named for the fiery color and flavor of this salmon.

Enjoy!


INGREDIENTS

salmon fillet
1-2 chopped green onions or chives

fiery marinade

firecracker-salmon

a small piece of minced fresh ginger or ginger powder
3 cloves garlic, minced or garlic powder
¼ cup olive oil
2 tablespoons soy sauce
2 tablespoons honey,  agave or maple syrup
1-2 tablespoons sriracha or hot sauce
1-2 tablespoons lemon or orange juice
1-2 tablespoons mustard
red pepper flakes to taste


DIRECTIONS

Whisk or shake marinade ingredients in a small container or jar.  Carefully pour or brush onto salmon. Sprinkle with onions or chives.

firecracker-salmon-before-cooking

Bake at 375 for 30-45 minutes, until fish flakes easily with fork.

firecracker-salmon-all-ready


Crockpot Pumpkin-Sweet Potato Soup

This is one of our family favorites.  In fact, when I offer to bring soup to a party or dinner, this soup and my Simply the best chicken soup…ever! are the two most popular favorites.   There is something about the natural sweetness of this soup paired with the velvety smoothness of its texture that is divine.

It is best made in a crockpot and can be adapted to incorporate butternut or acorn squash and carrots as well.  Just roast those ingredients until they are soft and beginning to caramelize and then add to the crockpot with seasonings and water.  The key to the soup is the unique combination of sweet and savory spices.  Cream can be added to the recipe for a delicious dairy version of this soup.

When I prepare this soup with butternut squash or pumpkin, I reserve the seeds and roast them for 20-30 minutes.  They are delicious served on top as a garnish.

pumpkin-soup-with-seeds

INGREDIENTS

1 small whole pumpkin
2 sweet potatoes, scrubbed
1-2 whole onions, peeled

2 teaspoons salt
1 teaspoon minced garlic or garlic powder
1/2 teaspoon powdered or freshly grated ginger
1/2 teaspoon black pepper
1/2 teaspoon cinnamon

DIRECTIONS

Scrub and rinse unpeeled sweet potatoes and pumpkin.  Remove any paper tags.   Place whole vegetables on a greased or parchment-lined baking sheet. Bake at 425 degrees F. Remove sweet potatoes and onions from oven after 45-60 minutes and pumpkin after 90 minutes.

Place onions in crockpot.  Once cool, carefully remove stem and peel skin from pumpkin and discard.  Carefully,  place clean pulp in crockpot. Carefully peel skin from sweet potatoes and place sweet potato pulp in crockpot.

Add seasonings and fill crockpot two-thirds of the way to the top.  Place crockpot on high setting and cook for 3-6 hours.  Adjust seasonings to taste.

Puree with a stick blender before serving.

Reserve seeds and place in separate pan for roasting.  Roast at 425 Degrees F for 20-30 minutes, checking often to make sure that the seeds are not burning.

SIMPLE SHORTCUT
Skip the roasting of the vegetables. Instead, use 1-2 cans of sweet potatoes or yams and use shredded carrots and raw onions or scallions. Place all ingredients and seasonings directly into crockpot. Allow 5-6 hours to cook in crockpot with seasonings. Puree before serving.

MY FAVORITE AMAZON SUPPLIES FOR THIS RECIPE

Cuisinart Stick Blender

Stainless Steel 6 Quart Manual Crockpot

Glazed Butternut Squash with Shallots and Grapes

glazed-butternut-squash-with-shallots-and-grapes

Leah recently spent Shabbos at her friend’s house and came back with this amazing recipe.  I simplified the preparation and have prepared this dish over and over again.  It is the perfect combination of smooth butternut squash, shallot rings and grapes that just pop in your mouth.  It is one of those new recipes that you will really enjoy.

Butternut squash is a flavorful winter squash shaped like a bottle.  The seeds are stored in the bottom part of the squash.  Butternut squash has a sweet, nutty flavor with a tan-orange hard skin and fleshy orange pulp.  It is an excellent source of  fiber, Vitamins A, C and E as well as potassium and magnesium.

Many people are intimidated by the shape of this squash and the toughness of the peel.   For this recipe, it is not necessary to peel the butternut squash.  When sliced, the stem portion of the butternut squash yields firm disks and the bottom portion yields rings filled with seeds.  I choose butternut squash with a long stem portion, as the disks that are sliced from the stem do not contain any seeds.

The glaze is applied by just drizzling and sprinkling the glaze ingredients directly over the butternut squash.

The simplicity, texture and sensational flavor of this recipe will wow you!

INGREDIENTS

1 large butternut squash
3-4 shallots, cut into rings
handful of green or red grapes, whole or halved

3-4 tablespoons oil
2-3 tablespoons honey, agave or maple syrup
kosher salt
pepper

scallions (for garnish)

DIRECTIONS

Preheat oven to 450 degrees F.

Scrub butternut squash.  Using a large knife, cut unpeeled butternut squash crosswise into 1/3 inch to 1/2 inch disks.  Remove seeds from rings at bottom of squash.

Peel shallots and slice into rings.  Clean grapes and if they are large, cut into half.

Line a baking sheet with parchment paper.  Place butternut squash disks in a single layer on lined baking sheet.

Scatter shallots and grapes among butternut squash disks and filling the butternut rings cut from the bottom of the butternut squash with shallots and grapes, too.

Lightly drizzle oil and honey, agave or maple syrup over vegetables.  Lightly sprinkle with salt and pepper.

Roast uncovered for 45-50 minutes.  Optionally, sprinkle with scallions within the last 10 minutes of roasting.  Butternut squash should be soft and just beginning to caramelize. Shallots and grapes should be browned and soft.

butternut-squash-with-shallots-and-grapes


Savta’s Sweet Potato Latkes

sweet-potato-latkes


Savta loves to make latkes and kugels.  I vividly remember how delicious they were when we were growing up and Savta’s kugel and latkes have become a real delicacy for my children.

This is Savta’s sweet potato latke recipe.  It is perfect.

INGREDIENTS

4 medium red potatoes, peeled
1-2 onions, peeled
1 sweet potato
3  eggs
4 tablespoons  flour
1 1/4 teaspoons kosher salt
1/4 teaspoon freshly ground black pepper

olive oil

DIRECTIONS

Using the s-blade of the food processor, process 2 potatoes with the onions, eggs, flour and seasonings. Using the shredder blade of the food processor, shred the remaining potatoes and sweet potatoes. Gently combine all the ingredients together in a large bowl.

Heat olive oil in a large saute pan over medium heat. Spoon a ladle-size amount  of  potato mixture into the oil and fry for 2 minutes. Turn the pancakes over and fry for 2 minutes more.  Latkes should be crispy on the outside and golden brown.

Latkes are best served hot from the skillet.

Strawberry and Brownie Mini Trifles


INGREDIENTS

oneFlourless Chocolate Cake or brownie recipe, cut into small cubes

whipped cream

1 tablespoon vanilla sugar

strawberries, diced

decorative cookie (optional)


DIRECTIONS

Soak, wash and dry strawberries well.

Using a paring knife, create one strawberry rose for each mini trifle.  For each rose, slice thin petals from close to the top of the strawberry from  to close to bottom of the strawberry. Gently curl each petal toward the outside.   Continue to slice petals all around the perimeter of the strawberry, overlapping slightly and curling them outward.

Dice the rest of the strawberries.

Whip the cream with vanilla sugar.

In clear glass or plastic cup, alternate layers of brownie cubes, strawberries and whipped cream.  Dry to drop the cream into the cup without touching the sides.  Gently shake the cup on the counter to settle the whipped cream.

Garnish the top of each mini trifle with a strawberry rose and/or a decorative cookie.

individual-bownie-and-strawberry-trifles-feauture-photo


KOSHER NOTES

Kosher laws disallow the eating of any whole insects and therefore strawberries require a process of soaking, rinsing and in some cases, pureeing. Kashrut authorities differ somewhat on the proper checking of strawberries and some disallow the eating of strawberries, altogether. This blog was not designed to be your kosher authority, so please consult your local rabbinic authority regarding the use of strawberries.

Sweet Potato Roses in Salad Box

sweet-potato-floral-appetizer-up-close

Who said that salads have to be tossed in a salad bowl?

I love the idea of individual salads and especially individual layered salads. There is something wonderful about being served an individual salad, especially when there is a beautiful and delicious garnish to top it off.

Here is one sensational salad appetizer that I created using the simplest of ingredients to create a wow.


sweet-potato-floral-appetizer-vegetables-slices-before-roasting-with-peeler-salt-and-oil

INGREDIENTS

sweet potato, onion or zucchini, scrubbed
kosher salt
oil
chives
romaine lettuce leaves
chopped peppers or your favorite chopped vegetables
Simple and Creamy Lemon Vinaigrette or your favorite dressing in a squeeze bottle

SUPPLIES

mandoline or wide peeler
clear square plastic bowls


DIRECTIONS

Preheat oven to 425 degrees F.

Thinly slice unpeeled sweet potato using wide peeler or mandoline.

Place thin sweet potato, zucchini or onion slices on parchment or foil-lined baking sheet. Drizzle with a bit of oil and kosher salt. Roast for 20-30 minutes, just until vegetables are soft with the edges just starting to turn brown.

While roasting the vegetables, soak and rinse romaine lettuce and chopped peppers.

Stand 1-2 sprigs of smallest inner leaves of hearts of romaine at edge of square plastic bowl. Place chopped peppers at the bottom and squeeze scant amount of dressing on top of peppers.

Remove the vegetable slices from the oven and allow to cool slightly.  Roll each slice up to form a rose, using the crispy end to form the middle of the rose bud and wind the softer end around to form a rose.

sweet-potato-floral-appetozer-sweet-potato-rose

Garnish each salad with vegetable roses and tuck  two or three loops of chives between the vegetable roses and the romaine  sprigs.


Please Note:  This post contains affiliate links from Amazon,
which means I earn a small commission if you click and make a purchase.

Weeknight Oven Roasted London Broil

Want a simple and no-fuss weeknight roast?  This one is for you.  It takes 3-4 hours of low-heat-cooking, so make sure to start it early.  It is one of my simple favorites and will become one of your favorites, too.

Our local kosher butchers all sell London broil.  It is an inexpensive and rather lean roast, though, technically, London Broil is not a cut of meat but rather refers to a cooking technique.  Kosher London Broil is typically cut from the shoulder or neck area and various butchers use different types of flank and shoulder steaks for their London Broils.

The tenderness of the meat very often depends on the source and cut of the London Broil. In general, I try to choose a London Broil that has some fat surrounding the meat and no gristle running down the center.  The fat protects the meat during cooking and either melts during cooking or can be trimmed afterward.  The thicker gristle often runs down the center of the steak and is difficult to remove.  Therefore, I try to find cuts that do not contain gristle running through.

Although London Broil is synonymous with fast cooking  over high heat, this recipe employs a quick marinade and spice rub and then slow low-temperature cooking.

INGREDIENTS

1 small (2 pound) London Broil
1 large onion, sliced
1/2 cup cranberry juice or other fruit juice

barbecue sauce

Coffee Spice Rub or your favorite rub

DIRECTIONS

Line baking dish with foil, leaving enough foil on sides so that foil can be folded over London Broil as a packet.  Place sliced onion at bottom of foil-lined pan.  Place London Broil on top of  onions, fattier side up.

Mix 1/2 cup juice with 1/4 cup barbecue sauce.  Pour liquid over London Broil , coating both sides. Pat with coffee rub.

Close foil packet around marinated London Broil , leaving room between London Broil and top of foil packet, but tightly closing foil.

Bake at 275 for 2-3 hours in foil packet.  London Broil should be fork tender at this point. Open foil, add some more barbecue sauce and bake uncovered for 1 hour more .

For cleaner slicing, allow meat to reach room temperature for at least 30 minutes.

Leah’s Parsnip Latkes

Leah has been in charge of preparing Sunday night’s dinner.  Leah has a taste and flair for interesting vegetable combinations.   Delegating the responsibility of preparing dinner frees me and gives others a renewed appreciation for all that dinner preparation entails.  Best of all, it introduces all of us, the diners, to the cook’s creativity and style.

This week, Leah prepared a masterful dinner of salad and parsnip latkes.

Parsnip is a root vegetable with a very unique flavor. Although it looks like a white carrot, it has a sweet, earthy and almost nutty flavor. Leah combined ingredients that we had on hand to wow us with this simple dish of complex flavors, just in time for Chanukah


INGREDIENTS

1 large russet potato, peeled

2-3 parsnips, peeled

medium lime, for juice and zest

1/4 cup flour

2 large eggs

1/2 teaspoon salt

1/4 teaspoon pepper

oil


DIRECTIONS

Zest lime and squeeze out the lime juice.

Coarsely grate potato and parsnips by hand or by using the shredder blade on the food processor. Sprinkle with lime juice and then carefully wrap the shredded vegetables in a kitchen towel to squeeze out as much liquid as you can.  Whisk egg and then add shredded potatoes and parsnips, lime zest, flour, salt and pepper.

Heat olive oil in a large saute pan over medium heat. Spoon a ladle-size amount  of  latke mixture into the oil and fry for 2 minutes. Turn the pancakes over and fry for 2 minutes more.  Latkes should be crispy on the outside and golden brown.

Latkes are best served hot from the skillet.

Simply Perfect Sufganiot in a Zipper Bag

I like to stay close to the latest trends in cooking and design.  One trendy and helpful technique in preparing dough is to use a zipper bag for preparing and kneading the dough.  It is a great idea for most dough and really reduces the cleanup.  Best of all, since the zipper bag can be discarded after use, this simple dough technique virtually eliminates those nasty dough-covered utensils and sponges that are so difficult to clean.

The ziploc bag eliminates the dusty mess of flour and allows all the dough crumbles to remain in the disposable ziploc bags.  Since the sufganiot in this recipe are amorphous and just dropped into oil, the ziploc bag can even be used  to dispense the doughnuts right into the frying pan.

I have adapted my favorite sufganiot recipe to use the ziploc bag.  I have tried it and it is just perfect!

sufganiot-in-a-bag-in-oil

INGREDIENTS
1/2 cup warm water
2 teaspoon sugar
1 teaspoon dry active yeast

1 cup flour

1/3 teaspoon salt
1/2 cup warm water
Olive oil, for frying

Powdered sugar (optional)

large zipper bag (1-2 gallon)


DIRECTIONS

In a ziploc bag, dissolve yeast and sugar in warm water.  To do this easily, I fold top of zipper bag over a small pan so that bottom of zipper bag is at bottom of pan and top of bag is folded over sides of the pan.    This ensures that the liquid contents do not spill over.

sufganiot zipper bag in pan.jpg

Wait until yeast mixture becomes bubbly or foamy.  If the yeast mixture does not bubble and foam, the yeast is not active and you will have to redo this step, making sure that the water used is warm but not too hot to touch.


Carefully add salt and flour to the yeast mixture, kneading the bag until all the flour has been incorporated, for several minutes.   The dough should resemble a thick, sticky cake batter.

sufganiot-in-a-bag-yeast-dough-before-rising-2


Spray your hands with oil spray or rub oil on your hands.  With your oiled hands, carefully rub the oil all over the dough. making sure to coat all sides of the dough.  Rub or spray oil on the entire inside of the zipper bag, too.

Allow dough to rise for 3-4 hours in the bag.  Open zipper and gently let the excess air out of the bag.  Gently push down the dough by pressing on the outside of the bag.

In a pot or sauce pan with a large opening, over medium heat, heat 1-2 inches of olive oil until sizzling.

Cut a corner into the side of the zipper bag to allow dispensing of the dough directly from the zipper bag corner.

sufganiot-in-a-bag-after-risen

Squeeze donuts into the oil by pushing dough into corner of bag and squeezing out small pieces of odd-shaped dough out of the zipper bag.  You may have to coax and pull donuts out of the bag into the oil using oiled hands.

Repeat until you have filled the oil with donuts without crowding, as the sufganiot will puff up during the ferrying process.


sufganiot-in-a-bag-in-oil


Turn them over once the bottom is golden brown.

Using a slotted spoon, carefully remove each doughnut from the oil and place on a plate lined with paper towels.

Sprinkle powdered sugar over the doughnuts and enjoy!

Happy Chanukah!

Onion-Battered Baked Tilapia

My mother loves tilapia.  She has a difficult time finding kosher fresh tilapia in Cleveland, so it is something that she looks forward to enjoying when she visits.

Whenever she comes to visit, I try to prepare this favorite dish for her, battering it in breadcrumbs and frying it in a pan (Savta’s Favorite Breaded Tilapia).  It is one of those simply delicious main dishes that is flaky, satisfying and never disappoints.

My mother will be coming to visit next week as she prepares for hip revision surgery at the Hospital for Special Surgery during Chanukah.

And, my mother’s visit makes me think of tilapia.

I love dishes that can be prepared and then placed in the oven, preferably on a timer.   This allows me to do other things while the food is being cooked.

Fry-pan breaded tilapia does not meet those qualifications. And, baked fish just doesn’t have the crunchy outside and soft inside of fried fish that would satisfy my mother.  So, I put my thinking cap on.

And, this is what I came up with….simple, satisfying and a delicious wow!

onion-crusted-tilapia-in-oven

INGREDIENTS

1 cup French Fried Onions

1/2 cup creamy dressing.  I used Simple, Creamy and Perfect Homemade Balsamic Vinaigrette

4-6 tilapia fillets

DIRECTIONS

Preheat oven to 425 degrees F.  Line a baking sheet or pie plate with parchment paper.

Pulse french fried onions in the food processor using the S-blade or crush by rolling a rolling pin or pounding a mallet over zipper bag of french fried onions.

In a shallow dish or pie plate, coat each fillet with creamy dressing.   Dip each fillet into the crushed onions, making sure that the fillets are well coated.
Spread coated tilapia fillets on baking sheet and bake for 20-30 minutes.  Tilapia should be golden brown on outside and soft and flaky on the inside.
Enjoy!
onion-crusted-tilapia

Sliced Carrots with Garlic and Shallots

sliced-carrots-with-shallots-and-garlic-2

Did you ever have one of those marathon days?  This recipe was inspired by that type of day.

I had the whole day planned out perfectly.  I had to drop something off for signature on the way home from the office and there should be plenty of time to pick up some fish and vegetables.  It was Scotty’s last dinner at the house before he headed back to California to resume dental school.  He had been visiting for nearly a week while interviewing for dental residencies throughout the tri-state area.

I wanted dinner to be perfect and perfection takes time.  Only, holiday traffic intervened with perfection.

When there’s no time for perfection, simplicity takes over.  And, simplicity inspired this recipe.

I didn’t even have the time to peel the carrots, so I used a bag of peeled baby carrots, instead of the rainbow carrots that I envisioned.

I had no time to mince the garlic and dice the shallots, so I thinly sliced them both in the food processor right after the carrots.

I just spread the vegetables and sprinkled and drizzled the seasonings and marinade ingredients.

It may not have been perfect, but it certainly was delicious.

And, I think I would do it this way all over again even if I had the time for perfection!

INGREDIENTS

1-2 pounds of peeled carrots or 1 bag of baby carrots
2-3 shallots, peeled
1 head garlic, separated into peeled cloves

3-4 tablespoons oil
2-3 tablespoons brown sugar or agave syrup
kosher salt
pepper

DIRECTIONS

Preheat oven to 425 degrees F.

Line a casserole dish or baking sheet with parchment paper.

Using the slicer blade of the food processor, slice peeled carrots and then shallots and garlic gloves.

Toss gently right in the food processor bowl.

Spread sliced carrots, shallots and garlic in parchment-lined casserole or baking sheet.

Lightly drizzle oil and brown sugar or agave syrup over vegetables.  Lightly sprinkle with salt and pepper.

Roast uncovered for 40-45 minutes.

Enjoy!

Roasted Sweet Potato Rose

sweet-potato-floral-appetozer-sweet-potato-roseINGREDIENTS

sweet potato, scrubbed
kosher salt
oil

SUPPLIES

mandoline or wide peeler

DIRECTIONS

Preheat oven to 425 degrees F.

Thinly slice unpeeled sweet potato using wide peeler or mandoline.

sweet-potato-slices

Place thin sweet potato on parchment or foil-lined baking sheet. Drizzle with a bit of oil and kosher salt. Roast for 15-25 minutes, just until vegetables are soft with the edges just starting to turn brown.

Remove the vegetable slices from the oven and allow to cool slightly.  Roll each slice up to form a rose, using the crispy end to form the middle of the rose bud and wind the softer end around to form a rose.

sweet-potato-floral-appetozer-sweet-potato-rose

Lazy Weeknight Pulled Beef

I really am lazy about cooking during the week.  Just ask my family.

I have learned to take just about every shortcut to the dinner table and love to prepare weeknight dinners that require very few ingredients, very little time and a minimum of effort.

To justify my weekday laziness, I make sure that weeknight dinners are not fussy or complicated.  I still try to use fresh ingredients, but I really downgrade the effort.

I have a repertoire of tried and true simple and delicious weeknight dinner recipes.  All require very little prep time.  Some cook or roast quickly.  Others cook all day.

This one is prepared in the morning, just before I start my day.  It is made in the crockpot and once the ingredients are placed, it requires virtually no attention.  It cooks all day, so that it greets you at the end of the day with the wonderful aroma and taste of slow cooked pulled beef.

The pulled beef is best pulled or shredded an hour or two before eating and then returned to the sauce in the crockpot.  It can also be pulled or shredded and eaten right before serving, but will yield a slightly drier product.  It is up to your schedule and taste.

It can be served on a roll or over a bed of pasta or rice.  I like it best served alongside a shredded or spiralized salad.  Here I have served it with a side of rutabaga and edamame salad.

pulled-beef-in-crockpot-plated

This recipe has the elements of a lazy dinner, but the taste of a most delicious and decadent weeknight dinner.

It is simple…and it truly infuses the lazy with wow.

pulled-beef-in-crockpot-on-plate

pulled-beef-in-crockpot-ingredients

INGREDIENTS

small boneless roast to fit your crockpot (I use a london broil or small brisket)
2-3 onions and/or shallots, peeled and cut into wedges
4-5 cloves garlic (optional)
3-4 stalks celery, cut into 1-2 inch sections (optional)
1/2 cup water or broth
1/3 cup barbecue sauce
2-3 tablespoons brandy (optional)

your favorite seasoning or rub (optional)

DIRECTIONS

Cut onions, shallots, celery and garlic and place on bottom of crockpot.  Place roast on top of vegetables.  If roast is larger than crockpot, just cut to fit and place in two layers, one on top of the other.  Dilute barbecue sauce with water or both.  Pour diluted barbecue sauce and brandy over roast.

pulled-beef-in-crockpot

Set crockpot to high or auto (see notes below) and cook for 6-8 hours.

pulled-beef-in-crockpot-before-shredding

About an hour before serving, remove beef from crockpot.  Place two forks in the center of the roasts, tines against tines and pull toward edges of roast.  Keep pulling until the roast is shredded.  Return roast to crockpot, ladle some sauce over the shredded beef and set to low or auto until ready to serve.

pulled-beef-in-crockpot-cooked

NOTES

Know your crockpot and which settings to use.  I cook this recipe on the high setting of my six quart crockpot for 6-8 hours and only turn it down to low or auto once the beef has been pulled and the pulled beef has been returned to the sauce.  Your crockpot may need to be set to auto for the duration of the cooking. If you are not sure, start this recipe at high. Check on the recipe after 4 hours.  If it tastes ready, then turn it down to auto or low until serving. If not, cook for longer, checking every hour.

Simple Baked Potato Kugelatkes


kugelatkes-serving-suggestion

kugelatkes

Traditionally, we eat potato latkes (pancakes) on Chanukah.  We eat foods prepared with oil to commemorate the miracle of the oil in the Beis Hamikdash (Holy Temple) once the Jews were victorious over the Greeks.  After the miraculous war, the Jews entered the desecrated Temple and only found enough pure olive oil to light the Menorah (candelabra) for one day.  The tiny  bit of oil lasted for an entire eight days, enough time for the Jews to get new pure oil to light the Menorah in the Beis Hamikdash, so that the Menorah would be continuously lit.

While latkes are so traditionally linked to Chanukah, there are so many foods that contain olive oil that may just as well commemorate the oil miracle of the Temple.

Truth be told, I hate to fry latkes.

It just takes too much time, too much splatter and it is so hard to manage while entertaining a houseful of guests.

I usually make one batch of latkes just for the first night and find other make-in-advance olive oil alternatives when we entertain guests over Chanukah.

This year, I have adapted my favorite potato kugel recipe to make baked potato kugelatkes.  I made them in a bundt-shaped muffin tin, but they can easily be baked in a cupcake tin, as well.

They are simple to prepare, beautiful and delicious to behold, require no frying and can be prepared well in advance of the Chanukah meal.

(more…)

An arrangement of Single Roses: Simple, Upcycled and Breathtaking

roses-in-sequence

Last week, I hosted Sheva Brochos (one of seven wedding after-parties, each with seven blessings) for the children of my dear friends, Andrea and Michael.  The chosson (groom) and kallah (bride), Davidi and Efrat, are a gorgeous and young couple.

The Sheva Brochos was hosted together with five other couples, all close friends of Andrea and Michael.  Since this Sheva Brochos was toward the end of the week of partying, we created a theme and menu that would be lighthearted, interesting and youthful.

We decided to host the Sheva Brochos as a Spanish fiesta and it was wonderful!

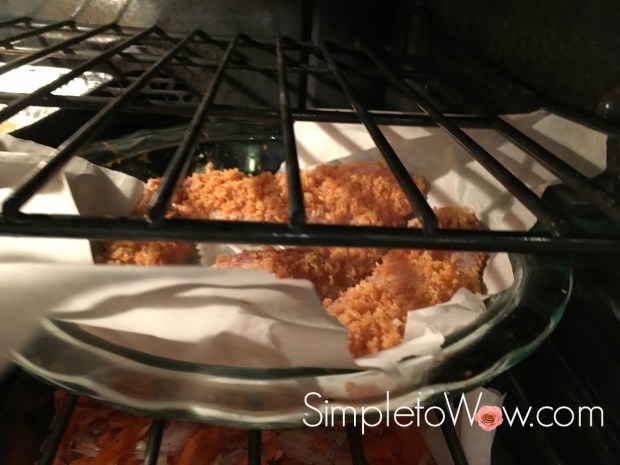
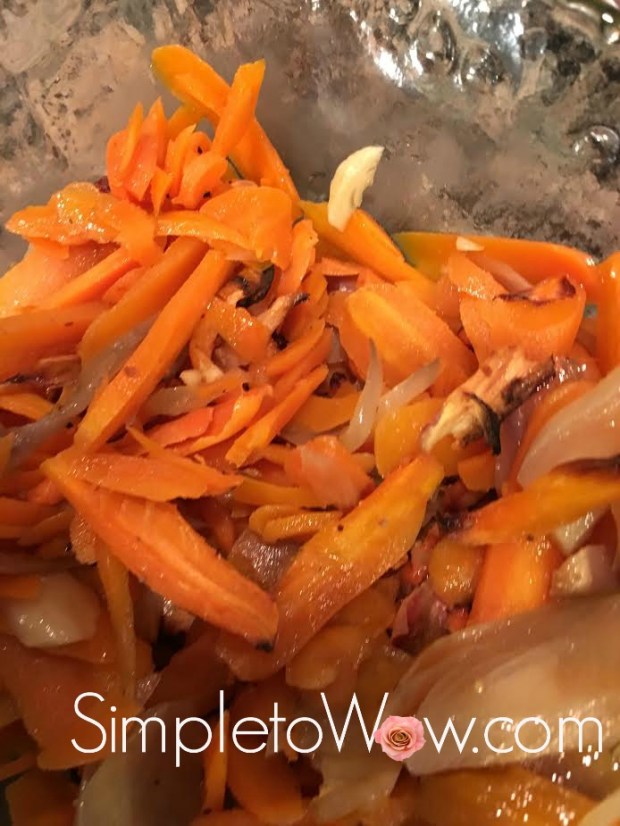
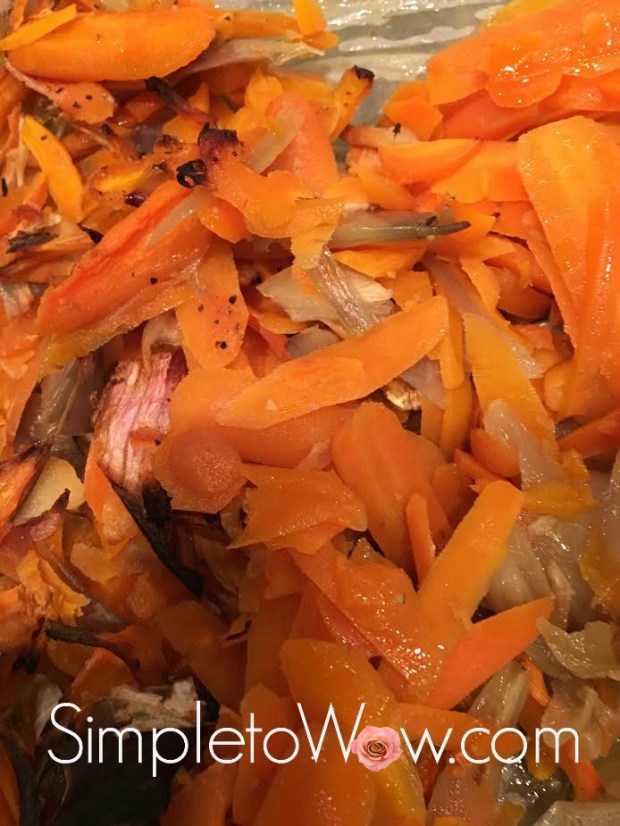
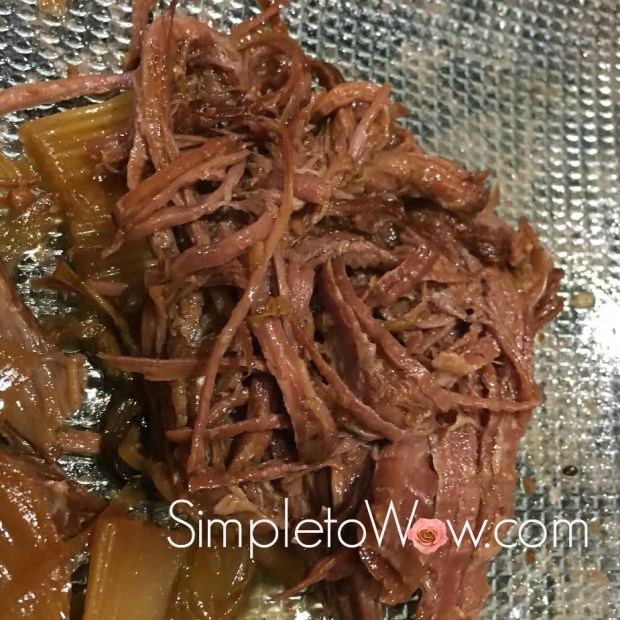
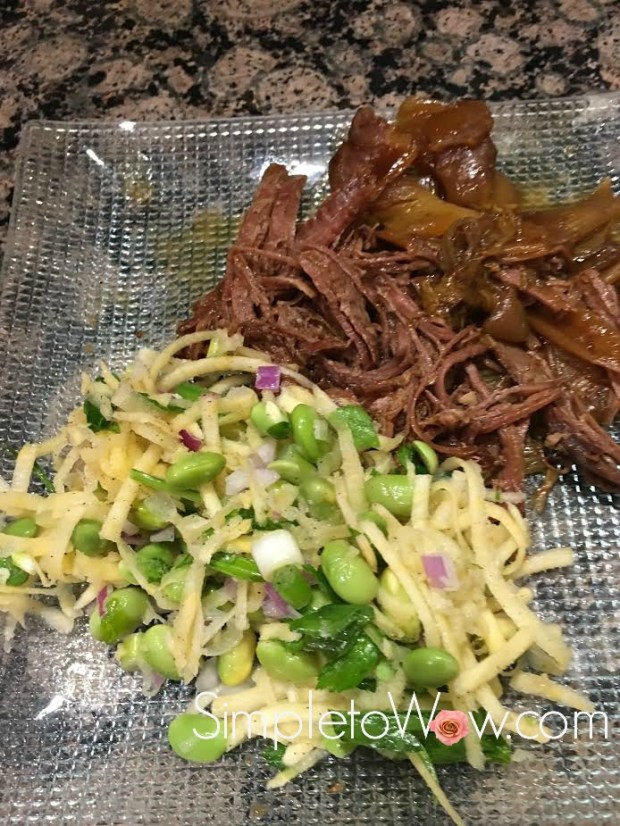
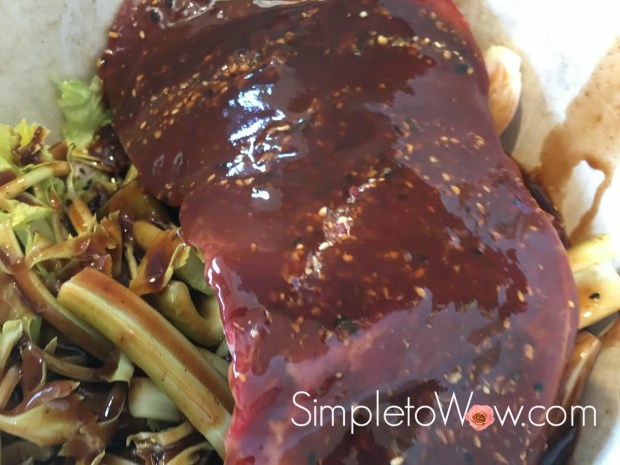
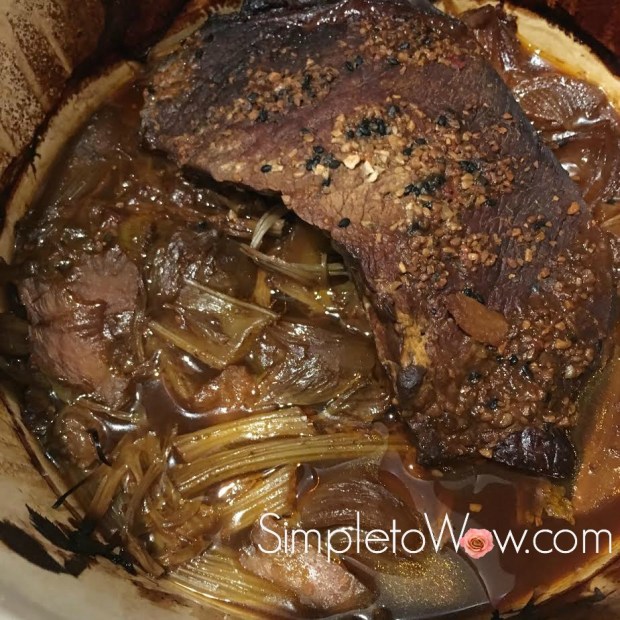
We set up a taco bar with pulled beef, pulled chicken,  chili, an assortment of taco shells and rice choices.  There were lots of toppings and salad choices for the vegetarian and diet-conscious guests, too.  Over the next weeks, I will share recipes, menu and table setting inspirations from this wonderful Sheva Brochos.

As a backdrop to the Sheva Brochos fiesta, I challenged myself to create centerpieces to reflect the youth and glamour of this couple and the fun inspired by the fiesta theme.

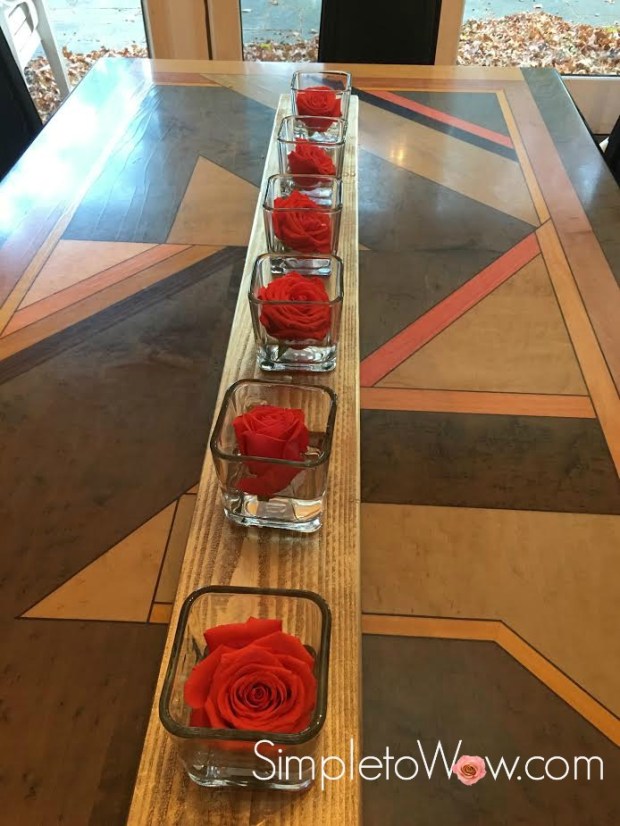
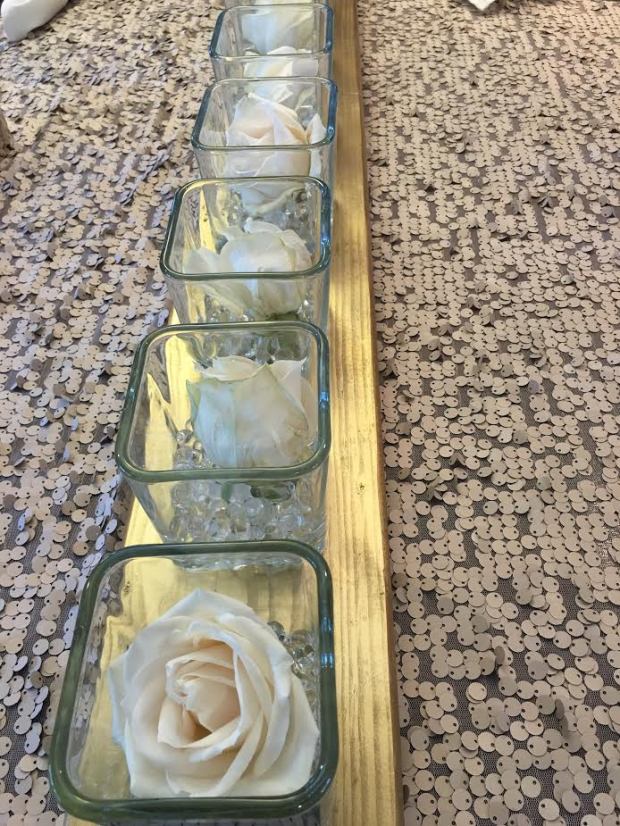
Since we had not allocated much of a budget for centerpieces, I created centerpieces that were inexpensive but sensational.  I set up long rectangular tables and round tables.  For each long table, its  centerpiece spanned four feet in length, six inches in width and amazingly, only required six flowers that I had upcycled from last week’s floral bouquet.  For each round table, its centerpiece spanned two feet in length, six inches in width and amazingly, only required three flowers that I had upcycled from last week’s floral bouquet.

For the floral arrangements, I selected the straightest two  inch by six inch by eight foot lumber beams from my local Home Depot.  Since I was using both long and round tables, I purchased two eight foot length beams and had the lumber cutter at Home Depot cut them.  I cut one beam into two four-foot beams and the other into one four-foot beam and two two-foot beams.

I now had three four-foot beams and two two-foot beams.  On an outside table, I sanded the wood with my hand sander, paying particular attention to the area that had been cut at Home Depot. The sanding took only a few moments per beam, but really smoothed the beams, removing all splinters and jagged edges.

I then sprayed the top and the sides of each beam with metallic gold spray paint and let it dry for several hours.

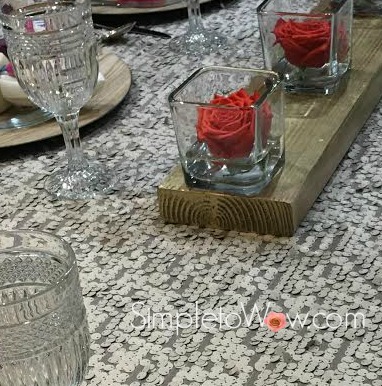
Finally, I lined up 6 clear 4″ square glass vases at equal intervals along the beam.  I placed a floral blossom in each vase with just an inch of clear water pearls

Voila!

roses-in-series-on-sequin-tablecloth

SUPPLIES

6 large open-blossoms
four foot section of 2″x6″ wood beam
metallic gold spray paint
6 clear 4″ square glass vases
clear water pearls (optional) or water

TOOLS

hand sander

INSTRUCTIONS

Sand rough edges of beam.

Spray paint the top and all sides of the beams in your favorite color.  I used metallic gold spray paint

wilted-roses

Cut  blossoms off of stem.

Set up glass vases at equal intervals along beam, aligning first and last vases with the edges of the beam.

Add one inch of water or  clear water pearls to each vase.

Carefully place each blossom in each vase.

roses-in-series-on-sequin-tablecloth
Please Note:  This post contains affiliate links from Amazon,
which means I earn a small commission if you click and make a purchase.

Simple Coffee Spice Rub

simple-coffee-rub


I am not a coffee drinker.  I just never developed a taste for coffee.  To me, it tastes bitter and unpleasant.  Thankfully, I wake up with enough energy that I don’t need the boost that coffee provides.

Interestingly, though, I love the aroma of coffee.  While the taste does not please me, the aroma of coffee is something I really enjoy.

There isn’t another member of my extended family that shares my distaste for coffee.  In fact, it is rare that I meet someone else who does not start their day with a cup of coffee.

Despite my not drinking coffee, we stock quite a varied supply of coffee in our home to satisfy the different but obligatory morning coffees of our family.  Some like dark roast, others light roast; some enjoy favored coffees and we have some visitors that actually prefer instant coffee.

Since we do not brew coffee on Shabbos (our Saturday Sabbath), our coffee drinkers either brew it in advance, buy cold brew coffee or use instant coffee for their Shabbos java.

I find that I have lots of leftover instant coffee, not fresh enough for the morning brew, but with enough aroma and flavor for a spice rub.  I store this instant coffee in the freezer until I am ready to use it.  Once I make the spice rub, I store the coffee rub in a spice container or ziploc bag in the freezer, as well.

The aroma and texture of this rub really adds that special wow to a roast. This spice rub imparts an amazing quality and flavor, even to my coffee-impaired taste buds.

If you are concerned about the caffeine in the coffee rub, feel free to use decaf coffee, instead.

INGREDIENTS

4 tablespoons ground coffee, regular or decaf
1 teaspoon kosher salt
2 tablespoons granulated garlic
1 heaping teaspoon black pepper
1/2 teaspoon cinnamon
1/2 teaspoon ground ginger

DIRECTIONS

Combine by shaking in container or ziploc bag.  Cover tightly and store leftovers in freezer

london-broil-spice-rub


Simple Baked Sweet Potato Cubes

sweet-potato-cubes

When I was a young girl, my Aba (father) would tell me that sweet potatoes were nature’s candy. He would also tell me that sweet potatoes are best when cooked right in their skin. I couldn’t imagine how anyone could compare a root vegetable to candy and why anyone would be interested in preparing sweet potatoes in their ruddy skin.

Now, I finally get it.  Aba is right.  Sweet potatoes are nature’s candy.  And, there are real health benefits to preparing sweet potatoes, especially without peeling them frst.

Sweet potatoes are high in Beta Carotene and contain significant levels of potassium, iron, vitamin B-6 as well as vitamins E and C.   They are a good source of fiber when eaten unpeeled.   They are delicious and nutritious.

This is a very simple and delicious recipe, perfect for a weeknight side dish.

INGREDIENTS

3-4 sweet potatoes, scrubbed
salt
garlic powder
cinnamon
1 teaspoon oil

DIRECTIONS

Preheat oven to 275 degrees F

Cube sweet potatoes.  Line a baking sheet with foil or parchment paper. Drizzle with oil and sprinkle lightly with salt, garlic and cinnamon.  Bake uncovered in center of oven for 60 to 90 minutes.  Sweet potato cubes should be firm and a bit chewy on the outside and soft on the inside.


Enjoy!

Simple Rutabaga and Celery Saute

sauted-shredded-rutabaga

For me, one of the most exciting things about this blog is the introduction of new ingredients to myself and my readers.

It is really about extending one’s comfort zone and affording new ingredients a chance to shine.

For some, it is about exploring new ingredients.  For others, it is about using old-hat ingredients in new and creative ways.  When I meet one of my blog followers, I am often told that through simpletowow.com, they have tried something new that has now become one of their favorites.  That makes my heart swell.

For one of my readers in Chicago, Simply the best salad…ever! has helped her discover so many new tomato varieties. She had always been a one-variety round red tomato consumer. Through the blog, her eyes were opened up to a rainbow of tomato shapes, colors and flavors.

Another one of my readers had never thought to use raw beets in the past.  His experience with beets had only been limited to cooked beets.  Balsamic Beet Slaw: Easy, Fresh and Delicious introduced him to raw beets as a delicious salad ingredient.

Then, there are the ingredients that people love to hate.

Rutabagas falls into that category so easily.

This fall, I have been seeing waxed turnips in the produce market.  Waxed turnips are also called rutabagas or swedes and have a very unique flavor and texture.   They are an excellent source of potassium, vitamin C and manganese, and are a great source of fiber, thiamin, vitamin B6, calcium, magnesium, and phosphorus.

rutabaga-half-peeled

The taste of a rutabaga is difficult to describe.  It has a sweet earthy bitterness that I find to be delicious and most interesting.  Technically, rutabaga is a cross between cabbage and turnip.  Rutabagas are usually waxed, hence they are also known as waxed turnips. Using a sharp paring knife, it is important to remove the peel of the rutabaga along with the wax coating before using it as an ingredient.

Rutabaga is one of our family’s new favorite ingredients.  I hope that you will learn to love it, too.

This quick saute is one of our simplest and most favorite rutabaga preparations.

(more…)

Baked French Fried Onion Fish

Last night, as I was preparing dinner, I thought: If everyone likes french fried onion chicken, why not use the same technique for baked fried fish?  It is such a simple and delicious way to prepare a main dish.

I had bought some fresh haddock and was in the mood of experimenting with a new recipe.  I brushed the fish with a light coating of mayonnaise and then french fried onions.

I baked it in a 375 degree F oven to 25 minutes.

It was a winner!

4 thin white fresh fish fillets (try flounder, tilapia, haddock or cod)


INGREDIENTS

1 cup French Fried Onions

mayonnaise

4-6 white fish fillets


DIRECTIONS

Preheat oven to 375 degrees F.

Brush each fish fillet with a light coating of mayonnaise.
onion crusted cod with mayo.jpg
Dip each mayo-coated fish fillet into french fried onion crumbs.
onion-crusted-cod-before-cooking
Place onion-coated fillets onto parchment or foil-lined baking sheet.  Press extra onions on top.
Bake for about 25 minutes or until fish is fully cooked.
onion-crusted-cod

Enjoy!

NOTES

I did not crush the onions and they produced a more sparsely battered fish fillet.  If you like a thickly battered fish fillet, I would suggest crushing the onions in a ziploc bag first.