Recipes
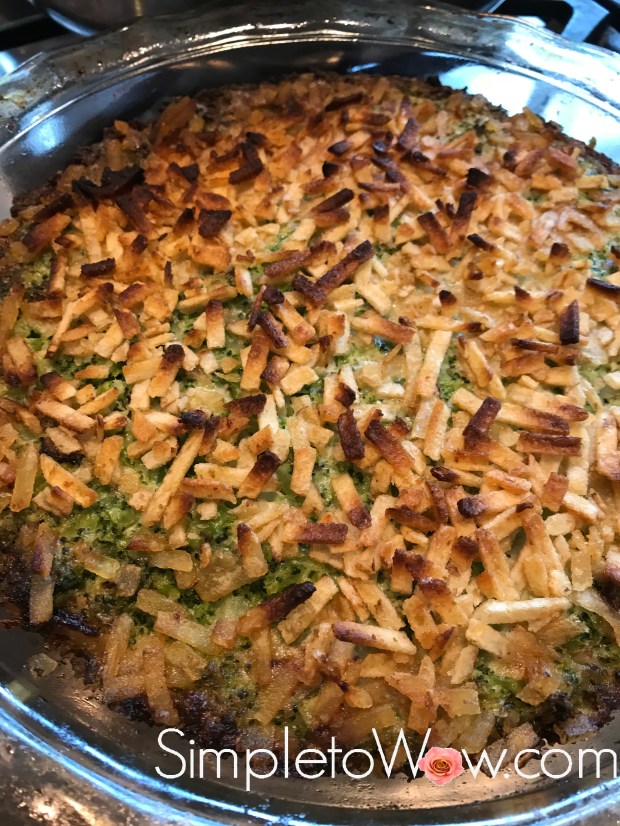
Crunchy Broccoli Kugel
By the time the three weeks rolls around, you, I no longer want to see bags of leftover Pesach (Passover) products.
Even if the bags are sealed. And, especially if they have been flattened.
As I’m always trying to upcycle, the bag of Pesach potato sticks offered a new challenge. I needed a way to use them in a way that would enhance my Shabbos menu.
Enter broccoli kugel. We were hosting a mostly women’s Shabbos with two of my favorite of Leah’s friends joining us for Shabbos. And, when that happens, we try to offer lots of vegetarian menu choices.
And, the gears started turning. What if…I just used the potato sticks as a simple and crunchy topping to a broccoli kugel? And this recipe was born.
My guests approved this simple, delicious and crunchy kugel for your viewing and tasting pleasure.
I’m sure you will love this recipe for its simplicity, texture and taste.
INGREDIENTS
1 bag (24 oz) chopped broccoli (see kosher notes)
1 large onion, sautéed
3 eggs
1 tablespoon mayonnaise
1/4 cup oil
1/2 cup seltzer
1 1/3 teaspoon salt
dash of black pepper
1/2 cup crushed potato sticks or chips
DIRECTIONS
Steam broccoli in microwave until soft. Preheat oven 425 degrees F. Combine all ingredients except potato sand pour into a 9″ round pie dish. Crush potato sticks and sprinkle on top. Bake for 35-45 minutes, until golden brown on top.
KOSHER NOTES
Kosher laws disallow the eating of any whole insects and therefore broccoli requires a process of soaking, rinsing and in some cases, pureeing, unless purchased with a reputable kosher hashgacha (certification). Kashrut authorities differ on the proper checking of broccoli. This blog was not designed to be your kosher authority, so please consult your local rabbinic authority regarding using and preparing broccoli.
Simplest Friday Ciabatta Ever

For those who have eaten at our home on Friday night, you most likely have tasted Davida’s delicious no-knead ciabatta. Since Davida will be spending the next few weeks in Israel, I decided that it was high time to take the ciabatta preparation back and make it my own.
Making something my own usually means taking some shortcuts and simplifying the whole process. It also means using fewer bowls and utensils because I hate the clean-up. Cleaning sticky dough off of counters, bowls, spoons and towels can really be a nightmare. And, truth be told, I do not have Davida’s baking precision or patience, anyway.
This ciabatta is almost as good as Davida’s with a lot less fuss. It can be made on the same day, although it requires a minimum of six hours of rising time. It still has the trademark thick crust and dough full of air bubbles inside.
INGREDIENTS
3 cups of high-gluten or bread flour
1 1/2 teaspoons dry yeast
1 1/2 teaspoons of kosher salt
1 teaspoon brown sugar
1 3/4- cups of warm water
olive oil
a sprinkling of additional bench flour or cornmeal
DIRECTIONS
In a large bowl, toss flour, yeast, salt, and sugar. Slowly pour in warm water, and knead with your hands or a large spoon until a soft sticky dough has formed without any spots or noticeable lumps.
Line a heavy loaf pan or narrow casserole dish with parchment paper and sprinkle a bit of bench flour or cornmeal. Stretch dough out a few times to create air bubbles and place dough in parchment-lined loaf pan. Drizzle a bit of olive oil on top of the dough and allow the dough to rise in a warm spot for at least six hours.
Lift dough with the parchment paper out of the loaf pan and carefully leave on the counter or on a baking sheet. Preheat the empty loaf pan in a 425 degree F oven for fifteen minutes.
Carefully remove preheated pan from oven (it will be very hot) and lift the waiting dough in its parchment paper back into loaf pan. Bake uncovered for 30-40 minutes or until top is a light golden brown.
Remove ciabatta from pan and allow to cool before slicing.
Enjoy!

Peach Velvet Salmon
I’ll share a little secret with you.
Last week’s leftover homemade dip or dressing becomes this week’s favorite marinade. The reason is simple. Dips have all the components needed in a marinade. They have an oil base for moisture, a flavor profile for taste and usually some acid for tenderizing.
I also like to use whatever seasonal items are on hand. This week, peaches are plentiful and flavorful at the market and my planters are bursting with fresh chives. These early summer flavors inspired this dish and my hungry family and friends approved it for publishing on the blog.
I used leftover Simple and Creamy Lemon Vinaigrette to coat the salmon fillets, but any dip, sauce or dressing will work. I pressed freshly ripened peach slices and torn chives on top.
The salmon is simple and delicious with a taste of summer. Enjoy!
INGREDIENTS
salmon fillets
Simple and Creamy Lemon Vinaigrette
1 ripe peach, scrubbed and sliced thin
Chives, torn for garnish
DIRECTIONS
Line cooking sheet with parchment paper or foil.
Brush salmon fillets generously with Simple and Creamy Lemon Vinaigrette or your favorite dressing or dip. Press thin peaches slices and a few torn chives into salmon.
Bake at 350 degrees F for 45-55 minutes, until fish flakes easily with fork. Sprinkle some more fresh chives over salmon.
Baby Carriage Cookies for a Shalom Zachor

Last week, Michelle’s friend, Daniella, gave birth to an adorable baby boy. To welcome the baby to the world, the family hosted a Shalom Zachor (lit: Peaceful welcome male). Michelle prepared these adorable cookies for the Shalom Zachor, held this past Shabbos.
I was sitting next to my friend, Carol, at the Shalom Zachor. She recommended that I try these delicious and adorable cookies, not knowing that Michelle had prepared them in my kitchen right before Shabbos!
The Shalom Zachor is such a beautiful tradition. It is a wonderful opportunity to gather friends, family and community for desserts and drinks at the home of the new baby. There are many reasons given for this delightful Jewish tradition:
- We simply welcome the baby to the first Shabbos of life outside the womb.
- We thank G-d on the first Shabbos for the baby surviving the birth.
- Since we know that all blessings for the upcoming week emanate from the preceding Shabbos, we open our home to the blessing of family and friends before the upcoming bris (circumcision).
- While in the womb, an angel teaches the baby the entire Torah. At birth, the teaching angel touches the baby near the mouth and the baby forgets all that he has learned. The baby’s lifetime duty is to relearn his Torah and family and friends gather to console the baby on having lost his Torah knowledge and study partner.
- Shabbos and the birth of a baby boy are auspicious times for peace and we invite our community to our homes in the hope of the creation and continuity of peace between family and community
INGREDIENTS
Hadar-Tirosh chocolate half-moon biscuits
Paskesz mini oreo cookies
frosting
blue/pink piping or frosting
DIRECTIONS
Using a small spatula coated with frosting, adhere two half-moon cookies together at right angles to create base of carriage. Since these cookies are double-sided, use the vanilla side for the base of the carriage and the chocolate-side for the carriage hood.
With a dab of frosting, adhere two wheels to front of cookie carriage. Pipe lines on hood of carriage for additional decoration.
Leah’s Smelly Drunken Bridesmaid Dress
Who knew that a gown could benefit from a few shots of vodka?
Leah was asked to be a bridesmaid recently and she asked my opinion if she should accept. Personally, I am not a fan of bridesmaids for so many reasons. I don’t like the stress, drama, cost and showiness inherent in having bridesmaids at weddings. So, I expressed my rather strong opinions on the matter to Leah.
And, Leah countered my negative bridesmaids views with arguments like, “it’s important for the bride”, “this one is an easy color to find and useful for future weddings” and “it should not create any stress at all.”
To which I conceded and told her that the final decision was hers. And, that I would stand by whatever decision she made.
But, I knew from the beginning that was not going to be as easy as she led me (and herself) to believe.
The color scheme was metallic. Leah already had a gorgeous gold dress given to her one of her friends. The gown was expensive and heavily beaded with classic styling. She asked me what I thought. “Beautiful,” “classic” and “free” were some of the adjectives that I used to describe the gown. I thought the gold gown fit Leah beautifully and that we were done.
Leah disagreed. And, I knew we were in trouble.
Leah asked her cohorts to advise her on the gold gown. They all agreed with Leah that the gold gown was just not right for her.
So, Leah found two more gowns to try. The first gown was an Amazon special in just the right color. The second gown was a rose gold beaded bridesmaid gown in her size being sold by a former bridesmaid in the Midwest. She worked out a price and shipping and a few days later both the Midwest gown and the Amazon gown arrived.
The Amazon gown was constructed of slinky cheap material and the Midwest gown was perfect except that it was a tad short for Leah’s 5’9″ height. After some more consultation with friends and co-workers, Leah decided to keep the Midwest gown and chose the perfect shoes to wear with the dress. Everything seemed right in the world of bridesmaid gowns.
Often, there is the calm before the storm. And, sure enough, the winds started up again on the morning of the wedding. I woke up and Leah was right there with an offer. “If you can help me with this challenge, I’ll let you write it up on your blog.”
Now, that was an offer I couldn’t refuse.
It seemed that Leah hadn’t noticed that the Midwest gown arrived with a stench that was unbearable. Somehow, with all the try-ons and consultations, no one had noticed that the gown had an odor. Overnight, Leah had already tried everything she knew to remove the odor unsuccessfully.
So, I did some research. And, the research came up with the following diluted suggestions: lemon juice, baking soda and vodka. I tried them incrementally. First, I tried a solution of lemon juice and water. That helped a bit. Then, I added some baking soda to the solution. That helped a bit more. Finally, I soaked the armpits of the lining in a solution of vodka. I pinned a few dryer sheets on the armpits and put the dress outside to dry.
And, thankfully, the tale of the Smelly Drunken Bridesmaid Dress was over after a few shots of diluted vodka.
INSTRUCTIONS:
To remove smell from clothing without washing, try any combination of the following steps. Test a small unnoticeable area first to ascertain how it will affect the color of the garment.
(1) Create a solution of equal parts of lemon juice and water. Use a brush to apply to smelly area or dip the garment in the lemon juice solution.
(2) Add a teaspoon of baking soda to the lemon juice solution created in #1. Use a brush to apply to smelly area or dip the garment in the solution.
(3) Combine 3 parts of vodka and 2 parts of water. Use a brush to apply to smelly area or dip the garment in the solution.
(4) Pin dryer sheets to the affected area.

Baby Stroller Fruit Display
There are events that just make you stop and take note. This past Shabbos, our family was part of one of those life events.
My best friend, Lori, welcomed her first grandchild into this world on Shabbos, Parshas (Torah portion) Shelach. Since the baby was born on Shabbos, the Shalom Zachor (festive gathering on first Friday night after birth of baby boy) and Bris (circumcision) were held back-to-back this past Shabbos, Parshas Korach. To complicate matters, our shul’s social hall was already booked for a Bar Mitzvah, so Lori opted to host both events at her home.
I so wanted to help Lori pull this together because Lori is like the sister that I never had. I called her daily asking for an assignment, but Lori assured me that the whole family was pulling together to prepare for these exciting and daunting celebrations. So, I took matters into my own hands. Actually, I took matters into the capable hands of my youngest daughter, Davida. And, of course, I wasn’t disappointed.
Davida carved a watermelon into this baby stroller complete with a nectarine baby sipping his bottle. It was not too complicated to prepare and it really created a wow at the celebration.
Thank you, Davida!
Mazel tov, Lori!
SUPPLIES
1″ baby bottle
Mini-skewers or heavy toothpicks
Permanent marker
melon baller
paring knives
INGREDIENTS
one oval-shaped watermelon
honeydew or cantaloupe
peach or nectarine
4 oranges or clementines
DIRECTIONS
Using a heavy knife, cut watermelon in half to create base of stroller.
Using a melon baller, scoop out the two halves of the watermelon and other melon(s) and place in a large bowl. Using melon baller and paring knives, clean out the cavity of the two watermelon halves so that cavities are smooth.
Reserve the larger watermelon half for the stroller cavity.
Using a heavy knife, cut the other half of the watermelon in two to create the stroller hood. Cut v-shaped notches to create a decorative edge on the larger half. On the smaller half, cut a small band to use as the stroller handle. Discard the rest of the watermelon.
Carefully secure the hood to the stroller cavity using Mini-skewers or heavy toothpicks inserted into the middle of the rind of each section. If skewers are too large, trim so that they are the right length to secure the watermelon sections together. Secure the stroller handle to the front of the stroller cavity in the same way.
Carefully secure citrus “wheels” to stroller using Mini-skewers or heavy toothpicks.
Draw eyelashes on the nectarine or peach and carefully push the baby bottle into the “mouth”.
Refill the watermelon with the melon balls, leaving a small space for the nectarine baby. Place the baby into the melon carriage.
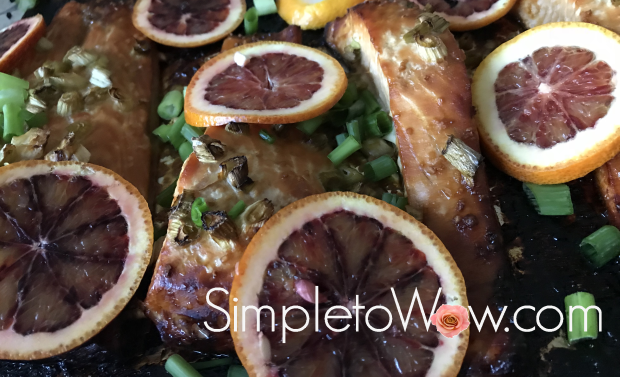
Blood-Orange Glazed Salmon

When I was a little girl visiting my grandparents in Willamsburg, Brooklyn, I remember my Oma and Opa bringing home blood oranges as a special treat for Yom Tov (Jewish holiday). I was traumatized by these small oranges tinged with bloodish red coloration throughout. I really believed that there was blood inside these oranges and no matter how much my grandparents tried to convince me that there was no blood inside these oranges, I was still horrified by the thought of blood oranges. Of course, I refused to eat them and was repulsed by the mere sight of these oranges with the red-tinged flesh.
I had forgotten about this aversion to blood oranges. Until a few years ago.
I cannot even remember exactly when Trader Joe’s began stocking blood oranges regularly. And, blood-orange became a flavor sensation in sorbet and drinks.
And, I decided that it was time to give blood oranges another chance. Thankfully, my adult self became fascinated with the tropical flavor and tye-dye whimsy of these oranges.
This simple salmon dish highlights the unique flavor and beautiful coloration of these oranges.
INGREDIENTS
salmon fillets
⅓ cup packed brown sugar
1 teaspoon Worcestershire sauce
2-3 tablespoons orange juice
2 garlic cloves, minced
1 blood orange, sliced thin for garnish
Scallions, sliced thin for garnish
DIRECTIONS
Line cooking sheet with parchment paper or foil.
Brush salmon fillets with just enough Worcestershire sauce and orange juice to be absorbed by the salmon fillets. Sprinkle with brown sugar. Drizzle a bit more Worcestershire sauce and orange juice over brown sugar. Sprinkle minced garlic and sliced scallions over salmon.
Bake at 375 degrees F for 40-50 minutes, until fish flakes easily with fork. Serve with sliced scallions and thin blood orange slices.
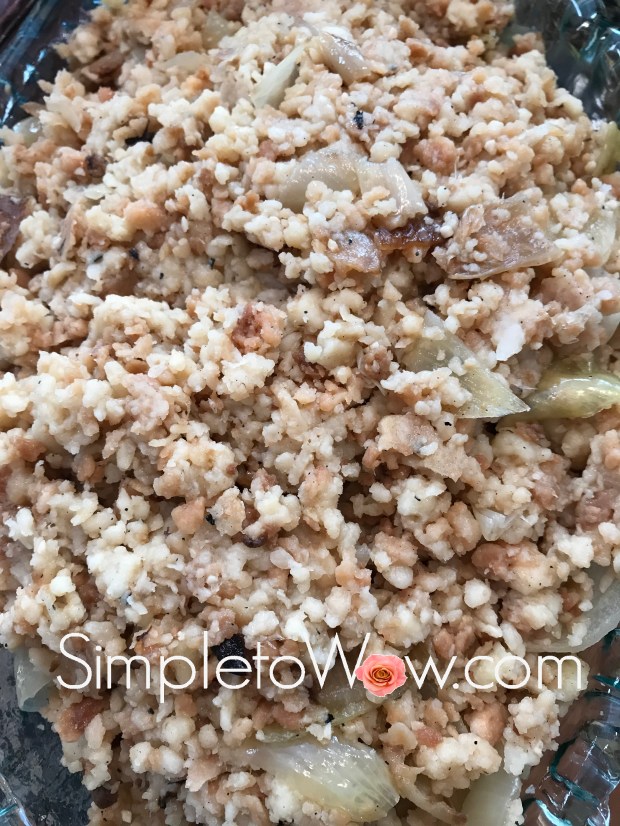
Heimeshe Farfel
My son, Aaron, loves farfel (flake-shaped pasta popular in Jewish cuisine).
When he was younger, Aaron used to love to visit Bubby and Zaidy in Kew Gardens Hills, Queens. While he enjoyed spending time with his grandparents, he was excited by the fact that there was nearly a dozen places where he could buy prepared farfel within a short radius of Bubby and Zaidy‘s home. That meant something back then.
Some things haven’t changed.
When Aaron comes home for Shabbos, I try to prepare heimeshe (home-style) farfel. Nowadays, there are not many stores in our hometown that sell Heimeshe farfel. Most sell egg barley, which is more like orzo than like farfel. Heimeshe farfel is typically made from an egg noodle dough and/or matzo and is toasted before being cooked. It has trademark light and dark coloration, reminiscent of the color of matzo.
Farfel is something that reminds me of my childhood. That uniquely hemishe side dish evokes images of a past era where life was so much simpler. On my visits to Monsey or Brooklyn, I can easily find this ingredient, much to Aaron’s delight. And, when I prepare this simple and delicious dish, he doesn’t even need to leave the house to enjoy it!
INGREDIENTS
2 small bags heimeshe farfel
1-2 onions
garlic, minced (optional)
oil
1 teaspoon salt
dash of pepper
1 1/2- 2 cups of water
DIRECTIONS
Over medium-high heat, saute onions and garlic in oil, just until starting to brown. Add heimeshe farfel and toast for 1-2 minutes. Add 1 1/2 cups of water and bring to a boil. Reduce heat to low and stir occasionally for 15-20 minutes, making sure that farfel doesn’t stick to the bottom of the pan. Add a bit more water in intervals, if necessary. Farfel should be dry and soft when ready.

Perfect Strawberry Smoothie
INGREDIENTS
1 cup frozen strawberries
1 cup milk
2 tablespoons honey or strawberry daquiri mix
whipped cream (optional)
SUPPLIES
DIRECTIONS
Add strawberries, milk and honey to blender jar. Blend until smooth. Carefully pour into tall glass and garnish with whipped cream. Add a thick straw.
Enjoy!
Please Note: This post contains affiliate links from Amazon, which means I earn a small commission if you click and make a purchase.
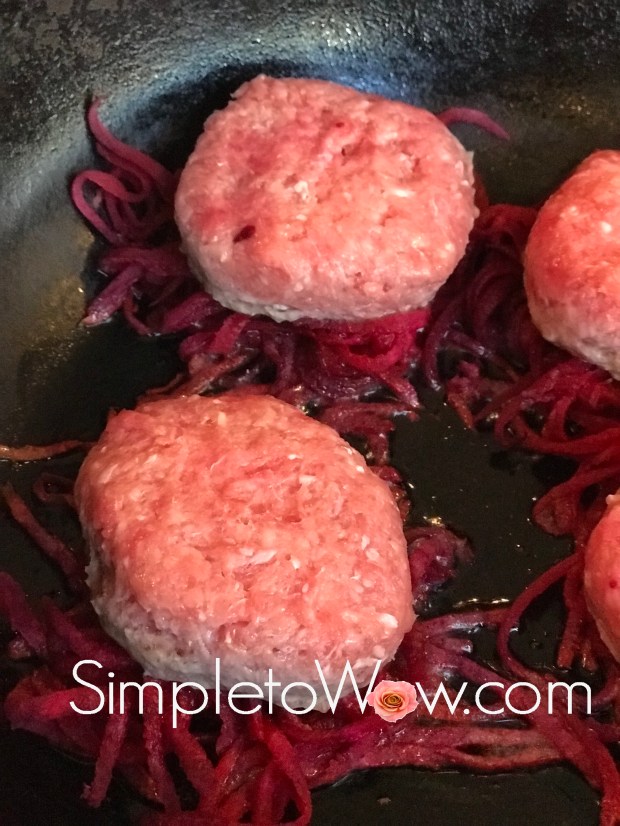
Sliders with Onion Slices and Frizzled Beets

Most of the time, we eat sliders without the bun. And, most of the family enjoys their burgers and sliders very well-done. That means that the burgers need some pretty exciting accessories to keep them moist and interesting. This burger started out as an experiment and ended up with rave reviews. It is a well-done burger that still has character and juiciness.
When thinking about how to dress up an ordinary burger, of course, onions came to mind. After all, onions make just about everything exciting. They are sweet and hearty, flavorful and versatile.
And, as you know, I have become an unwitting ambassador for beets. Beets are maligned and ignored, mostly because of the unfortunate texture that many people have encountered in their childhood. Thankfully, beets are making a comeback, mostly because boiled beets are a very small part of the beet preparation pie-chart. In reality, beets are beautiful and exciting with a variety of textures depending upon their preparation. They are inexpensive, widely available and are best eaten raw or roasted. Beets are truly are one of the most exciting vegetables available.
This recipe starts in a pan on the fire and ends in the oven. It is forgiving and will wait for you. The end product is a juicy well-done slider atop a soft, succulent onion slice with drizzled beets on the top.
Enjoy!
SUPPLIES
INGREDIENTS
1-2 beets, shredded
1-2 onions
all-beef sliders
DIRECTIONS
Preheat oven to 375 degrees F.
By hand or using the shredding blade on the food processor, shred or grate beets.
Slice the onions and place on the bottom of a baking dish. Pour water to coat the bottom and halfway up the onion slices. Place in hot oven.
Heat sliders and shredded beets in fry pan.
Turn sliders until both sides are well-cooked. Carefully place sliders, frizzled beets and some of the pan drippings on top of the onions in the baking dish and place bake in the oven.
Bake for 15 to 30 minutes in the preheated oven.
Roasted Vegetable Sliders

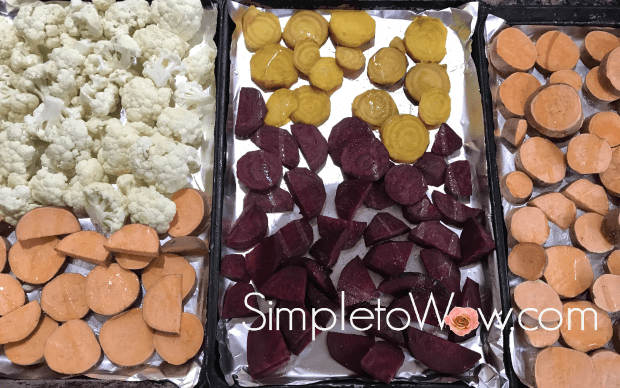
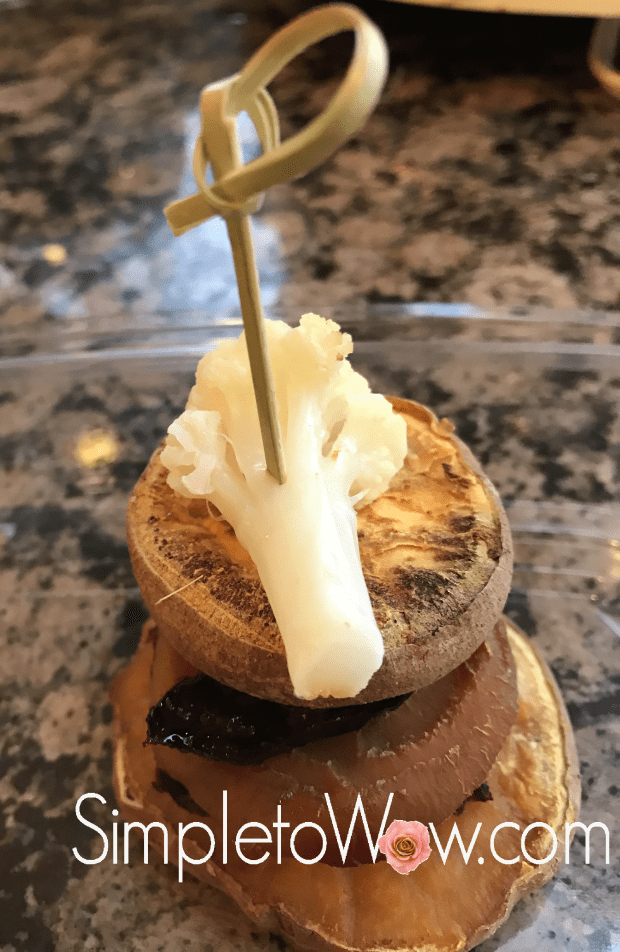
This appetizer is one of the most beautiful, delicious and versatile ones that I have up my sleeve. It is simply a stack of roasted vegetables secured with an interesting pick. As you already know, I roast vegetables almost every Erev Shabbos (Friday afternoon) in preparation for our Shabbos. Everyone enjoys the vegetables before Shabbos and I try to make enough that we still have enough to enjoy at our Shabbos meals.
This appetizer can be dressed up with an herb garnish on top. It can be served with a dollop of Jalapeño Dip, or even topped with some melted cheese for a dairy meal.
TIP
If roasting squashes or sweet potatoes, scrub peel and leave on before roasting. This will help the roasted vegetable hold together so that it can be stacked.

Onion-Smothered Salmon
I use salmon in a host of recipes. I prepare it as a main dish for an easy weeknight dinner. I prepare it or use in Shabbos appetizers like Individual Sushi Salads and others. Salmon is versatile and popular. Its distinctive taste makes it one of our family favorites.
Since I use salmon in so many different ways, I am always on the hunt for new preparations. This past Shabbos, I made a Tex-Mex Shabbos appetizer. The star of this appetizer was the onion-smothered salmon. It was so delicious and yet, so simple.
While I normally roast salmon at a higher temperature, baking the fish at 350 degrees F yields a dish that is so delicious and so moist. I normally saute a large batch of onions in advance of my marathon Shabbos or Yom Tov cooking. I sometimes even freeze the leftover onions. This dish is the perfect one to use these batch onions.
INGREDIENTS
salmon fillet
soy sauce
onions
oil
DIRECTIONS
Saute onions in oil or butter, just until soft and starting to brown. Line a baking sheet with parchment paper or foil. Lay salmon fillet on the lined sheet and brush with soy sauce. Smother with sauteed onions.
Bake at 350 degrees F for 30-50 minutes, depending on size of the salmon fillet. Salmon should be cooked through, thickly flaking and moist when ready.


5-Ingredient Cheesecake Brownie Bites
Cheesecake and brownies. Brownies and cheesecake. Two delicious and decadent desserts that deserve each other.
This recipe is simple and oh, so delicious. It is the perfect combination of these two classic dessert flavors. The recipe begins with brownie mix and end up as the perfect combination of brownies and cheesecake, marbled to perfection. It is forgiving and memorable. The texture is decadent and fudgey. It will wow you in its simplicity and it will wow you in its delicious taste and texture.
INGREDIENTS
1 brownie mix
8 ounces cream cheese
1 teaspoon vanilla sugar
1/4 cup sugar
1 egg
DIRECTIONS
Preheat oven to 350 degrees F.
Prepare brownie batter according to package instructions and pour into individual cupcake papers or ramekins.
Using a mixer or the s-blade of the food processor, mix together cream cheese, sugar, and vanilla. Add the egg and beat until creamy and smooth.
Add a dollop of cheesecake batter on top of each of the brownie batter ramekins. Use a skewer, small knife or chopstick to swirl the cheesecake and brownie batter.
Bake for 20-30 minutes until the top of the cheesecake is turning golden brown. Test with a toothpick inserted into the center of one ramekin. If a bit of the batter sticks to the toothpick, you will have a fudgier end-product. If you wait until the toothpick comes out clean, you will have a more cake-like end-product.
Modest Mountain Midrash Cupcakes for Shavuos
Tomorrow night, Davida will be hosting a Shavuos bake sale at our home from 8:00 PM to 10:30 PM. These Shavuos cupcakes will be offered for sale.


It comes just in time for the Jewish holiday of Shavuos, the holiday where we celebrate the giving of the Torah on Mount Sinai. There is a beautiful midrash (story-like commentary) explaining how G-d chose Har Sinai (Mount Sinai), the humblest mountain of all, to be the place where the Torah was received by the Jewish nation.
This past Shabbos, my grandchildren, Avigail and Yehuda, visited. On Shabbos, they sang this song that they both learned in their respective preschools. It is based upon this very Midrash. It explains in song how many mountains vied for the opportunity to be the venue for Matan Torah (the giving of the Torah). Each mountain highlighted its own virtue. Some were tall; others were strong or beautifully adorned. Har Sinai was chosen for it epitomized the lessons of humility and simplicity.
Here are the lyrics:
I am a mountain so very high
I can reach way up to the sky
The Torah should be given on me
For I am as tall as can be, you see
Oh No! I am much greater than you
There are so many things I can do
The Torah should be given on me
For I am as strong as can be, you see
But little Har Sinai just stood there and sighed,
“I know I’m not tall; I know I’m not wide
The Torah cannot be given on me
For I am as small as can be, you see
From all the mountains, Hashem chose Sinai
Because he did not hold himself high
He had such simple and humble ways
And from here we learn humility pays
This song and midrash became the basis for these mountain cupcakes. I frosted a dozen green cupcakes using different techniques, sprinkles and embellishments. I chose the simplest cupcake to represent Har Sinai. In the center of that cupcake, I placed white chocolate luchos (tablets).
SUPPLIES
cupcakes
green frosting
shredded coconut
green food coloring
assorted sprinkles and edible pearls.
white chocolate
1 large zipper bag
1 small zipper bag
DIRECTIONS
Place 1 cup of shredded coconut in a zipper bag. Add a few drops of green food coloring and knead or shake until color is distributed throughout.
Frost seven cupcakes with green icing. Add green coconut, sprinkles and embellishments. Keep one cupcake simple.
Melt white chocolate by placing on a microwave-safe plate and using the timed-defrost feature for 5-9 minutes, checking every minute after 5 minutes.
Spread a piece of waxed or parchment paper and carefully fill a small zipper bag with the melted chocolate. Pipe out the shape of the luchos (tablets) and allow to harden.
Place the luchos in the center of the plainest cupcake.
TIPS
For a smooth frosting, microwave the green frosting on high for 10-30 seconds, checking after every ten seconds. When frosting is smooth and warm, pour over cupcakes. This will yield a shiny smooth frosted cupcake that can be easily dipped into sprinkles.
Simple No-Cook Salmon Appetizer
There are times that a simple no-cook appetizer is the way to go.
Like, when there are six Yom Tov (holiday) meals in a row and you’re looking for a new creative way to serve an appetizer with minimal effort. The upcoming Shavuos holiday comes on the heels of a Shabbos, calling for six consecutive festive meals. And, because it is fish, this appetizer can be served pareve (non-dairy) or with crème fraîche on the side with a dairy meal.
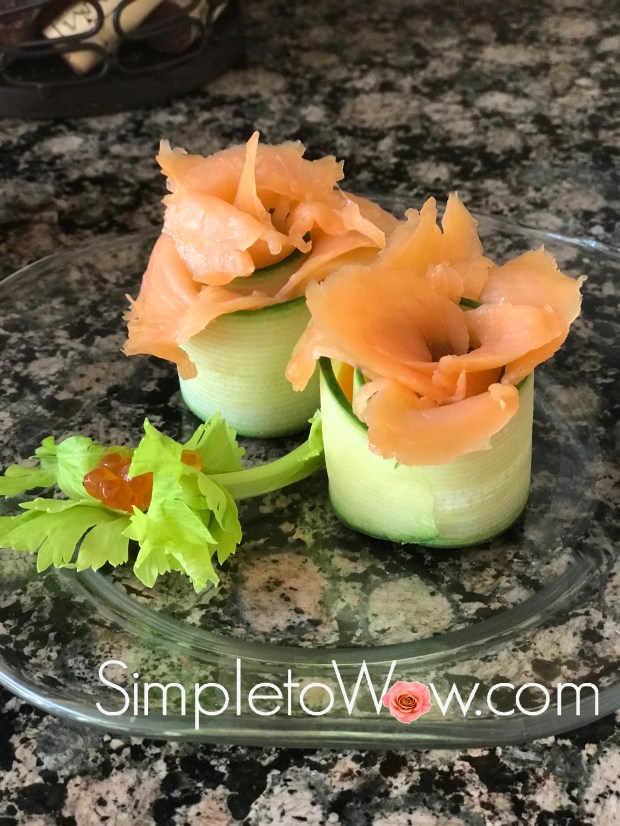
It is simple. It is beautiful. That simple and beautiful combination is a wow!
SUPPLIES
INGREDIENTS
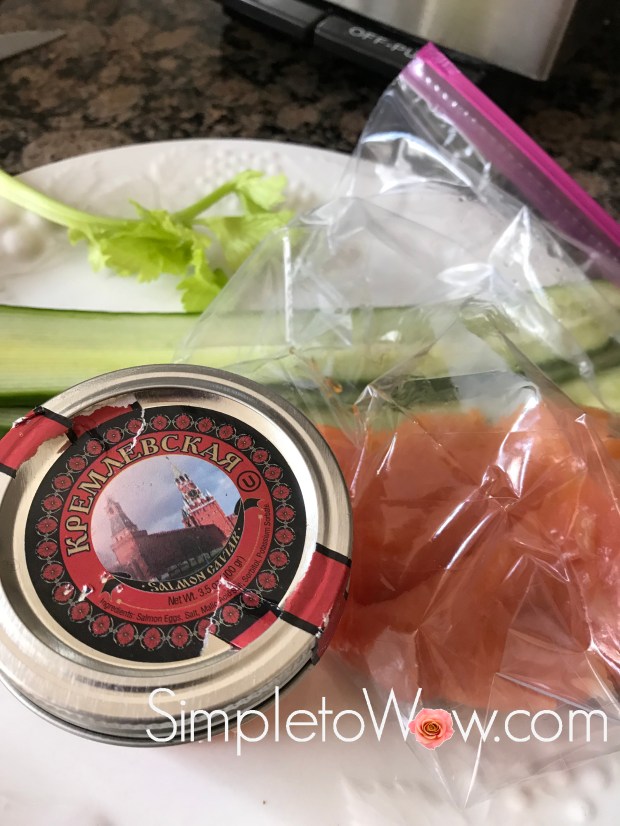
Long Seedless cucumber
lox or smoked salmon, sliced thin
celery leaves (optional)
salmon caviar (optional)
DIRECTIONS
Using a wide vegetable peeler, carefully peel long, thin slices of seedless cucumber.
Spread each slice of cucumber flat and top with lox slice(s), lining up bottom edges of cucumber and lox.

Starting at end that has both cucumber and lox, carefully roll up to form a rose.

Stand up and unfurl lox petals for a delicate rose-like formation.
Optionally, garnish with celery leaves and salmon caviar.
Voila!
Please Note: This post contains affiliate links from Amazon, which means I earn a small commission if you click and make a purchase.

A Bouquet of Cupcakes with Purpose

Davida volunteered to host a Shavuos bake sale at our home next Wednesday night, May 16th, 2018 from 8:00 PM to 10:30 PM. It comes right on the heels of Mother’s Day and right before the Jewish holiday of Shavuos.
Both Mother’s Day and Shavuos are days associated with flowers, so Davida and I prepared a few cupcake bouquets for the bake sale. All proceeds will benefit families in need and will satisfy both the food and decorative aspects of the upcoming holiday.
Davida is the go-to person in the family for any baking or cooking tasks. She is a master at baking and decorating and her baked goods are both delicious and beautiful. This one is no exception. It uses items that you would have on hand and is simple to assemble.
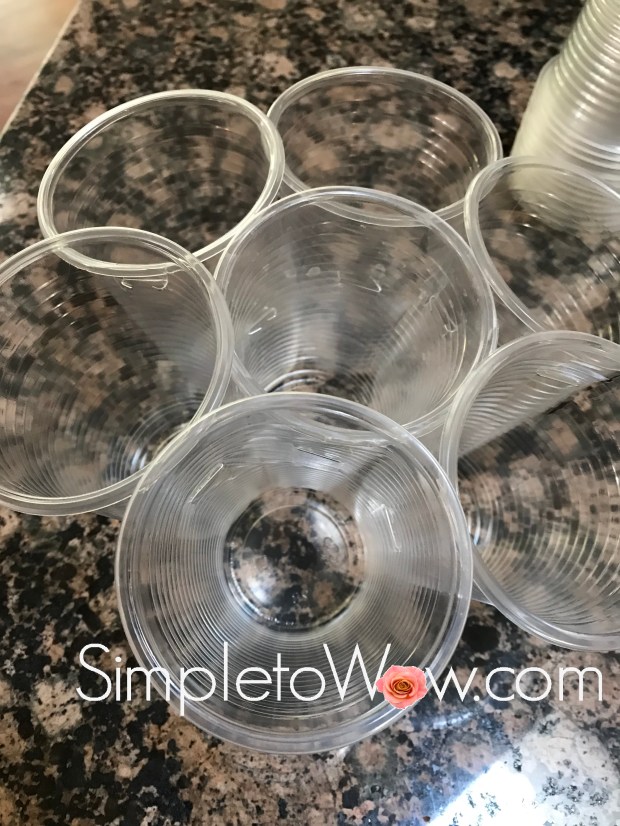
SUPPLIES
7 cupcakes
7 cups
stapler
green cocktail napkins
green tissue paper
glue stick
ribbon
container
DIRECTIONS
Frost seven cupcakes with icing to resemble flowers.
Find plastic or paper cups that will allow each cupcake to fit snugly inside.
Staple the seven cups together in the following way to easily form a bouquet base with places to hold the flower cupcakes:
- Staple three cups in a row.
- Staple another two cups to each other.
- Staple the last two cups to each other.
- Staple the three cups to one pair of two stapled cups. Staple the other pair of two cups to the three cups on the other side. This will form a base for your seven cupcakes with one cup in the middle and six cups all around.
Fit the plastic cup base into a basket or bowl that fits snugly. I found a farmer’s market basket that fit perfectly.
Cut the green tissue paper in half and wrap around the basket, gluing it into place. Tie a ribbon around the basket and secure with glue, if necessary.
Cut each cocktail napkin into a large circle. Tuck the napkin remnants between each cup to fill in gaps.

Wrap each cupcake in a napkin circle and fit each floral cupcake snugly into each plastic cup.
Voila!
Basil Pesto Butter

Close to ten years ago, we shared a dairy lunch meal with our good friends, Neal and Marilyn, at their new home in Jerusalem. They ordered food from Village Green, a well-known and delicious vegetarian restaurant on Jaffa Street right in the heart of Jerusalem. They ordered a lavish assortment of salads, quiches, pastas and desserts.
It was a luncheon to remember. The food was delicious, colorful and plentiful. The camaraderie among the adults and the kids was remarkable. But, there was one stand-out rockstar at that luncheon.
It was the herbed butter.
Village Green had packaged the food with small individual pats of herbed butter and those delicious flavorful butter treats transformed that afternoon.
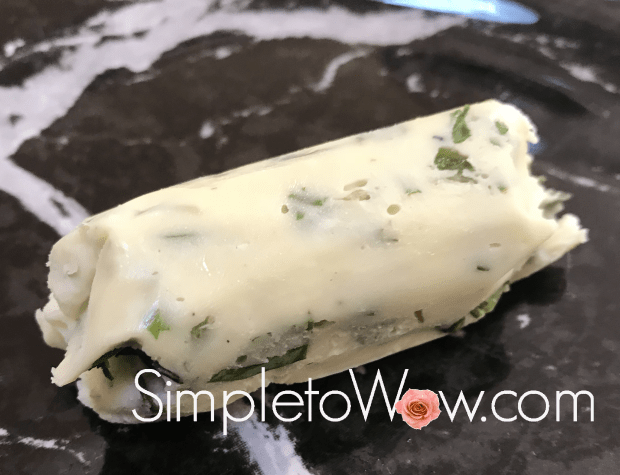
So, ten years later, I decided that it was time to recreate that buttery sensation. I simply added basil to the food processor and pulsed it into a rough pesto. I then added softened butter and processed it until it was well combined.
Best of all, when I served the butter, it transported us back instantly to that afternoon in the heart of Israel. Hopefully, this simple upgrade to your dairy meal will create pleasant memories for you, too….
INGREDIENTS
1/2 cup fresh basil leaves, cleaned and pat dry (see kosher notes)
1 pound salted or unsalted butter
DIRECTIONS
Place basil leaves in the food processor. Using the s-blade, pulse until roughly ground. Cut butter into small cubes and add to food processor. Pulse until smooth and well-combined.
Alternatively, chop basil. Soften butter by using the time-defrost mode on the microwave. Defrost in 30 second intervals until softened but not melted. Combine chopped basil and softened butter until well-combined
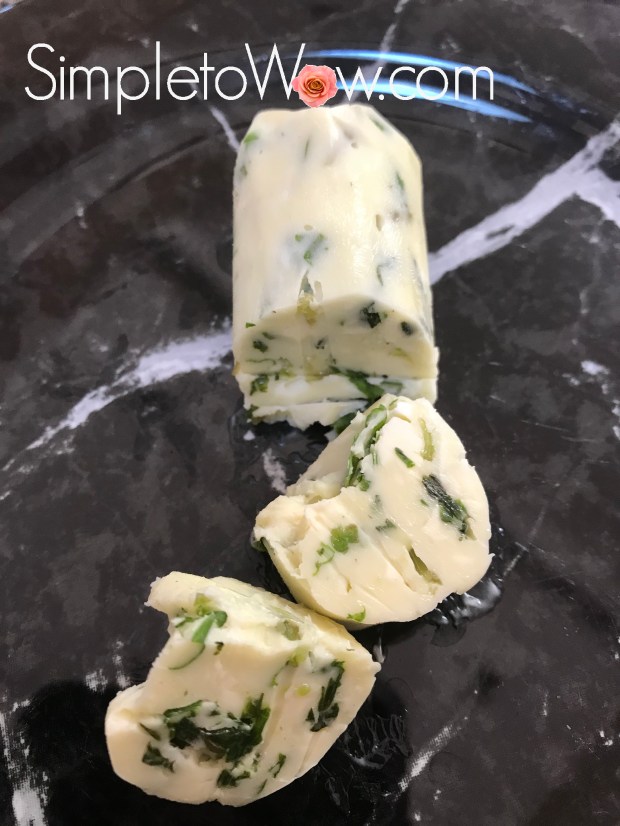
Place pesto butter onto parchment paper and roll. Twist ends of parchment roll. Refrigerate until firm.
Cut into thin slices before serving.
KOSHER NOTES
Kosher laws disallow the eating of any whole insects and therefore herbs require a process of soaking, rinsing and in some cases, pureeing, unless purchased with a reputable kosher hashgacha (certification). Kashrut authorities differ on the proper checking of broccoli. This blog was not designed to be your kosher authority, so please consult your local rabbinic authority regarding using and preparing fresh herbs.
TIP
For an additional wow, place basil butter in individual molds or interesting ice cube trays. Freeze until it is easy to pop out into individual decorative pats of butter.
Refrigerate or freeze leftovers and use as starter for dairy soups and omelets or as a delicious accompaniment to roasted or steamed vegetables and fish.
Challah Braiding Hack: It Really Works
This week, a challah braiding hack by Seth Brandes took the challah-baking public by storm. This hack was shared with me by many of my Whatsapp groups. It seems that Seth shared this terrific shortcut on his Facebook account and it went viral. He showed that simply slicing a lump of challah dough on the diagonal with a dough scraper in both directions can produce a beautiful challah loaf in minimal time with very little effort. After all, the time-honored challah braiding takes time and effort and Seth brought challah-braiding into 2018.
My friends and family challenged me to check out this hack and see if it really is as simple as Seth claimed and if it really produces the type of challah wow that challah bakers want.
And, it does. The initial result looks quilted rather than braided.

But, as you can see, the final baked result looks great. And it really saves braiding time and effort.
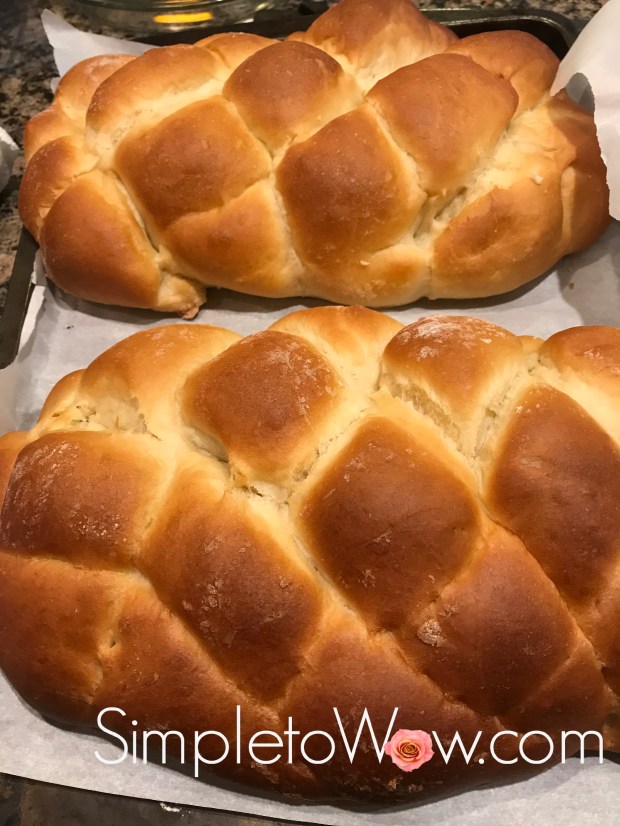
Thanks, Seth!
Please Note: This post contains affiliate links from Amazon, which means I earn a small commission if you click and make a purchase.
Tzitzis Plates for Yehuda

Yehuda a.k.a Ju-Ju just turned three!
Yehuda was born on Shabbos Hagadol (Shabbos before Pesach) three years ago and arrived several weeks early to the great surprise of us all. For me, his arrival was especially eventful and complicated.
I had already arrived in Israel and had just finished preparing everything for Pesach when Kaitlyn called to tell me the exciting news of her baby boy’s early arrival into the world.
It was 3 AM and I had just fallen asleep after a full night of cleaning and Pesach preparations.
“Are you aware that it is in middle of the night here in Israel?, ” I asked Kaitlyn that night.
“Yep” responded Kaitlyn.
“Oh!” I exclaimed and sat up quickly in my bed. “Did you have a baby?”
“Yep” responded Kaitlyn.
I sat up a bit straighter in my bed. “Did you have a baby boy?”
“Yep” responded Kaitlyn. And, she added, “And I guess you’ll be missing the bris!”
“Never challenge your mother!, ” I retorted and immediately began making arrangements to return to the United States to meet my first grandson.
That was three years ago and it has been my children’s proof that my mantra of “you cannot be too organized” has some exceptions to the rule. They claim that if I had only started my Pesach preparations a bit later, I would have saved myself a whole lot of work.
They may be right, but it has made for some great memories!
Now, Yehuda has turned three, is finally toilet trained and has begun wearing a kippa and tzitzis. To celebrate his third birthday, I designed these tzitzis plates for our small family celebration.
SUPPLIES
white square plates
scissors
white twine
black electrical tape
INSTRUCTIONS
Cut a v-shape out of the top of each plate. Tape parallel lengths of black electrical tape to form black stripes on each white plate. Cut several lengths of white twine and tape to the back of each plate. Voila!
Broccoli Encrusted Baked Chicken Cutlets: A Basic Lesson in Sharing

I am on a forever quest to produce great meals with minimal effort. In that endeavor, I have found many shortcuts. One of my favorites is to prepare one starter and use it in multiple recipes and in different ways. I convince myself that it is just another form of sharing, true collaboration between recipes. I vehemently deny that it has anything to do with laziness.
On the most basic level, I use this sharing shortcut for sauteed onions and/or garlic. Sauteed vegetables add an important depth of flavor to most recipes but can be time-consuming. Therefore, I saute one large batch and then split the sauteed batch between the soup, side dishes and main dish within the same menu. Any leftover sauteed vegetables are then moved to a zipper bag and placed in the freezer for future sharing.
This recipe is the next step in batter-sharing. This recipe began as the batter for my Broccoli Kugel. I was planning to prepare Baked Chicken Cutlets later on in the day. While I was pulsing the Broccoli Kugel batter in my food processor, I thought, “why not use this batter to coat the baked chicken cutlets?” After all, the batter incorporated so many of the ingredients necessary for moist baked chicken. And, the addition of broccoli would add a moist barrier to the chicken while adding a new color and flavor profile!
And, so I applied the batter-sharing concept to my broccoli batter. In a moment of boldness, I split off some of the kugel batter for the coating of these chicken cutlets.
Wow! Sharing can be daring, and oh, so delicious!
SUPPLIES
food processor
parchment paper
INGREDIENTS
4-6 boneless skinless chicken breasts, pounded or cut thin
1 cup cooked or thawed frozen broccoli (see kosher notes)
1 sauteed onion or 1/4 cup French Fried Onions
1 egg, beaten or 1/2 cup of your favorite dressing
1/2 teaspoon salt
dash pepper
Spicy Mayo (optional)
DIRECTIONS
Preheat oven to 400 degrees F. Line a baking sheet with parchment paper or spray with cooking spray.
Pulse French Fried Onions soft broccoli, egg, salt and pepper.
Coat the thin chicken breasts in broccoli mixture.
Place chicken on parchment on prepared baking sheet. Optionally, drizzle with Spicy Mayo
Bake chicken for 20-30 minutes or until chicken is fully cooked.
KOSHER NOTES
Kosher laws disallow the eating of any whole insects and therefore broccoli requires a process of soaking, rinsing and in some cases, pureeing, unless purchased with a reputable kosher hashgacha (certification). Kashrut authorities differ on the proper checking of broccoli. This blog was not designed to be your kosher authority, so please consult your local rabbinic authority regarding using and preparing broccoli.
Enjoy!
Please Note: This post contains affiliate links from Amazon, which means I earn a small commission if you click and make a purchase.
No-Strain Lemon Curd

I love citrus!
I love lemons, limes, grapefruit, mandarines, oranges, pomelos and just about every citrus fruit that I can get my hands on.
Even when choosing a synthetic flavor, I opt for the citrus flavors. When I choose a dish detergent, air freshener, floor cleaner or gummy worm, I almost always opt for the citrus ones. There is something about the punch of the flavor, the smell of the zest and the tiny sacs of juiciness packed into a citrus fruit that is oh, so tantalizing.
And, Pesach (Passover) just goes with citrus.
We try to spend part of Pesach in the Galil (Galilee of Israel) and the fragrance of the citrus blossoms perfumes the air during this season. The spring air with the sweet smell of citrus blossoms is Pesach’s gift to Israel. And, in Israel, citrus fruits are called פרי הדר (literally glorious fruits), a real validation of my passion for citrus.
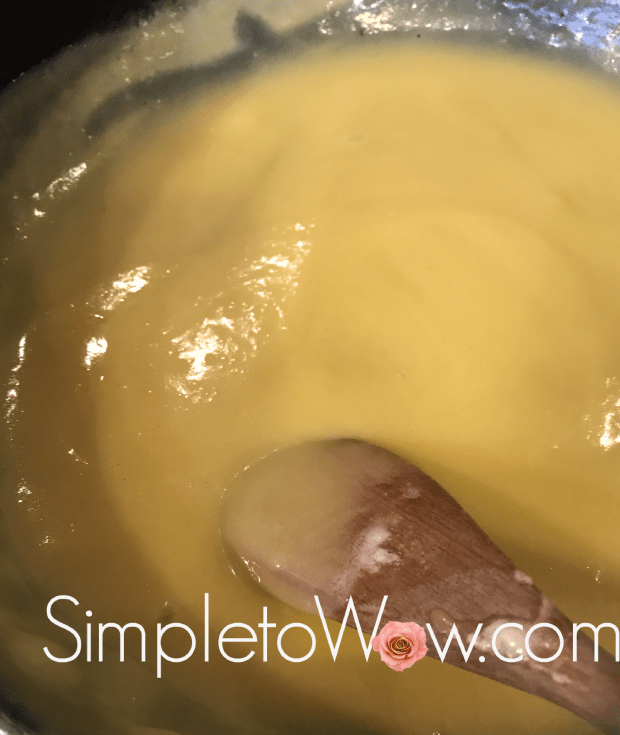
This Pesach, I was determined to prepare a simple and delicious lemon curd. It uses simple ingredients and even calls for egg yolks, which abound on Pesach when egg whites seem to be on the list of so many Pesach baking recipes. This recipe can be eaten on its own, spread on Matzo or fruit or can be combined with other ingredients to create mousses and sorbets.
I like the curd not too sweet and quite tart but you can easily adjust the amount of juice and honey to make the curd more or less sweet or lemony. You can use any type of lemon, but I find that the Meyer lemons are in season now and are extra juicy. This recipe can be made in advance and stored in the refrigerator for several days.


SUPPLIES
INGREDIENTS
6 tablespoons margarine, softened
1/2 cup honey
2 eggs + 2 egg yolks
3-4 Meyer lemons or 2/3 cup fresh lemon juice
DIRECTIONS
Soften margarine in the microwave in ten-second increments, just until the margarine is soft to the touch but not runny.
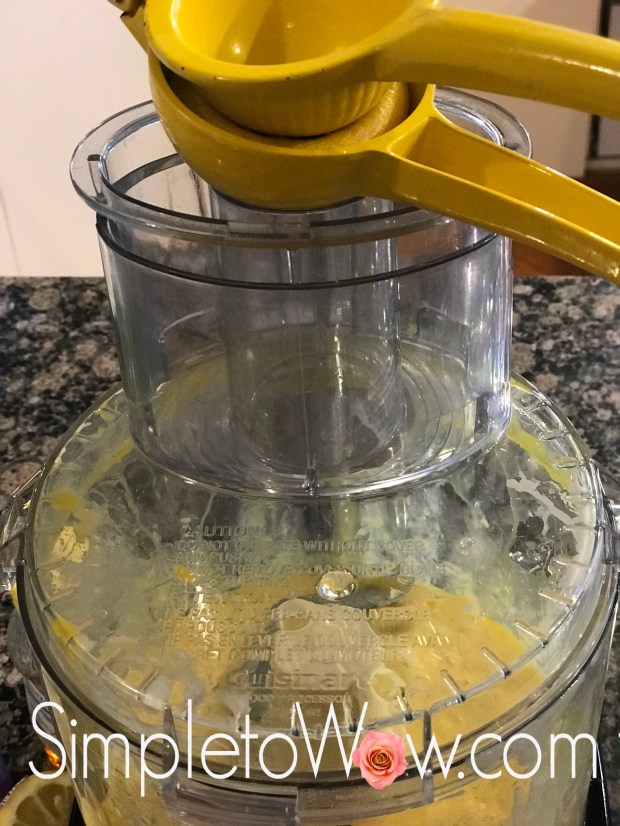
In food processor fitted with the s-blade or in a blender, pulse margarine, honey, eggs and egg yolks until blended. Using lemon squeezer, squeeze lemons and then add the lemon juice slowly into the blended mixture while the food processor / blender is running The mixture may look curdled around the edges. Taste the curd and add honey, if necessary and reblend.
Pour the lemon curd into a pan and slowly cook over a medium flame, stirring occasionally until the mixture becomes smooth, but is not boiling. Reduce the heat a bit and continue stirring until the lemon curd coats the back of a wooden spoon, about 10-15 minutes.
To store, pour the curd into a glass jar. To keep the curd from developing a skin, touch plastic wrap to the surface of the lemon curd. Refrigerate until firm.

Passover Red Wine Chicken Marsala
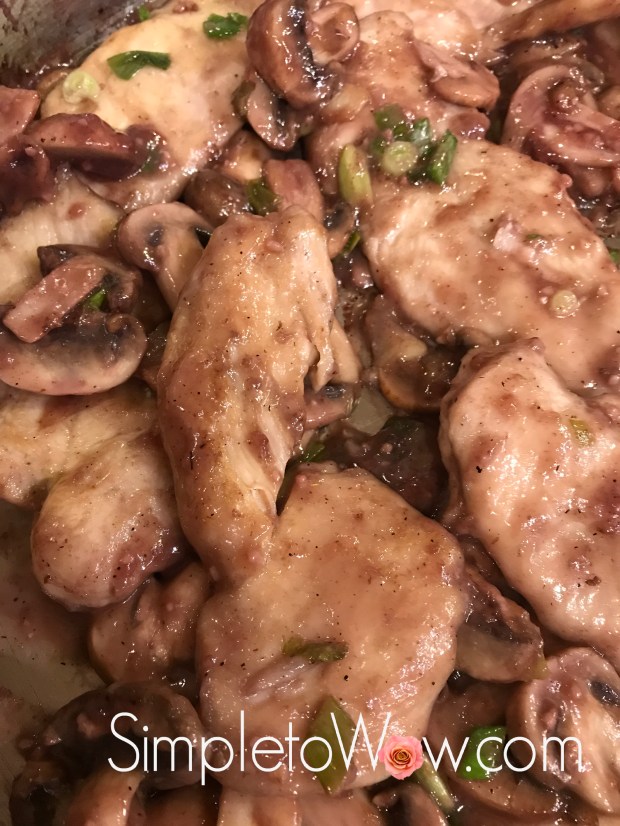
This perfect for Pesach (Passover) recipe stars a red wine sauce and potato flour dredging for the chicken. Although Marsala wine and flour are typically used in this recipe, I have adjusted the recipe to use red wine and Pesach gluten-free ingredients that pair so well with the flavors and themes of the Pesach seder experience.
Traditionally, we do not eat roasted meats at the seder, since the Karban Pesach (Passover sacrifice offering) was a roasted meat that was eaten at the time of the Holy Temple. Since we no longer have the Holy Temple, it is customary not to eat roasted meat on the evening of the seder. This recipe is perfect for the seder.
We have a tradition of drinking four cups of wine at our Pesach (Passover) Seder. After all, the majestic Seder venue commemorates our miraculous exodus from Egypt and the transformation of the Jewish nation from slavery to freedom. What better drink than wine to celebrate freedom on a night replete with regal traditions?
We make a separate blessing on each of the four cups of wine at different parts of the seder. The first cup of wine fills the role of kiddush (wine benediction) to sanctify the holiday of Pesach. The second cup is associated with the lengthy telling of the story of the Exodus. The third cup is associated with the Birkas Hamazon (Grace after Meals) and the fourth cup of wine is associated with the Hallel (songs of praise) that we sing toward the end of the seder.
Each of the four cups of wine symbolize one of the national exiles experienced by the Jewish nation and relate to one of the four expressions of redemption by G-d in the Exodus.
והוצאתי V’ho-tzaisi (and He took us out)
This expression of redemption symbolizes the Babylonian exile.
והצלתי V’he-tzalti (and He saved us)
This expression of redemption symbolizes our oppression by Persia (further commemorated by Purim)
וגָּאלתי V’ga-alti (and He redeemed us) This expression of redemption symbolizes our oppression by the Greeks (further commemorated by Chanukah)
ולקחתי V’la-kachti (and He took us) This expression of redemption symbolizes the Roman exile.
This recipe tastes as good as the orginal and will wow your seder guests. Enjoy!
INGREDIENTS
2 pounds boneless chicken breasts, cut or pounded thin
1/3 cup potato starch
salt and pepper to taste
6 tablespoons olive oil
2 packages mushrooms, sliced or 2 large cans mushrooms, drained
Juice of half a lemon or 2 tablespoons lemon juice
3/4 cup red wine
1/4 cup pareve milk (optional)
parsley (optional, for garnish)
DIRECTIONS
Place 1/3 cup of potato starch in a pie dish or a shallow bowl and season with salt and pepper. Coat each piece of chicken with potato starch mixture.
Over medium-high heat, heat oil in a large frying pan or saute pan. Add the coated chicken. Cook each piece of coated chicken for 3-4 minutes on each side. Work in batches, if necessary, making sure not to crowd the pan.
Slice mushrooms and cook for a few minutes in same pan, until mushrooms are soft and fragrant.
Add the wine and lemon juice, deglazing the pan with a wooden spoon by stirring in any brown bits left over from the cooking of the coated chicken. Cook until the mushroom sauce is reduced to half.
Lower the heat to medium and add the pareve milk. With a wooden spoon, stir well until the sauce is well-combined. Reduce heat to a simmer and simmer the sauce until the sauce is thick and glossy.
Return the cooked chicken to the pan and cook for 10-15 minutes more, until chicken is fragrant, soft, succulent and cooked through.
Add additional salt and pepper to taste, if necessary. Optionally, garnish with chopped parsley.
Enjoy!

Shabbos Table Tip: Napkins That Stand for Kiddush
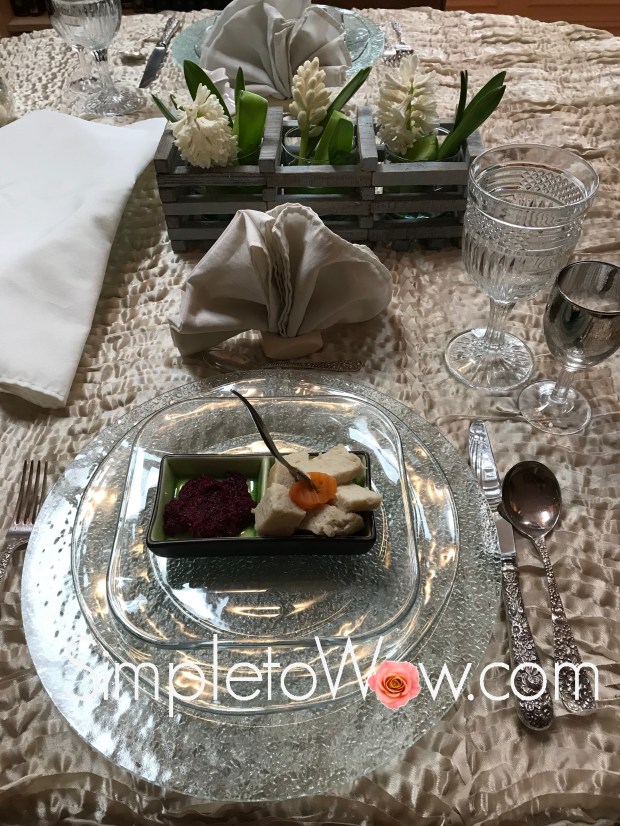
A simple way to change up your Shabbos table setting is to play with the napkins. For this Shabbos, I used a simple ivory, clear glass and silver color palate. I folded the cloth napkins into fourths and then folded them accordion style. I then stood them up in sturdy napkin rings.
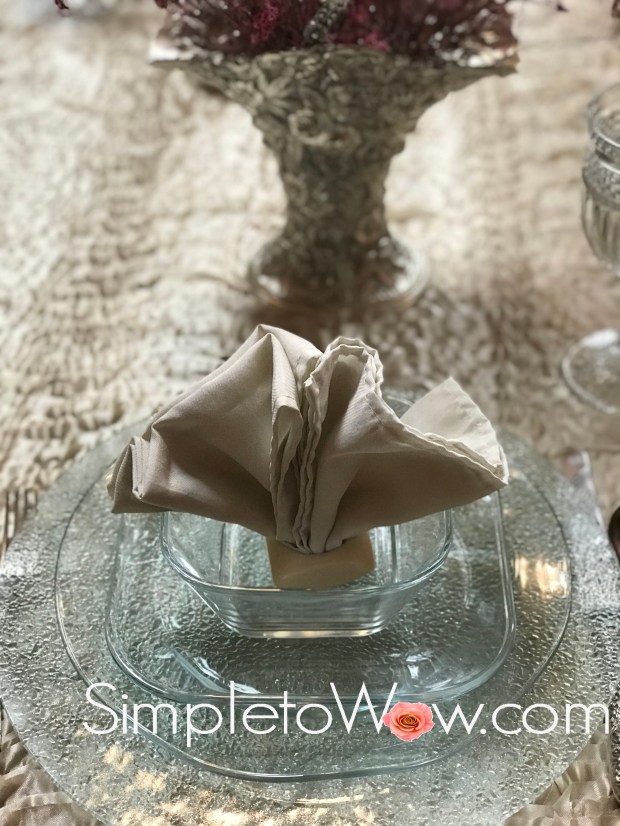
Shabbat Shalom!

Pesach Onion Kugel
I absolutely love a challenge! In a comment on my Simply Amazing Onion Kugel, Pearl asked about adjusting this simple and delicious recipe to Pesach (Passover) cooking. I worked on making this recipe suitable for Pesach and my family contends that this recipe is even better than the original.
I agree.
Our custom on Pesach is not to bruck (use matzo products with liquid), so it was not possible to merely substitute soaked matzo for the soaked bread in the original recipe. I played with the recipe until I came up with this Pesach variation.
We all licked our plates clean. It is a winner and it will be on our seder menu this year.
Have a Chag Kasher V’Samaech (Happy and Kosher Passover)!
SUPPLIES
food processor
pyrex pie plate
INGREDIENTS
4-5 onions
3 eggs
2/3 cup potato starch
1/4 cup oil
1/3 cup seltzer
1 teaspoon salt
pinch black pepper
DIRECTIONS
Preheat oven to 425 degrees F.
Coat a pyrex pie plate lightly with oil and place in oven.
While the oil is heating up, cut the onions into large chunks. Using the metal s-blade of the food processor, pulse the onions until they are shredded but not liquidy. Add eggs, oil, seltzer, salt and pepper. Pulse a few times to combine.
Carefully remove the sizzling pyrex pie plate from the oven. Pour the mixture directly from the food processor bowl into the pyrex pie plate and bake uncovered for one hour and ten minutes. When done, the onion kugel should be caramelized on top and bottom and soft and creamy on the inside.
TIPS
Because sulphuric gas released from the onion during cutting reacts with tear ducts, eyes feel irritated and release tears when cutting onions. Heating the onion before cutting breaks apart the enzymes that emit sulphuric gas to reduce and/or eliminate the tears. The easiest way to heat the onions for this kugel is to microwave them on high for several minutes in 30 second increments. For best results, cool the microwaved onions before cutting into chunks.
Please Note: This post contains affiliate links from Amazon, which means I earn a small commission if you click and make a purchase.
